While He Was Napping

momma gets stuff done

  • Home
  • About
  • Archive
  • Do It Yourself
    • Crafts
      • No Sew
      • Painting
      • Paper Crafts
      • Repurpose Projects
      • Vinyl
      • Washi Tape
      • Kid’s Crafts
      • Fonts
    • Sewing
    • Decorate
      • Home Decor
      • Holiday Decor
    • Celebrate
      • DIY Gifts
      • DIY Your Party
  • Recipes
    • Beverages
    • Appetizer
      • Bread
      • Other Appetizers
    • Snacks
    • Main Dish
      • Meat
        • Chicken
        • Beef
        • Pork
        • Seafood
      • Vegetarian
      • Slow Cooker
      • 30 Minute Meals
    • Dips & Sauces
    • Salads
    • Pasta
    • Soup
    • Dessert
      • Cookies
      • Brownies
      • Cupcakes and Cake
      • Box Mix Recipes
      • Other Sweet Treats
    • Breakfast Food
      • Pancakes
      • Waffles
      • Muffins
      • Other Breakfast Food
  • Family
    • Babies
      • Pregnancy
      • Newborns
      • The 1st Year
    • Toddlers
    • Preschoolers
    • Kindergartners
    • 6-8 Year Olds
    • The Grown Ups
      • Date Night
      • Romantic Gifts
    • Self Care
  • For the Home
    • Cleaning
    • Organizing
    • Emergency Preparedness
  • Travel
    • Travel Tricks & Tips
    • Traveling with Kids
  • Tech & Gadgets
    • Must-Have Apps
    • Techy Home Appliances
    • Gadgets & Electronics
    • Blogging Tips
  • Printables
    • Posters
      • Quote Printables
      • Subway Art Printables
    • Printable Organizers
    • Printable Journals
    • Learning Printables & Worksheets
    • LDS Printables
  • Holidays
    • New Year’s
    • Valentine’s Day
    • St. Patrick’s Day
    • Easter
    • Cinco de Mayo
    • Mother’s Day
    • Father’s Day
    • 4th of July
    • Back to School
    • Halloween
    • Thanksgiving
    • Christmas
    • Holiday & Seasonal Printables

August 9, 2011 by Krista

DIY Lantern

Do you love easy and frugal decorating ideas?  Well then, here is a post for you.  I keep seeing those gorgeous old-timey lanterns in catalogues and on websites like Pottery Barn and Crate & Barrel.  I am so in love…. until the price tag catches my eye.  Move that puppy to the “I wish in a million years” list. 
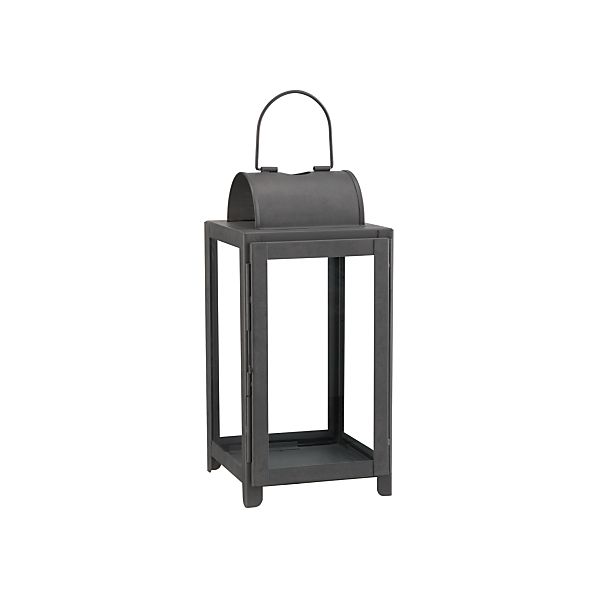
Source

       
This simple design is $40 from Crate & Barrel.  FORTY BUCKS!  That’s almost a month’s worth of diapers in this household.  Not a splurge I can justify or even bring myself to contemplate. 
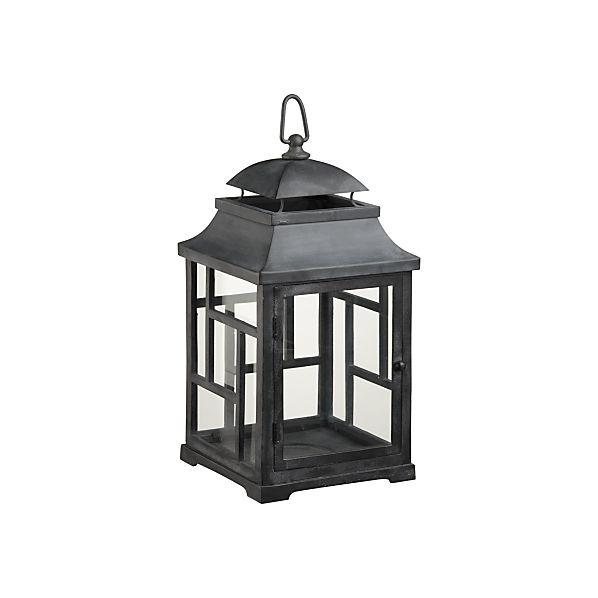
ZincHurricaneLLS9
Source

This baby is $80.  Are your eyes popping out of your head yet?  My jaw fell promptly to the floor when I saw that price tag.  These pieces are gorgeous, but no where near my budget.  So, I set out to make my own.

2011-08-09_14-25-41_610

This is my DIY version.  Cost me nothing, as I had everything on-hand already.  Much more manageable.

Here’s the How:
1)  I took four 5×7” picture frames (from the Dollar Tree) that I already had, removed the glass and spray painted the frames black.  Give ‘em a good two or three coats.  You can also do a clear sealant over them, but I didn’t and have had no problems with scratches.  My paint was a matte finish, it’s what I prefer.  A glossy finish may give it a little “newer” look, if that’s the look you like.  Make sure you paint both sides of the frames.  Clean the glass while it’s out of the frames.

2)  After your frames are thoroughly dry, put the glass back in and wipe off any fingerprints.  Then, glue them together along the edges to form a cube, except the top and bottom are open.  I use LocTite glue.  E6000 and Gorilla Glue are other glues you could consider.  I did a thin strip of glue all the way down the edge of the frame.  Brace them while they dry.  Let them dry really well (like over-night, at least).
2011-07-23_14-37-43_411

3)  I liked the lantern just like that.  But, I also liked the lantern from Crate & Barrel.  Yeah, the one with the $80 price tag.  So, I decided to take some vinyl and decorate the glass.  Vinyl is typically pretty easy to remove, so if I didn’t like it, I could take it back off.  I like it…
 2011-08-09_14-24-46_854

4)  I wanted to leave the top open so I could use a real candle in it without the worry of scorching anything.  I also decided to leave the bottom open for now.  If you want to close the bottom off you could use something as simple as a piece of cardboard painted black and glued to the base.  Or you could get a piece of plywood and cut it to the dimensions of your lantern, paint it to match and glue it to the base.  You could also consider putting a wire handle on it too.    

2011-08-09_14-25-22_668

A couple of weeks ago I found this idea on Remodelaholic.  Kari from The Sunset Lane did a similar project, but she made a chandelier with it.  It’s too cool.  Check it out.

❮❮ Previous Post
Next Post ❯ ❯

Comments

  1. Ben says

    December 13, 2014 at 8:29 pm

    Love these! If you create it with hinges, you could put photos/pictures in them and switch them out based on the season!

    Reply
    • Krista says

      December 17, 2014 at 8:57 pm

      What a great idea! It would probably hold up a little better too. Put a flame-less tea light candle inside and it would make a fun night light. Thanks for the great idea!

      Reply
  2. connie says

    November 30, 2014 at 10:37 am

    Brilliant!

    Reply
  3. Maggie says

    November 6, 2012 at 11:28 pm

    Loving this! So clever. I featured it at my blog: http://squarepennies.blogspot.com/2012/11/diy-inexpensive-decorative-lantern-from.html

    Thanks!!!

    Reply
  4. Tara says

    November 2, 2011 at 12:37 am

    Very creative! I have a lantern on hand and maybe put it into use one of these days.

    Reply
  5. ♥ Sonny ♥ says

    October 31, 2011 at 12:02 pm

    Yours is GREAT and super creative.. well done, indeed.. stand up and take a bow~!

    Reply
  6. Stylish Settings says

    October 31, 2011 at 4:01 am

    Great idea. $80 for a lantern is way over the top.

    Reply
  7. ladywiththeredrocker says

    October 31, 2011 at 3:52 am

    This is sooooo cool! I love it! I may have to “steal” this idea! Thanks for sharing! 🙂
    Stephanie @ Ladywiththeredrocker.wordpress.com

    Reply
  8. Amber says

    October 13, 2011 at 3:21 pm

    Very smart and cute idea.

    Reply
  9. Kelly says

    October 12, 2011 at 3:09 am

    This looks great!

    Reply
  10. Janice says

    October 7, 2011 at 6:45 am

    Wow that is really neat! I would love it if you linked this up on my blog carnival Family Time Tuesday! You are so creative! I need to try this. 🙂

    Janice

    Reply
  11. Linda@Coastal Charm says

    October 5, 2011 at 4:31 am

    Great THRIFTY idea!!!

    Blessings,
    Linda

    Reply
  12. Michelle says

    September 8, 2011 at 8:47 pm

    Great idea to use the frames! Thanks for linking up with DIY under $5!

    Reply
  13. Steph @ Crafting in the Rain says

    September 3, 2011 at 10:03 pm

    Looks great–and I love your addition of vinyl on it! I’ve had fun poking around your blog here, and I’m a new follower 🙂

    Reply
  14. thatswhatchesaid says

    August 19, 2011 at 5:58 pm

    This is genius! I just tweeted your post! I think this is awesome!!!

    Reply
  15. Kara says

    August 17, 2011 at 12:45 am

    This is such a cool idea! I will be featuring it tomorrow at Creations by Kara. 🙂

    Reply
  16. http://sassandfrasscrafts.blogspot.com/ says

    August 16, 2011 at 1:18 am

    I think you are a genius. 🙂 I love it. Tess

    Reply
  17. S says

    August 15, 2011 at 6:35 pm

    Different size frame lanterns would look great side by side.

    Reply
  18. Miss Char says

    August 15, 2011 at 12:09 pm

    Great project, I’m going to give this one a try soon. I think I have everything I need in the craft room too.

    Reply
  19. Alana Karl says

    August 14, 2011 at 7:28 pm

    Love your lantern, especially the price of it 🙂

    I picked up a couple of lanterns at Ikea for about 7 or 8 dollars each, not bad!

    Reply
  20. Noelle says

    August 11, 2011 at 6:20 pm

    This is so awesome! I love it!

    Reply
  21. Stephanie says

    August 10, 2011 at 10:32 pm

    You are so creative! I never would have thought of that! I love lanterns too and will not pay much for them either! Wow! I am in awe with this! I have a party going on over at my blog if you want to join! I’d love to have you! Check it out under the “Stache Party” page on my blog: mylilpumpkinpatch.blogspot.com

    Reply
  22. Mary-Sweetwater Style says

    August 10, 2011 at 8:18 pm

    Love this idea. Wouldn’t one look nice as a Holiday Centerpiece when it is too cold to be on the deck? Now…I am off to the dollar store. Thanks for giving me an excuse!
    Your blog is inspiring!

    Reply
  23. Wendy says

    August 10, 2011 at 6:33 pm

    I love it, what a Fabulous Thrifty Idea! Off to find some frames to make my own! Thanks

    Reply
  24. ReFresh ReStyle says

    August 10, 2011 at 2:22 pm

    Great idea!

    Reply
  25. Ruth says

    August 10, 2011 at 12:40 pm

    I love these lanterns, too but find them pricey. This is definitely going on my to do list.
    Love the chandelier idea, too!

    Ruth

    Reply
  26. CraftCrave says

    August 10, 2011 at 9:08 am

    Just a quick note to let you know that a link to this post will be placed on CraftCrave today [10 Aug 01:00am GMT]. Thanks, Maria

    Reply
  27. Anna says

    August 10, 2011 at 2:48 am

    I saw that post too! What a great idea. I love the vinyl on yours!

    Anna
    http://www.askannamoseley.com

    Reply

Leave a Reply Cancel reply

Your email address will not be published. Required fields are marked *

This site uses Akismet to reduce spam. Learn how your comment data is processed.

I'm Krista. Ringleader here on While He Was Napping, wife to my handsome Mr. Right & momma to my THREE energetic boys, Big J (9), Little J (6) & Little N (4). We FINALLY added a beautiful little girl to our family last December.

I’m knee-deep in Tonka trucks & Thomas trains. I survive our crazy days with Vanilla Coke, Sonic slushies, sweet snuggles and little giggles. When I tuck them in tight & kiss them good night, I get a little time to create & just be me.


It all happened
while (s)he was napping
Want More of My Story?

Privacy Policy

While He Was Napping respects your privacy and is committed to keeping any personal information collected on this website confidential. To find out what information we collect and how it is used or what options you have regarding your information, see our full privacy policy here. Creative Commons License The website found at whilehewasnapping.com and all subdomainsauthored and published by Krista is licensed under a Creative Commons Attribution-NonCommercial-NoDerivs 3.0 Unported License.

Pretty Chic Theme By: Pretty Darn Cute Design