While He Was Napping

momma gets stuff done

  • Home
  • About
  • Archive
  • Do It Yourself
    • Crafts
      • No Sew
      • Painting
      • Paper Crafts
      • Repurpose Projects
      • Vinyl
      • Washi Tape
      • Kid’s Crafts
      • Fonts
    • Sewing
    • Decorate
      • Home Decor
      • Holiday Decor
    • Celebrate
      • DIY Gifts
      • DIY Your Party
  • Recipes
    • Beverages
    • Appetizer
      • Bread
      • Other Appetizers
    • Snacks
    • Main Dish
      • Meat
        • Chicken
        • Beef
        • Pork
        • Seafood
      • Vegetarian
      • Slow Cooker
      • 30 Minute Meals
    • Dips & Sauces
    • Salads
    • Pasta
    • Soup
    • Dessert
      • Cookies
      • Brownies
      • Cupcakes and Cake
      • Box Mix Recipes
      • Other Sweet Treats
    • Breakfast Food
      • Pancakes
      • Waffles
      • Muffins
      • Other Breakfast Food
  • Family
    • Babies
      • Pregnancy
      • Newborns
      • The 1st Year
    • Toddlers
    • Preschoolers
    • Kindergartners
    • 6-8 Year Olds
    • The Grown Ups
      • Date Night
      • Romantic Gifts
    • Self Care
  • For the Home
    • Cleaning
    • Organizing
    • Emergency Preparedness
  • Travel
    • Travel Tricks & Tips
    • Traveling with Kids
  • Tech & Gadgets
    • Must-Have Apps
    • Techy Home Appliances
    • Gadgets & Electronics
    • Blogging Tips
  • Printables
    • Posters
      • Quote Printables
      • Subway Art Printables
    • Printable Organizers
    • Printable Journals
    • Learning Printables & Worksheets
    • LDS Printables
  • Holidays
    • New Year’s
    • Valentine’s Day
    • St. Patrick’s Day
    • Easter
    • Cinco de Mayo
    • Mother’s Day
    • Father’s Day
    • 4th of July
    • Back to School
    • Halloween
    • Thanksgiving
    • Christmas
    • Holiday & Seasonal Printables

February 9, 2016 by Krista

Chocolate Dipped Strawberry Sugar Cookies

This shop has been compensated by Collective Bias, Inc. and its advertiser. All opinions are mine alone. #SendSweetness #CollectiveBias

Valentine’s Day has never been a holiday just about romantic love for me. Growing up, my mom always made sure we knew that we were loved and that, in later years, relationship status didn’t matter on Valentine’s Day. It was a day to express your love and gratitude for everyone who was special to you. And that’s something I fully intend on passing on to my kids. We are tightening the budget around here and so that means homemade Valentines this year. Since Valentine’s Day falls on Sunday and we will be going to church, Big J asked if we could make something for his Primary teacher. He’s had the same teacher for the last three years and he adores her. I headed out to Walmart and picked up the new M&M’s® Strawberry and decided to make some Dipped Strawberry Sugar Cookies to show his teacher that we are so thankful for the time and effort she puts into teaching our hooligan son every week and that he really does love her.

DIPPED STRAWBERRY SUGAR COOKIES

Chocolate Dipped Strawberry Sugar Cookies


Print This Recipe
Dipped Strawberry Sugar Cookies

Prep time:  20 mins

Cook time:  60 mins

Total time:  1 hour 20 mins

Serves: 3 dozen cookies

Kick up your favorite sugar cookies with a fun chocolate-strawberry twist.
Ingredients
  • 1½ cups sugar
  • ¾ cup butter, softened
  • 2 eggs
  • 4½ tbsp milk
  • ¼ tsp salt
  • 3½ tsp baking powder
  • 4½ cups all purpose flour
  • 1 tsp strawberry extract
Instructions
  1. Preheat oven to 350ºF.
  2. Mix the sugar, baking powder and salt together in a medium bowl.
  3. Add the eggs, butter and milk. Mix until smooth.
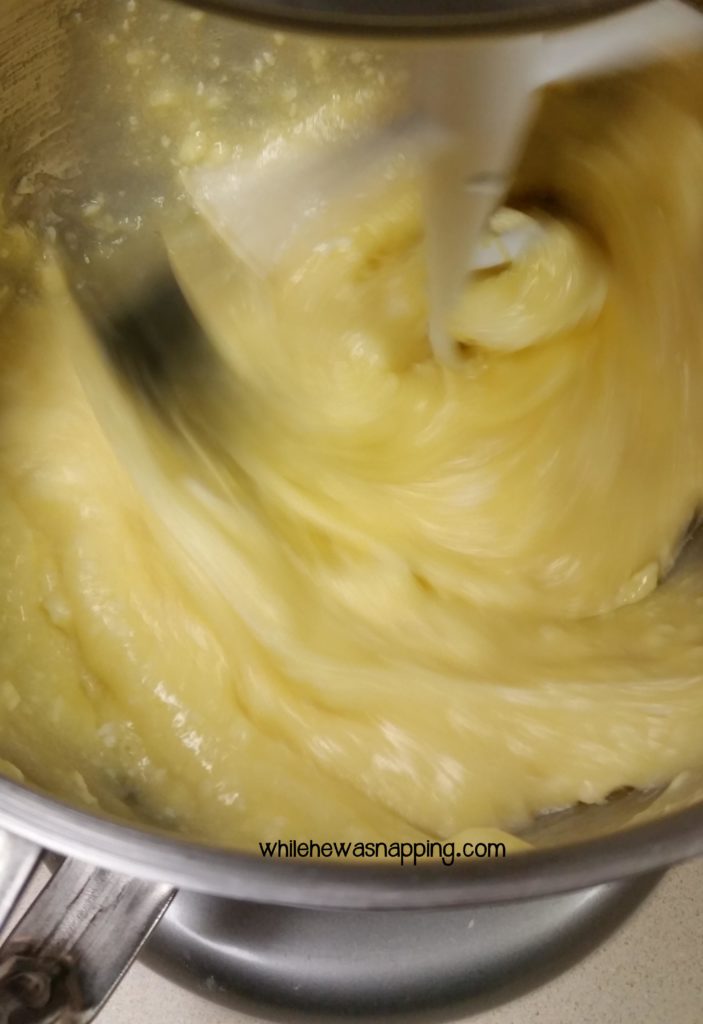
  4. Chocolate Dipped Strawberry Sugar Cookies- mixing the wet ingredients
  5. Add the flour, one cup at a time, and mix until dough is formed.
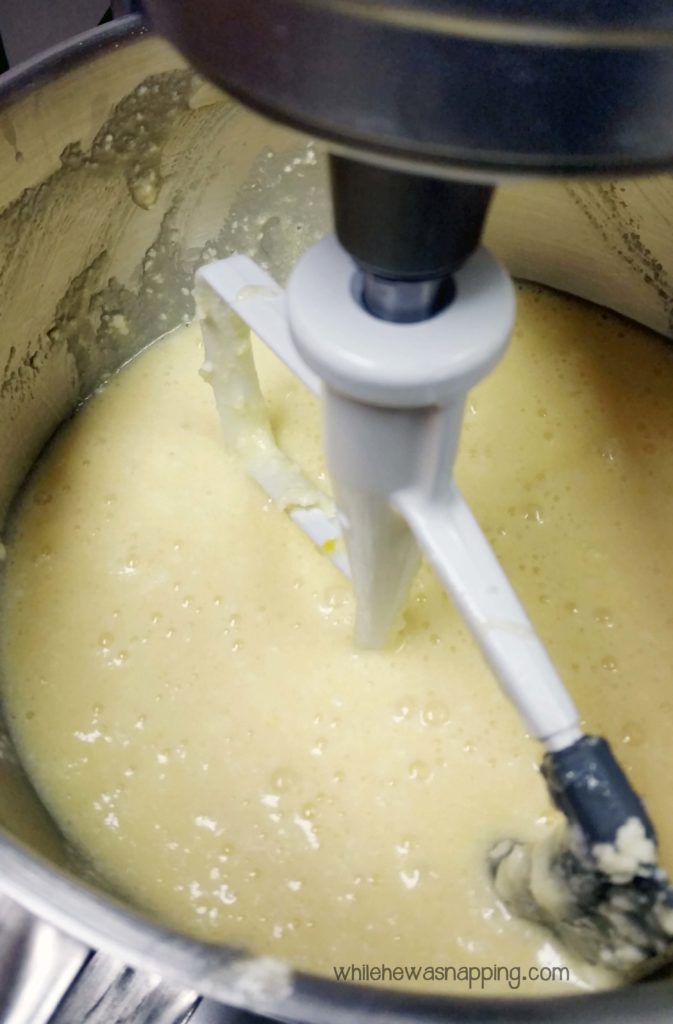
  6. Chocolate Dipped Strawberry Sugar Cookies - Add flour 1 cup at a time
  7. This dough can be rolled into 1-inch balls and placed 2 inches apart on a lightly greased cookie sheet.
  8. If you want to cut shapes from the dough, lightly sprinkle the counter top with flour and roll the dough out until it's approximately ¼" think. Then, cut it with cookie cutters and place the dough on a lightly greased cookie sheet.
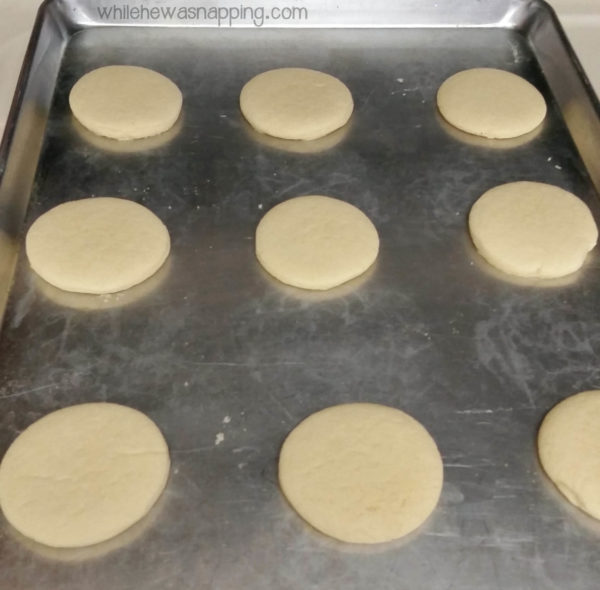
  9. Chocolate Dipped Strawberry Sugar Cookies - baking the cookies
  10. Depending on the size of the cookie, bake for 5-10 minutes. If you want a chewy cookie, your cookies should NOT be golden anywhere - even the bottoms. See the photo below. If you like a crispy cookie, bake until the tops are lightly golden.
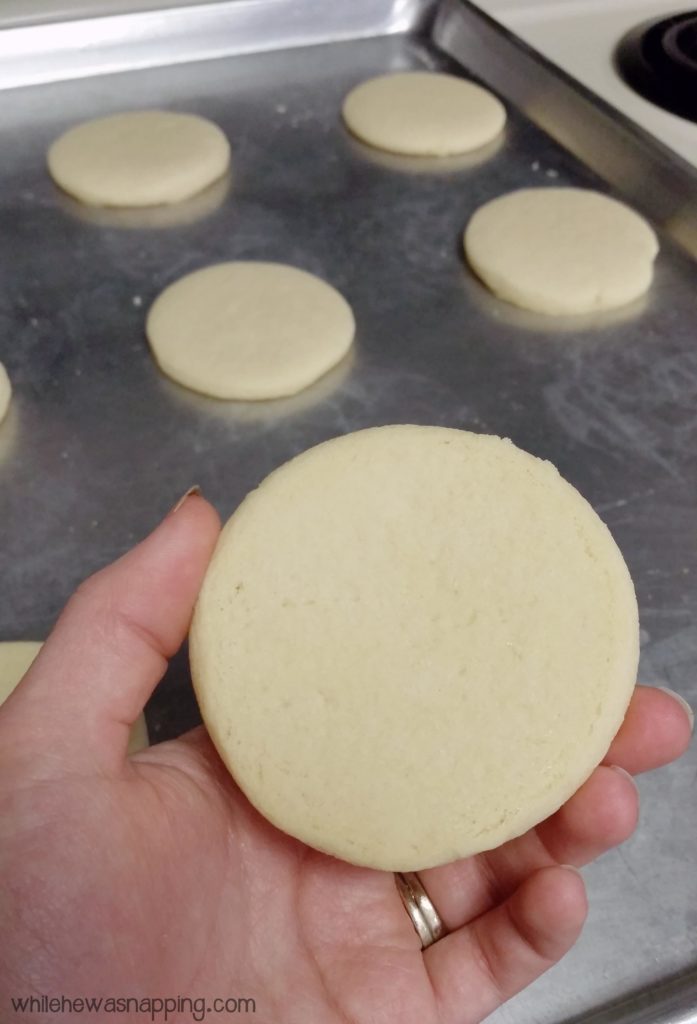
  11. Chocolate Dipped Strawberry Sugar Cookies - White Chewy Sugar Cookies
  12. Cool cookies 3-5 minutes on the cookie sheet and then transfer to a cooling rack to cool completely.
3.5.3208

This is my go-to sugar cookie recipe. The cookies are soft and chewy and just perfect. But, what does every great sugar cookie have? A great topping, right? Well, I wanted something easy and delicious. And what goes better with strawberry than chocolate?! So, I dipped those cookies in some chocolate and they were amazing. It was super easy, but they turned out great!

Chocolate Dipped Strawberry Sugar Cookies - dipping materials

I started out melting the chocolate as it directed on the package in a glass in the microwave, stirring every 30 seconds until smooth. When the chocolate was melted, I just hand dipped my cookies, set them on wax paper to dry and then decorated them before the chocolate hardened to hold the candies on. Quick tip: use a fork to help spread the chocolate around where you want it when it starts to cool enough that it doesn’t move around very easily anymore. You won’t have to reheat as often – which can make the chocolate crystallize.

I crushed up a few of the M&M’s® Strawberry to top the cookies with. They were a little bigger than I had hoped they would be so I crushed them up a bit with a meat tenderizer. I tried some with whole M&M’s® Strawberry too and they were fun, but it was kinda hard to eat them by the time I got my whole mouth around the cookie and the candy.

Chocolate Dipped Strawberry Sugar Cookies - Horizontal

While I was at Walmart, I found these awesome DOVE® chocolate tins and some super cute American Greetings® cards. There was a great card for Big J’s teacher and one for Mr Napping that was just perfect… A dad of three boys is definitely a superhero! And the way to my man’s heart is definitely through his stomach… and my sweet tooth won out on this one. He will be getting (and sharing!) the DOVE® chocolate tin this weekend. Walmart became my one-stop shop for Valentine’s Day, which was super nice! I loved all the awesome options all in one place.

Chocolate Dipped Strawberry Sugar Cookies - instore

You can check out even more amazing ideas with M&M’s® Strawberry, DOVE® and American Greetings®! What will you make this Valentine’s Day?

December 30, 2015 by Krista

Spread Cheer with Simple Surprises

How was your Christmas celebration? Or, if you don’t celebrate Christmas, how was your past week? It was busy, busy, busy around here. We have had some fun adventures, a busy Christmas full of family and are getting ready for the new year to bring some more fun. Have you been busy too? Hopefully your hectic holidays are winding down, but don’t stop spreading cheer just yet! Spread cheer with simple surprises this winter season.

Spread Cheer with Simple Surprises Delicious Peanut Butter Blossom Cookies


SPREAD CHEER WITH SIMPLE SURPRISES

The kids are out of school and I am trying to find a balance of attention for them and not letting my other responsibilities get left behind or completely overwhelm me. We have been looking for lots of fun activities that aren’t too time consuming or involve a lot of preparation or supplies. We’re working with little attention spans and all. That also lets me spend time with my boys and still not have too much mom guilt when I tell them I need to do some work or a few chores.

Spread Cheer with Simple Surprises Peanut Butter Blossom Cookies Ingredients

Betty Crocker®  cookie mixes have come to our rescue more than once this past week! We love cookies… because, who doesn’t? We used Betty Crocker®  mixes to make our cookies for Santa and he loved them. He told me so. We’ve shared cookies with lots of family and friends this past week too. It’s been fun to spread some cheer with simple surprises, like a plate of cookies.

I knew that Christmas Eve would be a busy day and we had quite a bit of baking we needed to do. Among the pies, rolls and waffle dough we needed to make we also needed to make cookies for Santa. I knew we weren’t going to have a lot of time so I went with one of my favorite flavor combinations. Peanut butter and chocolate!

Spread Cheer with Simple Surprises Peanut Butter Blossom Cookies Mixing

I picked up the Betty Crocker® peanut butter cookie mix at Walmart. I grabbed a sugar cookie one too because I knew my kids would be home for the next three weeks and we might need a project to do. We haven’t made the sugar cookies yet, but there’s still two weeks of Winter Break so I’m not tucking it away into the cupboard just yet.

Spread Cheer with Simple Surprises Peanut Butter Blossom Cookies Making Cookies

We made peanut butter blossoms for Santa on Christmas Eve and it was perfect. My boys love to help mix things up in the mixer and Betty Crocker® cookie mixes are perfect. They are quick and there’s just enough ingredients that my boys stay interested. We rolled the dough so my boys even got to help with getting it ready to bake, which they usually don’t get to do.

While the cookies baked, my boys helped me unwrap the chocolates to top the cookies with. They did really well and didn’t even eat that many of the chocolates, although that was their favorite part, of course.

Spread Cheer with Simple Surprises Peanut Butter Blossom Cookies Baking

We will be making some more cookies while we wait for New Year’s tomorrow, although I’m not sure what kind of Betty Crocker® mix we’ll use yet. There are so many to choose from. I love being able to get my kids in the kitchen in a low-stress, fun project that we can do together. It’s something we all enjoy. And the end result is pretty great too. Another simple surprise we can all enjoy.

Spread Cheer with Simple Surprises Peanut Butter Blossom Cookies Closeup

If you want some fun cookie ideas, check out the Betty Crocker® Homepage. How would you like a coupon to save on some delicious Betty Crocker® cookie mix? You can do just that with any Betty Crocker® cookie mix and this coupon on Ibotta. How are you going to bake with Betty this winter?

This is a sponsored conversation written by me on behalf of Betty Crocker. The opinions and text are all mine.

November 4, 2015 by Krista

Nutter Butter Snowmen Cookies

I can’t think of a better way to kick off the chilly season than with some fun in the kitchen. Celebrate the first snow fall, with these fun and super easy Nutter Butter Snowmen cookies!

I often run out of steam and energy before we’re finished when I’m in the kitchen with my boys; so, I decided to skip the baking part and just jump right to the fun part. We used Nutter Butter Cookies and candies to decorate and make snowmen!

NUTTER BUTTER SNOWMAN COOKIES
Nutter Butter Snowmen Cookies

Print This Recipe
Nutter Butter Snowmen Cookies

Prep time:  30 mins

Total time:  30 mins

Decorate Nutter Butter cookies and turn them into a winter wonderland! Create friendly snowmen with candies and white dipping chocolate.
Ingredients
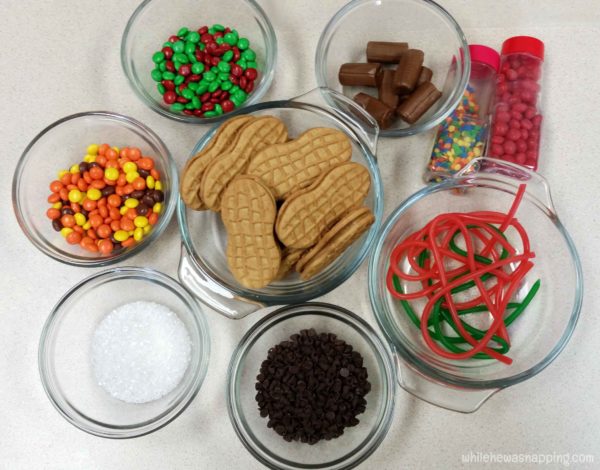
  • Nutter Butter Cookies
  • White Dipping Chocolate
  • Mini Chocolate Chips
  • Mini Chocolate Candies
  • Mini Peanut Butter Candies
  • Chocolate Flavored Roll Candies
  • Red and Green Licorice
  • Confetti Sprinkles
  • Nutter Butter Snowmen Cookies Ingredients
Instructions
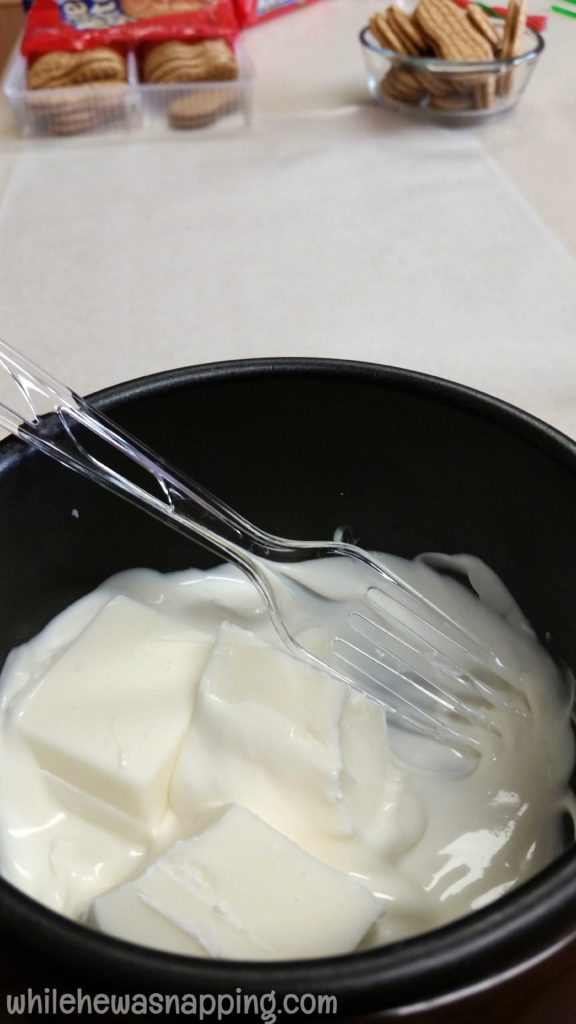
  1. Melt the white chocolate.
  2. Nutter Butter Snowmen Cookies Melt White Chocolate
  3. Work one cookie at a time so you can get it completely decorated before the chocolate hardens.
  4. Nutter Butter Snowmen Cookies Snowman Cookie Construction
  5. Spread the white chocolate on one side of the Nutter Butter cookie with the back of a plastic spoon.
  6. Shape the chocolate roll candies into the shape off a top hat. I actually found it easier to make several at a time and have them ready to go straight on the cookies as soon as I got the chocolate spread.
  7. Use the mini chocolate candies, the mini peanut butter candies and the confetti sprinkles to create eyes and buttons on the snowmen. The orange peanut butter candies perpendicular on the cookies made a great nose on the round snowman faces.
  8. Use the licorice to make a scarf for the snowman.
Notes
The best part of these cookies is that you can decorate them however you want! Your imagination is the limit. My kids liked the snow globe, but my favorite was the snowman faces. Get creative.
3.4.3177

Decorating these cookies was a ton of fun and, while my boys ate more candy than they put on their cookies, it was definitely more conducive to the length of their attention spans. There wasn’t a long wait time while the cookies baked. We got in, got it done and moved on to other activities.

These would be perfect for neighbor goody plates this holiday season. My kids loved the snow globe cookie, but it wasn’t as pretty as I had in my head so I only did one of those. My favorites were the snowman faces.

Nutter Butter Snowmen Cookies Large Nutter Butter Snowman Closeup

Nutter Butter Snowmen Cookies Nutter Butter Snowman Face Closeup


Tips and Tricks I Discovered While Making Nutter Butter Snowman Cookies

  • I loved that the cookie decorations were trapped in the melting chocolate after it hardened. It was less messy when my kids were eating them… and that’s definitely a win. You could definitely substitute the melting chocolate for frosting too, if that is more your style.
  • I opted to just spread the melted chocolate on one side of the cookie because I like Nutter Butter cookies as they are and didn’t want to change the taste too much. I didn’t want the dipping chocolate to overpower the Nutter Butter cookie flavor. And it cut down on sugar a little bit.
  • I used my little melting pot to keep the chocolate warm and melted. It worked great. A small slow cooker would probably work as well. Just make sure you don’t over heat your chocolate or it will get grainy. You can also just heat it in a microwave-safe dish in the microwave in 30-second intervals until it’s melted. If you have access to a melting pot, I would highly suggest using it.
  • It was much easier to shape several hats before I started putting the chocolate on the cookies. Then I just had to grab one and stick it on. I didn’t have to worry about moving quickly before the chocolate hardened.
  • Use a toothpick to help you place the little candies on the cookies. The candies are tiny and kind of hard to position with larger hands. My boys did great if I was steadying their hands. A toothpick lets you push the candies right where you want them.
  • Use an orange peanut butter candy bit for the snowman face nose. Stand it up on the cookie to make it look more carrot shaped and give your cookie more dimension.


September 15, 2014 by Krista

Chocolate Oatmeal Raisin Cookies

Welcome to Day 1 of my unofficial oatmeal cookie week. Because… cookies for a whole week? Yes, please.

Oatmeal cookies just shout “AUTUMN” to me… I don’t really know why. Oatmeal is also a lactation-boost; so, there’s that going for me too. I figured it was a win-win. That’s right, all those cookies I’m inhaling are for the baby. That’s my story and I’m sticking to it. Don’t worry, they are still delicious, even if you don’t make more milk.

I took the classic oatmeal raisin cookie and added a bit of chocolate… That’s right.  Yum.

CHOCOLATE OATMEAL RAISIN COOKIES

 
 These cookies are soft and the chocolate will satisfy your next craving. The oatmeal and raisins are healthy, so I won’t judge if you eat two or three at once. I just ask that you do me the same courtesy. These whip up pretty quickly and even my kids and husband, who aren’t big fans of oatmeal at all, still really enjoy these. If you use regular oats, definitely let them sit in the milk while you mix up everything else. If you use instant oats, that step isn’t as crucial, but I still like to let them soften a little. What are you waiting for!? Mix up some cookies!

Print This Recipe
Chocolate Oatmeal Raisin Cookies

Prep time:  20 mins

Cook time:  12 mins

Total time:  32 mins

Serves: 2 dozen

Soft and chocolaty, this takes classic oatmeal raisin cookies and kicks them up a notch!
Ingredients
  • 1 cup sugar
  • 1 cup brown sugar
  • 2 cups flour
  • 1 cup butter
  • 2 eggs
  • ½ cup milk
  • 1 tsp salt
  • ½ Tbsp vanilla
  • ½ tsp baking soda
  • 3 cups oats
  • 1 cup chocolate chips
  • 1 cup raisins
  • 6 Tbsp cocoa powder
Instructions
  1. Combine oats and milk in a bowl and let set.
  2. Combine the sugar, brown sugar, flour, baking soda, salt, and cocoa in a large mixing bowl. Mix until well combined.
  3. Add in the butter and eggs. Combine.
  4. Fold in the milk and oats until evenly mixed.
  5. Add raisins and chocolate chips. Mix into batter.
  6. Drop 1 inch balls onto lightly greased cookie sheet.
  7. Bake at 350F for 12 minutes.
  8. Cool on a cooling rack.
  9. Store in an airtight container.
3.5.3226

Chocolate Oatmeal Raisin Cookies the whole family will love!


This post was written by Krista and originally appeared on While He Was Napping.

April 30, 2014 by Krista

Jello Snickerdoodle Cookies

Do you love snickerdoodles? Then, I’ve got a fun twist for you today. These Jello Snickerdoodle cookies take all the best parts of a snickerdoodle and add some zing. It’s a fun way to add a pop of flavor to your cookies… not to mention, just look at those colors!! Admittedly, I think that was my favorite part. Are you ready to kick your cookie game up a notch with these jello snickerdoodle cookies?

JELLO SNICKERDOODLE COOKIES

Jello Snickerdoodle Cookies


JELLO SNICKERDOODLE COOKIES ARE PERFECT FOR EVENTS

Trying to color-coordinate treats with an event? Look no further! The colors you can create with this recipe are nearly endless and you’re sure to end up with just what you need. Without a ton of work! Simply choose your jello based on the colors you’re trying to create and you’ve got yourself a perfectly pretty cookie platter.


LET’S MAKE JELLO SNICKERDOODLE COOKIES

Print This Recipe
Jello Snickerdoodle Cookies

Prep time:  30 mins

Cook time:  15 mins

Total time:  45 mins

Serves: Approx 6 dozen

Classic Snickerdoodles with a springtime fruity twist.
Ingredients
  • 3 cups flour
  • ½ cup sugar
  • ½ cup brown sugar
  • 2 eggs
  • 2 tsp vanilla
  • ½ tsp salt
  • 1 tsp baking soda
  • 1 cup (2 sticks) softened butter
  • ½ tsp cream of tartar
  • Flavored Gelatin (Jello) - I made 5 different colors/flavors. I used about 1.5 oz for every 8 oz of cookie dough, but I'll explain that more in a minute.

  • Cinnamon Sugar Topping:
  • ⅓ cup sugar
  • 3 tsp cinnamon
  • Adjust to taste if you prefer
Instructions
  1. Combine butter, sugars, salt, soda and cream of tartar in a large mixing bowl.
  2. Add eggs and vanilla. Mix well.
  3. Stir in flour and mix until well combined and dough forms.
  4. Separate the dough into equal balls. This is were I got a little complicated. I made 5 colors and each ball of dough ended up being just barely over 8 oz. Yes, I measured it out on my kitchen scale. You don't have to be as precise, but it will make your flavors more consistent in strength as well as keeping each flavor close to the same number of cookies if you do measure it out. For each 8 oz ball of dough I ended up using 1.5 oz of gelatin powder. You could easily use 1 oz and the flavor would still be strong enough (although the color probably wouldn't be as bright).
  5. Mix the gelatin in to each ball. I just put the dough back in my KitchenAid and mixed it until the gelatin powder was combined with the dough. Then I kneaded the dough by hand to get the color mixed evenly. It didn't take much kneading.
  6. Roll dough into 1 inch balls and roll the tops in cinnamon sugar topping. Place on an ungreased cookie sheet.
  7. Preheat oven to 300F and bake for 12-15 mins. Mine were perfect at 13 mins.
  8. Remove from oven and cool 2-4 minutes before moving to a cooling rack to cool completely.
3.5.3226

Store in an airtight container.  Yields approximately 6 dozen cookies (I got about 15 cookies of each color, just FYI.)


This post was written by Krista and originally appeared on While He Was Napping. 

I'm Krista. Ringleader here on While He Was Napping, wife to my handsome Mr. Right & momma to my THREE energetic boys, Big J (9), Little J (6) & Little N (4). We FINALLY added a beautiful little girl to our family last December.

I’m knee-deep in Tonka trucks & Thomas trains. I survive our crazy days with Vanilla Coke, Sonic slushies, sweet snuggles and little giggles. When I tuck them in tight & kiss them good night, I get a little time to create & just be me.


It all happened
while (s)he was napping
Want More of My Story?

Privacy Policy

While He Was Napping respects your privacy and is committed to keeping any personal information collected on this website confidential. To find out what information we collect and how it is used or what options you have regarding your information, see our full privacy policy here. Creative Commons License The website found at whilehewasnapping.com and all subdomainsauthored and published by Krista is licensed under a Creative Commons Attribution-NonCommercial-NoDerivs 3.0 Unported License.

Pretty Chic Theme By: Pretty Darn Cute Design