While He Was Napping

momma gets stuff done

  • Home
  • About
  • Archive
  • Do It Yourself
    • Crafts
      • No Sew
      • Painting
      • Paper Crafts
      • Repurpose Projects
      • Vinyl
      • Washi Tape
      • Kid’s Crafts
      • Fonts
    • Sewing
    • Decorate
      • Home Decor
      • Holiday Decor
    • Celebrate
      • DIY Gifts
      • DIY Your Party
  • Recipes
    • Beverages
    • Appetizer
      • Bread
      • Other Appetizers
    • Snacks
    • Main Dish
      • Meat
        • Chicken
        • Beef
        • Pork
        • Seafood
      • Vegetarian
      • Slow Cooker
      • 30 Minute Meals
    • Dips & Sauces
    • Salads
    • Pasta
    • Soup
    • Dessert
      • Cookies
      • Brownies
      • Cupcakes and Cake
      • Box Mix Recipes
      • Other Sweet Treats
    • Breakfast Food
      • Pancakes
      • Waffles
      • Muffins
      • Other Breakfast Food
  • Family
    • Babies
      • Pregnancy
      • Newborns
      • The 1st Year
    • Toddlers
    • Preschoolers
    • Kindergartners
    • 6-8 Year Olds
    • The Grown Ups
      • Date Night
      • Romantic Gifts
    • Self Care
  • For the Home
    • Cleaning
    • Organizing
    • Emergency Preparedness
  • Travel
    • Travel Tricks & Tips
    • Traveling with Kids
  • Tech & Gadgets
    • Must-Have Apps
    • Techy Home Appliances
    • Gadgets & Electronics
    • Blogging Tips
  • Printables
    • Posters
      • Quote Printables
      • Subway Art Printables
    • Printable Organizers
    • Printable Journals
    • Learning Printables & Worksheets
    • LDS Printables
  • Holidays
    • New Year’s
    • Valentine’s Day
    • St. Patrick’s Day
    • Easter
    • Cinco de Mayo
    • Mother’s Day
    • Father’s Day
    • 4th of July
    • Back to School
    • Halloween
    • Thanksgiving
    • Christmas
    • Holiday & Seasonal Printables

April 15, 2016 by Krista

DIY Cell Phone Charging Station

I’m so glad you’re here! Have you ever needed to charge your cell phone somewhere than you normally do? Just wait until you see the Cell Phone Charging Station we’re going to make today!

But first, I have a couple questions for you…

  • Do you reuse what you can?
  • Do you like to recycle?
  • Is it something you are teaching your kids to do?

We do recycle. But, we don’t spend a lot of time doing it. We have a recycle bin under our kitchen counter that collects tin and aluminium cans, glass and plastic containers. Every two weeks, we sort it into the recycle baskets and set it out with the trash. Mr. Napping takes our cardboard to work and recycles it there, since we can’t do that from our residence at this point. We spend less than 20 minutes a week in our recycling efforts, but we are still reducing waste that would otherwise end up in the landfill.

I also re-use empty containers and things around our home. Old spice bottles makes great maracas. Empty toilet paper tubes are fun to make into play binoculars, race cars and rain sticks. Empty, clean tin cans are great for organizing pens, pencils, crayons and other art supplies. Reusing these items are just as much for the sake of fun, and recycling is just a bonus!

Care to Recycle Phone Charging Station Repurpose

There’s lots of things you can repurpose and reuse. And what you can’t reuse, you might be able to recycle. Most recycling is done in the kitchen. Have you ever thought about recycling in the bathroom?

WHERE DO YOU RECYCLE?

A 2016 consumer survey on in-home recycling habits, conducted in partnership with Johnson & Johnson Consumer Inc., shows that 34% of regular recyclers admit that it never even occurred to them to recycle in the bathroom! They found one of the main reasons people don’t recycle personal care products in the bathroom is a lack of tools and resources; only one in five recyclers have a recycling bin in their bathroom. We don’t! Do you?

Here’s a couple recycling pointers you might not know:

  • #1 and #2 plastics are the most widely accepted plastics in curbside and town recycling programs
  • #5 plastic bottle collection is increasing, but it’s still not generally accepted in curbside and town programs
  • Plastic tubes and plastic films are not accepted
  • Plastic caps can be left in place
  • Pumps need to be removed and discarded in the trash
  • Rinsing the bottles before recycling is appreciated

Care to Recycle Phone Charging Station Repurpose Recyclables

Johnson & Johnson Consumer Inc. have created the Care To Recycle® program to encourage recycling of personal care product packaging and as a gentle reminder to extend your recycling habits outside your normal areas. Care To Recycle® wants to help parents extend recycling habits outside the kitchen and into the bathroom. We can involve our children in the fun and ease of recycling and reusing.

Here’s a fun, quick and easy little project that will help you reuse and recycle things you use in the bathroom.

RECYCLED DIY CELL PHONE CHARGING STATION

Care to Recycle Repurpose Empty Bottle into Phone Charging Station

Materials:
– Empty plastic bottle large enough to hold your phone. I used an Aveeno lotion bottle. The stress relief lotion is amazing (because as a mom of three boys, I have stress. Lots and lots of it). The bottle is a great size for reusing. If you don’t want to reuse it, it is recyclable.
– Rubbing Alcohol and Cotton Balls
– Permanent Marker
– Scissors, Razor Blade and Craft Knife. You can get by with just one, but I ended up using all three of them.
– Washi Tape

Care to Recycle Phone Charging Station Repurpose Materials

Directions:
– Start by washing out your empty bottle. Get out all the gunk and goop. Keep rinsing…. Almost there. Great, it’s goop-free now.

Here’s a video of the next five steps. Watch me do this project in less than a minute and a half. Or read through the directions below. If you get confused, come back and watch the video.

– Remove the label. The lotion bottle I used just had a sticker label. It took a little coaxing on one corner – we’re talking like maybe 30 seconds tops – but the label came up relatively easy. If you can’t get it off or don’t want to deal with it, you’ll be covering it up in a few minutes. Taking the label off just gives you a cleaner, less textured surface to deal with when you’re covering your bottle.
– Use the rubbing alcohol to clean off any sticky residue left behind by the label.
– Take the permanent marker and draw the basic shape of the area you want to cut out. You will need enough space to put your phone into and take it out of the container. I opted to turn the bottle upside down and thread the USB charging cord up inside the bottle opening. If the majority of the cord is inside the bottle, hopefully it won’t get pulled on, played with or caught on anything and damaged. You could leave the bottle upright and just drop the cord in the bottom too.
– Then I thought It might be nice to be able to hang the charging station on the plug and keep it all together that way. I cut a hole in the back of the bottle large enough to put my plug through.
– You can go back over any stray permanent marker lines and clean them off your charging station with rubbing alcohol. Wax on, wax off and you’ve got yourself a clean bottle again.
– Now, it’s time to get fancy. I didn’t want just a boring charging station hanging around, so I used some washi tape and stuck it to the bottle. I only did the front, but you could do the whole thing if you wanted. I like washi tape because it’s easy to use, it’s simple to make adjustments if you make a mistake and it’s easy to remove if you ever decide you don’t want it anymore. You can still recycle the bottle that way.


That’s it. Your cell phone charging station is ready to use! What I really love about this is that there are so many possibilities! And, I turned the cut out part of the bottle into a sink spout extender in our bathroom so Little N can wash his hands without needing to be held! Double score!

Care to Recycle Phone Charging Station Repurpose Water Spout Extention

Do you have any great repurposing hacks? Leave a comment and tell me about it!


I was selected for this opportunity as a member of Clever Girls and the content and opinions expressed here are all my own.

July 14, 2014 by Krista

Washi Tape Summer Boredom Buster Jars

Well, hello friend! I’m so glad you came to visit today! Looking for a boredom buster activity to help you out with the kids? Thousands of people on Pinterest have loved this Washi Tape Boredom Buster Jar and I know you will too.

Here’s a question for you…Can you feel it? Feel what? The warmer weather, the longer days. The school bell’s last ring of the year.

It won’t be long now before school is out and the kids are home!

Every. Single. Day.

Does that make you a little nervous? Because it makes me nervous.

Day after day after day of refereeing the Brother Bickering Match isn’t my idea of a good time. Back when I didn’t spend my days chasing three little hooligans and trying to keep them entertained all day, I lived for summer. Now, I’m a little apprehensive when summer hits full force.

We live in the desert, which means that it’s too hot to play outside from about 11 am until around 5 pm.  That’s a lot of hours inside. Climbing and bouncing off the walls. Pulling out every toy we own, all at once. Hiding in the closet eating chocolate.

That last one might be me.

I have a hard time coming up with ideas of things for us to do on the spot and my boys get tired of the same thing all the time. So, I put together a list and then made us our very own Boredom Buster Jar. Actually, two jars… they wouldn’t all fit in one! There’s no excuse now. Let the fun begin!

WASHI TAPE BOREDOM BUSTER JARS


Materials:
– Craft sticks
– Permanent Marker
– Washi Tape in seven designs
– Jars or containers to hold your sticks

Directions:
– Gather ideas of activities your kids would like to do. Include things like projects you can make together, things they can do on their own, activities that will help get the wiggles out, and even places to go. I had a running list on my phone that I kept adding to for about two or three weeks. When I came upon something else I thought my kids would enjoy, I’d add it to the list.

Want a great list in just a few seconds? Check out my list with 168+ activities and ideas of things to put on your craft sticks!

– Write each activity on a craft stick with a permanent marker. Doesn’t need to be fancy, just legible. You could type them up on the computer, print them out and then glue them on the sticks – but that’s too time intensive for me.


DIVIDING THE ACTIVITIES INTO CATEGORIES

I divided the categories up so that my kids would be able to use the boredom jar on their own.

By putting the activities into categories, I was able to control the kind of activity and still allow my kids to choose what they wanted to do, randomly or by picking sticks until they found something they liked.

I thought about our typical day and the kinds of activities we like to do. Then I considered how involved I am in different parts of my children’s days. I came up with seven categories.

My categories were:

  • Things we can do
  • Things we can make
  • Energy Bug – activities that help focus their bouncing off the walls into something a little less destructive
  • Quiet time activities – things for my preschooler to do on his own while his brothers nap
  • Family activities – things we wanted to do as a family, like outings. This was perfect for weekends!
  • Outside play time – activities to do outside. A lot of these involved water
  • Fun with food – activities to do with food, often ending with snack time

– Tape each stick in a single category with the same color washi tape. You could also paint the ends or use some other method of distinguishing the sticks.  Washi tape was quick, easy, and mess-free. If you have a problem with the tape sticking, a small piece of scotch tape or a swipe with a glue stick should fix the problem.

– Store your sticks in a jar (or jars…) and the next time boredom strikes, prepare to be a superhero!

Did you download my list of 168+ activity ideas to put on your craft sticks?
GET IT NOW!
I did the hard part for you, the rest is cake. And you’ll be so glad when you need a distraction and you can just grab the boredom jar and quell the storm.
Maybe the jar is too much? Just print the list!

PROMISE, it’ll be a lifesaver.

June 11, 2014 by Krista

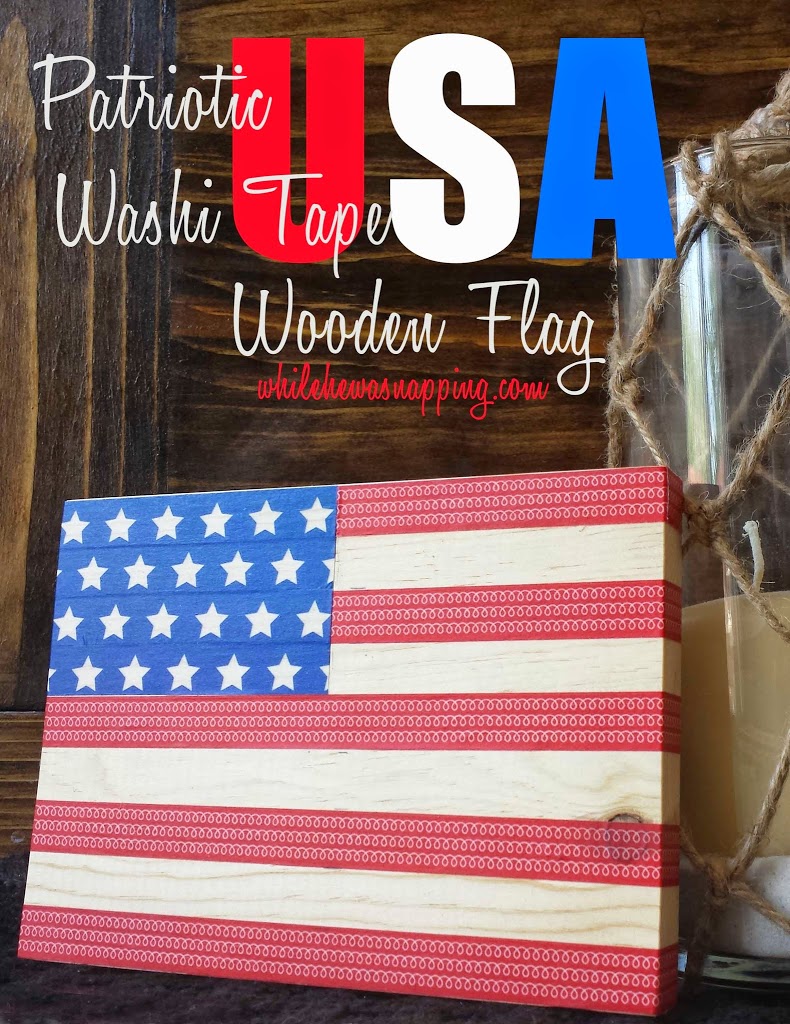
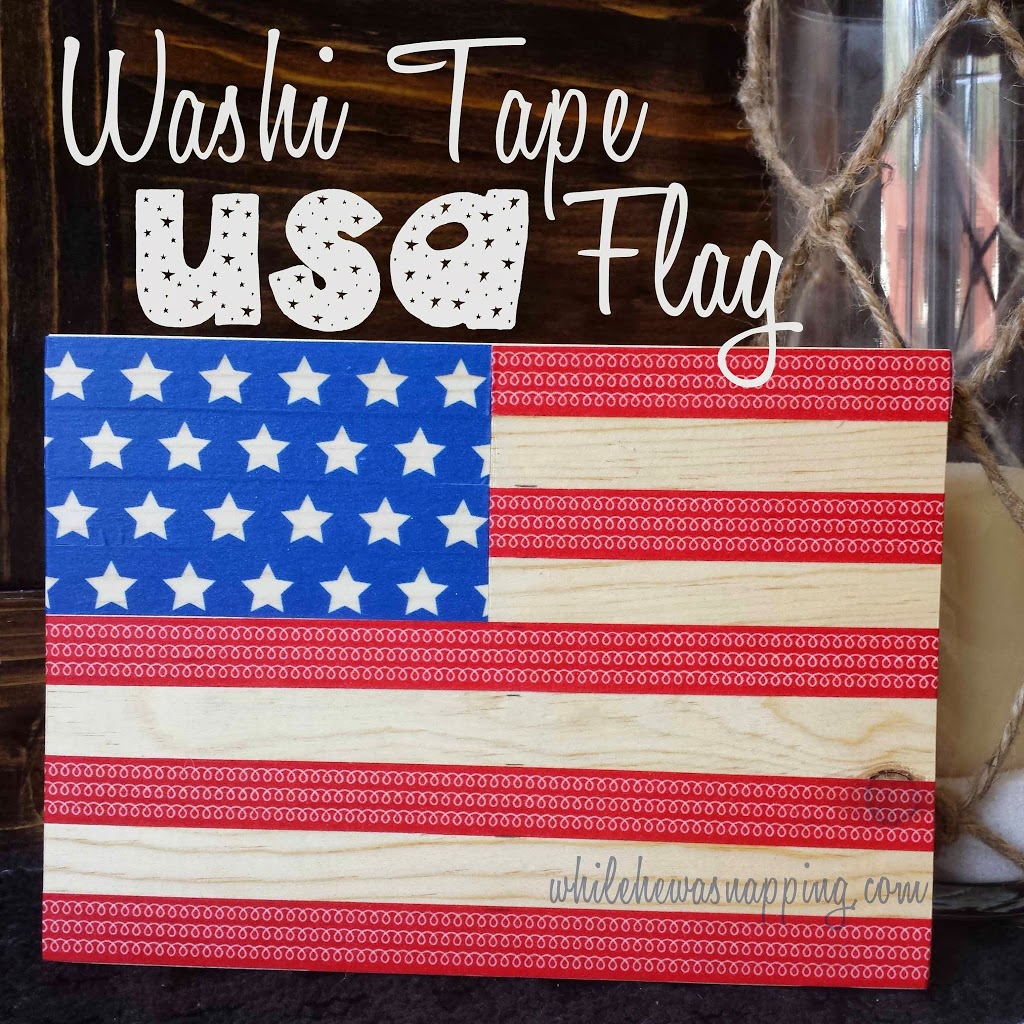
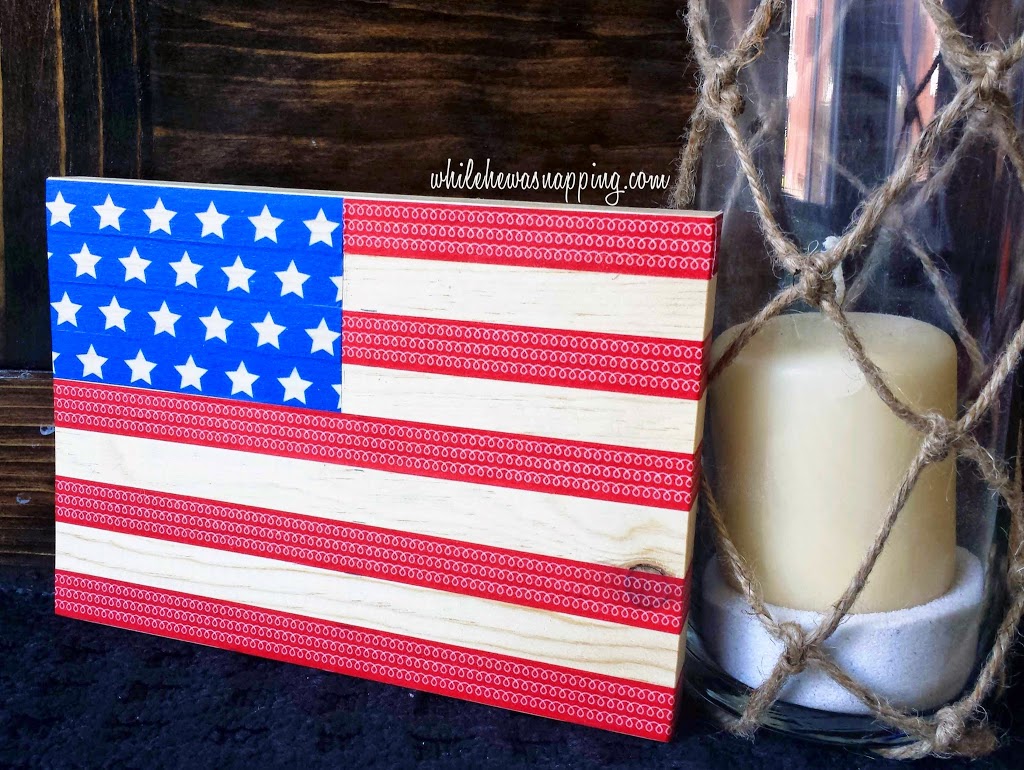
Washi Tape USA Flag Craft

I’m super excited to be part of Jen’s {from Girl in the Garage} Red, White and Blue Inspiration Series.  There have been some fun projects so far, which I’ll show off a little more in a minute or two.  You’re gonna want to check them out.  But first… I’m going to share a fun and super easy USA flag craft for your patriotic enjoyment!

This project is incredibly simple and took me about 20 minutes to do.  The supplies are simple and you can easily take this idea and run with it… how cute would these be as smaller, drink coasters?!

WASHI TAPE USA FLAG CRAFT

SUPPLIES NEEDED TO CREATE ONE USA FLAG CRAFT

Affiliate Link Disclaimer

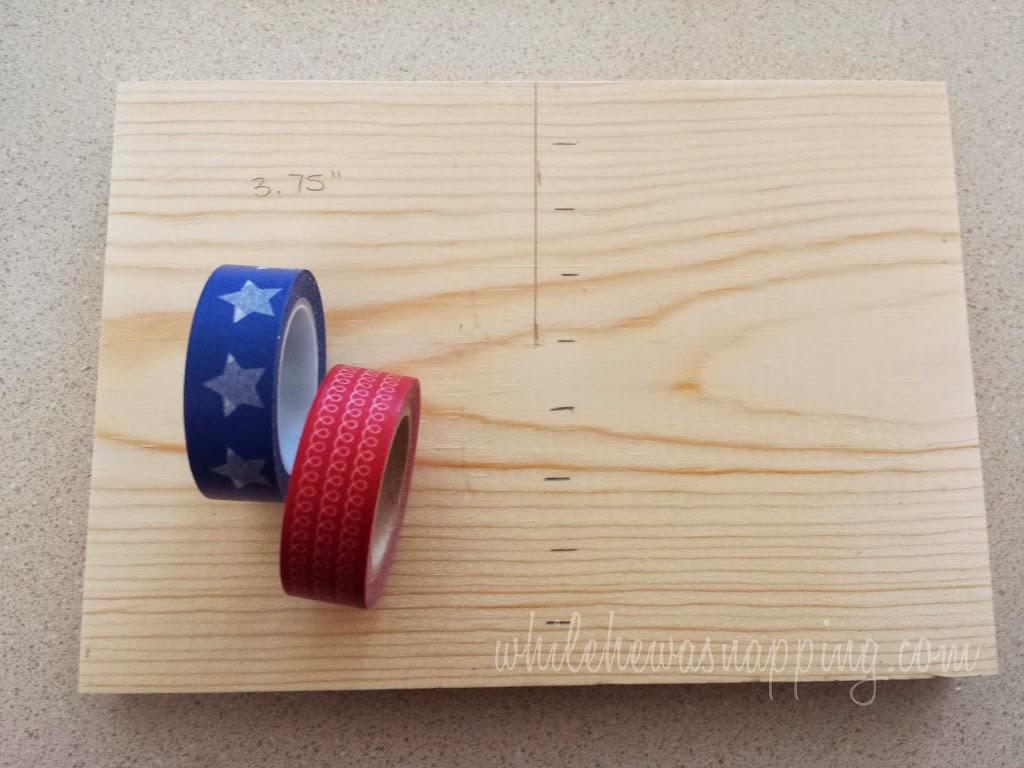
– One 1″x6″ board cut at 7.5″ long.  You can get it at Lowe’s or Home Depot and if you ask nice, they’ll even cut it for you.
– Red Washi Tape – I like to buy washi tape on Etsy (SOLID RED | RED POLKA DOTS | RED CHEVRON | RED STRIPES)
– Blue Washi Tape – The blue star tape I used can be found on ETSY or AMAZON
– Craft Knife (I have THIS ONE in both the knife and swivel knife and really like them)
– Ruler
– Pencil
– Sandpaper (optional, but recommended)
– Polyurethane (optional, but also recommended)


DIRECTIONS TO CREATE YOUR USA FLAG CRAFT

MEASURE FIRST!

– If you want to shape your board and clean up any rough edges or imperfections, do so now.  I just took a quick swipe along the edges with sandpaper to get any splintery slivers and take a little of the edge off.
– Lay your board down horizontally.  Measure out 3.75″ from the top, left side of your board.  Mark it with your pencil. This space will be for the blue stars.

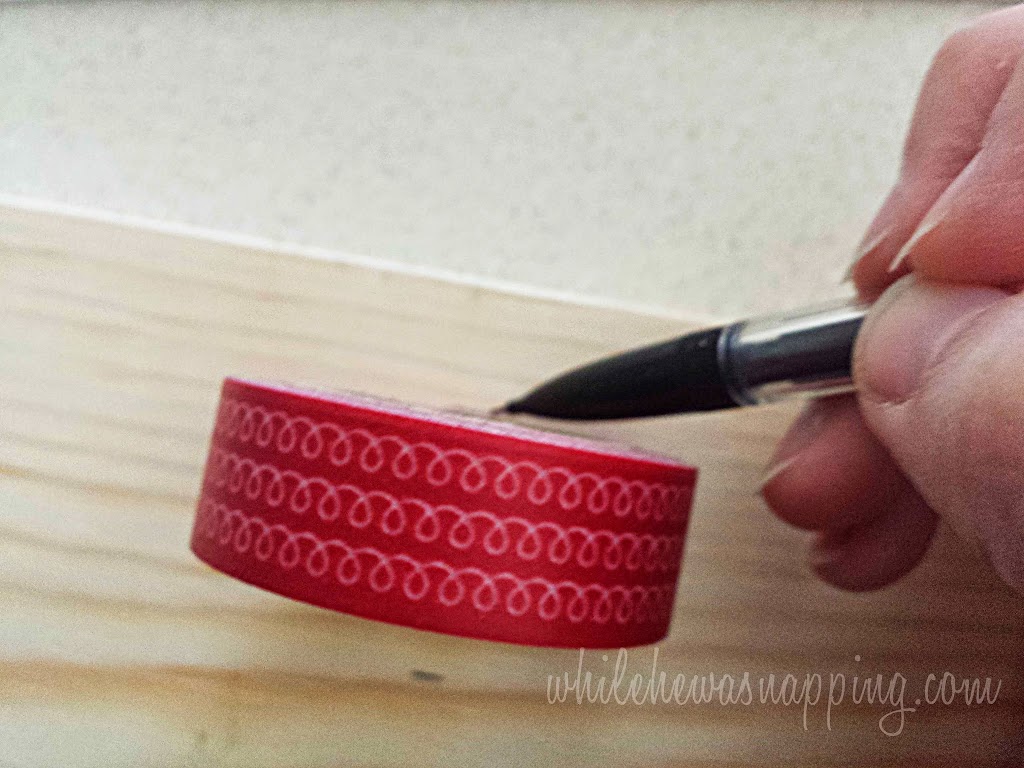
– Measure the stripes on your flag.  I did it the super technical way and just used a roll of washi tape to measure the width of each stripe.  Fancy, huh?

APPLY THE RED STRIPES

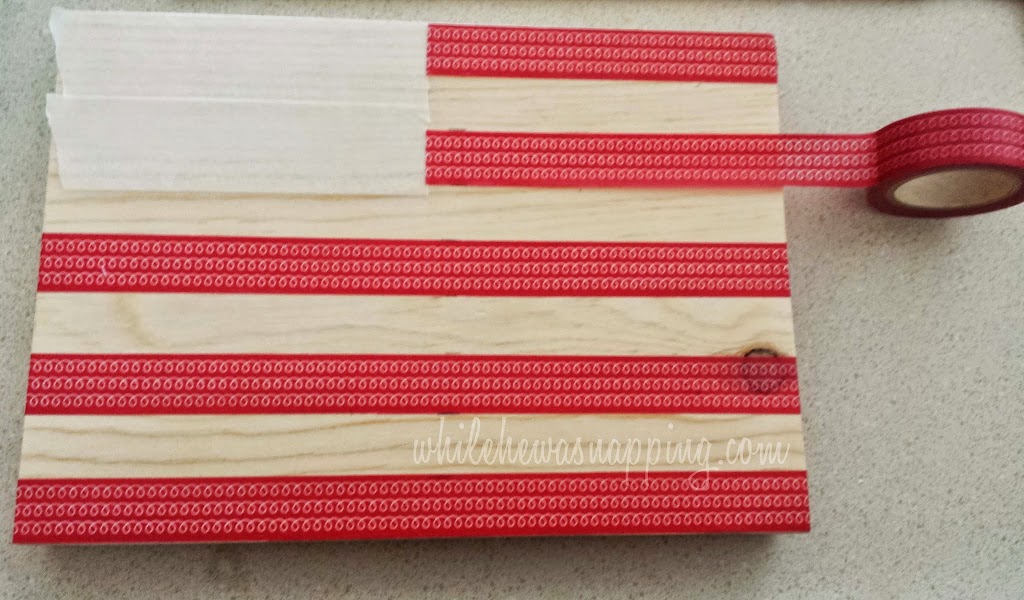
– Start with whichever tape you want, I did the red.  Following the measurements your marked on your board, lay down strips of tape.  I wrapped the edges of the board as well as the face.
– Skip every other line to create the white stripes in between the red ones.  If you want a truer white than the board you’re using, you could paint the board before you begin.  Because I am using pine, it’s a pretty light color already and I really like the wood grain in it.

NOW FOR THE BLUE

– When you finish with the red, switch to the blue tape and start in the top left corner, carefully laying down strips of that tape.
– Make sure your stars face the way you want them to and remember to stagger each row if you want them offset, like they are on a real flag.

– Use your craft knife to get precise straight(ish) lines where the blue square stops.  I wasn’t too particular, but use your ruler if you want it to be straight and even.

That’s it.  You’re done!


HELPFUL TIPS AND TRICKS

I did end up going over the board with a layer of polyurethane to help hold the tape in place.  (A glue stick will also help if your tape keeps coming up.)  It actually added an antique look to the flag, which was kind of neat.

I think these USA Flag Crafts would make super cute coasters if you scaled the proportions down a bit.

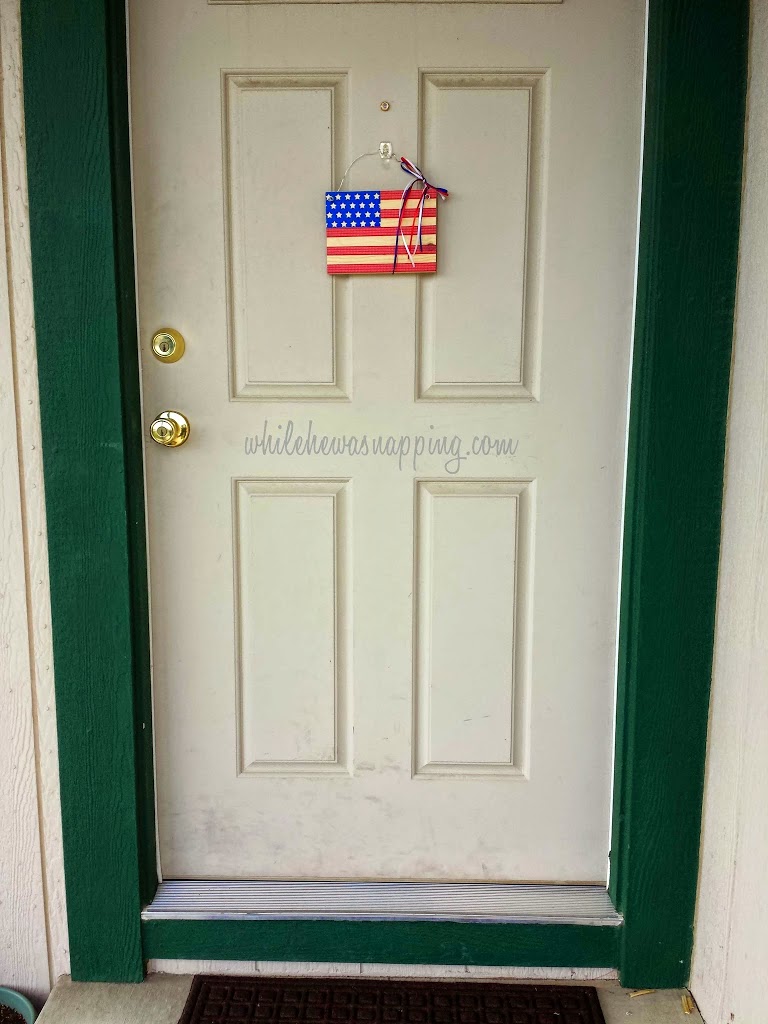
There are some great options to display your USA flag craft. Sawtooth hangers are inexpensive and easy to install. The real no muss, no fuss solution.

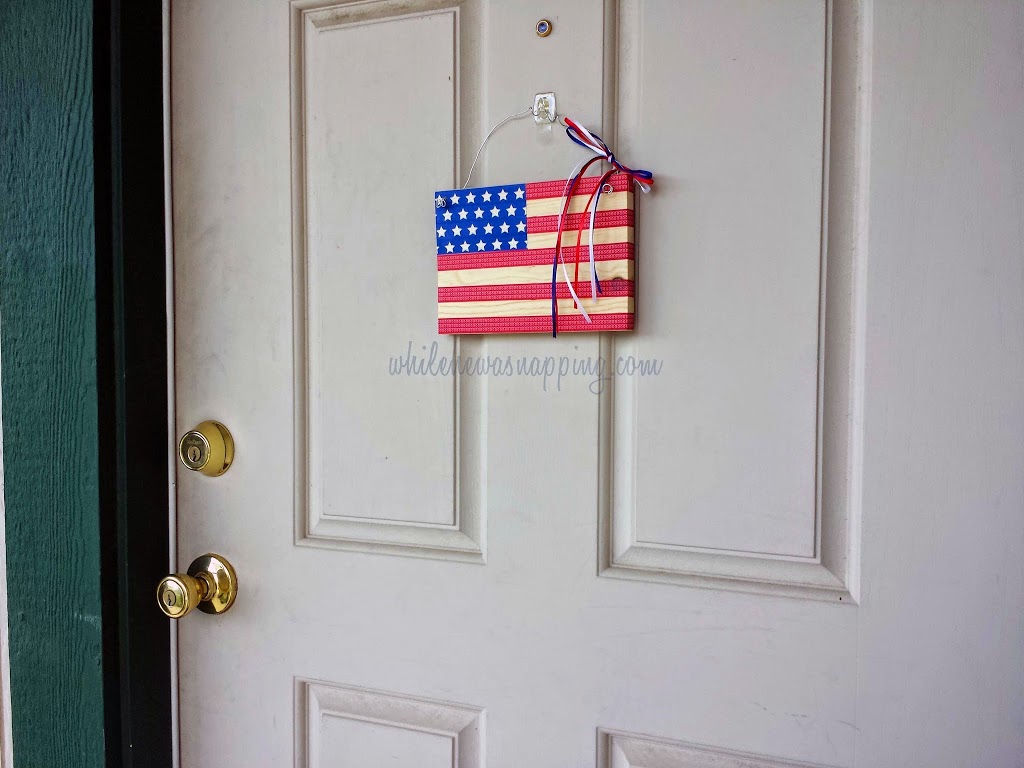
I ended up drilling a couple holes and then looped some picture hanging wire through them and tied some ribbon on it for a little more cutesy finish and hung it on our door.


THE BEST PART?

I like that it’s not huge, but the bright colors will still draw the eye.  It’s a nice wreath alternative.  Because, seriously, who has the room to store a wreath for every holiday?  Uh, not me.  A 5×7″ wooden board, I can probably handle though.


As I mentioned, there are some other really great projects from some super talented bloggers.  Don’t miss the other great features in this series!  Check them all out!


*After some looking around… I found the red swirly washi tape HERE and the blue star tape HERE.  These are not affiliate links, just what I found with my own Google searches. Hopefully, they will help you complete your own washi tape USA flag craft.


This post was written by Krista and originally appeared on While He Was Napping.


I'm Krista. Ringleader here on While He Was Napping, wife to my handsome Mr. Right & momma to my THREE energetic boys, Big J (9), Little J (6) & Little N (4). We FINALLY added a beautiful little girl to our family last December.

I’m knee-deep in Tonka trucks & Thomas trains. I survive our crazy days with Vanilla Coke, Sonic slushies, sweet snuggles and little giggles. When I tuck them in tight & kiss them good night, I get a little time to create & just be me.


It all happened
while (s)he was napping
Want More of My Story?

Privacy Policy

While He Was Napping respects your privacy and is committed to keeping any personal information collected on this website confidential. To find out what information we collect and how it is used or what options you have regarding your information, see our full privacy policy here. Creative Commons License The website found at whilehewasnapping.com and all subdomainsauthored and published by Krista is licensed under a Creative Commons Attribution-NonCommercial-NoDerivs 3.0 Unported License.

Pretty Chic Theme By: Pretty Darn Cute Design