While He Was Napping

momma gets stuff done

  • Home
  • About
  • Archive
  • Do It Yourself
    • Crafts
      • No Sew
      • Painting
      • Paper Crafts
      • Repurpose Projects
      • Vinyl
      • Washi Tape
      • Kid’s Crafts
      • Fonts
    • Sewing
    • Decorate
      • Home Decor
      • Holiday Decor
    • Celebrate
      • DIY Gifts
      • DIY Your Party
  • Recipes
    • Beverages
    • Appetizer
      • Bread
      • Other Appetizers
    • Snacks
    • Main Dish
      • Meat
        • Chicken
        • Beef
        • Pork
        • Seafood
      • Vegetarian
      • Slow Cooker
      • 30 Minute Meals
    • Dips & Sauces
    • Salads
    • Pasta
    • Soup
    • Dessert
      • Cookies
      • Brownies
      • Cupcakes and Cake
      • Box Mix Recipes
      • Other Sweet Treats
    • Breakfast Food
      • Pancakes
      • Waffles
      • Muffins
      • Other Breakfast Food
  • Family
    • Babies
      • Pregnancy
      • Newborns
      • The 1st Year
    • Toddlers
    • Preschoolers
    • Kindergartners
    • 6-8 Year Olds
    • The Grown Ups
      • Date Night
      • Romantic Gifts
    • Self Care
  • For the Home
    • Cleaning
    • Organizing
    • Emergency Preparedness
  • Travel
    • Travel Tricks & Tips
    • Traveling with Kids
  • Tech & Gadgets
    • Must-Have Apps
    • Techy Home Appliances
    • Gadgets & Electronics
    • Blogging Tips
  • Printables
    • Posters
      • Quote Printables
      • Subway Art Printables
    • Printable Organizers
    • Printable Journals
    • Learning Printables & Worksheets
    • LDS Printables
  • Holidays
    • New Year’s
    • Valentine’s Day
    • St. Patrick’s Day
    • Easter
    • Cinco de Mayo
    • Mother’s Day
    • Father’s Day
    • 4th of July
    • Back to School
    • Halloween
    • Thanksgiving
    • Christmas
    • Holiday & Seasonal Printables

February 27, 2019 by Krista

How to DIY Laser Printer Labels for Home Organization

Welcome! I’m so glad you stopped by today! Have you ever been organizing something and thought, this sure could use a cute label!? Or maybe you’ve wished for something cuter than a sticky note. If you’ve ever wish organization could be easier, cuter and functional then these DIY Laser Printer Labels are just what you need. Simple, inexpensive, cute and actually useful! Just how organizing should be!

Make DIY Laser Printer Labels


ORGANIZE SIMPLY, EFFECTIVELY AND INEXPENSIVELY WITH DIY LASER PRINTER LABELS

Organizing supplies can get costly quickly. But it doesn’t have to be a choice between chaos and cash. Keep your things in order with a quick print job and this easy DIY project. These labels will make it easier to calm the chaos in the kitchen, the toy room, the craft room, the bathroom, or anywhere else you might need a little more calm and a little less chaos.
Organizing with DIY Laser Printer Labels


ORGANIZE YOUR SPACE FOR FUNCTION AND FORM WITH THESE EASY DIY LASER PRINTER LABELS

  • Does your spice cupboard look like a disaster zone?
  • Do you buy foods in bulk?
  • Do your kids have toys with lots of little pieces? (Lego bricks and Shopkins, I’m looking at you.)
  • Is your home office or command center a jumble of pencils, pens, sticky notes, markets and other paraphernalia?

You need some containers, my friend. But what good is a container if you don’t know what goes in it? And that is where your super easy, oh-so-cute DIY Laser Printer Labels will come to the rescue!
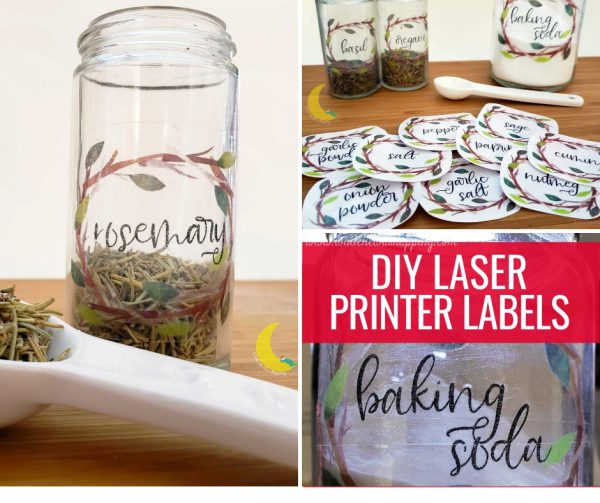
DIY Laser Printer Labels for Organizing


GET ORGANIZED WITH DIY LASER PRINTER LABELS IN JUST 30 MINS

Now that you know why you need some super useful DIY Laser Printer Labels, are you ready for the best part of this little project?

These only take 30 minutes to make. Seriously.

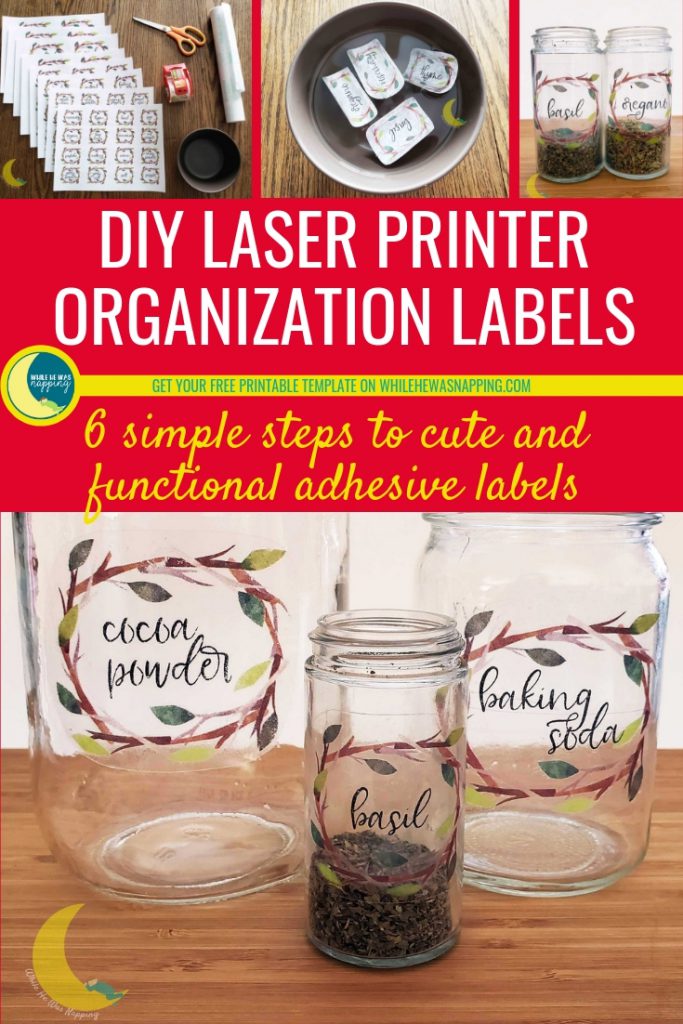
In 6 super simple steps, you’ll be ready to organize ALL. THE. THINGS.

Ready? Let’s calm that chaos!

Affiliate Link Disclaimer


DIY LASER PRINTER LABELS SUPPLIES:

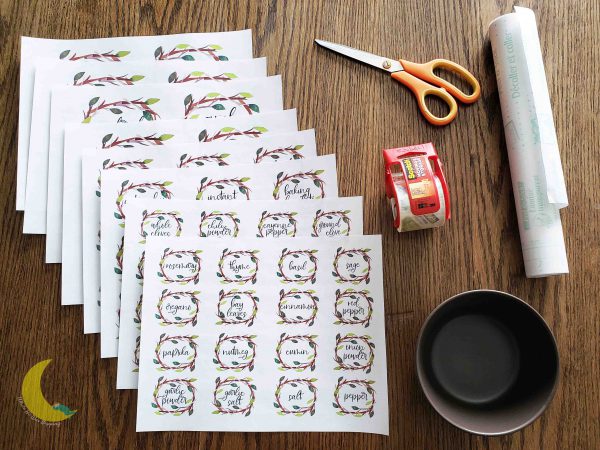
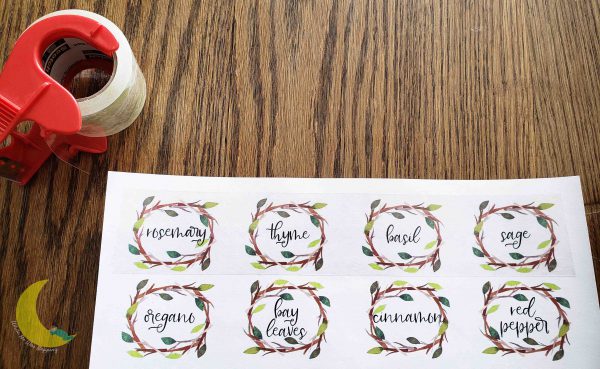
  • Labels. You can download my blank farmhouse-inspired wreath labels HERE and fill them in with an image editor before you print them. Or grab my set of Ready-to-Print Spice, Baking and Pantry Labels with editable templates from my Etsy Shop. The editable templates will make it super easy to quickly make labels for anything you might need.
  • Laser printer. No, unfortunately, ink jet won’t work for this project, as the ink is water based. I personally own a Brother Laser Printer and it does a decent job, as long as you aren’t looking to do photos. You can also get your files printed at an office supply store for just a few dollars, if you don’t have access to a laser printer.
  • Copy paper. Any standard copy paper will work. In fact, the cheaper, the better.
  • Box packing tape or contact paper. I personally prefer the packing tape. The ink tends to transfer better with the tape than with the contact paper. More info on this is below, at the bottom of the directions.
  • Scissors.
  • Bowl and water. 

DIY Laser Printer Labels


DIY LASER PRINTER LABELS DIRECTIONS:

PRINT YOUR LABELS

Step #1: Print your labels on a laser printer. You can download my blank labels from the links below. If you choose to use them, you will need to edit the image files before you print them. Any image editor will work.

2-inch Spice Labels | 2.75-inch Baking Labels | 4-inch Pantry Labels

Kitchen Pantry DIY Laser Printer Labels

Or get the pictured Ready-to-Print Labels and editable templates in my Etsy shop.


COVER YOUR LABELS

Step #2: Cover your labels with packing tape. If the label is too large for the packing tape, you have 2 choices:

  1. Layer with strips of tape to cover the entire label or
  2. Use contact paper to cover the label.

I personally prefer to layer the tape than to use contact Paper. The ink transfers better with the tape If you use tape, you’ll have to overlap the layers of tape a little or your label will fall apart. The overlap lines are barely noticeable. There is a photo below of a layered label so you can see if it bothers you or not.*

DIY Laser Printer Labels Cover with Tape


CUT OUT YOUR LABELS

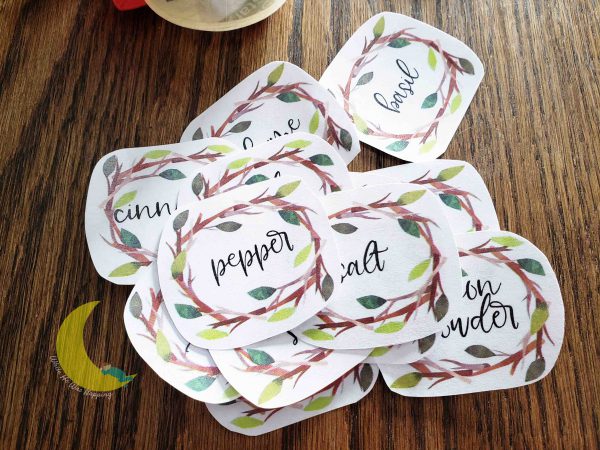
Step #3: Use the scissors to cut out your label. The shape of the tape is more important than the shape of the paper. I typically just cut around the perimeter of the label. If you want a specific shape for your label, make sure you cut it out of the tape, not just the paper.

DIY Laser Printer Labels Cut Out


SOAK YOUR LABELS

Step #4: Fill your bowl with water. Regular old tap water at room temperature is my preference. Your hands will be in the water, so super hot or super cold water is not recommended.

Step #5: Place the labels in the bowl. Push them under the water so they are completely submerged. Let the labels soak in the water for 10-15 mins.

DIY Laser Printer Labels Soak


PEEL YOUR LABELS

Step #6: Peel the paper backing off the tape. Rub your fingers lightly, but firmly, over the back of the label until all the paper is rubbed away. The ink should remain on the tape.
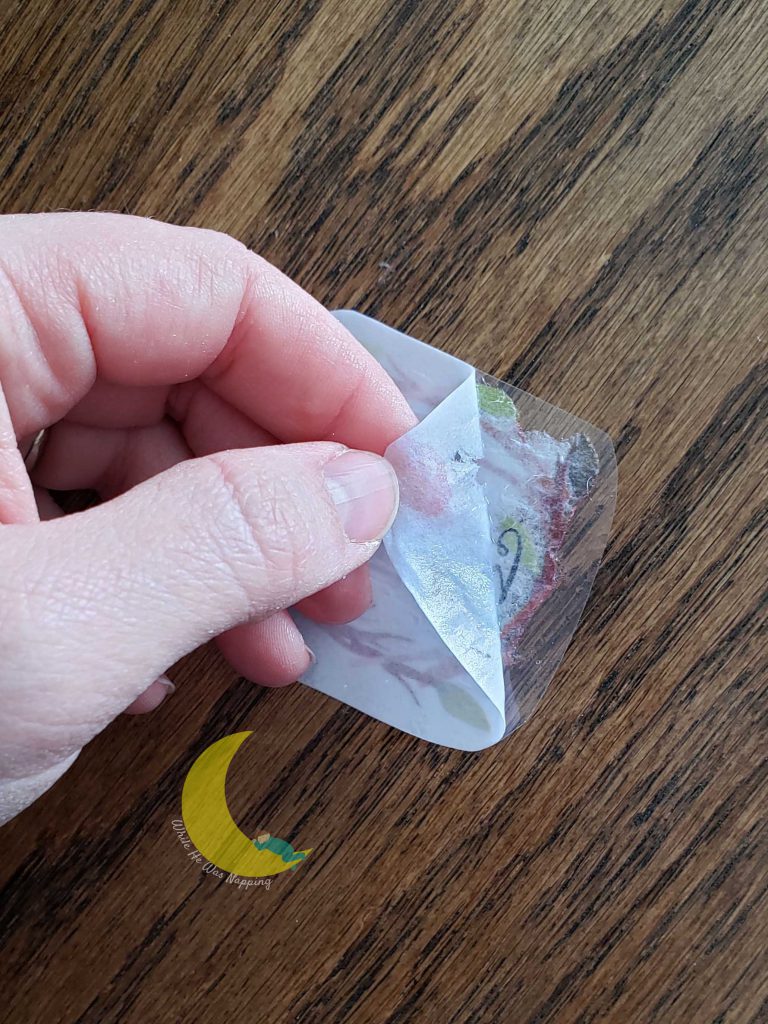
DIY Laser Printer Labels

It’s a little easier to rub the paper away while the label is in the bowl, submerged in the water. You’ll need to inspect it to make sure all the paper comes off. Pay particular attention around the ink, it tends to stick there more.
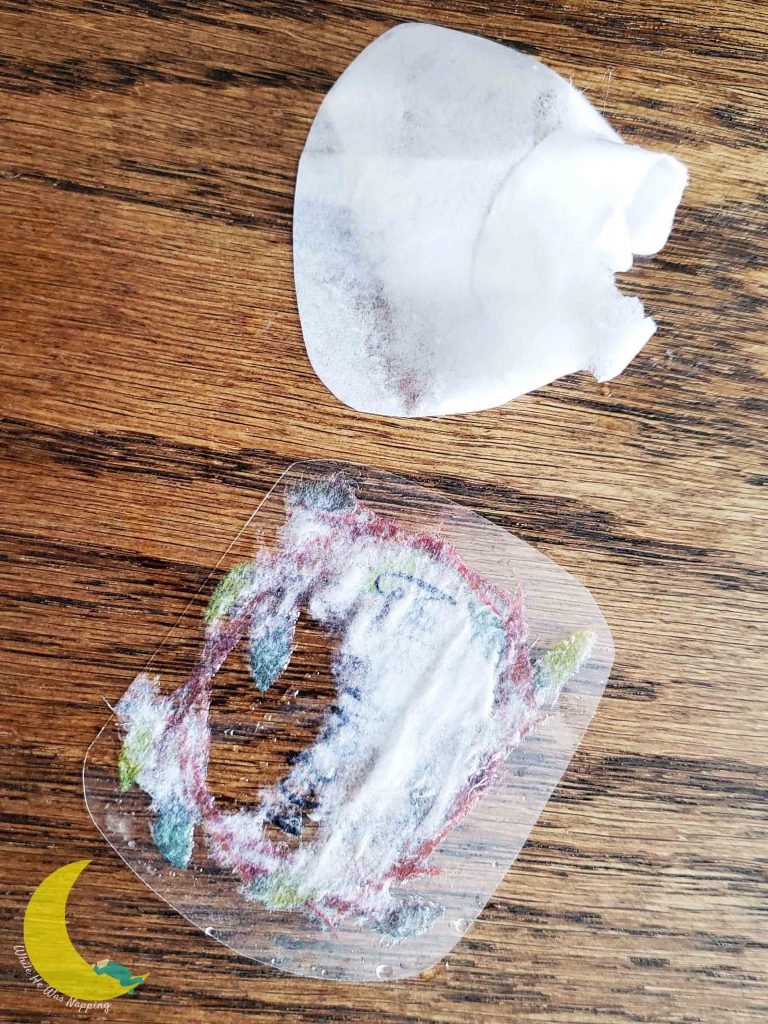
DIY Laser Printer Labels

Once all the paper is peeled from the tape, let your label dry completely. You can blot with a paper towel to speed this up a little.
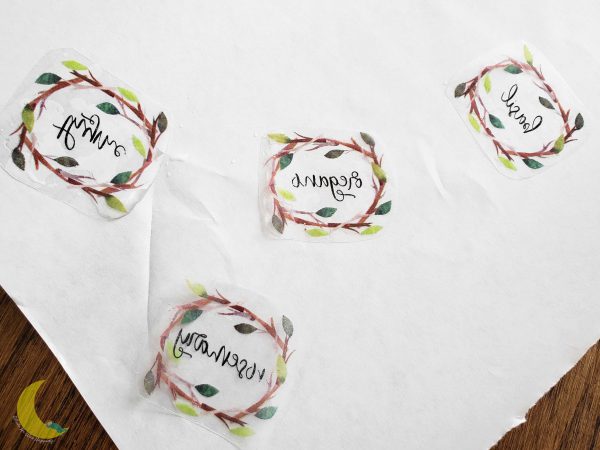
DIY Laser Printer Labels


STICK YOUR LABELS

Yep that’s it. Once your labels are dry, they are ready to use! The adhesive will be sticky again as soon as it is dry. So start sticking those labels and organize all the things!
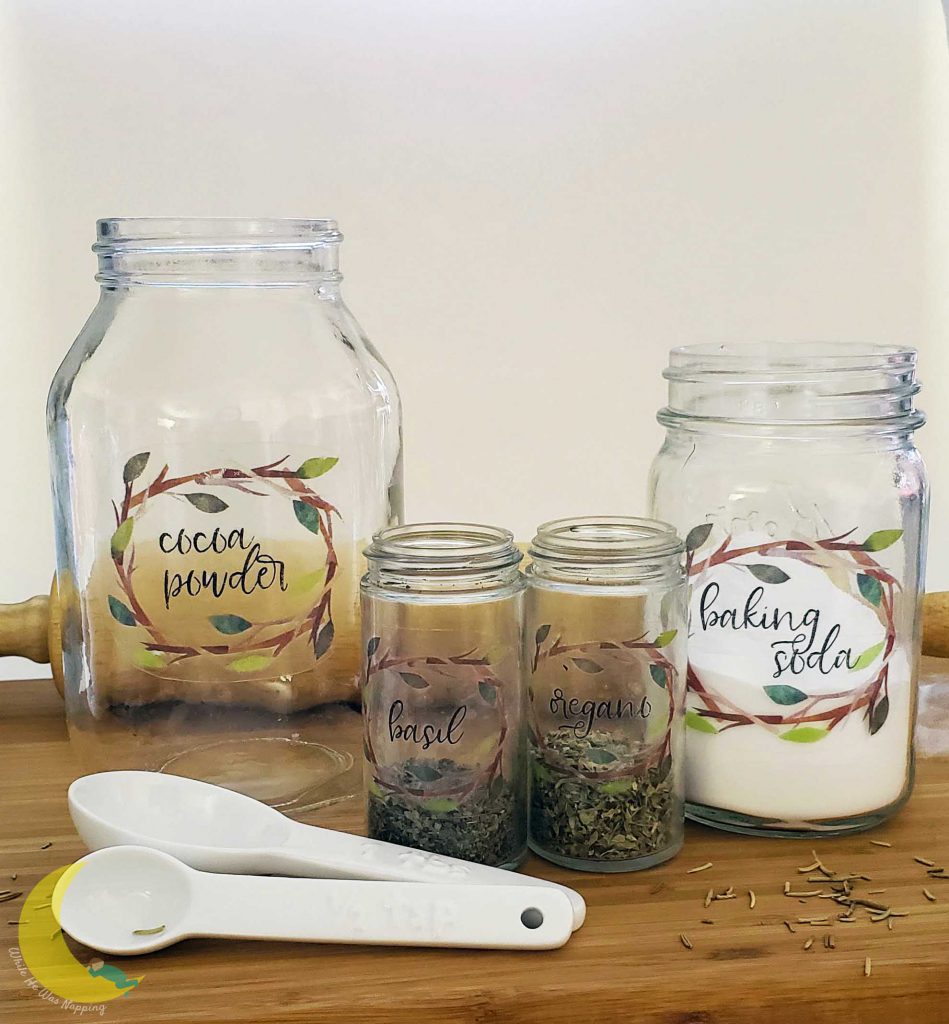
DIY Laser Printer Labels Baking Labels


CONTACT PAPER VS. PACKING TAPE

So, remember when I talked about the layering of tape for larger labels? In the photo above, the baking soda label is a layered label. Can you see where the pieces of tape overlap? Check out the close up below. The layer lines go through the word “soda”.
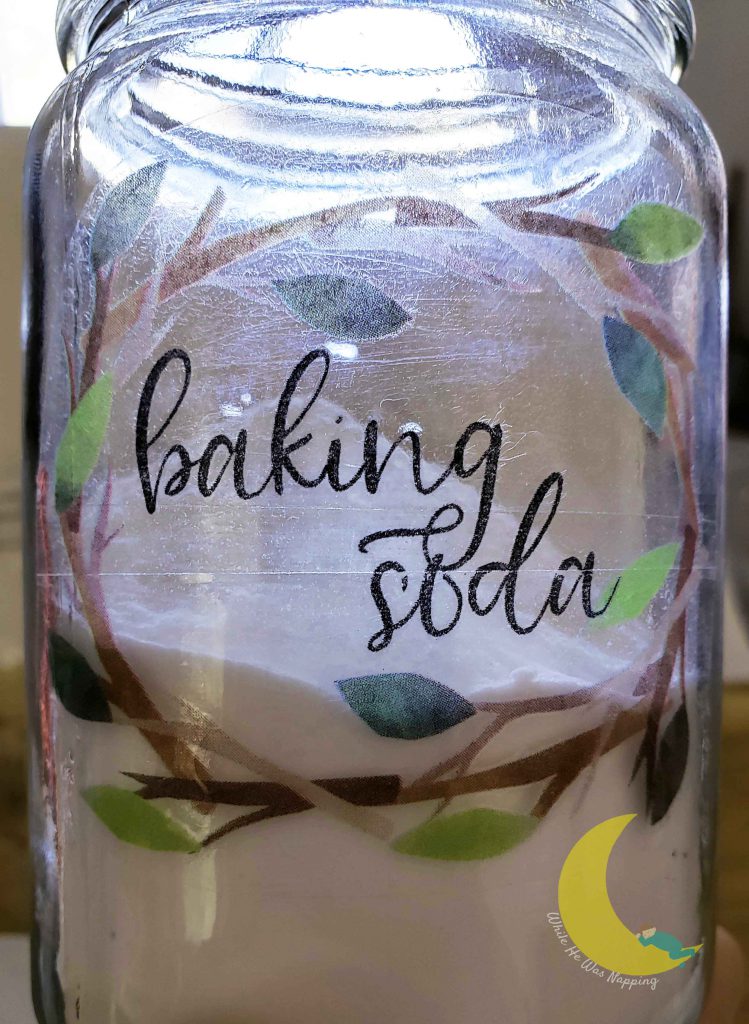
DIY Laser Printer Labels

The cocoa powder label in the first photo above is a contact paper label. And that one actually came out really good. Most of them were more like the photo below, which is why I prefer to layer the tape than to use contact paper.
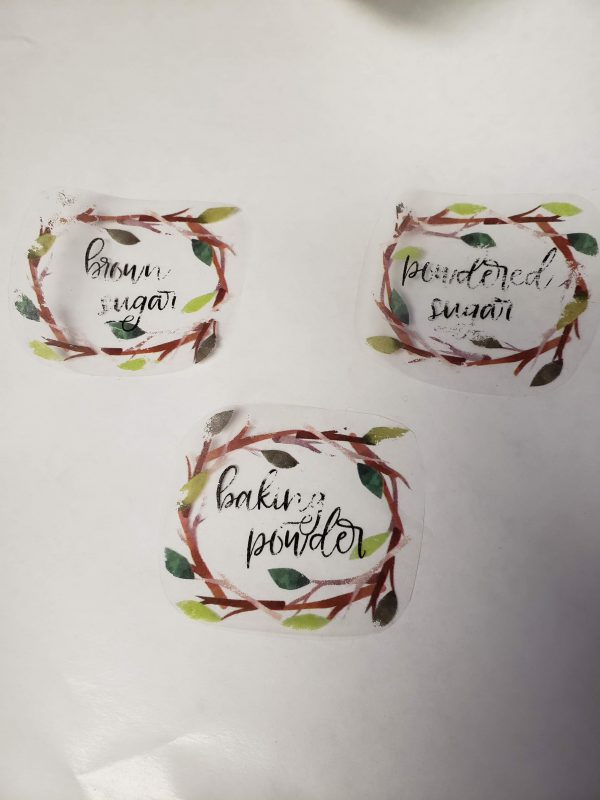
DIY Laser Printer Labels Contact Paper Fail

If you do decide to use contact paper, make sure you give the ink the best chances of transferring to the contact paper adhesive by rubbing it firmly with a plastic card (like a bank card or library card) or another hard item after you’ve covered the labels with the contact paper.


GET ORGANIZED WITH DIY LASER PRINTER LABELS

Sure, you could spend a small fortune on organizing supplies and custom labels. Or you could make some adorable, functional labels yourself in less than half an hour.

Label your bulk foods, your spice cupboard, your baking ingredients, your kids toys, your office supplies and anything else you might need or want a label on.

So, what are you waiting for? Calm the chaos and organize your life with some totally cute, totally functional, totally inexpensive and easy DIY Laser Printer Labels.
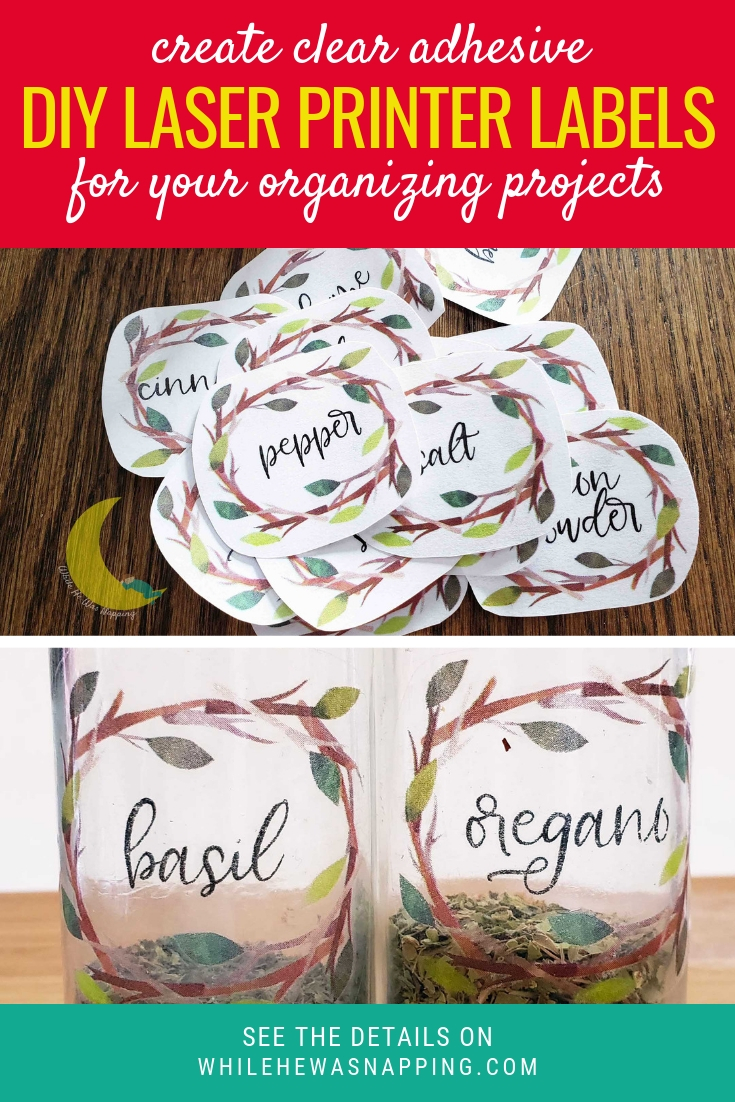

Clear Adhesive DIY Laser Printer Labels


DON’T FORGET YOU CAN GRAB MY READY-TO-PRINT LABELS AND THE EDITABLE TEMPLATES IN MY ETSY SHOP TO MAKE THIS PROJECT EVEN EASIER!

January 3, 2018 by Krista

Calendar Journal

This post was originally posted in 2014. It was last updated Jan 2018 to maintain accuracy and pertinence. Full 2018 calendar journal templates are available in my Etsy shop.


Do you keep a journal?  I am the worst journal-keeper ever.

I used to be pretty good at it when I was younger – okay, I used to do it when I was younger. Being good at it might be a little too generous. But, then… Life. Marriage. Motherhood.

I was so busy living (sometimes surviving) day-to-day that I was sure I wouldn’t forget the important stuff and the daily stuff was monotonous. Did I really need another journal entry about dishes and laundry and baby snot on my clothes?

Calendar Journaling is the perfect way to record the little and the big things in life in just 5 minutes a day!

WHY WE NEED TO JOURNAL THE LITTLE THINGS

But, I realized that I WAS forgetting the important stuff.  Wait, what day was it when my beautiful little niece was born again?! And how much did the doctor say my youngest weighed at his well-baby check up last week? If only I’d written it down!

And, you know what, the dishes, laundry and baby snot DOES matter. It might seem like small, inconsequential chores and a boring daily grind – but it’s my life! It’s not always glamorous and fancy, but it’s mine.

When I’m feeling unaccomplished and like I spent my day just spinning my wheels, some times I need to account for the little things like laundry and dishes. Because keeping my family fed and clothed IS important. Having a physical list of my accomplishments helps me have the motivation to do it all again the next day.


EVEN YOU HAVE TIME TO JOURNAL WITH A CALENDAR JOURNAL

Part of my struggle was time. I felt like I didn’t have time to sit down and write for 20 minutes! And filling only three lines in my journal was kind of depressing.

However, I seemed to have stumbled on something that works! A Calendar Journal. I first saw a similar idea on a Flickr feed. The one I originally saw, I can’t seem to locate, but the link is quite similar. I totally fell in love with the idea. THIS I can do! AND I DID!

Eleven months down and I only missed a week plus a couple days. It looks so neat and only takes a couple minutes a day (usually right before I go to bed). The good news: I think I’m hooked!


WHY THE CALENDAR JOURNAL WORKS SO WELL

The limited space is just what I need. It’s small enough that I don’t feel like I need to spend large chunks of time on writing. I just jot down a few quick notes and I’m done. Some times, I write in it while I brush my teeth at night. Super quick, super easy.

It’s also a creative outlet for me and that’s just what I need to wind down and relax at the end of my day.

And, if I do miss a couple days, I can go back pretty easily and fill it in. (Confession: I may or may not have spent some time filling in about a month and a half in November and December… whoops. But I was able to get it all filled in before I forgot everything and my calendar still looks awesome.)

2013 Journal Calendar

February 2013 Calendar
Close-Up-Journal-Calendar-Box1
Printable-Journal-Calendar1
A couple of close-ups of my Calendar Journal.  Nothing super detailed or incredibly personal… unless you want it to be. Sometimes, my entries were just a check list of things I’d done that day – dishes, laundry, wiping up baby snot – and sometimes they were more personal – like we’re having another baby!
As you can see, I am no artist and the little sketches are just simple little drawings.
Printable-Journal-Calendar1
Click the image to view a larger version of my Calendar Journal.


WANT TO CREATE YOUR OWN CALENDAR JOURNAL?

I have the 2018 calendars available for purchase in my Etsy shop. It is a one-time, single instant download with all 12 months. The PDF file has all 24 calendar pages and is ready for printing right at home. Another nice thing about the PDF packet is that you will be able to print the pages back-to-back all at one time. Each month also has extra space to write down additional notes.  I used it for things my kids said, anything exciting that didn’t fit in the box for that day and little extras (like when my husband surprised me with a new cell phone upgrade).

2018 Journal Calendars available from While He Was Napping


I never got around to binding my pages, they are all still just loose papers, as you can see in the photos above. Some binding ideas are: You could put them in a three-ring binder, bind them with tape and glue or sew them together.

Affiliate Link Disclaimer

UPDATE 2018: I now do my calendar journal in my planner. I used the Mom on the Go Planner from leafytreetops.com last year. I love the weekly spread where each day is split into three columns. I use the bottom box to do my calendar journal and the top boxes are my appointments and to-dos. Any blank calendar or planner would work though. I also really like the Erin Condren Life Planner – it has the three column layout as well.


Enjoy and happy journaling!


This post was written by Krista and originally appeared on While He Was Napping.
 

May 3, 2017 by Krista

The Kitchen Declutter Challenge You Can Do In A Weekend

Welcome! I’m so glad you stopped by today! If your kitchen is feeling a little overcrowded and cluttered then you have come to the right place. If you want a little more order and less chaos in your cocina, this is for you. In two days, you can reclaim your space with this weekend kitchen declutter challenge. This checklist will guide you through, step-by-step to a clutter-free kitchen.


A CLUTTER FREE KITCHEN IN TWO DAYS WITH THIS KITCHEN DECLUTTER CHALLENGE

Two days is all it will take to get your kitchen under control, contain the chaos and kick out the clutter. Imagine finding that bowl or pitcher or cheese grater the first place you look. What would it be like actually knowing what spices you have in your cupboards. Imagine a calm, enjoyable cooking experience in a kitchen you love. You can have all that and more! Your kitchen can be a place you love, even if it’s not your dream kitchen. Only store the things you use and love. Make your kitchen a haven where your family will love to spend their time.

 Declutter your Kitchen in a weekend

A CLUTTERED KITCHEN IS A SMALL KITCHEN

Do you have a small kitchen? Clutter can make the largest of kitchens feel cramped and claustrophobic. My current kitchen is not small. It’s spacious and open and the reason we made an offer on this house. But the apartment we lived in before we bought our house had a teeny tiny kitchen. We barely had room to open the refrigerator door all the way. And, honestly, some days I miss our little kitchen and the limits it gave us.

If you have

  • a small kitchen with limited space
  • a large kitchen with plenty of space
  • a kitchen with awkward spaces
  • a cluttered kitchen with too many appliances
  • a kitchen that is cluttered and complicated to use

this checklist will help you put your priorities into place, organize what you love, give up the stuff you don’t and figure out how to best use the kitchen you’ve got to make it a place you enjoy being.

Kitchen Weekend Declutter Challenge

TRASH, DONATE, KEEP

The hardest part of decluttering any space is to ruthlessly purge your things. It can be hard to let go of those measuring cups or that casserole dish you got for your wedding… But, if they don’t work anymore, they aren’t doing you any good. Figure out a way to use them for something else or get rid of them. Start with 3 boxes: Trash, Donate, Keep.

Materials/Ingredients:

  • 3 boxes – 1 for trash, 1 for donations, and 1 for things you’re going to keep but that don’t belong in the kitchen.
  • A weekend to conquer the list
  • Weekend Declutter Challenge Checklist (gain instant access when you unlock the premium content below)


Instructions/Directions

CHOOSE A STRATEGY TO CONQUER THE KITCHEN DECLUTTER CHALLENGE

Decide if how you want to tackle your kitchen. Do you work best:

  • starting in one corner and working your way around the room?
  • concentrating on one task at a time?
  • working on small areas at a time?

What works best for you?


PRINT YOUR KITCHEN DECLUTTER CHALLENGE CHECKLIST

Grab your checklist when you click the image below. Download and save or print it right away. No email address and no waiting for it to show up. Just open and print it. And start your decluttering challenge now!

Weekend Kitchen Declutter Challenge Checklist


CHOOSE A WEEKEND AND GET TO WORK!

This challenge is designed to focus on a prominent area so you will be able to enjoy the results of your work. It’s designed to take place over two days so it doesn’t feel like you are cleaning and never making any progress. This challenge is quick and dirty.

For best results, divide this list into to parts. One for the first day and the other for the second day. While you don’t have to stick to it exactly, if you can accomplish approximately half the list one day and half the next, you won’t burn out and you’ll be sure to do a fairly thorough job so it will last longer than just a few days. Because, isn’t that the worst part of cleaning?! I hate spending hours working and you can’t even tell a day or two later. Get your results to last without having to kill yourself to get it all done at once.

 Kitchen Weekend Declutter Challenge

ARE YOU READY TO CONQUER THE KITCHEN DECLUTTER CHALLENGE?

You’ve got your list. Grab some boxes and get the clutter out of your home. Think how much easier it will be to cook in a kitchen that has the things you need, you know where they are and you aren’t avoiding the things you never use. Use this checklist to get your clutter free kitchen in just two days.


Want more inspiration to declutter your home? Check out these great books:


Weekend Declutter Challenge The Kitchen

April 13, 2017 by Krista

3 Reasons You Need a Medication Tracker + Free Printable

Hi! Welcome! I’m so glad you stopped by today! Have you had sickness in your home lately? We are going on 4 weeks here. FOUR! Everyone has been on antibiotics at least once and now we’re passing around the strangest virus I’ve ever had. Sick kids can be so hard when you’re trying to run a household. Especially if you’re sick too! But tracking your family’s medication shouldn’t be a hassle – that’s where this medication tracker will come to the rescue!

3 reasons you need a medication tracker + free printable

DISCLAMER: I’m not a medical professional and this is not medical advice! I’m just a mom who has had sick kids, been sick myself, had a sick husband, and missed medication doses or couldn’t remember what time it was when I gave him medicine last time. This is something that helps me keep track and stay on top of medicating my family safely and confidently and I wanted to share it with you, hoping it will help you do the same for your family.

NEVER MISS A DOSE AGAIN WITH THIS MEDICATION TRACKER

Have you ever wondered… “Did I give him his last dose?” or maybe “when did I give her medicine last?” When there’s illness in a family it affects everyone and trying to remember when the last dose of medication was given should be the least of your worries; but often, it’s not.

I know how all those doses run together when a fever lasts days or a round of antibiotics stretches on and on. Save yourself some worry, uncertainty and maybe even sleep! Make it super easy to medicate your sick family with confidence with just a glance.

And these are a MUST-HAVE in families where more than one person might give the medication. Never worry about double dosing again!

Reasons you need a medication tracker and free printable

IS MEDICATING YOUR FAMILY SAFE AND EASY?

Do you ever administer medication to anyone else or take it yourself, ever? If so, this is for you! Are you tired of trying to remember when that last dose was given? How much? And what medicine was that again? Are you:

  • a tired mom or dad, giving medication every 4-8 hours, around the clock? Day and night?
  • a daycare provider that cares for, and occasionally medicates, children you don’t live with?
  • one of many adults that may give medication to one child or other adult?
  • ever sick yourself, but still have to keep up with your life and sometimes find yourself missing medication doses?

If you said yes to any one of those, this medication tracker can help make your next bout of sickness a little easier to manage. What are you waiting for?

3 REASONS YOU NEED A MEDICATION TRACKER

Sickness affects everyone in the house. It affects sleep cycles, you have to keep to the medication schedule. Are multiple people giving the medication? Maybe you’re not thinking clearly from being sick and medicated? Here’s what a medication tracker can do for you:

  1. You won’t have to wonder, “What time was that last dose? Has it been 6 hours yet?” You’ll know exactly when that next dose is due. This is nice to grab and take to the doctor, if you get that far.
  2. If multiple people are giving medicine, this is the perfect way to make sure there are no double dosing accidents. Keep your kids safe!
  3. If you’re the one who is needing medication, it can be hard to run a household while you’re sick. Not feeling well and having to keep up life is a lot to think about. Ease your stress by tracking your medication so you can focus on what really matters.

PRINT YOUR MEDICATION TRACKER AND MAKE YOUR NEXT ILLNESS EASIER TO MANAGE

This is super simple. You won’t need anything fancy. This medication tracker is a single page, but print as many of them as you need. One for each sick child or for as many doses as you need to track. The bright colors will hopefully help remind you to mark your progress and maybe bring some feel-good power to your day… after your next medication dose kicks in, of course. Now, print your medication tracker and medicate confidently!

3 Reasons you need a medication tracker Free printable


Of course, you can simply download and print the file. It’s usable as it is. But, I like to make my organizer pages re-usable. It’s super easy, but totally optional. The only thing you really NEED is the download file and a printer to print it on.


Materials/Ingredients:

  • Medication Tracker –> Get the printable PDF!
  • Printer
  • Laminator (I love my Scotch thermal laminator and use it all the time. The cold laminating sheets also work, as does a simple plastic page protector, although the ink of your pen might bubble a little on a page protector sheet.)
  • Laminating Pouches for each medication tracker you plan to make
  • Wet erase pens (you can use dry erase pens, but the fine tip wet erase ones usually work better)
  • Magnet tape
  • Scissors


Instructions/Directions

PRINT YOUR MEDICATION TRACKER

Step #1: Download the medication tracker and save it to your computer.

Step #2: Print the medication tracker. If you are going to make it re-usable, I suggest using a heavier paper such as card stock. If you’re only going to use it once, regular printer paper is fine.


MAKE YOUR MEDICATION TRACKER RE-USABLE WITH A THERMAL LAMINATOR

Step #3: Turn on your laminator and let it warm up. While the laminator is heating up, slide your printed medication tracker inside a thermal laminating sheet.

Step #4: When the laminator is ready, run the laminating pouch through the laminator. Pull out the pouch and lay it flat on a cool surface until it cools to the touch.

Step #5: Cut a strip of magnet tape and adhere it to the back of the medication tracker. I prefer to put a strip on the top and one on the bottom as well.

Step #6: Use a wet erase pen to write on the medication tracker.

MAKING YOUR MEDICATION TRACKER RE-USABLE WITH A COLD LAMINATING POUCH

DISCLAIMER: I don’t have a lot of experience with the cold laminating pouches. I’ve only ever used the small sizes and my results have been mostly good. I prefer the hot laminating method though.

Step #1: Prep the laminating pouch as directed on the package. Follow all instructions.

Step #2: Cut a piece of magnet tape and adhere it to the back of the medication tracker. I usually do a long piece at the top and a long piece at the bottom.

Step #3: Use the wet erase marker to write on the medication tracker.


MAKING YOUR MEDICATION TRACKER RE-USABLE WITH A SHEET PROTECTOR

Step #1: Slide the page into the plastic page protector.

Step #2: Use a magnet to hang medication tracker on the fridge. Or you can use some magnet tape on the back of the page protector.

Step #3: Use wet erase markers to write on the medication tracker.


MEDICATE YOUR FAMILY WITH CONFIDENCE AND SAFETY

Congratulations! You’re ready to take on the next illness that comes your way. You’ll be able to give your family the medication they need, when they need it. You won’t have to wonder if it’s really been 6 hours since the last dose or if you actually gave that medicine this morning. At a glance, you’ll be confident that you’re doing all you can to manage those pesky germs.


Do you have any tricks for dealing with sick kids? Leave your tips in the comments below.

And if you love this medication tracker, check out the entire 47-page set of organizer pages in The Organized Family Starter Kit, available on Etsy.

April 6, 2017 by Krista

How to Get Control of the Mess with this Cleaning Checklist

Has clutter taken over your home during the winter months? The holidays and then two of my boys’ birthdays always tend to leave my home feeling a little… messy. When the sun finally starts shining, I want to get our things back under control. This cleaning checklist makes it easy to stay on track and get the extra clutter out.

Control the Mess Cleaning Checklist


WHAT’S IN THIS CLEANING CHECKLIST

This list is 2 pages of tasks, divided by room, that will help you clean and de-clutter your home. The winter months often bring an influx of things into our homes – I blame it on the holidays – and this is a great place to start weeding some of the things out. It’s much easier to keep your home together if there aren’t so many pieces. You don’t need all the things! Get rid of some! I promise you won’t miss them.


WHO IS THIS CLEANING CHECKLIST FOR

This list is for the busy household that doesn’t have days and weeks to spend cleaning up their home. It’s for the stay-at home mom who spends days making snacks and chasing toddlers. This list is for the working mom who has limited time in her home and with her family. It’s for the family that would rather play together than spend weekends cleaning. It’s for the household that is full of things they don’t use and love.

If you’re not sure where to start, if you’ve started before and gotten overwhelmed, if your time is limited or if you’re tired of all the things taking over your home, then this list will help!

Disclaimer: This list doesn’t include tasks such as washing walls in every room, baseboards, or window tracks. It doesn’t include dusting ceiling fans, dusting in general, or cleaning carpets. Those things should still be done, eventually. The main focus of this list is getting unnecessary things out of your home. Once there are fewer things, these deeper cleaning jobs will be easier to complete. So, get the things out and then go back and do the window tracks and baseboards.


WHY DO YOU NEED THIS CLEANING CHECKLIST?

Life is busy. Who has time to spend days and weeks deep cleaning? I sure don’t. This checklist keeps you on track when your cleaning list is long and detailed and time is limited. Deep cleaning your home is a big job and all the tasks can be overwhelming. This list will:

  • keep you organized with tasks divided room by room
  • keep you from missing commonly overlooked tasks and areas
  • help you clean your home systematically, thoroughly and comprehensively
  • help you use your time efficiently with a checklist of tasks that need completing

Simplify the huge project of deep cleaning your home by using this checklist. You’ll be able to work room-by-room, clearing clutter from your home in an efficient manner. Remember, you want to cut down on the things in your home while cleaning a little too.


CLICK TO DOWNLOAD YOUR OWN CHECKLIST!!Declutter Your Home Cleaning Checklist


HOW TO USE THIS CLEANING CHECKLIST

This may seem obvious. Just check everything off the list, right? Check off all the boxes and you’re done. Sure, you can do that. But, I want to let you in on a little secret. That’s not the only way to rock your clean and purge project!

These pages are divided into rooms, but they are designed so the tasks can be done depending on the time you have available. Most of the tasks can be done in 45 minutes or less. Some can be done in as little as 10 or 15 minutes. Save the tasks that take longer for when you have the time to conquer them. And get the whole family to help and knock that list out even more quickly!

If you can work room-by-room, I do suggest doing that. Two reasons:

  1. When you see everything all at once, it’s overwhelming. Cut it down and focus on one space at a time. It’s much easier to clean one room than an entire house. If you can’t do a whole room at one time, cut that down too and focus on just the closet or just the dishes or just under the sink.
  2. If you focus on one space, get it cleaned and de-cluttered, then move on, you will be encouraged by the visible progress. The clean room will motivate you to keep it that way and to keep going on the rest of the tasks.


Conquer the Clutter Chaos Cleaning Checklist


CAN A CLEANING LIST GIVE YOU FREEDOM?

YES. It can and it will, if you take the de-clutter part seriously. Cleaning is good, simplifying and de-cluttering is better! Take the list one room, one area, one task at a time. Before you know it, you’ll find your groove. Throwing things out won’t be so difficult. It’s okay if it takes a little time to get through it all. And it’s okay if your home still looks “lived in” – you do, indeed, live in it. But, I promise you will love the freedom that having fewer things will give you.


CLICK TO DOWNLOAD YOUR OWN CHECKLIST!!Declutter Your Home Cleaning Checklist


NOT QUITE READY TO COMMIT TO THE WHOLE CLEANING CHECKLIST?

Does de-cluttering your entire house overwhelm you? Start small and make a big impact with these 6 steps to fewer toys and a happier home.

fewer toys happier family


Not ready to get rid of the toys completely? Find out how to set up a toy rotation system. Your home will be less cluttered and your kids will think Christmas comes every time you rotate the toys out.


  • 1
  • 2
  • 3
  • Next Page »

I'm Krista. Ringleader here on While He Was Napping, wife to my handsome Mr. Right & momma to my THREE energetic boys, Big J (9), Little J (6) & Little N (4). We FINALLY added a beautiful little girl to our family last December.

I’m knee-deep in Tonka trucks & Thomas trains. I survive our crazy days with Vanilla Coke, Sonic slushies, sweet snuggles and little giggles. When I tuck them in tight & kiss them good night, I get a little time to create & just be me.


It all happened
while (s)he was napping
Want More of My Story?

Privacy Policy

While He Was Napping respects your privacy and is committed to keeping any personal information collected on this website confidential. To find out what information we collect and how it is used or what options you have regarding your information, see our full privacy policy here. Creative Commons License The website found at whilehewasnapping.com and all subdomainsauthored and published by Krista is licensed under a Creative Commons Attribution-NonCommercial-NoDerivs 3.0 Unported License.

Pretty Chic Theme By: Pretty Darn Cute Design