While He Was Napping

momma gets stuff done

  • Home
  • About
  • Archive
  • Do It Yourself
    • Crafts
      • No Sew
      • Painting
      • Paper Crafts
      • Repurpose Projects
      • Vinyl
      • Washi Tape
      • Kid’s Crafts
      • Fonts
    • Sewing
    • Decorate
      • Home Decor
      • Holiday Decor
    • Celebrate
      • DIY Gifts
      • DIY Your Party
  • Recipes
    • Beverages
    • Appetizer
      • Bread
      • Other Appetizers
    • Snacks
    • Main Dish
      • Meat
        • Chicken
        • Beef
        • Pork
        • Seafood
      • Vegetarian
      • Slow Cooker
      • 30 Minute Meals
    • Dips & Sauces
    • Salads
    • Pasta
    • Soup
    • Dessert
      • Cookies
      • Brownies
      • Cupcakes and Cake
      • Box Mix Recipes
      • Other Sweet Treats
    • Breakfast Food
      • Pancakes
      • Waffles
      • Muffins
      • Other Breakfast Food
  • Family
    • Babies
      • Pregnancy
      • Newborns
      • The 1st Year
    • Toddlers
    • Preschoolers
    • Kindergartners
    • 6-8 Year Olds
    • The Grown Ups
      • Date Night
      • Romantic Gifts
    • Self Care
  • For the Home
    • Cleaning
    • Organizing
    • Emergency Preparedness
  • Travel
    • Travel Tricks & Tips
    • Traveling with Kids
  • Tech & Gadgets
    • Must-Have Apps
    • Techy Home Appliances
    • Gadgets & Electronics
    • Blogging Tips
  • Printables
    • Posters
      • Quote Printables
      • Subway Art Printables
    • Printable Organizers
    • Printable Journals
    • Learning Printables & Worksheets
    • LDS Printables
  • Holidays
    • New Year’s
    • Valentine’s Day
    • St. Patrick’s Day
    • Easter
    • Cinco de Mayo
    • Mother’s Day
    • Father’s Day
    • 4th of July
    • Back to School
    • Halloween
    • Thanksgiving
    • Christmas
    • Holiday & Seasonal Printables

December 7, 2016 by Krista

Feed Your Family and Save Money with FoodSaver Vacuum Sealer + Nachos recipe

I would like to thank Jarden Consumer Solutions for sponsoring this post. I was provided with a FoodSaver vacuum sealer and sealing material in exchange for this post. All content is mine, 100% original and true. Pinky promise.


I have 3 boys, and a six foot three husband, who eat ALL. THE. TIME. Keeping them fed is no small task, physically or on our wallets. That’s why we buy in bulk when possible.

The problem has always been buying meat and fresh fruits and veggies. We didn’t really have a good way to store them and keep them fresh when we bought them in bulk.

FoodSaver Vacuum Sealer Buying in Bulk

That’s why I’m so excited about our new FoodSaver FM5000 vacuum sealer. We can buy meat and fresh fruits and veggies in bulk, seal them up, and freeze them for later. It’s much for effective and efficient than our previous method and the food is fresher when we pull it out to use it.

FoodSaver Vacuum Sealer Buying in Bulk Ground Beef

I did a quality test with our new FoodSaver vacuum sealer. We have bought our ground beef in bulk for several years now. We used to divide it, then wrap it in plastic wrap and put 3-4 sections of meat into a ziptop bag. Then we put the whole package in the freezer. It worked fine, but the meat always turned brown before we used it. Even if it was just a couple of weeks after we bought it.

The FoodSaver vacuum sealer cut out the plastic wrap and the bag. And it kept our meat fresher! This meat had been in the freezer for 4 weeks. It was still red with just a bit of brown and was still very fresh.

FoodSaver Vacuum Sealer Fresher Food from the Freezer

We decided to make nachos for dinner one night. We used the meat we put in the freezer, cooked up some beans, and cut up some toppings for a delicious dinner.

It was a hit! And I loved how fresh the meat was still, even after 4 weeks!

FoodSaver Vacuum Sealer Nachos


FOODSAVER VACUUM SEALER – NOT JUST FOR FOOD!

My favorite part of the FoodSaver vacuum sealer is that you can use it for more than just food.

  • Seal up your favorite sweaters during the months you aren’t wearing them to keep them in good shape.
  • Cook your food ahead of time and seal it for camping trips for super easy meals. Just warm it up.
  • Seal ice in a bag and you’ve got water storage when it melts.
  • We are going to Disneyland next month and will be taking a pair of each of our boys’ clothes and sealing it in a vacuum pouch to keep it dry.


NOT ALL FOODS SHOULD BE SEALED

There’s lots of things you can still with the FoodSaver vacuum sealer, but there’s a few things you shouldn’t seal. Vegetables like broccoli, cauliflower, tomatoes, brussel sprouts, mushrooms, and garlic are a few things you should never seal. The gases created by these foods over time are toxic and will make the food go bad.

You can find more info on the FoodSaver vacuum sealers HERE.
We like to put cilantro lime rice on our nachos and tacos too. I love that it’s a super easy recipe you do in your rice cooker. Check it out. See our nacho recipe below. Enjoy!

THE RECIPE

Print This Recipe
Nachos

Prep time:  10 mins

Cook time:  30 mins

Total time:  40 mins

Serves: 6-8 servings

Create delicious meals and save money when you buy in bulk. Seal your foods with a FoodSaver vacuum sealer for fresher foods from the freezer.
Ingredients
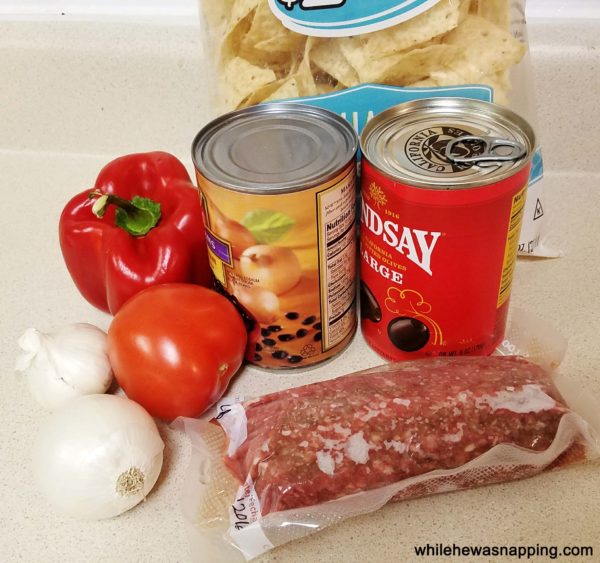
  • Tortilla chips
  • 2 Roma Tomatoes, diced
  • 2 15oz cans Black Beans, rinsed and drained
  • ½ onion, diced
  • 1 can green chilies
  • ½ lb ground beef
  • 2 tsp taco seasoning
  • Sour cream
  • Guacamole
  • Shredded cheddar cheese
  • FoodSaver Vacuum Sealer Fresher Food from the Freezer
Instructions
  1. In a small sauce pan, combine 2 cans of rinsed and drained black beans, 1 diced Roma tomato, ½ onion, diced, and 1 can green chilies. Let simmer on the stove.

  2. FoodSaver Vacuum Sealer Black Beans
  3. Brown ground beef in a large skillet on the stove. Season with taco seasoning. Cook until brown and temperature is 165°F.
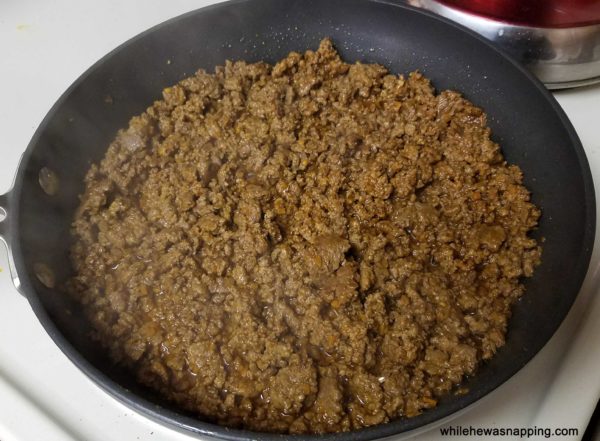
  4. FoodSaver Vacuum Sealer Ground Beef Taco Meat
  5. When ground beef is cooked and beans are tender, lay tortilla chips on a plate. Layer ground beef, beans, cheese, tomatoes, guacamole, and sour cream on top of tortilla chips.
  6. FoodSaver Vacuum Sealer Nachos
  7. Serve!
  8. We like to put cilantro lime rice on our nachos and tacos too. I love that it's a super easy recipe you do in your rice cooker. Check it out.
3.5.3226

November 3, 2016 by Krista

24 Star Wars Gifts that your favorite Chef needs

The holidays are coming! Do you have your gift list all made out? If your list is anything like mine, there is at least one Star Wars fan on your list. I have four. And those are just the ones that live in my house. There’s another three Star Wars fans on my gift list that don’t live under my roof. One of my wannabe Jedis also loves to cook. I had no idea there were so many awesome Star Wars gadgets for your kitchen. Here’s 24 Star Wars gifts to get your favorite chef.

Star Wars Gift Guide for the kitchen

Click on any image in the collage below and you can find more information about that item. Or use the links below to navigate to the Star Wars gift ideas you like most.

Links in this post maybe affiliate links. I will receive a small portion of any purchase made through these links. Your cost is in no way changed. This is one way I keep this site running. Thank you for your support.

24 STAR WARS GIFTS FOR YOUR FAVORITE CHEF

  1. R2-D2 Teapot
  2. Death Star Tea Infuser
  3. Heat Activated Lightsaber Mug
  4. Death Star Waffle Iron
  5. Lightsaber Immersion Blender
  6. Darth Vader Toaster
  7. Darth Vader Apron
  8. Star Wars Cupcake Wrappers
  9. R2-D2 Oven Mitts
  10. Death Star Timer
  11. R2-D2 Cookie Jar
  12. Star Wars Rolling Pin
  13. Darth Vader Cookie Jar
  14. R2-D2 Measuring Cup Set
  15. Lightsaber Chop Sticks
  16. Stormtrooper & Vader Salt & Pepper Shakers
  17. Lightsaber Pizza Cutter
  18. Death Star Cutting Board
  19. Death Star Popcorn Popper
  20. Darth Vader Mug
  21. Set of 4 Star Wars Mugs
  22. Set of 4 R2-D2 Bowls
  23. R2-D2 Salt & Pepper Shakers
  24. Star Wars Cookbook

Which of those galactic gadgets do you want in your kitchen? That tea infuser and the heat activated lightsaber mug are pretty high on my wish list! And that Death Star waffle iron?! Now that would be some pretty awesome waffles to wake up to.

So, which gift would your favorite chef just love to have?


November 25, 2015 by Krista

Get Company Ready this Holiday Season with Hoover AIR™ CORDLESS LIFT

You know what’s synonymous with kids? Mess. My three kids spend a startlingly large amount of time eating. I’m not sure if it’s a boy thing, or because they are growing, a little of both, or what; but, they eat a lot! Whether it’s because they don’t have as much practice as I do or the testosterone in their bodies doesn’t allow it, they are not dainty or careful eaters. To make matters worse, we have carpet in our dining room. I’m not sure who had that grand idea, but it is a terrible, horrible thing to live with. The last time I deep cleaned my dining room carpet, it stayed clean for an entire two weeks before it was stained again. Yep, that’s it.

Cleaning up the carpet after every meal is a must and, even then, I don’t always get it all. Then there are all the snacks all day long. It’s a full-time job just keeping my dining room floors clean. The new Hoover AIR™ CORDLESS LIFT UPRIGHT Vacuum line has made my job (well, one of them) a whole lot easier. I love my AIR™ CORDLESS LIFT UPRIGHT Vacuum. It’s perfect for after-meal clean up.

Hoover AIR™ CORDLESS LIFT Vacuum

The Windtunnel 3 technology provides the perfect suction power to lift and remove dirt and food. I was mildly worried about the battery life when I first got the machine, but this thing is a tank. The LithiumLife batteries have double the capacity of Hoover’s standard 18-volt lithium Ion batteries which give me longer run time (about 50 minutes and an extra battery is included) and I get amazing power regardless of the battery charge. The LithiumLife batteries are interchangeable through out the Hoover Cordless line, making it easy to use the right machine for the job. There are three vacuums and a hard floor wet cleaner in the line and I’ve got a hankering for the Floormate® hard floor wet cleaner now…

Hoover AIR™ CORDLESS LIFT Vacuum LithiumLife Batteries WindTunnel 3

My absolute favorite thing about the Hoover AIR™ CORDLESS LIFT though is the cordless part. The cordless feature means I can clean up multiple messes in multiple rooms in a fraction of the time I used to.  I can vacuum up breakfast crumbs, grab the popcorn kernels my boys threw at each other during movie night last night and then zip over and get the dirt my husband tracked in from the garage in mere minutes. And it’s a dream in cleaning out the car. There is no unplugging and plugging back in, no winding that wretched cord back up (or driving my husband crazy that I don’t wind it back up). My kids don’t trip over the cord when I’m vacuuming or play tug of war with it anymore. And it’s easy to take out the to the car too!


Hoover AIR™ CORDLESS LIFT Vacuum in action

Hoover AIR™ CORDLESS LIFT Vacuum attachments

The holiday season is here and it’s a busy time of year for most everyone. Simplify your cleaning duties and skip the cord. I also love the canister option on the AIR™ CORDLESS LIFT that makes dusting a breeze and stairs are so much easier to clean when you’re not lugging the vacuum behind you. Get the work done faster so you can enjoy more time doing the things you really want to do.

Hoover AIR™ CORDLESS LIFT Vacuum Features

Whether hosting holiday parties or family is coming to visit, things can get crazy. I’ve come up with a printable checklist that can help you make sure you don’t forget anything super important before company comes. Then you can make the most of and enjoy the time you get to spend with your family and friends. Just click on the image below to be taken to it’s download page. You can save it to your computer and print it off. Hang it on the fridge so the entire family can help get the work done. No more “I didn’t know what needed to be done” excuses!

CLICK TO DOWNLOAD

Hoover AIR™ CORDLESS LIFT Vacuum Holiday Party Cleaning Checklist

Kick the cord this holiday season, grab the printables, get the work done and enjoy making new memories with the ones that matter most! Happy Holidays!


I was selected for this opportunity as a member of Clever Girls and the content and opinions expressed here are all my own. Pinky promise.

October 29, 2015 by Krista

Controlling the Paper Clutter

This post brought to you by Fellowes Brands. The content and opinions expressed below are that of While He Was Napping.

I don’t know about you, but my house seems like it gets it hit by a bomb… or two… around this time of year. The kids bring home even more papers from school, stores are sending out sale papers, companies are doing their end-of-year policy updates, and we’re approaching a major election year so there’s all kinds of political mailers coming in as well. That’s a lot of paper coming through my front door.

We haven’t always been awesome at filing the mail when it comes through the door. It, often times, gets dropped somewhere on the kitchen counter. As if it isn’t hard enough to keep the kitchen counters clean… and, I hate to admit it, but I do have a box of old papers in my bedroom that is full of mail from our countertops. Clearly, I still have some improving to do in getting rid of paper clutter in our home, but I have been doing a lot better with this new system. Ready to cut down on your paper clutter? Here’s the how:

1. Start now with all the new papers that come in your home. Once you get in the habit of getting rid of the stuff coming in, you can add a step or two here and there to get rid of the stuff already there. It’s so much easier to get rid of stuff a step at a time, rather than a big purge. Now, if you have the time for a big purge, then by all means. But, shy of burning my house down and just starting all over, I don’t have time to get rid of every single paper in one sitting. Besides, I’d much rather play with my cute boys than go through tedious piles of paperwork.

When papers get brought into your house, go through them immediately. Take five minutes and just get it done.

2. I have two paper trays on my counter. Hey, it’s better than a stack of (unopened) mail! One for “things that need attention”, like bills, insurance things, a wedding announcement, coupons – if it has an expiration date or deadline. And one for “things to file”, like report cards, most DMV papers and other documentation, school papers or projects my kids bring home that I want to keep – if it is going to be kept long-term.

Once a week, I clear out the trays. I deal with the stuff that needs attending and then file the things that are being kept where they belong. My filing boxes are a whole ‘nother story! The paper trays actually work really well for me. If having them in the kitchen doesn’t appeal to you, put them somewhere else. Maybe putting them in your office or something would work better for you. If so, I’m totally jealous you have an office!

Keeping the Paper Clutter Down with Fellowes 79Ci Shredder

3. Now, think of all that stuff you got rid of. Feels good to not have it cluttering your home, right? Some paperwork shouldn’t just be thrown out though. Even outdated paperwork can have sensitive information on it. That’s where a good shredder comes into play.

I have been using a Fellowes 79Ci shredder and I just love the sleek design and advanced technology. The SilentShred™ Technology lets me work on getting rid of our paper clutter during nap time without fear of waking the babies. Its patented 100% Jam Proof System is fantastic and has completely lived up to the promise in all the shredding I’ve done with it so far. The heavy-duty cross-cut blades can handle up to 16 pages at a time and you don’t have to take out staples or paper clips either, which is such a time saver.

Another thing that I love is the extended 20 minute run time. I can get everything shredded all in one sitting and I don’t have to wait for the shredder to cool down. There’s also a cool little Energy Savings System feature that maximizes efficiency 100% of the time, both when you are actively using the shredder or when it’s in standby. If we ever get our bedroom office center set up like we want to, I will move this shredder in there and leave it on all the time. For now, it’s in our dining room and I unplug it after I use it, simply because I don’t want my kids to shred things! Which brings me to my absolute favorite feature: the patented SafeSense® Technology that automatically stops shredding when hands touch the paper opening so I don’t have to worry about little fingers. Obviously, you should still be cautious and not allow children to use the shredder but that safety feature allows me to feel confident in leaving it in our easily-accessible dining room.

4. Now that you’re getting into the routine of getting rid of the paper before it piles up, what do you do about the already piled paper? Well, you have to go through it. But, here’s my trick to do it quickly: sort it out by type of paper.

So, you have a pile of old mail: 3 pages from your insurance company, 2 medical bills, 3 utility bills, 2 credit card bills, some advertising pieces and a postcard from Grandpa and Grandma on vacation.

First, pitch that advertising in the trash! Anything that is addressed to … ” or current resident” doesn’t need to take up your space. Make an exception for coupons, if that’s your thing, but that’s about all the exceptions I can think of.

Second, separate the mail into the categories listed above: insurance documents, medical, utility, credit card and personal.

You can stop there for now if you need to or keep going.

Third, choose a pile and open up the main page. Depending on how much time I have, I try to start with the biggest pile. Get the worst done first. If it’s a bill that had already been paid, shred it. Your bank will have documentation of the payment and most companies have the option to look up your account online, including payment history. You don’t need the statement. If it had not been paid, it goes to the “needs attention” paper tray to be dealt with.

If the paper is something medical, legal or otherwise needs to be kept, put it in the “to be filled” tray.

If the paper is personal, decide whether you need to keep it or not. Something like a postcard from Dad or Grandpa and Grandma is something I will hang on the fridge for a while (like until they get back – not like months or years), share with my boys and then throw out. If it’s too sentimental, consider taking a photo of it and then discarding. You’ll have the photo to look back at later if you really want to. If you do keep it, file it away so it has a place. Don’t let it clutter.

Keep working your way through the piles, one at a time. I find I usually add to my piles before I ever get them all gone through completely. I still find the occasional box of papers that need to be sorted, but it’s getting better.

Mostly, I LOVE that my kitchen counters aren’t covered in old mail! I love knowing or personal information is safely destroyed with the Fellowes 79Ci shredder so I don’t have to worry. The 79Ci is available at Amazon and Office Superstores with a suggested retail price of $239.99. I love that I can use the shredder while my children are napping or when they are awake, I don’t have to plan getting rid of clutter papers that come into my home, I can just do it. This means I have more time to spend with my kids, doing festive holiday activities and that my house doesn’t look like a bomb went off. At least, not a paper bomb. We’re still working on a toy factory explosion problem. But that’s a whole different problem.

Visit Sponsors Site

I'm Krista. Ringleader here on While He Was Napping, wife to my handsome Mr. Right & momma to my THREE energetic boys, Big J (9), Little J (6) & Little N (4). We FINALLY added a beautiful little girl to our family last December.

I’m knee-deep in Tonka trucks & Thomas trains. I survive our crazy days with Vanilla Coke, Sonic slushies, sweet snuggles and little giggles. When I tuck them in tight & kiss them good night, I get a little time to create & just be me.


It all happened
while (s)he was napping
Want More of My Story?

Privacy Policy

While He Was Napping respects your privacy and is committed to keeping any personal information collected on this website confidential. To find out what information we collect and how it is used or what options you have regarding your information, see our full privacy policy here. Creative Commons License The website found at whilehewasnapping.com and all subdomainsauthored and published by Krista is licensed under a Creative Commons Attribution-NonCommercial-NoDerivs 3.0 Unported License.

Pretty Chic Theme By: Pretty Darn Cute Design