While He Was Napping

momma gets stuff done

  • Home
  • About
  • Archive
  • Do It Yourself
    • Crafts
      • No Sew
      • Painting
      • Paper Crafts
      • Repurpose Projects
      • Vinyl
      • Washi Tape
      • Kid’s Crafts
      • Fonts
    • Sewing
    • Decorate
      • Home Decor
      • Holiday Decor
    • Celebrate
      • DIY Gifts
      • DIY Your Party
  • Recipes
    • Beverages
    • Appetizer
      • Bread
      • Other Appetizers
    • Snacks
    • Main Dish
      • Meat
        • Chicken
        • Beef
        • Pork
        • Seafood
      • Vegetarian
      • Slow Cooker
      • 30 Minute Meals
    • Dips & Sauces
    • Salads
    • Pasta
    • Soup
    • Dessert
      • Cookies
      • Brownies
      • Cupcakes and Cake
      • Box Mix Recipes
      • Other Sweet Treats
    • Breakfast Food
      • Pancakes
      • Waffles
      • Muffins
      • Other Breakfast Food
  • Family
    • Babies
      • Pregnancy
      • Newborns
      • The 1st Year
    • Toddlers
    • Preschoolers
    • Kindergartners
    • 6-8 Year Olds
    • The Grown Ups
      • Date Night
      • Romantic Gifts
    • Self Care
  • For the Home
    • Cleaning
    • Organizing
    • Emergency Preparedness
  • Travel
    • Travel Tricks & Tips
    • Traveling with Kids
  • Tech & Gadgets
    • Must-Have Apps
    • Techy Home Appliances
    • Gadgets & Electronics
    • Blogging Tips
  • Printables
    • Posters
      • Quote Printables
      • Subway Art Printables
    • Printable Organizers
    • Printable Journals
    • Learning Printables & Worksheets
    • LDS Printables
  • Holidays
    • New Year’s
    • Valentine’s Day
    • St. Patrick’s Day
    • Easter
    • Cinco de Mayo
    • Mother’s Day
    • Father’s Day
    • 4th of July
    • Back to School
    • Halloween
    • Thanksgiving
    • Christmas
    • Holiday & Seasonal Printables

January 3, 2018 by Krista

Calendar Journal

This post was originally posted in 2014. It was last updated Jan 2018 to maintain accuracy and pertinence. Full 2018 calendar journal templates are available in my Etsy shop.


Do you keep a journal?  I am the worst journal-keeper ever.

I used to be pretty good at it when I was younger – okay, I used to do it when I was younger. Being good at it might be a little too generous. But, then… Life. Marriage. Motherhood.

I was so busy living (sometimes surviving) day-to-day that I was sure I wouldn’t forget the important stuff and the daily stuff was monotonous. Did I really need another journal entry about dishes and laundry and baby snot on my clothes?

Calendar Journaling is the perfect way to record the little and the big things in life in just 5 minutes a day!

WHY WE NEED TO JOURNAL THE LITTLE THINGS

But, I realized that I WAS forgetting the important stuff.  Wait, what day was it when my beautiful little niece was born again?! And how much did the doctor say my youngest weighed at his well-baby check up last week? If only I’d written it down!

And, you know what, the dishes, laundry and baby snot DOES matter. It might seem like small, inconsequential chores and a boring daily grind – but it’s my life! It’s not always glamorous and fancy, but it’s mine.

When I’m feeling unaccomplished and like I spent my day just spinning my wheels, some times I need to account for the little things like laundry and dishes. Because keeping my family fed and clothed IS important. Having a physical list of my accomplishments helps me have the motivation to do it all again the next day.


EVEN YOU HAVE TIME TO JOURNAL WITH A CALENDAR JOURNAL

Part of my struggle was time. I felt like I didn’t have time to sit down and write for 20 minutes! And filling only three lines in my journal was kind of depressing.

However, I seemed to have stumbled on something that works! A Calendar Journal. I first saw a similar idea on a Flickr feed. The one I originally saw, I can’t seem to locate, but the link is quite similar. I totally fell in love with the idea. THIS I can do! AND I DID!

Eleven months down and I only missed a week plus a couple days. It looks so neat and only takes a couple minutes a day (usually right before I go to bed). The good news: I think I’m hooked!


WHY THE CALENDAR JOURNAL WORKS SO WELL

The limited space is just what I need. It’s small enough that I don’t feel like I need to spend large chunks of time on writing. I just jot down a few quick notes and I’m done. Some times, I write in it while I brush my teeth at night. Super quick, super easy.

It’s also a creative outlet for me and that’s just what I need to wind down and relax at the end of my day.

And, if I do miss a couple days, I can go back pretty easily and fill it in. (Confession: I may or may not have spent some time filling in about a month and a half in November and December… whoops. But I was able to get it all filled in before I forgot everything and my calendar still looks awesome.)

2013 Journal Calendar

February 2013 Calendar
Close-Up-Journal-Calendar-Box1
Printable-Journal-Calendar1
A couple of close-ups of my Calendar Journal.  Nothing super detailed or incredibly personal… unless you want it to be. Sometimes, my entries were just a check list of things I’d done that day – dishes, laundry, wiping up baby snot – and sometimes they were more personal – like we’re having another baby!
As you can see, I am no artist and the little sketches are just simple little drawings.
Printable-Journal-Calendar1
Click the image to view a larger version of my Calendar Journal.


WANT TO CREATE YOUR OWN CALENDAR JOURNAL?

I have the 2018 calendars available for purchase in my Etsy shop. It is a one-time, single instant download with all 12 months. The PDF file has all 24 calendar pages and is ready for printing right at home. Another nice thing about the PDF packet is that you will be able to print the pages back-to-back all at one time. Each month also has extra space to write down additional notes.  I used it for things my kids said, anything exciting that didn’t fit in the box for that day and little extras (like when my husband surprised me with a new cell phone upgrade).

2018 Journal Calendars available from While He Was Napping


I never got around to binding my pages, they are all still just loose papers, as you can see in the photos above. Some binding ideas are: You could put them in a three-ring binder, bind them with tape and glue or sew them together.

Affiliate Link Disclaimer

UPDATE 2018: I now do my calendar journal in my planner. I used the Mom on the Go Planner from leafytreetops.com last year. I love the weekly spread where each day is split into three columns. I use the bottom box to do my calendar journal and the top boxes are my appointments and to-dos. Any blank calendar or planner would work though. I also really like the Erin Condren Life Planner – it has the three column layout as well.


Enjoy and happy journaling!


This post was written by Krista and originally appeared on While He Was Napping.
 

September 6, 2017 by Krista

30+ Healthy & Low-Prep Snack Ideas for the Busy, Pregnant Mom

Anyone who has ever been pregnant knows there’s a lot of information on eating healthy while you’re growing that little babe. The do list, the don’t list, the healthy recipes and even how often you should eat and drink. But sometimes all of that is easier said than done. I get that, really I do. When you’re eating every couple of hours or less, it can be hard to plan all that out. Eating that often means you need lots of snack ideas that are low-prep or you’ll be in the kitchen for the remainder of your pregnancy. I’ve got just what you need…


THE IMPORTANCE OF HEALTHY SNACK IDEAS DURING PREGNANCY

I’m 8 months pregnant with my 3rd baby. I’m not a newbie to this pregnancy thing.

This wasn’t an unforeseen complication. It could have been prevented.

I know all the do’s and don’t’s. I know the importance of staying hydrated and fed.

But, last week I ended up spending about four hours in the hospital.

It was a busy morning getting Big J off to preschool and Little J had absconded with about half my breakfast… because, it’s always better off Mommy’s plate, or something. I was so busy I didn’t realize what I was depriving myself – and my baby – of. Food. Fuel.

Healthy, Low-Prep Snacks for Expecting Moms. 30+ delicious and simple snacks that will keep your energy up during pregnancy.

PRIORITIES DON’T HAVE TO BE TIME CONSUMING

It can be so easy to get so busy that things just slip by us. Mom life is a busy life. It can happen to any of us. So, learn from my oversight, my busy mistake, my imperfect mom life.

And keep this list of healthy, low-prep snack ideas on hand for the next time you make out your grocery list or just need some ideas.

It’s the perfect solution when nothing really sounds good. Or maybe you’re so full of baby, you don’t feel hungry. Whatever the case, pregnancy can be hard enough – let’s make it a little easier.

Healthy, Low-Prep Snack ideas for Pregnant Moms. When you're eating every couple hours or less, it can be exhausting to plan out all that food. Make pregnancy a little simpler with these easy, healthy snacking ideas that are good for you and baby!

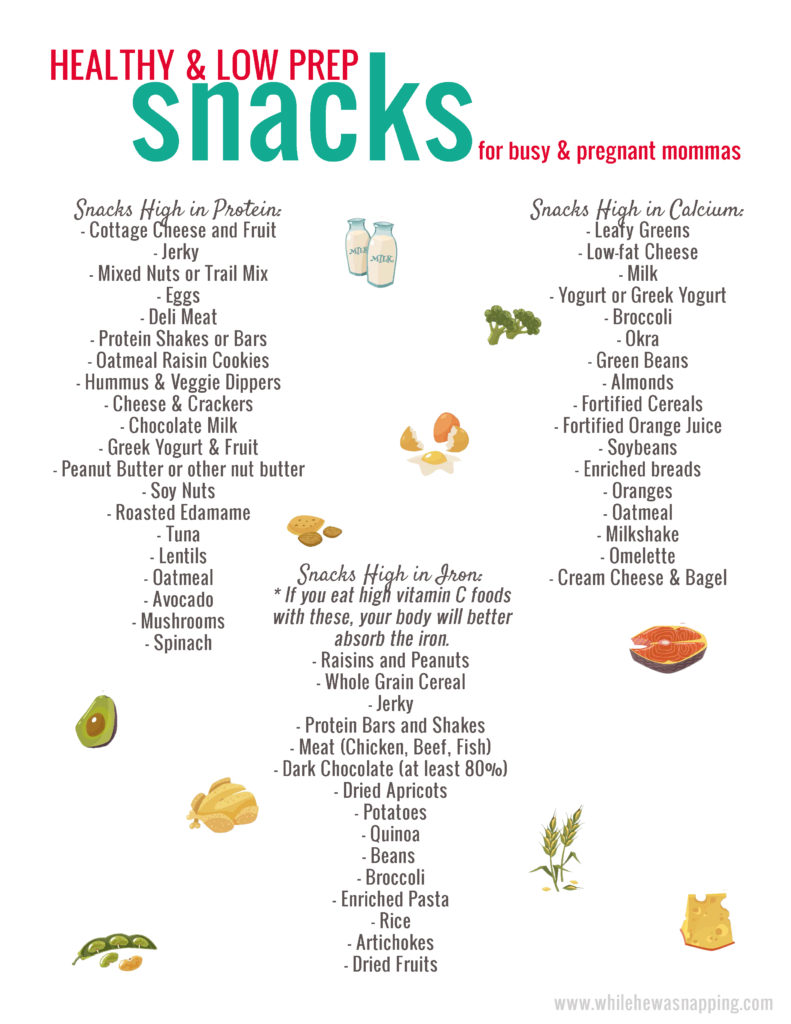
After some research and brush up from all those health classes I took once upon a time, I came up with a list of snacks that are easy to make with little to no prep and are healthy.  I’ve divided them into categories: high in iron, high in calcium and high in protein. Some of them appear in more than one section.


Affiliate Link Disclaimer

Healthy, Low-Prep Snack ideas that are Rich in Protein

Snack Ideas High in Protein

– Cottage Cheese and Fruit
– Jerky (choose a low-sodium, low-sugar brand or make your own)
– Mixed Nuts or Trail Mix
– Eggs
– Deli Meat (choose one low in sodium and preservatives.  Put it in the microwave for 20-30 seconds to be safe, if you’re pregnant)
– Protein Shakes or Bars
– Oatmeal Raisin Cookies (here’s a Chocolate Oatmeal Cookie recipe, a Cranberry Almond Oatmeal Cookie recipe and a Chocolate Peanut Butter Oatmeal cookie recipe – try them all! The cranberry almond is my favorite though. And hang on to these after baby is born. Oatmeal can give you a boost while you’re lactating too!)
– Hummus and Veggie Dippers
– Cheese and Crackers
– Chocolate Milk
– Greek Yogurt and Fruit
– Peanut Butter or other nut butter (low-fat and crunchy is best)
– Soy Nuts
– Roasted Edamame
– Tuna (eat sparingly while pregnant)
– Lentils (a yummy, pre-cooked bean salad, perhaps?)
– Oatmeal (pre-packaged flavored packets are super simple and quick!)


Healthy, Low-Prep Snack ideas that are Rich in Calcium

Snack Ideas High in Calcium

– Leafy Greens
– Low-fat Cheese
– Milk
– Yogurt or Greek Yogurt
– Broccoli
– Okra
– Green Beans
– Almonds
– Fortified Cereals
– Fortified Orange Juice
– Soybeans
– Enriched breads
– Oranges
– Oatmeal
– Milkshake
– Omelette
– Cream Cheese on Enriched Bagel


Healthy, Low-Prep Snack ideas that are Rich in Iron

Snack Ideas High in Iron

* If you eat high vitamin C foods with these, your body will better absorb the iron.

– Raisins and Peanuts
– Whole Grain Cereal
– Jerky
– Protein Bars and Shakes
– Meat (Chicken, Beef, Fish – Add these to meals or salads)
– Dark Chocolate (at least 80%)
– Dried Apricots
– Potatoes
– Quinoa
– Beans (black, kidney – on Nachos made with whole grain chips and low-fat cheese or in a salad)
– Broccoli
– Enriched Pasta
– Rice
– Artichokes
– Dried Fruits


What’s your favorite, easy snack?  Give me your ideas in the comments!

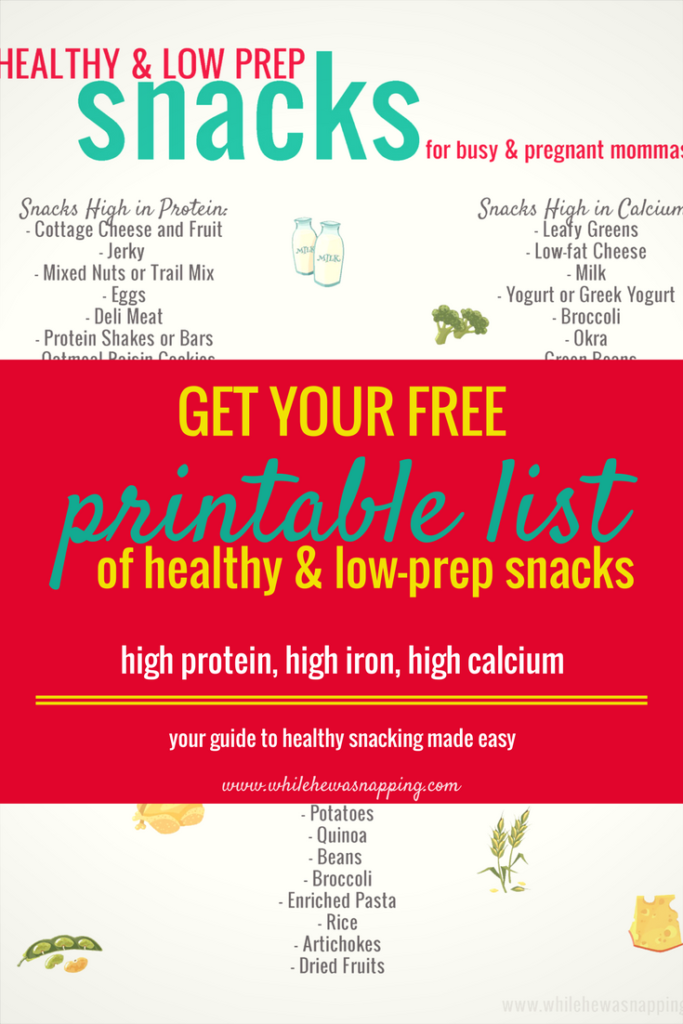
Do you want a printable version of this list? CLICK HERE to Sign up to get it in your inbox!
Get your printable list of healthy, low-prep snack ideas perfect for busy, pregnant moms

June 6, 2017 by Krista

How to make DIY Sunscreen that will protect your family

Hi there! I’m thrilled you’re here today! Summer is about to hit with full force and sunscreen sales are increasing dramatically. Here, in the desert, we’ve been putting sunscreen on for a few weeks already. My oldest is allergic to one of the major brands of sunscreen and I’ve never loved slathering all those chemicals on my kids – or myself – especially after the research I did on sunscreens last year. So, I decided to try making my own DIY sunscreen.

While the initial cost was more than a bottle of sunscreen from the store, I had enough supplies to get my family of 5 through all of last summer – we spent 6 weeks of our 8 week summer traveling and were outside A LOT. I also only used a fraction of the ingredients, so I didn’t have to buy anything this year. Overall, it’s evened out to be comparable to the cost of sunscreen from the store and it’s actually good for your skin. If you don’t want to recoup your costs over time, this would be a great project to split with a friend or two.

DIY Sunscreen that provides chemical-free, good-for-your-skin protection with ingredients you can pronounce

DIY SUNSCREEN: PROTECTION WITHOUT THE CHEMICALS

I will let you do your own research on sunscreen because my goal here isn’t to try to convince you that homemade is right and wonderful and store bought is wrong and bad. We are actually a divided house on this matter. From personal experience, I prefer homemade sunscreen. My husband does not. We still use store bought sunscreen and our home is definitely not an organic, all-natural only home (she types as she sips her Vanilla Coke).

I simply want to offer another option to what’s out there. Using chemical-free sunscreen is an option. It’s relatively simple to make, it will protect your family and it is good for your skin. My favorite thing about DIY sunscreen is that it doesn’t make me feel oily and greasy. I hate feeling sweaty, which often happens when you’re out in the sun, and it is 100 times worse to have that feeling compounded by an oily lotion. That has been a huge complaint of mine since I was a child and this homemade version solves that problem for me. This DIY sunscreen feels like any other body lotion I routinely use.

DIY SUNSCREEN: THE PROS AND CONS

What’s the benefits of making your own sunscreen? Well, here’s what I discovered last year. The actual making part is relatively easy. However, not everyone loves homemade sunscreen. My husband prefers the stuff from the store, while I prefer the homemade stuff.

PROS:

  • All natural ingredients – no allergic reactions to unknown chemicals
  • Easy to make in small or large batches
  • Protects as well as store bought sunscreen with no harsh chemicals
  • Costs about as much per ounce as sunscreen from the store – if you want to off-set the initial cost, share ingredients with some friends.
  • Doesn’t feel greasy after application

CONS:

  • Slightly whitens skin – doesn’t bother me any, but this is a definite downside for my husband.
  • Lower SPF – Did you know that an SPF 40 is not equivalent to 2x the strength of an SPF 20? A SPF 20 blocks about 94% of UVB rays, a 40 blocks around 98%. We’re so fair skinned that we reapply every couple hours and a lower SPF doesn’t make much of a difference for us.
  • Takes a little longer to apply – This is the biggest reason my husband doesn’t like homemade sunscreen, however our leftovers from last year are spreading better now.


DIY Sunscreen made with natural ingredients that are good for your skin

HOW TO MAKE DIY SUNSCREEN

Making your own sunscreen lotion is easy, once you find your ingredients. However, I’ve tried to make that super easy too. I’ve included links to the exact products I use in my sunscreen. I buy from Bulk Apothecary and have since 2011. I’ve always been happy with their products and their pricing is hard to beat (although shipping sometimes feels a little pricey). The only thing Bulk Apothecary doesn’t have is the Raspberry Seed Oil, which you can get on Amazon. You could probably find all the ingredients on Amazon, but it can be hard to know what quality you’re getting. I trust Bulk Apothecary.

I use this kitchen scale to measure out my ingredients and highly suggest this method if you can. You’ll get more precise ratios. I did include measurements in tea and tablespoons too, but your results will be more reliable if you use the weight measurements.

This sunscreen recipe has an approximate SPF 37. You can omit any of the ingredients and still create sunscreen, but it will change the SPF and possibly the physical make up of the lotion. I’ve included each ingredient’s purpose; so, if you do omit something, you’ll know what you’re losing. Okay, ready to protect your skin with all the good stuff?


The purpose of each ingredient:

Beeswax – makes the lotion waterproof, anti-oxidant, anti-inflammatory and anti-bacterial.
Coconut oil –  natural SPF of about 2-8, anti-bacterial, natural moisturizer, full of anti-oxidants
Jojoba oil – natural SPF 4, anti-bacterial, anti-inflammatory, anti-fungal
Aloe vera – soothes skin irritations, anti-oxidants, anti-inflammatory, natural moisturizer, helps make sunscreen easier to spread
Unrefined shea butter –  natural SPF of 3-8, natural moisturizer, good source of vitamins for skin, anti-inflammatory
Zinc oxide – sun protectant, anti-bacterial, anti-inflammatory, anti-aging properties
Vitamin E – can extend life of the sunscreen, natural moisturizer, anti-oxidant, anti-inflammatory
Raspberry seed oil – natural SPF 30-40, anti-inflammatory, can substitute carrot seed oil; this is expensive, but you don’t use much and it’s worth the SPF protection – you could get 24 batches of sunscreen with a 2 oz bottle


Materials/Ingredients:

Makes enough lotion to fill a 3 oz cosmetic tube

  • 10 grams (1 Tbsp + 1 tsp) white beeswax | Get it here
  • 26 grams (1 Tbsp + 2 tsp) coconut oil | Get it here
  • 10 grams (2 1/2 tsp) jojoba oil | Get it here
  • 10 grams (2 tsp) 1x aloe vera Liquid | Get it here
  • 15 grams (approx 1 Tbsp) Unrefined Shea Butter | Get it here
  • 20 grams (4 slightly heaping Tbsp) non-nano zinc oxide powder | Get it here
  • 1/4 tsp liquid vitamin E | Get it here
  • 1/4 tsp raspberry seed oil | Get it on Amazon
  • double broiler or a small pot and a glass jar (I use an old pot and a small measuring glass or a mason jar)
  • wooden skewer or small spatula or whisk
  • ziptop bags
  • cosmetic tubes to put your lotion in (I found empty soft squeeze tubes at Walmart last year in their travel cosmetics, but when I looked this year, they didn’t have the same kind. I got what they did have and they are stiffer and harder to squeeze. I don’t like them as well; this is the kind I prefer.)

Instructions/Directions

SET UP YOUR DOUBLE BROILER

Step #1: If you’re using an actual double broiler, follow the directions it comes with. If you don’t have a double broiler, you can use a pot and glass jar. This is my method. Fill the pot with water until it is about 4 inches from the top. Place on the stove burner.

Step #2: Measure out all your ingredients with the kitchen scale and put them in the glass jar. Put the glass jar in the water on the stove and turn the stove on to low-medium heat. You want the water to come to a rolling boil. Once achieved, turn down the stove if you need to. You just want to maintain that rolling boil. Too rapid a boil can tip your jar and your sunscreen will be ruined.

DIY Sunscreen made with all natural ingredients at home

MELT AND MIX YOUR SUNSCREEN

Step #3: Let the ingredients melt and liquefy. Stir with your skewer, spatula or whisk to thoroughly combine. It should be white in color and creamy in texture with no lumps. The bubbles will pop as the lotion cools.

Step #4: Remove from heat, turn off the stove, and remove the jar from the water. Be CAREFUL!! The jar will be VERY HOT! Let the lotion cool for several hours to room temperature, stirring occasionally to keep combined.

DIY Sunscreen will get creamier in texture and whiter in color as it melts


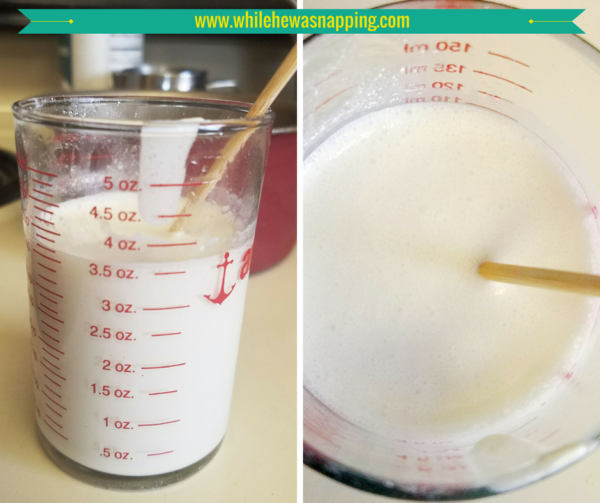
In the photo below, you’ll notice there is 3.5 oz of melted lotion in the measuring cup. You’ll lose some of the volume to the jar and zip bag when you transfer the lotion. It will also condense as it solidifies. A 3 oz cosmetic tube is the size you want.

Stir your DIY Sunscreen as it cools to keep a smooth, homogeneous consistency.

Note: I actually tried pouring the hot lotion directly into the cosmetic tube and skipping the ziptop bag. It worked… alright. The tube didn’t melt like I worried it might, but it got pretty soft. This tube was a thicker plastic than the tubes I prefer, so a thinner tube may melt. The biggest issue though was mixing the lotion while it cooled. It’s really hard to mix anything well when there’s no room to stir it up. If you want a well mixed lotion, let it cool in the jar and use the ziptop bag.

FILL YOUR COSMETIC TUBES

Step #5: Using the skewer, spatula or whisk, scrape as much of the cooled lotion into a ziptop bag. Snip a small corner off the bottom of the bag.

Step #6: Carefully, fill the squeeze tubes with the lotion by squeezing it out of the bag and into the cosmetic tube. Squeeze the lotion to the bottom of the tube occasionally so you can fill the entire tube.

Transfer DIY Sunscreen to cosmetic tubes for easy transportability and on-the-go use all summer long.


That’s it. You just made your very own sunscreen! Use and store as you would any other sunscreen lotion. The shortest shelf life of these ingredients is 1-2 years. The vitamin E may help extend that. You’ll know it’s gone bad if it has an acidic or rancid oil smell. If so, toss it and start over. The leftovers from the batch I made last year are still going strong though.


DIY SUNSCREEN THAT PROTECTS YOUR SKIN & YOUR FAMILY!

DIY Sunscreen made with all natural ingredients and doesn't leave you feeling oily


If you’ve been wanting a different option than all those brightly colored bottles lined up on the store at the shelves, something with ingredients you can pronounce, something that will protect your family’s skin without harsh chemicals, then making your own sunscreen is a great choice. You get to choose exactly what is in the sun protectant you’re putting on your skin.

I have loved making my DIY sunscreen over the past year. If I can do it, you can too. So, get out there and have a safe summer! Protect your skin with DIY Sunscreen!

April 27, 2017 by Krista

10 Essential Oil Recipes that will Help You Focus

Hi and welcome! I’m so glad you stopped by. Have you ever found yourself struggling to focus? If you’re suffering from anxiety in your life, just plain fatigue, prolonged stress or a medically diagnosed condition like ADHD that makes it difficult for you to focus, let me share what has helped me. As a busy mom with lots of responsibilities, I struggle with balancing those things too. I don’t believe essential oils have magical powers that cure everything; but, I have found some essential oil recipes that help me focus and get my stuff done. Plus, I’ll share my bonus tactic that is a huge help in keeping me focused.

Oh, also… I’m not a doctor, nor do I have any medical training. This is NOT medical advice. I’m just a tired, stressed out mom trying to share some of the things that help me cope and even succeed, because maybe they’ll help you too.


10 Essential Oil Recipes that will Help You Focus


AROMATHERAPY WITH ESSENTIAL OIL RECIPES

Aromatherapy has been around for a long time and I’ve spent the last two years researching and testing essential oils in my home. Essential oils will never replace my medicine cabinet, but they do have a place within it. When I started my essential oil research, I didn’t plan to study aromatherapy. But, it has become one of my favorite uses for essential oils. Aromatherapy has been beneficial for my mental health. It’s incredible what essential oils can do for your mood. When combined with (BONUS TACTIC ALERT!) mini meditation sessions and short, focused work times my productivity has increased dramatically.


WANT MORE FOCUS? TRY THESE ESSENTIAL OIL RECIPES

If you struggle with focus, these recipes are for you. Do you find yourself dragging through the afternoon (or before noon!)? Then, these recipes are for you. If you’re tired, your to-do list is long and you start many tasks but accomplish few, this is for you. If you

  • were up all night with the kids
  • suffer from insomnia
  • are committed to too many things
  • feel frazzled, stressed, or anxious
  • are facing deadlines and feel stuck

find a recipe and try it. Not all essential oils have the same impact on every person, but these essential oil recipes are a great place to start to improve your focus and get things done.

Essential Oil Recipe Blends to Help You Focus

10 ESSENTIAL OIL RECIPES THAT WILL HELP YOU FOCUS

You may find that one method of use is more effective for you. Personally, topical application works better for me than diffusing the oils. I use roller bottles a lot, but if diffusing works for you, then do that. These recipes are simple. In all 10 recipes, there are only 6 oils. Most of the oils are common and have multiple uses – which makes me more likely to keep them stocked in my home.

Imagine crawling into bed, your pillow soft against your face as you relax and drift into sleep. Your responsibilities are taken care of – to the best of your ability and you can rest easy. Tomorrow, you’ll get up and do it again. You’ll crush your to-do list. With some discipline, determination and focus you’ll be a rock star!

Materials/Ingredients:

  • Peppermint Essential Oil (get it now)
  • Lemon Essential Oil (get it now)
  • Lavender Essential Oil (get it now)
  • Grapefruit Essential Oil (get it now)
  • Rosemary Essential Oil (get it now)
  • Ylang Ylang Essential Oil (get it now)
  • Diffuser (I have and love this one – love it’s large capacity!) or Roller Bottles (I use these ones)
  • Essential Oil recipes for Focus printable below


GET YOUR 10 ESSENTIAL OIL RECIPES PRINTABLE REFERENCE SHEET

This handy reference sheet will help you keep all the recipes in one place, neat and organized. I have a small notebook where I keep essential oil recipes and printables so, if I find a recipe that works well, I can make sure I’m able to go back and replicate it again and again. All you need to do is enter your information below to get instant access to the recipes and the premium printable.

Click on the image below to download your high resolution printable reference sheet.

10 Essential Oil Blends to Help You Focus

FOR USE IN A DIFFUSER

Step #1: Add water to the max fill line in your diffuser. I like to use distilled water to help keep my diffuser clean.

Step #2: Add the essential oils as directed in each recipe.

Step 3#: Replace the diffuser cover and turn it on. If you diffuser allows you to set time limits or frequency of mist, do that now.

You can diffuse for a couple hours or all day; however, I find it most effective when I diffuse while I am actively working on a task.


FOR USE IN ROLLER BOTTLES

Step #1: Clean and disinfect roller bottles – I run them through a cycle in the dishwasher – before use. Let dry completely.

Step #2: Add the essential oils in the recipe and fill the remainder of your 10mL roller bottle with carrier oil. Fractionated coconut oil is common and works well, but I actually like grapeseed oil in my roller bottle blends.

Step #3: Gently shake the roller bottle before each use to re-blend the oils. Apply to wrists, temples, back of your neck or the bottoms of your feet. Temples and wrists are my preferred locations.

10 Essential Oil Recipes to Help You Focus


FIND YOUR FOCUS AND GET STUFF DONE WITH THESE ESSENTIAL OIL RECIPES

What are you waiting for? If you’re just starting with essential oils, this is a great place to try a few things. When I first started using oils, I wanted miracles and I wanted them RIGHT NOW. But, oils don’t work that way. Be consistent and willing to try other methods to find the one that is right for you. You’ll find your focus and things will get done. And you’ll feel better too!


FOR BEST RESULTS, USE QUALITY OILS

I use Rocky Mountain Oils. I love their guarantee and return policy. The quality of their oils is comparable to the other expensive brands I’ve used before while being a little easier on my wallet and budget too. They are affordable and effective – and, my favorite part, there’s no MLM structure so you can order what you need when you need it.

April 20, 2017 by Krista

3 Sleep Apps that will have you Sleeping like a Baby

Hi there and welcome! Thanks for stopping by today. Do you struggle with getting enough sleep? Is restful sleep just always out of reach? Are you up with kids during the night and the sleep you do get is anything but rejuvenating? There’s a way to change that. You can get the restful, rejuvenating sleep you so desperately need. And the answer is simpler than you might think. No medication, no supplements. Just a calm, peaceful, rested mind and body. These 3 sleep apps can help you attain the rest you need to conquer your days… and nights.

3 Sleep Apps that will help you sleep like a baby


CAN YOU FALL ASLEEP QUICKLY AND REST DEEPLY WITH SLEEP APPS?

Are your days long and exhausting and your nights restless and leave you more tired than you were the day before? What would you give for just one night of restful, rejuvenating sleep? Would you dedicate 10 minutes, 20 minutes, 30 minutes? Imagine a night where you crawl into bed. Your head presses into the pillow, the fabric soft against your face. Your mind is calm. Your body relaxed. Your eyelids close. And you sleep. When you wake, you are rested and ready for whatever woke you.

I’ve spent years with an erratic sleep pattern. Whether it’s crying babies, upset toddlers, sick kids, a snoring husband, a mind that just won’t quit or insomnia. I’ve woken up so many mornings wondering why I even bothered with sleep. I’ve tried it all – medication, supplements, oils, routines, meditation. I know how frustrating and exhausting it is.

But, that’s in the past now.


ARE SLEEP APPS YOUR ANSWER?

After I spent hundreds of hours researching sleep and sleep patterns, talking to my doctor, trying supplements, essential oils, and anything else I could possibly think to try, I was still exhausted.

  • Are your days long and your nights longer?
  • Are you awake multiple times a night?
  • Is it hard to shut your mind off when you climb into bed?
  • Do you get up in the morning, feeling even more tired than when you went to sleep?

If any of that describes you, then you need this. I can’t promise your results will be as awesome as mine have been, but I’ve been desperate too, and I promise it won’t hurt to try. I had to experiment and adjust things until I found the right balance for me. But, it’s totally worth it!

3 Sleep Apps to use every night to wake up refreshed and rejuvenated


THE SLEEP APPS THAT WILL HELP YOU WAKE UP REJUVENATED AND READY TO FACE THE DAY

Our world is full of technology. My husband is a gadget guy and we like our electronics. I read about leaving the electronics in another room, about the harm blue light can do to your sleep cycles, and how technology is bad, bad, bad for sleep.

But, I figured if I wasn’t going to sleep anyway, I might as well have something to distract me from all the sleeping I wasn’t doing. One night, after I’d been up with my youngest and couldn’t fall back asleep, I was browsing the Google Play Store and found some sleep apps I decided to try. It changed everything.

HEADSPACE – GUIDED MEDITATION AND MINDFULNESS

Headspace helps me shut things down. This app has so many layers, but the sleeping sessions are gold for me. It’s guided meditation that helps you relax your body, focus your mind and helps shut down that part of your brain that just won’t quit. There are even separate sessions for kids that have helped my 5 year old wind down when he’s having a hard time with bedtime.

There are sessions that build upon each other, or you can do a single session designed for whatever you need help focusing on.

  • Is the day just too much and you feel a breakdown coming on? There’s a session for that.
  • Do you fear flying and you’re waiting in the terminal? There’s a session for that.
  • Commuting and you’d like to relax before you get home? There’s a session for that.

The sleep sessions are part of the subscription, but you can try the fundamental “take 10” sessions for free. I did a fundamental session one day when I was feeling really scattered and it sold me on trying the full version of Headspace. There are four subscription options: monthly, yearly, two years, and forever. I opted to try it on the monthly subscription for $13, in the chance I didn’t like it. I’ve upgraded to the yearly subscription since.

Sleep Apps Headspace

Sleep Apps Headspace

Sleep Apps Headspace Google


WHITE NOISE: BACH BY THE SEA

Growing up, I slept with white noise; but, my husband likes it silent. In fact, he pulls the blankets up over his ears to muffle all noise. So, I stopped using white noise when I got married. But, I discovered that I need the white noise to sleep more deeply and restfully. Otherwise, every little creak, whistle of wind, child stirring and that far-away siren snatch me right from slumber.

My white noise of choice is Bach by the Sea. It’s the typical white noise ocean waves, but with beautiful works of Bach over the top. What I love about this is, if my brain hasn’t relaxed quite enough for sleep, I can focus on the music. If I’m already drifting off, I focus on the ocean sounds. I can pretty much fall asleep in less than 2 minutes with this. I just play it on the music player on my phone, but you can download the whole album at the links below. It works great on my kids too.

Sleep Apps Bach by the Sea App StoreSleep Apps Bach by the Sea Amazon App StoreSleep Apps Bach by the Sea Google Play Store


WAKE UP RIGHT WITH SLEEP CYCLE

Sleep Apps Sleep Cycle Alarm Clock

I am NOT a morning person. Anything before 9:00 am is really hard for me. This sleep app hasn’t made me love mornings by any means, but it has made them easier. Some day… I hope to get up early before my family so I can get some work done – instead of burning the midnight oil, which doesn’t help my sleep problems.

Sleep Cycle tracks your movement with the accelerometer in your phone while you’re sleeping to wake you while you’re in a light sleep cycle, which is as close as you’ll to get to waking naturally when you have to be up and ready for the day in a timely manner. You just place it on your mattress – I place it near my pillow, not under it – and it’ll track all night. I was a little worried it wouldn’t work well with my memory foam mattress, but it does fine most of the time. And there’s still a snooze option, if you need it. There’s some interesting graphs from all that tracking too.

You can try it free for a month and see if it works for you, after that it’s $30/year. If my alarm clock can wake me up less drowsy and ready to conquer my day, it’s worth $30 to me.

Sleep Apps Sleep Cycle App StoreSleep Apps Sleep Cycle Play Store


SLEEP APPS THAT WILL HAVE YOU SLEEPING PEACEFULLY AND WAKING REFRESHED

3 Sleep Apps to use every night for better sleep


So, just imagine. Tomorrow morning, your eyelids flutter open to a soft, peaceful alarm. You stretch and you’re ready to begin the day. Your mind isn’t hazy, your body feels refreshed. What are you waiting for? It can’t hurt to try; I made sure you could try these sleep apps out before you committed your pennies to it. If it doesn’t work for you, well, at least you know. But, what if it does? What are restful, rejuvenating nights worth to you?

  • 1
  • 2
  • 3
  • Next Page »

I'm Krista. Ringleader here on While He Was Napping, wife to my handsome Mr. Right & momma to my THREE energetic boys, Big J (9), Little J (6) & Little N (4). We FINALLY added a beautiful little girl to our family last December.

I’m knee-deep in Tonka trucks & Thomas trains. I survive our crazy days with Vanilla Coke, Sonic slushies, sweet snuggles and little giggles. When I tuck them in tight & kiss them good night, I get a little time to create & just be me.


It all happened
while (s)he was napping
Want More of My Story?

Privacy Policy

While He Was Napping respects your privacy and is committed to keeping any personal information collected on this website confidential. To find out what information we collect and how it is used or what options you have regarding your information, see our full privacy policy here. Creative Commons License The website found at whilehewasnapping.com and all subdomainsauthored and published by Krista is licensed under a Creative Commons Attribution-NonCommercial-NoDerivs 3.0 Unported License.

Pretty Chic Theme By: Pretty Darn Cute Design

Get the Healthy & Low-Prep Snacks printable right in your inbox!

​

x