While He Was Napping

momma gets stuff done

  • Home
  • About
  • Archive
  • Do It Yourself
    • Crafts
      • No Sew
      • Painting
      • Paper Crafts
      • Repurpose Projects
      • Vinyl
      • Washi Tape
      • Kid’s Crafts
      • Fonts
    • Sewing
    • Decorate
      • Home Decor
      • Holiday Decor
    • Celebrate
      • DIY Gifts
      • DIY Your Party
  • Recipes
    • Beverages
    • Appetizer
      • Bread
      • Other Appetizers
    • Snacks
    • Main Dish
      • Meat
        • Chicken
        • Beef
        • Pork
        • Seafood
      • Vegetarian
      • Slow Cooker
      • 30 Minute Meals
    • Dips & Sauces
    • Salads
    • Pasta
    • Soup
    • Dessert
      • Cookies
      • Brownies
      • Cupcakes and Cake
      • Box Mix Recipes
      • Other Sweet Treats
    • Breakfast Food
      • Pancakes
      • Waffles
      • Muffins
      • Other Breakfast Food
  • Family
    • Babies
      • Pregnancy
      • Newborns
      • The 1st Year
    • Toddlers
    • Preschoolers
    • Kindergartners
    • 6-8 Year Olds
    • The Grown Ups
      • Date Night
      • Romantic Gifts
    • Self Care
  • For the Home
    • Cleaning
    • Organizing
    • Emergency Preparedness
  • Travel
    • Travel Tricks & Tips
    • Traveling with Kids
  • Tech & Gadgets
    • Must-Have Apps
    • Techy Home Appliances
    • Gadgets & Electronics
    • Blogging Tips
  • Printables
    • Posters
      • Quote Printables
      • Subway Art Printables
    • Printable Organizers
    • Printable Journals
    • Learning Printables & Worksheets
    • LDS Printables
  • Holidays
    • New Year’s
    • Valentine’s Day
    • St. Patrick’s Day
    • Easter
    • Cinco de Mayo
    • Mother’s Day
    • Father’s Day
    • 4th of July
    • Back to School
    • Halloween
    • Thanksgiving
    • Christmas
    • Holiday & Seasonal Printables

September 12, 2018 by Krista

The Most Delicious 20 Minute Prep Apple Crisp

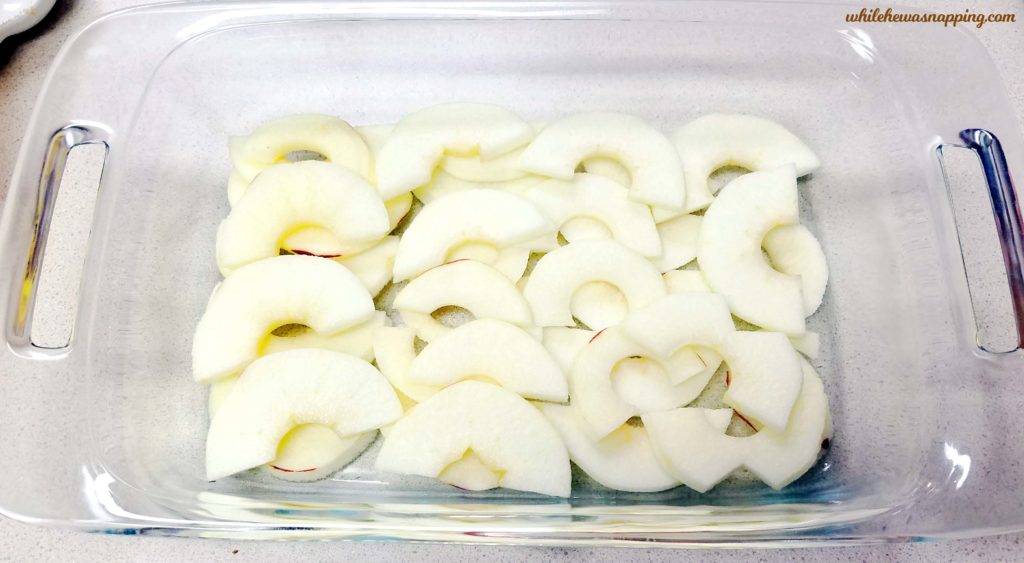
There is nothing I love more than a yummy, warm dessert on these cold wintery nights. The scent of cinnamon and warm apples is almost as tantalizing as the sweet treat melting across your taste buds. This apple crisp is easy to make, it’s delicious, it’s packed with fiber and has 100% of your day’s whole grains! When was the last time your dessert had all that?!

20 MINUTE PREP APPLE CRISP

20 minute prep apple crisp

Apple Crisp is one of our family traditions. That’s my favorite thing about the last half of the year: all the traditions. Because, to me, THAT is what is important in life. The traditions, the memories, the friends and family. And good food.


20 MINUTE PREP APPLE CRISP

My favorite thing about this recipe is that it is so very simple to make, which is just what I need as things get busy around this time of year, and it only gets crazier until the end of the year.

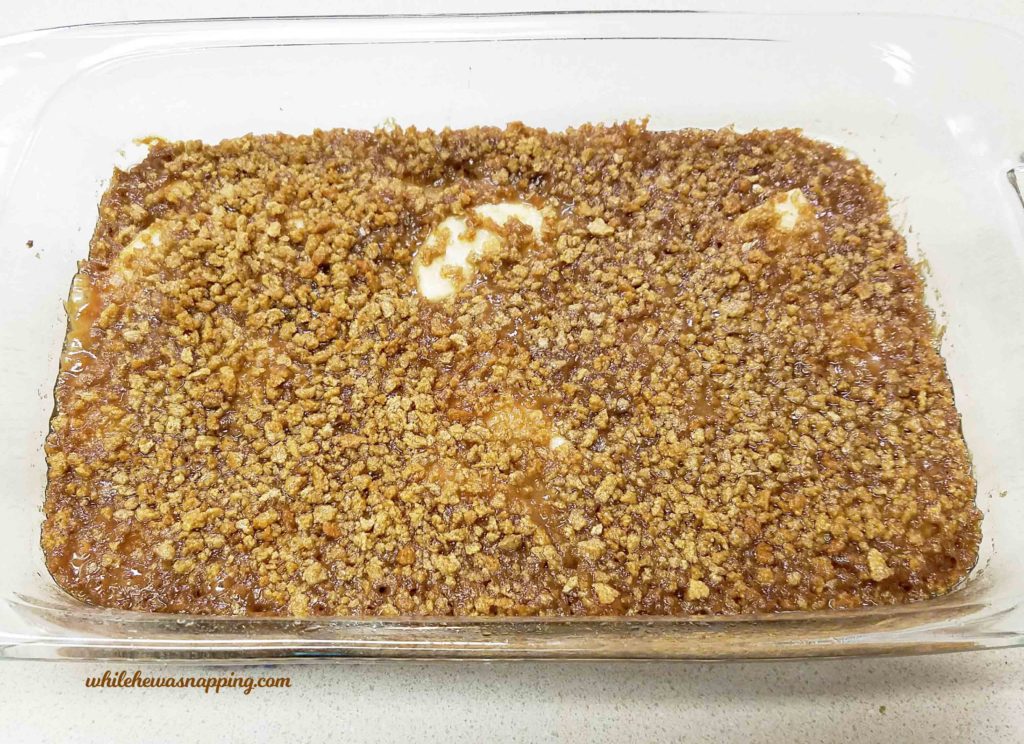
My second favorite thing is that you can make it ahead of time. Just put it in the freezer and save it until you need it. Take it out, let it thaw, add the Grape Nuts topping and then bake. So easy! And you’ll be lucky if there are leftovers.

Let’s get bakin’!


Yield: 8-10 Servings

The Most Delicious 20 Minute Prep Apple Crisp

20 Minute Prep Apple Crisp

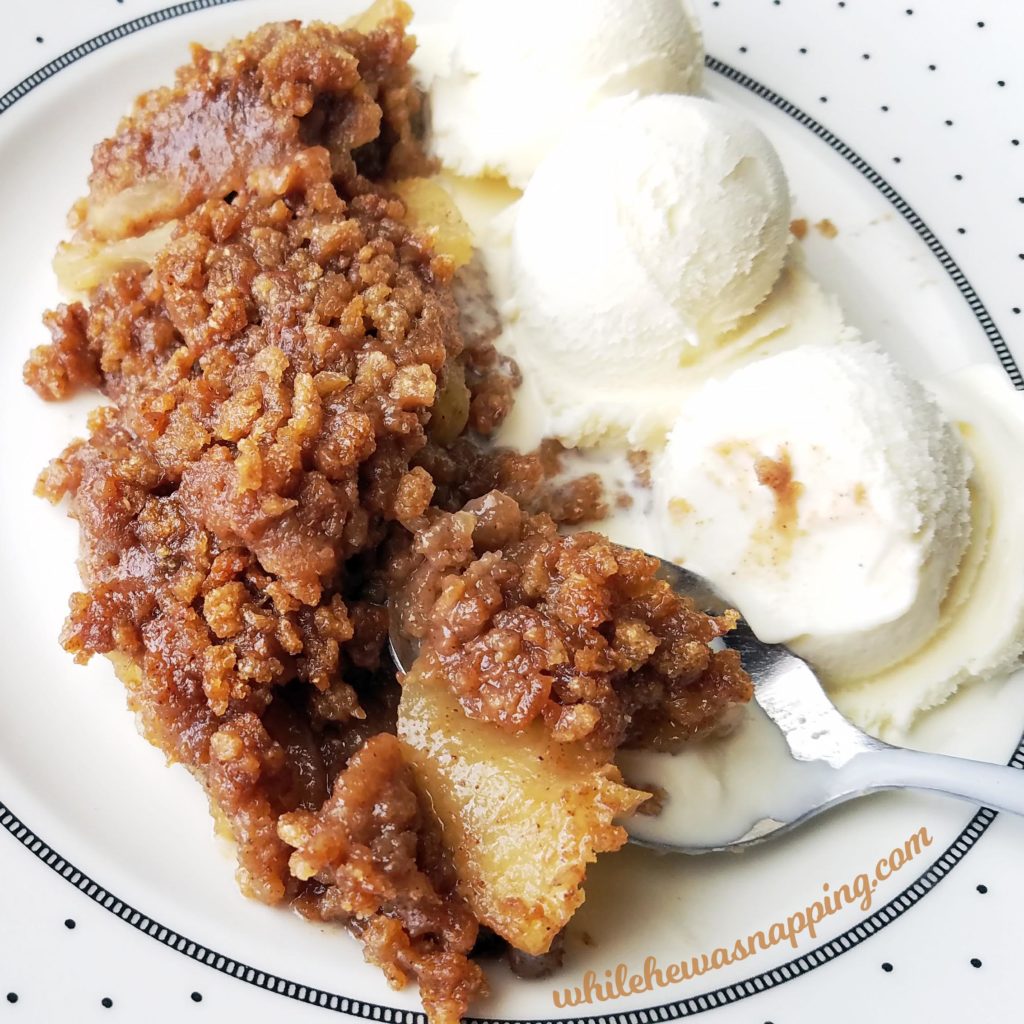
This yummy, warm dessert will hit just the spot on these cold wintery nights. This apple crisp is sweet and savory and easy to make with only 20 minutes of prep time!

Prep Time 20 minutes
Cook Time 30 minutes
Total Time 50 minutes

Ingredients

  • 1/2 cup Grape Nuts Original
  • 1/2 cup butter
  • 6 Tbsp milk
  • 6 Tbsp brown sugar
  • 2 tsp vanilla
  • 2 tsp lemon juice
  • 1 tsp cinnamon
  • 2 apples
  • 1/2 cup Grape Nuts, for topping

Instructions

  1. Preheat the oven to 350°F.
  2. Peel and slice the apples. Lay the apple slices in the bottom of a 7x11" pan. You can also use an 8x8" pan. 20 Minute Prep Apple Crisp
  3. In a medium saucepan pan, melt the butter on medium low heat.
  4. Add 1/2 cup Grape Nuts and milk. Stir until evenly combined. Allow to simmer 3-5 minutes, until the Grape Nuts have softened a little. Don't scald the milk!
  5. Add brown sugar, vanilla, lemon juice and cinnamon. Combine well.
  6. Continue mixing over heat until sugar is dissolved and the consistency thickens into a thick sauce. 20 Minute Prep Apple Crisp
  7. Pour the sauce over the apples in the pan. Use a spatula to smooth and evenly distribute across the entire pan. 20 Minute Prep Apple Crisp
  8. Sprinkle 1/2 cup Grape Nuts on top of the sauce. 20 Minute Prep Apple Crisp
  9. Bake at 350°F for 25-30 minutes, until apples are tender.
  10. Remove from oven and let stand for 15 minutes.
  11. Serve warm with vanilla ice cream. 20 Minute Prep Apple Crisp

Nutrition Information:

Yield:

8

Serving Size:

3/4 cup

Amount Per Serving: Calories: 219Total Fat: 12.1gSaturated Fat: 7.4gCholesterol: 31mgSodium: 160mgCarbohydrates: 26.7gFiber: 3.3gSugar: 14.3gProtein: 2.4g
© Krista
Simple, hearty, and warm is just what these frosty nights need. Warm up from the inside with this tasty treat the whole family will enjoy. Relax with your favorite people and make some memories this fall and holiday season. And all memories are better when good food is involved!

Ready to make your own? Let’s do it! And it’s okay to make a couple at a time! Freeze the second for a no-prep (or make-ahead!) dessert that will simplify your busy holidays without sacrificing the good stuff.

April 18, 2017 by Krista

One Pan Parsley Rosemary Chicken & Veggies that will Make You Drool

Hi and welcome! I’m so glad you stopped by today! If you are looking for a quick and easy dinner recipe the whole family will love that is also healthy, then you’re in the right place! This is perfect for those busy week nights because it only takes about 20 minutes to prep and 40 minutes to cook. And it all cooks on one pan in the oven, making dishes a breeze. Get dinner on the table in an hour. This One Pan Parsley Rosemary Chicken & Veggies will make you drool and then leave you full and satisfied!

 One Pan Parsley Rosemary Chicken & Veggies. The perfect weeknight dinner with only 20 minutes of prep time, minimal dishes and it'll be on the table in under 1 hour!

ONE PAN PARSLEY ROSEMARY CHICKEN & VEGGIES WILL HAVE DINNER PREPPED IN 20 MINUTES AND ALL ON ONE PAN!

Weeknight dinners can be hard. The after school rush – homework, chores, activities or sports – can leave your family eating microwave meals or takeout. Is it really possible to feed your family good food without spending hours in the kitchen? YES! On the nights you don’t want to cook, this meal comes to the rescue. It’s easy, delicious and healthy. You’ll spend just 20 minutes prepping dinner. Just enough time for the kids to do their chores, right? Then you’ll be free to help with homework or do other things for the next 40 minutes while dinner cooks.

And everything cooks at the same time. That means it will all be hot and ready at the same time! Have I mentioned the dishes… or lack thereof? Your cutting board, your knife and the pan you bake it on – plus the dishes your family eats off of – are all the dishes you’ll have to do. Can’t beat that, am I right?!

Weeknights are hard enough, let’s make dinner easier.

MAKE WEEKNIGHT DINNER EASIER WITH ONE PAN PARSLEY ROSEMARY CHICKEN & VEGGIES

Do you ever find yourself standing in front of the fridge with the door open, willing something to jump out that you can make dinner with? Have you ever wondered if dinner really needs to be an every day occurrence? Or are you:

  • a busy mom trying to run a household?
  • trying to feed your family food that tastes good and is good for you?
  • always looking for a new go-to dinner recipe that comes together quickly and doesn’t leave you cleaning up for an hour afterward?

If you said “yes” to any of those, this recipe is FOR YOU!! If you are juggling lots of hats and responsibilities, trying to help your family eat a little better or looking to add some new, quick dinners to your menu plan, you need this recipe!

One Pan Parsley Rosemary Chicken & Veggies FB


PARSLEY ROSEMARY CHICKEN & VEGGIES… IT’S WHAT’S FOR DINNER!

My kids love this and so does my husband… all except the asparagus, but that’s just for me. Last time I bought some at the store, my 7-year-old asked me, “Why do you keep buying that stuff?!” So, next time I won’t be including as much asparagus in our Parsley Rosemary Chicken & Veggies. But the moist and juicy chicken, the tender potatoes, carrots and asparagus… Mmmm, so good! And dinner is ready in an hour. Total score.


Print This Recipe
One Pan Parsley Rosemary Chicken & Veggies that will Make You Drool

Prep time:  20 mins

Cook time:  40 mins

Total time:  1 hour

Serves: 4-6 servings

Get a healthy and delicious dinner on the table quick! This one pan meal only takes 20 minutes of prep time. It's loaded with protein and veggies and delicious flavors. You CAN make a meal the whole family loves in just an hour!
Ingredients
  • Frozen chicken breasts (enough for your family)
  • 4-6 red potatoes
  • 3-5 carrots
  • 8-10 stalks asparagus
  • 5-6 green onions
  • ½ cup parsley, chopped
  • Olive oil
  • Dried rosemary
  • Dill weed
  • Garlic powder
  • Lemon juice
  • John's Steak and Seasoning spice (the only place I've ever found this is from a little restaurant in Idaho - Pickle's Place. You can call and order it from them at 208-527-9944. Get two... or three. Seriously, it's amazing - I am in no way affilated with Pickle's Place, we just love this spice blend)
Instructions
  1. Fill a large pot or bowl with hot water and place the chicken breasts in the water. Let thaw while you continue.
  2. Chop up the red potatoes, carrots, asparagus, parsley and green onions.
  3. Combine the potatoes, carrots and asparagus in a large bowl. Toss with olive oil until coated lightly.
  4. Cover a sheet pan with tin foil. Lightly spritz with olive oil. Preheat the oven to 375ºF.
  5. Spread the veggies on half the pan in a single layer. Place the chicken on the other half the pan.
  6. Sprinkle the rosemary, garlic powder, lemon juice, parsley, green onions, and John's seasoning on the chicken.
  7. Sprinkle dill weed, garlic powder, lemon juice, parsley, green onions, and John's seasoning on the veggies.
  8. Bake the chicken and potatoes at 375ºF for 40 minutes. Check the chicken with a thermometer to make sure the internal temperature of the chicken is 165ºF or higher. If the chicken is not 165ºF, return to oven for an additional 5-10 minutes and check again. Check that the potatoes and carrots are tender by poking with a fork.
  9. Remove from oven, cool and serve. Enjoy!
3.5.3226

One Pan Parsley Rosemary Chicken & Veggies

WINNER, WINNER, PARSLEY ROSEMARY CHICKEN & VEGGIES DINNER!

You’ve done it! Dinner is delicious and healthy and on the table in an hour. Look at you go!! My kids gobble this up, even my picky 3-year-old. The dishes take about 5 minutes to rinse off and put in the dishwasher. And, if there’s any leftovers, you can wrap them up in the foil you cooked them on.  This is a winner on every level and it’s one of my go-to recipes for busy weeknights.

Sign up to get recipes and other great ideas in your inbox every Wednesday!

January 24, 2017 by Krista

Easy Parmesan Garlic Knots: The Perfect Appetizer

As your family gathers around the dinner table, the tantalizing smell wafting through out the room, the main course often gets the spotlight. But, I promise these Easy Parmesan Garlic Knots will steal the show. And they are incredibly easy to make.

I’m trying to make more balanced meals this year – and some days that means simply making more than just a main course. I mixed up this Parmesan Garlic Knot recipe and my family has requested them 3 times over the past month! The whole family loves Parmesan Garlic Knots! And, really, can you blame them?!

Garlic Knots with Ragu Sauce SMVertical

WHY YOU’LL LOVE THESE PARMESAN GARLIC KNOTS

My favorite thing about these Parmesan Garlic Knots is instead of taking 8 or 12 hours to make like some of the bread recipes I’ve tried before, they only take 4 hours. And they fit right into your schedule if you’re planning a day at home already. That might sound like a lot of time, but active prep time is 30-45 minutes and the rest of it is just waiting to the dough to rise and the knots to bake.

You can mix up the dough in the morning and do the morning chores while the dough does its first rise. Cutting the dough and tying them into the knots is super easy and only takes about 10 minutes. While the garlic knots work on their second rise, throw in a load of laundry, feed the kids lunch and prepare the yummy butter garlic topping. Put the topping on and then bake those knots. Your home will smell like heaven. And garlic. To me, those are synonymous.

And you’ll have some amazing appetizers to go along with dinner. Who doesn’t love good bread, especially during these cold wintry months.


PARMESAN GARLIC KNOTS: PERFECT FOR DIPPING

These Parmesan Garlic Knots pair perfectly with soups, dips and sauces! I’m not a huge fan of dipping sauces with my bread, but I love to dip them in a good soup! My boys, including my husband, LOVE dipping their breads!

Garlic Knots with Ragu Sauce SMHorizontal

Go super simple and dip in a marinara or alfredo sauce. Or kick it up a notch with a little bacon ranch dip. I really love these with a good hearty potato soup or cheddar veggie soup too. Or just eat one. Or two… or three. 


HOW EASY ARE PARMESAN GARLIC KNOTS? TAKE A LOOK.


PARMESAN GARLIC KNOTS

Print This Recipe
Easy Parmesan Garlic Knots: The Perfect Appetizer

Prep time:  3 hours 45 mins

Cook time:  22 mins

Total time:  4 hours 7 mins

Serves: 2 dozen knots

Soft and chewy bread knots topped with parsley, garlic, butter and Parmesan cheese are sure to be a winner with your family and friends. The perfect appetizer for every occasion.
Ingredients
  • 4 cups bread flour
  • 2 tsp salt
  • 2 Tbsp olive oil
  • 4 tsp yeast
  • ½ cup warm water
  • ½ cup parsley, chopped
  • 6-8 cloves garlic, minced
  • ½ cup butter, melted
  • RAGU Homestyle Thick & Hearty traditional sauce
Instructions
  1. Mix water and yeast together. Let stand 5-10 minutes.
  2. Garlic Knots with RAGU Sauce Ingredients
  3. Combine yeast, olive oil, salt and flour until dough forms. If dough is too sticky, add ⅛ cup flour. If dough is too dry, add 1 tsp of water. Dough should be firm and tacky, but not sticky.
  4. Garlic Knots with Ragu Sauce mixing dough
  5. Put dough in a bowl and cover with plastic. Let rise for 1-2 hours.
  6. Garlic Knots with Ragu Sauce Rise#1
  7. Sprinkle flour on counter top. Remove dough from bowl and cut into quarters.
  8. Take one quarter of dough and shape into a rectangle. Cut into strips.
  9. Garlic Knots with Ragu Sauce cut strips
  10. Tie strip into a knot. Set on lightly greased baking sheet. Repeat with each quarter of dough.
  11. Cover and let rise 30-45 minutes.
  12. Garlic Knots with Ragu Sauce tie into knots
  13. Combine melted butter, 2 - 4 minced garlic cloves, and half cup parsley. Mix until well combined. Spread on top of each knot.
  14. Garlic Knots with Ragu Sauce top knots with butter sauce
  15. Sprinkle Parmesan cheese on top of butter mixture.
  16. Garlic Knots with Ragu Sauce sprinkle with parmesan cheese
  17. Bake at 350 for 17 to 22 minutes, or until tops are lightly golden brown.
  18. Cool knots on pan for 5 minutes. Move knots to cooling rack and allow to cool until they can be handled.
  19. Garlic Knots with Ragu Sauce garlic knots on cooling rack
  20. Serve with RAGU Homestyle Thick & Hearty traditional sauce. Enjoy!
  21. Garlic Knots with Ragu Sauce serve with RAGU sauce
3.5.3226


December 7, 2016 by Krista

Feed Your Family and Save Money with FoodSaver Vacuum Sealer + Nachos recipe

I would like to thank Jarden Consumer Solutions for sponsoring this post. I was provided with a FoodSaver vacuum sealer and sealing material in exchange for this post. All content is mine, 100% original and true. Pinky promise.


I have 3 boys, and a six foot three husband, who eat ALL. THE. TIME. Keeping them fed is no small task, physically or on our wallets. That’s why we buy in bulk when possible.

The problem has always been buying meat and fresh fruits and veggies. We didn’t really have a good way to store them and keep them fresh when we bought them in bulk.

FoodSaver Vacuum Sealer Buying in Bulk

That’s why I’m so excited about our new FoodSaver FM5000 vacuum sealer. We can buy meat and fresh fruits and veggies in bulk, seal them up, and freeze them for later. It’s much for effective and efficient than our previous method and the food is fresher when we pull it out to use it.

FoodSaver Vacuum Sealer Buying in Bulk Ground Beef

I did a quality test with our new FoodSaver vacuum sealer. We have bought our ground beef in bulk for several years now. We used to divide it, then wrap it in plastic wrap and put 3-4 sections of meat into a ziptop bag. Then we put the whole package in the freezer. It worked fine, but the meat always turned brown before we used it. Even if it was just a couple of weeks after we bought it.

The FoodSaver vacuum sealer cut out the plastic wrap and the bag. And it kept our meat fresher! This meat had been in the freezer for 4 weeks. It was still red with just a bit of brown and was still very fresh.

FoodSaver Vacuum Sealer Fresher Food from the Freezer

We decided to make nachos for dinner one night. We used the meat we put in the freezer, cooked up some beans, and cut up some toppings for a delicious dinner.

It was a hit! And I loved how fresh the meat was still, even after 4 weeks!

FoodSaver Vacuum Sealer Nachos


FOODSAVER VACUUM SEALER – NOT JUST FOR FOOD!

My favorite part of the FoodSaver vacuum sealer is that you can use it for more than just food.

  • Seal up your favorite sweaters during the months you aren’t wearing them to keep them in good shape.
  • Cook your food ahead of time and seal it for camping trips for super easy meals. Just warm it up.
  • Seal ice in a bag and you’ve got water storage when it melts.
  • We are going to Disneyland next month and will be taking a pair of each of our boys’ clothes and sealing it in a vacuum pouch to keep it dry.


NOT ALL FOODS SHOULD BE SEALED

There’s lots of things you can still with the FoodSaver vacuum sealer, but there’s a few things you shouldn’t seal. Vegetables like broccoli, cauliflower, tomatoes, brussel sprouts, mushrooms, and garlic are a few things you should never seal. The gases created by these foods over time are toxic and will make the food go bad.

You can find more info on the FoodSaver vacuum sealers HERE.
We like to put cilantro lime rice on our nachos and tacos too. I love that it’s a super easy recipe you do in your rice cooker. Check it out. See our nacho recipe below. Enjoy!

THE RECIPE

Print This Recipe
Nachos

Prep time:  10 mins

Cook time:  30 mins

Total time:  40 mins

Serves: 6-8 servings

Create delicious meals and save money when you buy in bulk. Seal your foods with a FoodSaver vacuum sealer for fresher foods from the freezer.
Ingredients
  • Tortilla chips
  • 2 Roma Tomatoes, diced
  • 2 15oz cans Black Beans, rinsed and drained
  • ½ onion, diced
  • 1 can green chilies
  • ½ lb ground beef
  • 2 tsp taco seasoning
  • Sour cream
  • Guacamole
  • Shredded cheddar cheese
  • FoodSaver Vacuum Sealer Fresher Food from the Freezer
Instructions
  1. In a small sauce pan, combine 2 cans of rinsed and drained black beans, 1 diced Roma tomato, ½ onion, diced, and 1 can green chilies. Let simmer on the stove.
  2. FoodSaver Vacuum Sealer Black Beans
  3. Brown ground beef in a large skillet on the stove. Season with taco seasoning. Cook until brown and temperature is 165°F.
  4. FoodSaver Vacuum Sealer Ground Beef Taco Meat
  5. When ground beef is cooked and beans are tender, lay tortilla chips on a plate. Layer ground beef, beans, cheese, tomatoes, guacamole, and sour cream on top of tortilla chips.
  6. FoodSaver Vacuum Sealer Nachos
  7. Serve!
  8. We like to put cilantro lime rice on our nachos and tacos too. I love that it's a super easy recipe you do in your rice cooker. Check it out.
3.5.3226

October 19, 2016 by Krista

Coca-Cola BBQ Pork Dip

In a house full of testosterone, sports are a big deal and game day is a holiday. Game day is a family affair for us and good food is always present. Slow cooker recipes save the day in our house because they are easy to put together, taste delicious and don’t require a lot of prep time. This Coca-Cola BBQ Pork Dip is delicious served with crackers. In addition, this recipe is great because you can change the quantity really easily to fit the size of your crowd.

COCA-COLA BBQ PORK DIP: THE PERFECT GAME DAY RECIPE

Coca-Cola BBQ Pork Dip served with TRISCUIT RITZ and Wheat Thins crackers on While He Was Napping

Why is this the perfect game day recipe? This one recipe offers these three things I look for in my favorite game day recipes:

  • Can easily feed a large crowd without a lot of complicated steps
  • Minimal prep time because the kitchen isn’t where I want to spend Game Day
  • Doesn’t require a lot of attention when I’ve already got a busy kitchen

If you need to feed a large crowd this is the perfect recipe. It’s super easy to change the size of the roast you use and, furthermore, it doesn’t take much longer to make a large batch.

Your active prep time for this Coca-Cola BBQ Pork Dip is less than 30 minutes. All you really have to do is put the roast in the slow cooker, shred the meat when it’s tender, mix in the BBQ sauce and add the garnishes.

You can make this recipe ahead of time and warm up back up; furthermore, make it super simple and serve it right from the slow cooker. It’s a great way to keep the dip warm, if you prefer it that way. It’s good cold too. My kids like it warm best, but my husband eats it right out of the fridge.

THE WHOLE FAMILY WILL LOVE COCA-COLA BBQ PORK DIP

Coca-Cola BBQ Pork Dip with TRISCUIT RITZ and Wheat Thins on While He Was Napping

This is always a huge crowd pleaser, especially with the men. It’s good, hearty man-food. I love that I don’t have to worry about a sugar rush (and crash!) during our celebrating. My family loves this recipe and always hopes for leftovers. We almost always end up disappointed though, because it really is THAT good.

I love that the recipe is easy, the ingredients are simple, and my whole family loves it. And, on Game Day, it’s ready and waiting for me to drop it in the slow cooker so I can get on with our pre-game preparations.


COCA-COLA BBQ PORK DIP RECIPE

Print This Recipe
Coca-Cola BBQ Pork Dip

Prep time:  20 mins

Cook time:  8 hours

Total time:  8 hours 20 mins

Serves: 18 servings

A sweet. tangy dip that is hearty and full of flavor. A real crowd pleaser, especially with the men.
Ingredients
  • Approximately 1lb pork roast
  • .5 liter Coca-Cola
  • ½ cup brown sugar
  • ½ Tbsp garlic powder
  • 1 tsp ginger powder
  • ⅓ cup honey BBQ sauce
  • ¼ cup sour cream
  • ¼ cup bacon bits
  • colby jack cheese for garnish
Instructions
  1. Place a pork roast in a slow cooker.
  2. Combine one half liter bottle of Coca-Cola, ½ cup brown sugar, ½ Tbsp of garlic powder, 1 tsp ginger powder and mix well.
  3. Coca-Cola BBQ Pork Dip with 4 ingredient Pork Marinade on While He Was Napping
  4. Pour over pork roast and set slow cooker to high. Cook 4-6 hours until roast is tender.
  5. Shred roast and return shredded meat to the slow cooker. Cook meat for additional 2 hours on low heat.
  6. Coca-Cola BBQ Pork Dip Shredded Pork on While He Was Napping
  7. Using a slotted spoon, transfer the meat to a large serving bowl.
  8. Add BBQ sauce to the meat and mix until evenly combined.
  9. Coca-Cola BBQ Pork Dip Coca-Cola Marinaded BBQ Shredded Pork on While He Was Napping
  10. Spread ¼ cup sour cream on top of the shredded meat.
  11. Sprinkle with shredded colby jack cheese and bacon bits.
  12. Serve with crackers.
  13. Coca-Cola BBQ Pork Dip with crackers on While He Was Napping
3.5.3208

 Coca-Cola BBQ Pork Dip served with TRISCUIT RITZ and Wheat Thins on While He Was Napping

In our family, part of what makes Game Day great is all the amazing food! And the festivities aren’t complete without delicious chips and dip. So, grab your favorite chips, some tasty pork and cola and get this in your slow cooker now! You’ll love it, pinky promise.

Now get out there and celebrate! GO TEAM!

  • 1
  • 2
  • 3
  • …
  • 30
  • Next Page »

I'm Krista. Ringleader here on While He Was Napping, wife to my handsome Mr. Right & momma to my THREE energetic boys, Big J (9), Little J (6) & Little N (4). We FINALLY added a beautiful little girl to our family last December.

I’m knee-deep in Tonka trucks & Thomas trains. I survive our crazy days with Vanilla Coke, Sonic slushies, sweet snuggles and little giggles. When I tuck them in tight & kiss them good night, I get a little time to create & just be me.


It all happened
while (s)he was napping
Want More of My Story?

Privacy Policy

While He Was Napping respects your privacy and is committed to keeping any personal information collected on this website confidential. To find out what information we collect and how it is used or what options you have regarding your information, see our full privacy policy here. Creative Commons License The website found at whilehewasnapping.com and all subdomainsauthored and published by Krista is licensed under a Creative Commons Attribution-NonCommercial-NoDerivs 3.0 Unported License.

Pretty Chic Theme By: Pretty Darn Cute Design