Avast, ye mateys! Ahoy and welcome to the most fun map skills practice activity you will find! Whether you’re looking for an educational exercise for the kids, a fun activity to pass a warm afternoon or a creative project and a scavenger hunt, you’ll love making your own pirate treasure map!
WHY WOULD I MAKE A PIRATE TREASURE MAP?
I think a better question is why wouldn’t you map a pirate treasure map? But, in case you need a bit more convincing than that, let’s look at some of the cool things you can do with a DIY pirate map.
A DIY Pirate Treasure map is a great way to get creative, practice mapping skills, and it encourages STEAM thinking. It’s great for pretend play and it’s hands-on.
Need a little more information?
GET CREATIVE WITH A PIRATE MAP STEAM ACTIVITY
There is nothing quite so creative as designing your own space. From the ground up – whether it’s a whole planet or just a little part, crafting the environment requires creativity. It’s a great way to test the limits of how different landscapes and biomes interact with each other. Or to throw them out all together. Glaciers in the desert? Why not?
PRACTICE MAPPING SKILLS WITH A TREASURE MAP
Mapping skills are important. Sure, we’ve all got a GPS attached to our palms or the dashboard, but what if you didn’t? Batteries die, tools get lost, things happen. Could you read a map? These skills don’t just pop into existence when we need them. This is the perfect way to practice and have fun at the same time! The kids might not even realize they are learning!
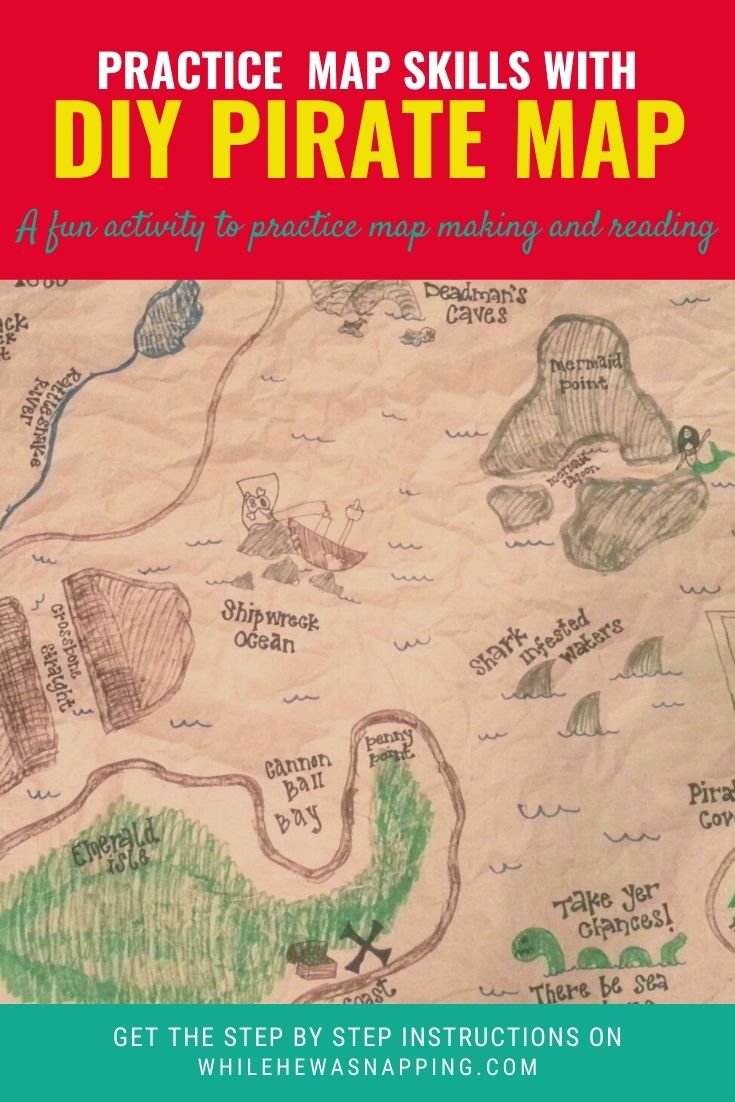
The perfect way to practice map making and map reading skills is with a swashbuckling adventure!
MAKING YOUR PIRATE TREASURE MAP
DIY Pirate Treasure Map Materials:
– Brown wrapping paper used for packaging and mailing. I got a whole roll at Dollar Tree. Brown paper bags or grocery sacks will also work, your map will just be smaller. You can use regular paper, construction paper or whatever else you think would make a cool map.
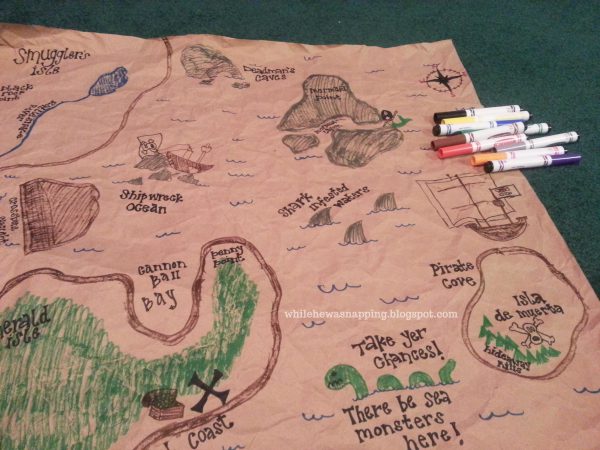
– Markers. I used regular old washable Crayola markers. But, you can get as creative as you’d like with the art supplies you want to offer.
HOW TO MAKE A TREASURE MAP:
Ok, now that we have the materials all gathered, let start this project already. Follow these steps and you’ll be swashbuckling before you know it.
DIY Pirate Map Directions:
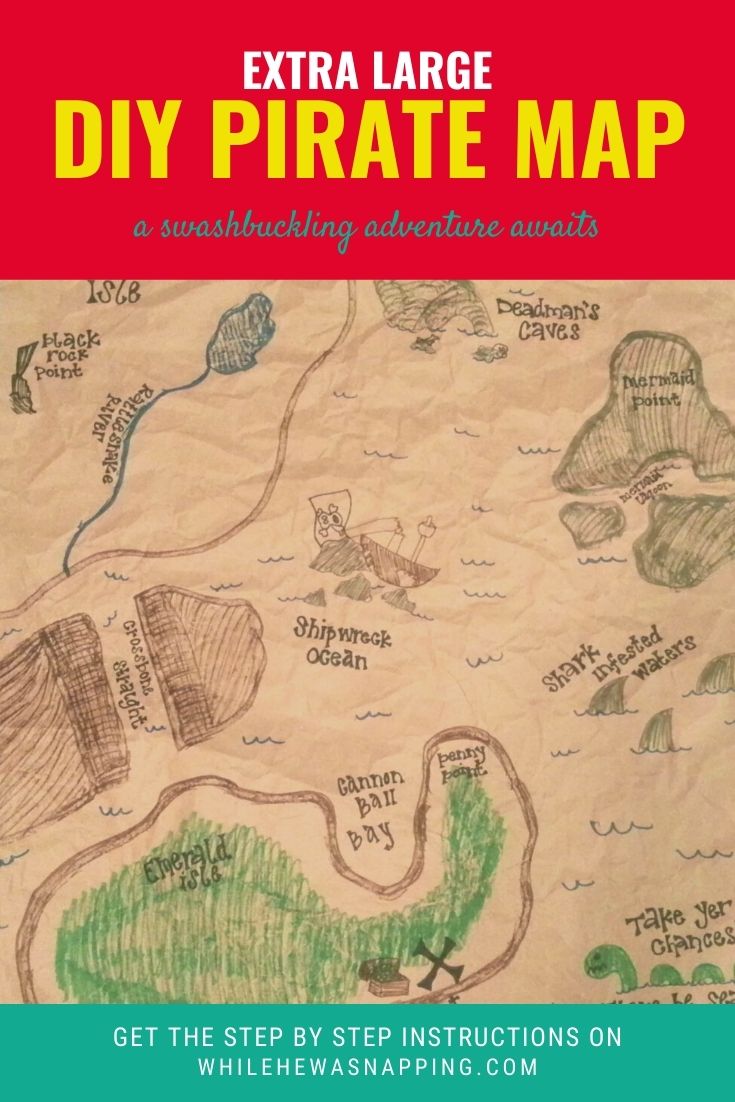
1. Cut off a section of wrapping paper. It doesn’t have to be square, but that’s about the shape I went for. Keep in mind the size of your creators and make-believers. When I created ours, it was a little big for my 3 year old to handle himself, although the extra large size was pretty cool as far as WOW factor.
2. Draw and design your treasure map to your heart’s content. This was my favorite part. There is NO wrong way to do this. Add in whatever landmarks you want, where ever you want them. You might want to set some rules (no glaciers in the jungle, no cactus in the tundra) or you might want to just throw caution to the wind and see what gets created. Again, no wrong way.
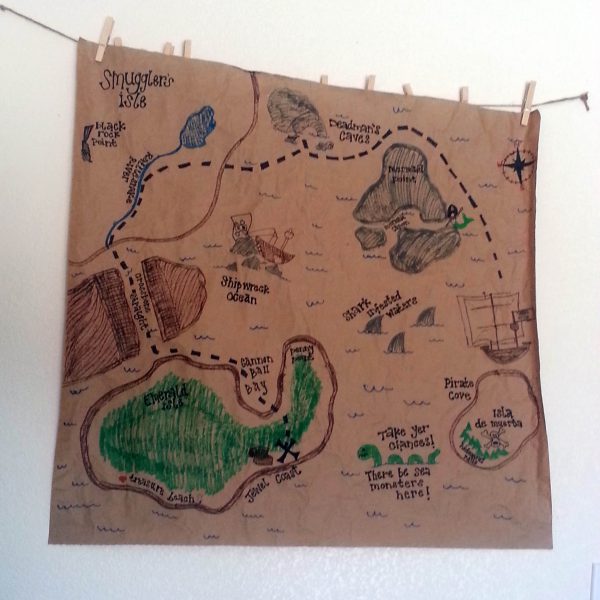
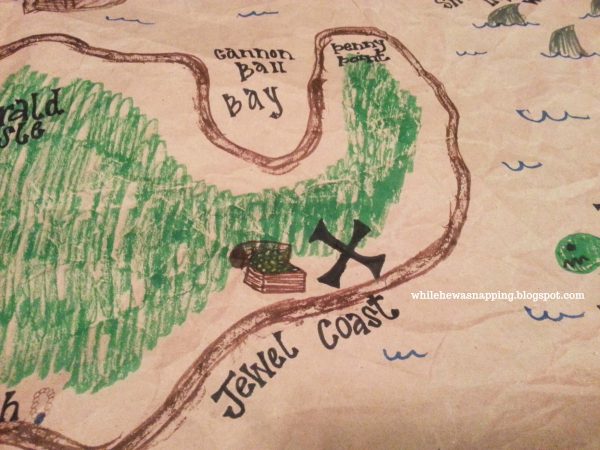
3. Label your map and add any illustrations you want. Don’t forget the compass rose! This was the hardest part of the whole project. After “deadman”, “isla de muerta” and “treasure island” I ran out of pirate-y things to name all the landmarks. A quick Google search later and I had everything I needed. To help you get started, here’s some ideas:
- Pirate Cove
- Isla de Muerta (Island of the Dead in Spanish)
- Cannon Ball Bay
- Jewel Coast
- Smuggler’s Isle
- Deadman’s Caves
- Shipwreck Sea
- Hideaway Hills
- Penny Point
- Treasure Beach
- Emerald Isle
- Cross Bone Straight
- Mermaid Lagoon (thanks, Peter Pan)
- Mermaid Point
- Black Rock Mountain
- Rattlesnake River
GET READY TO PLAY WITH YOUR DIY TREASURE MAP
We had a whole Pirate Adventure Day after I made this map. My preschool aged kids LOVED it. We had a treasure hunt and pirate themed food and everything.
I wanted to make sure we followed a specific route on our Pirate Treasure Hunt, so “shark-infested waters” blocked one way and “sea monsters” blocked another. There was soo much on this map, we didn’t get to see them all on our treasure hunt, but it was fun for the kids to pretend with later.
Don’t be afraid to hand over the markers and paper! This is a great activity for older kids to do and then let them play with their creations.
This would also be a lot of fun for a birthday party!
