I have been meaning to do this project for quite some time. When I posted as part of Jen’s Patriotic Series last week, this was actually the original project I planned to post. However, life got a little cah-ray-zee and I didn’t have the chance to get it completely finished before I finished the Washi Tape Flag. So that one won the race to be my contribution to the series (you can check out all the awesome projects in the series on the Washi Tape Flag post – at the bottom).
Anyway, this project was pretty easy and only took as long as it did because I messed up painting part of the sticks, had to wait for the paint to dry and then repaint them the correct color. I’m going to blame my distraction on my children, ’cause well that’s why you have children, right?!
Materials:
– Seven Paint Stir Sticks
– Red Acrylic Paint
– White Acrylic Paint
– Blue Star Washi Tape
– Picture Hanging Wire
– 1/16″ Drill Bit and Drill
– Needle Nose Pliers
Directions:
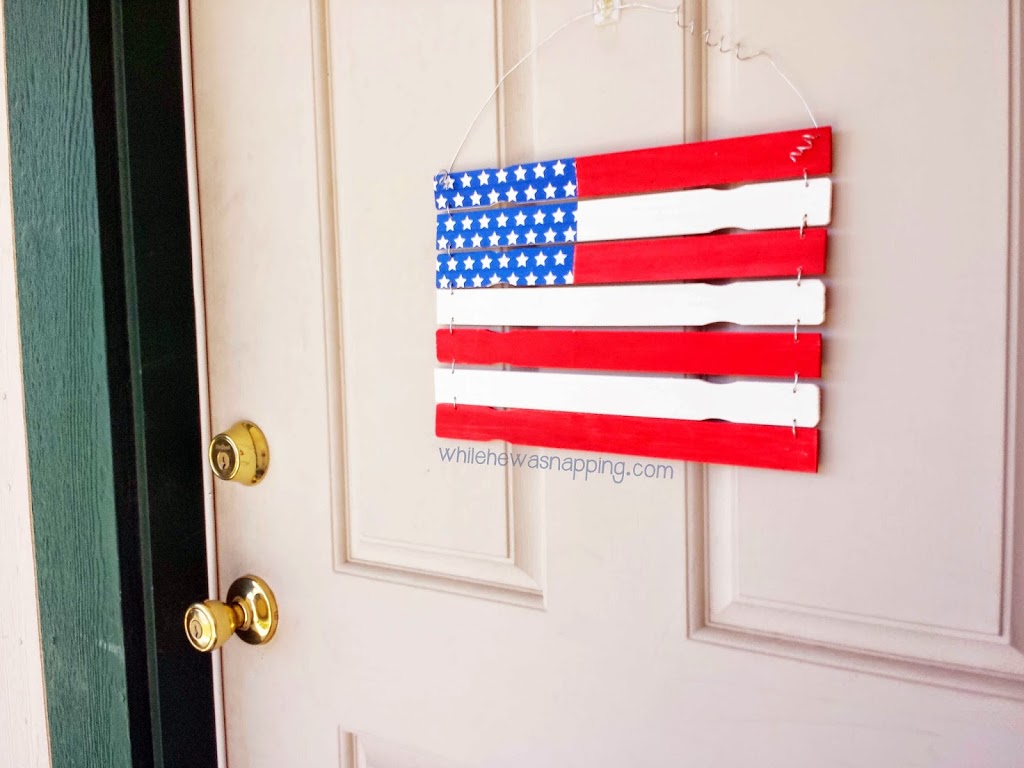
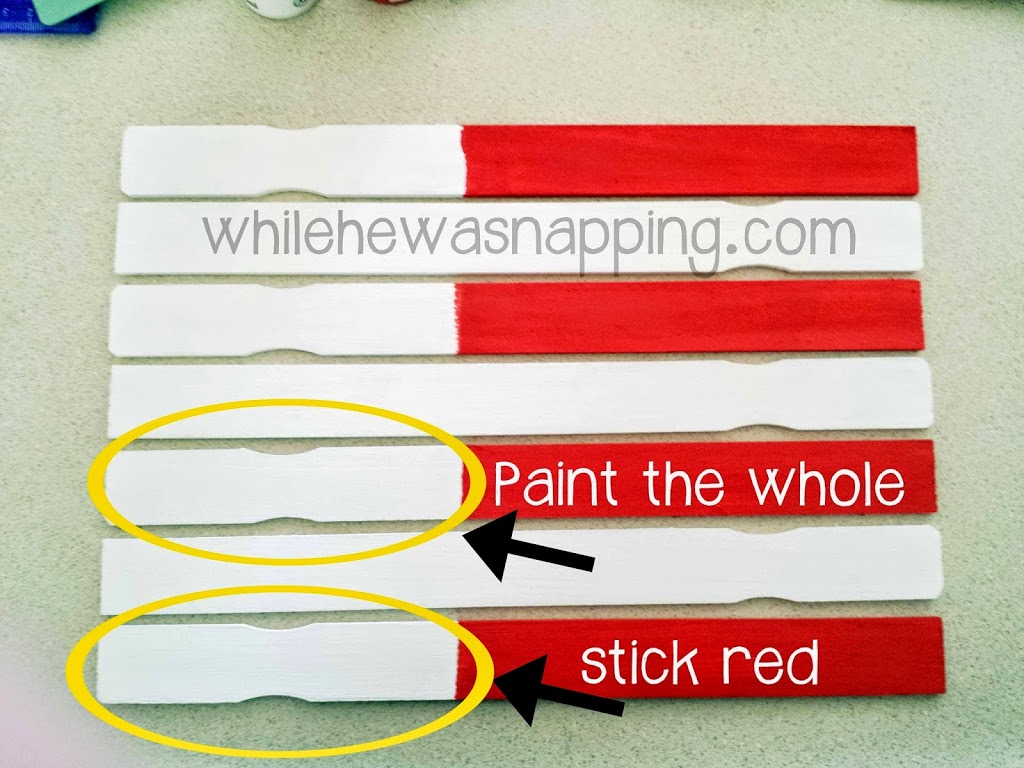
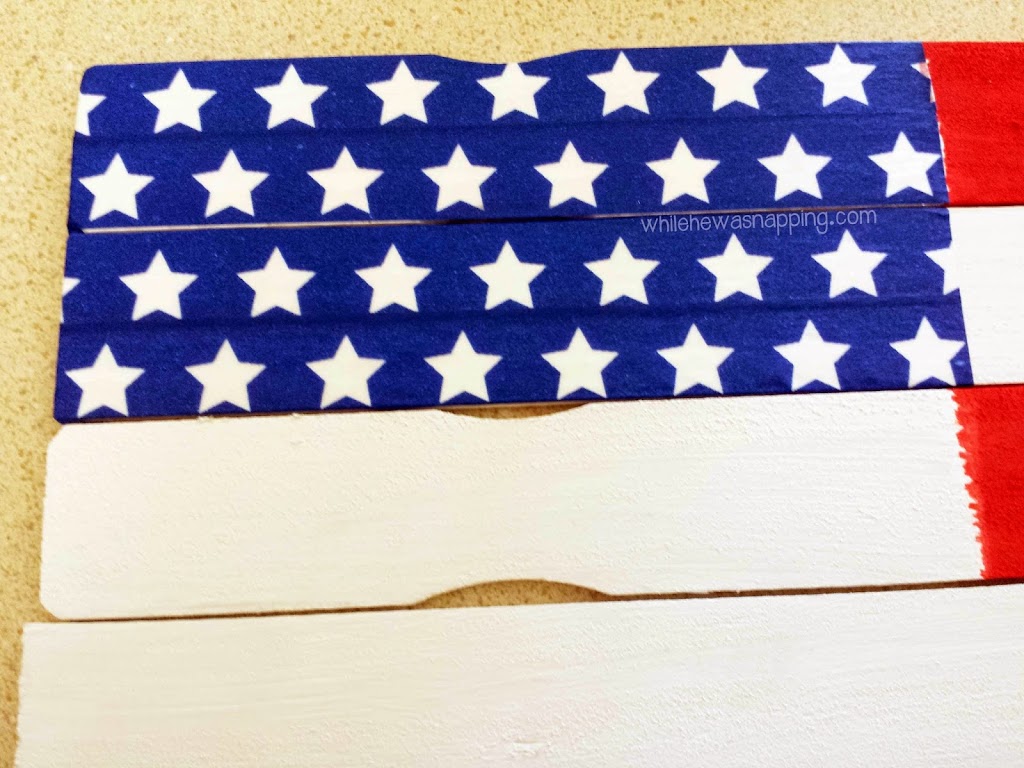
– Begin by painting the sticks. Paint three of them white. Paint two of them red (this is where I messed up, paint the whole stick red). On the other two, decide how long you want the blue star portion of the flag and mark it on two of the sticks. Paint everything to the left of your line white. Everything to the right should be red. Got that? Basically, make it look like the photo, but paint the last two half-and-half sticks all red. Let the paint dry.
– Take the two sticks you painted half-red, half-white and another all white stick and apply the star washi tape to the left side of the stick. I was able to get about two rows of tape on each stick with some overlap and minor folding over the edges. Make sure to alternate the stars, if you want it to look like an authentic flag. Trim any parts of the tape that don’t cover wood. I had to trim the handle notches on a couple of the sticks (you don’t want dirt to get stuck to it as it can work it’s way between the tape and the stick and cause all sorts of problems – ugh, so just trim it).
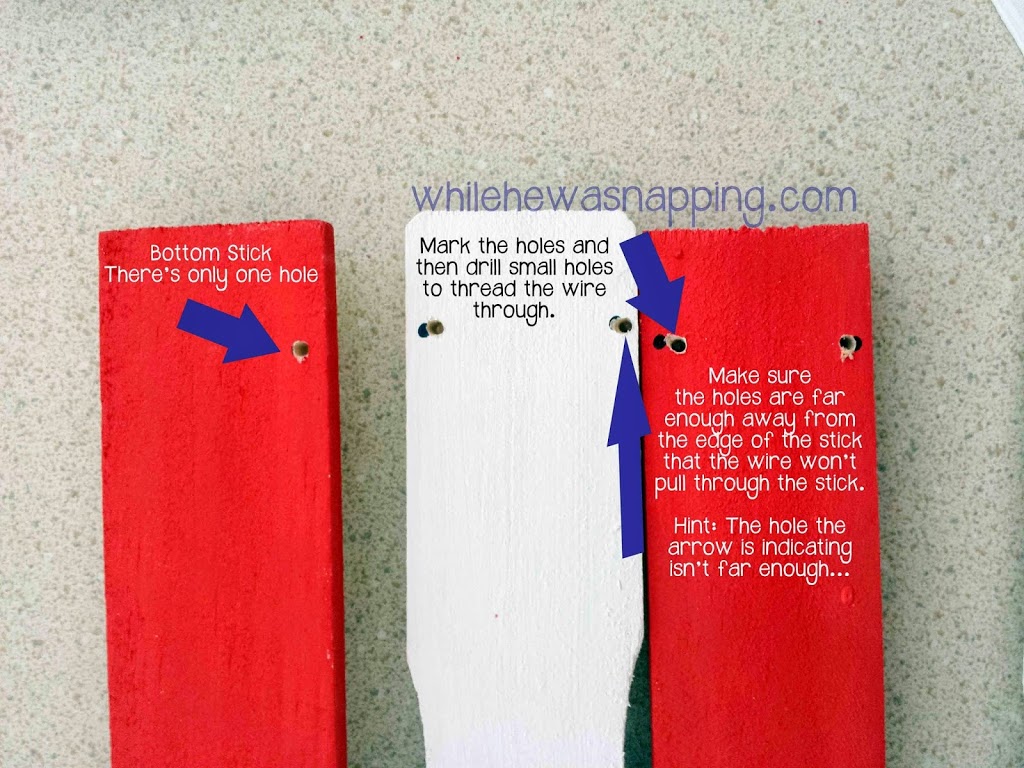
– Lay out your sticks in the correct order and make a small mark where you will drill the hole for your wire. I just eyeballed it, I didn’t measure. Make sure you are in from the edge far enough that the stick isn’t going to break when you pull the wire through. Drill holes with your 1/16″ bit on the marks you made. Your bottom stick only needs a hole at the top.
– Thread your wire through the holes you drilled. Start in the bottom hole of the top stick and thread up through the hole. Go down through the top hole on the next stick down. This way the wire will be behind each stick and only visible in between the sticks, not over them.
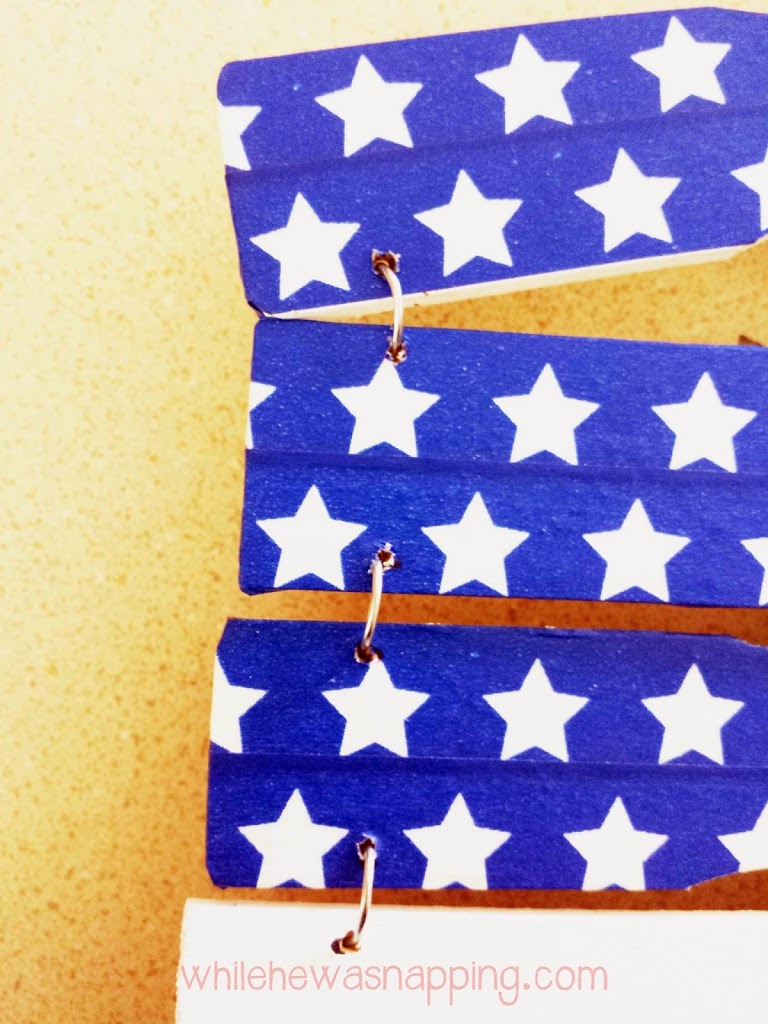
– Repeat the last step until both sides of all the sticks are connected. Twist the wire on the back side of the last stick to hold it in place.
– Thread some wire through the top hole in the top stick, loosely over the top of the flag and back up through the hole on the other side. Cut the wire and twist the ends to hold in place and form your hanger. You can put a little twist in the wire with a pencil if you wish. Tie on some ribbon if your heart so desires. Mine did not, but my brain thought about it…

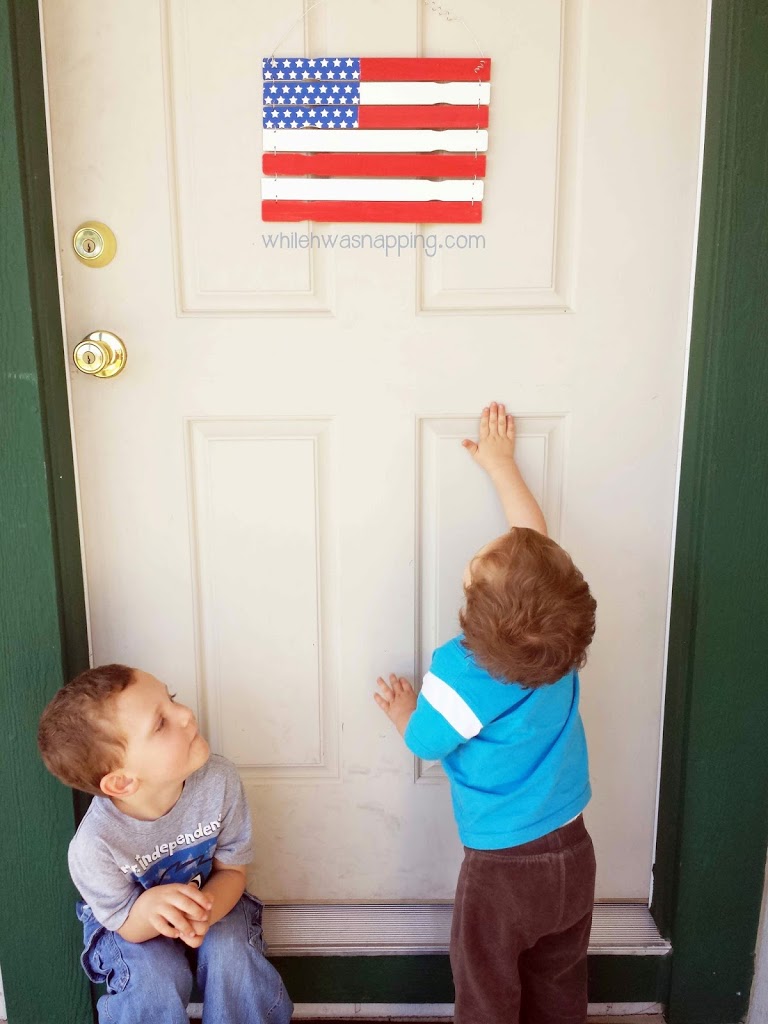
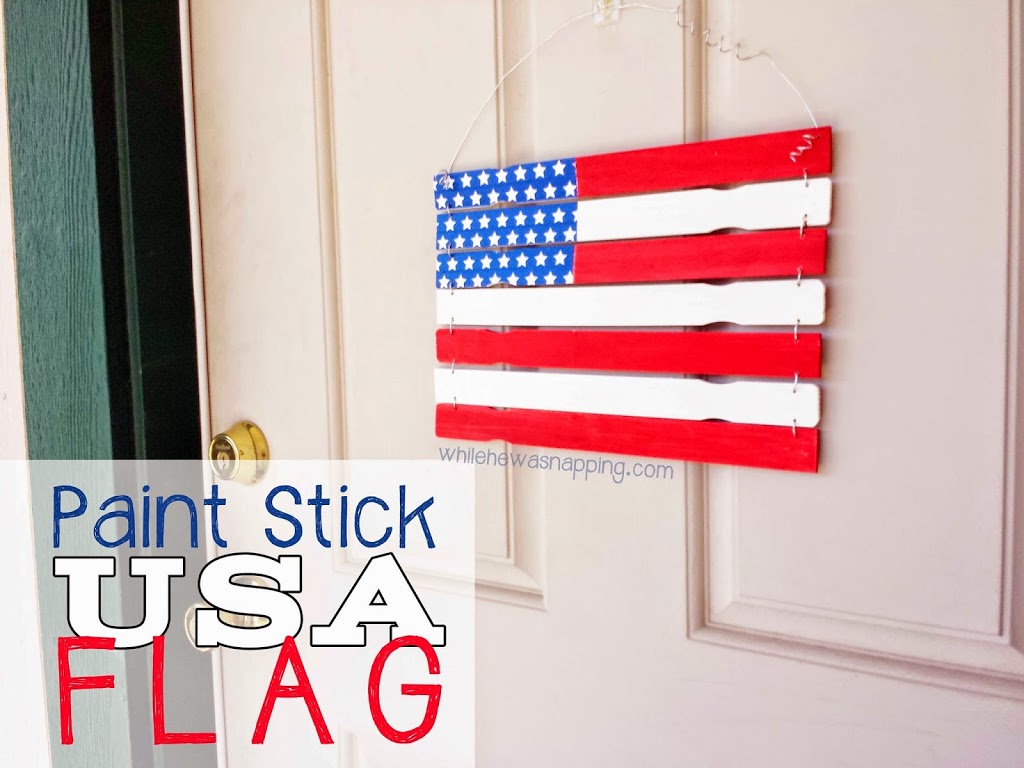
– Hang it up and bask in your awesomeness.