While He Was Napping

momma gets stuff done

  • Home
  • About
  • Archive
  • Do It Yourself
    • Crafts
      • No Sew
      • Painting
      • Paper Crafts
      • Repurpose Projects
      • Vinyl
      • Washi Tape
      • Kid’s Crafts
      • Fonts
    • Sewing
    • Decorate
      • Home Decor
      • Holiday Decor
    • Celebrate
      • DIY Gifts
      • DIY Your Party
  • Recipes
    • Beverages
    • Appetizer
      • Bread
      • Other Appetizers
    • Snacks
    • Main Dish
      • Meat
        • Chicken
        • Beef
        • Pork
        • Seafood
      • Vegetarian
      • Slow Cooker
      • 30 Minute Meals
    • Dips & Sauces
    • Salads
    • Pasta
    • Soup
    • Dessert
      • Cookies
      • Brownies
      • Cupcakes and Cake
      • Box Mix Recipes
      • Other Sweet Treats
    • Breakfast Food
      • Pancakes
      • Waffles
      • Muffins
      • Other Breakfast Food
  • Family
    • Babies
      • Pregnancy
      • Newborns
      • The 1st Year
    • Toddlers
    • Preschoolers
    • Kindergartners
    • 6-8 Year Olds
    • The Grown Ups
      • Date Night
      • Romantic Gifts
    • Self Care
  • For the Home
    • Cleaning
    • Organizing
    • Emergency Preparedness
  • Travel
    • Travel Tricks & Tips
    • Traveling with Kids
  • Tech & Gadgets
    • Must-Have Apps
    • Techy Home Appliances
    • Gadgets & Electronics
    • Blogging Tips
  • Printables
    • Posters
      • Quote Printables
      • Subway Art Printables
    • Printable Organizers
    • Printable Journals
    • Learning Printables & Worksheets
    • LDS Printables
  • Holidays
    • New Year’s
    • Valentine’s Day
    • St. Patrick’s Day
    • Easter
    • Cinco de Mayo
    • Mother’s Day
    • Father’s Day
    • 4th of July
    • Back to School
    • Halloween
    • Thanksgiving
    • Christmas
    • Holiday & Seasonal Printables

December 2, 2013 by Krista

{Printable} Kid’s Christmas Countdown Jar

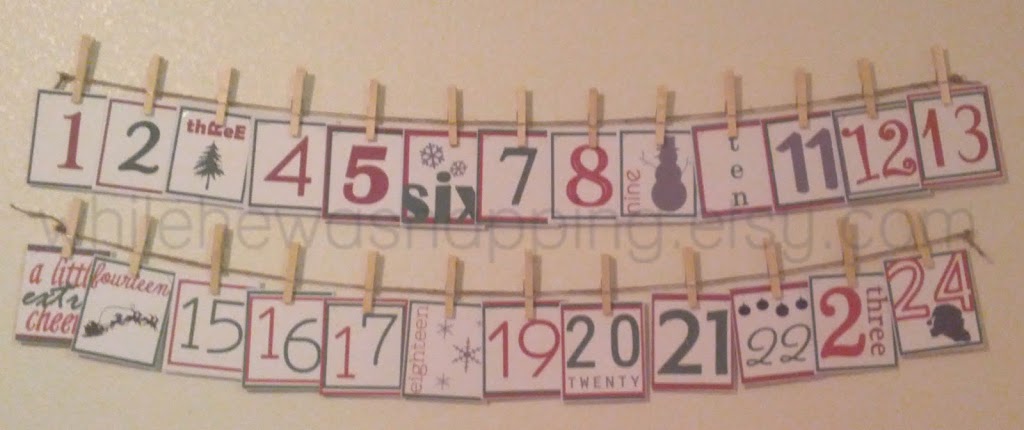
Will you be crazy busy with holiday preparations this month?  Will the kiddos be home a lot more than normal?  Need a quick little advent calendar or boredom buster jar for the cold month ahead?  This boredom jar or Advent Calendar Christmas Countdown Jar is exactly what you need! Check out this little beauty that will take about 30 minutes to put together and will help make your December one to remember:

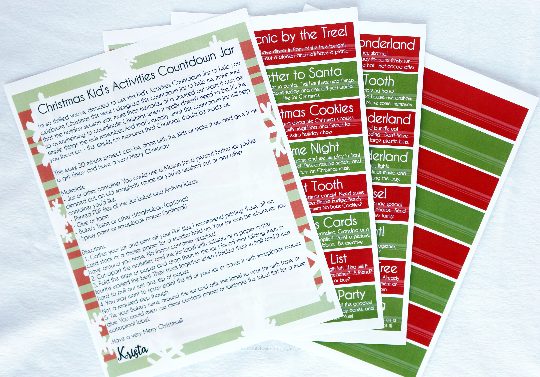
KID’S CHRISTMAS COUNTDOWN JAR
This is a simple and fun way to celebrate the season all month long. Use it as a Boredom Jar or Advent Christmas Countdown.

 Download the watermark-free version HERE.
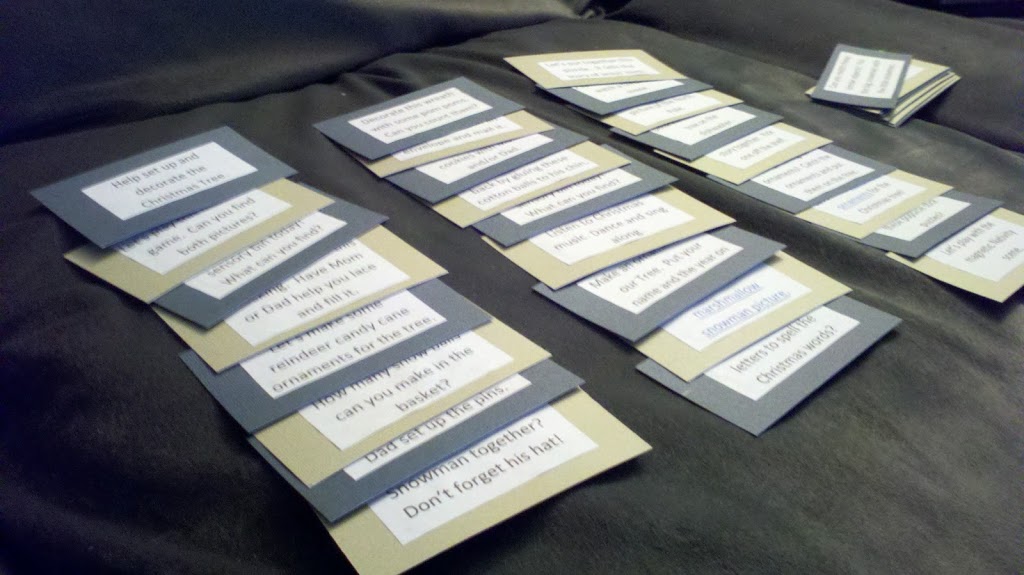
Looks like fun, right? My kids love when the Christmas Countdown jar comes out! It’s full of fun activities to do together all season long. Some of the activities are simple – like writing a letter to Santa. Some are a little more involved and will make for some great memories and traditions – making Christmas cookies or a picnic by the Christmas tree. This is a great reminder to me that holidays with my kids are limited and to really think about what I want them to remember about Christmas – and then to make those things happen!
Kid's Christmas Activity Jar
Hit the link above to get your copy of the free version of The Christmas Countdown Jar. If you’re looking for a little more, the full version of this project in my Etsy Shop. It includes 18 more activities and a full page of blank cards to easily add your own activities so nothing important gets left out. Check out the photo below for exactly what’s in the expanded version. You’ve got enough going on this December, but that doesn’t mean you can’t prioritize making memories too! Let me do the work for you!  Just print, cut apart and stick in jar.
This is a simple and fun way to celebrate the season all month long. Use it as a Boredom Jar or Advent Christmas Countdown.


Check out these other ideas for Activity Advent Calendars as well:
Envelop Advent Calendar

Toddler Activities Advent

This post was written by Krista and originally appeared on While He Was Napping.


November 18, 2013 by Krista

Thanksgiving No-Sew Place Mats #turkeytablescapes

This post is sponsored by Jo-Ann Fabric and Craft Stores.  I was provided supplies and a gift card for incidental purchases in order to create the projects mentioned within.  All content is 100% original and all opinions are 100% mine and truthful.

So, I will be the first to admit I wasn’t super excited when I got the keywords for this month’s Celebrate the Season post with Jo-Ann: Turkey Tablescapes And here’s why: the last Thanksgiving I was home for was my freshman year in college.  I stayed home while the rest of my family went on our annual trip to my grandma’s because I was working retail.  At my grandma’s house there are usually 35+ people there, so we’re super classy and use paper plates, plastic cups and silverware and plastic tablecloths.  Who wants to be doing 3 hours of dishes anyway?!

During the year, we’re lucky if we eat at the table in our house.  The poor design has the dining room behind the kitchen wall and it’s just more effort to set and clear the table each night than we usually put into it.  We usually dine at the island in our kitchen, and not in the formal dining room.  So decorating the table is almost laughable in our house.  Admittedly, it’s kind of my craft table.  In desperation of a great tablescape, I went to Pinterest and wound up with overwhelming frustration.  Tablescapes are sooooo very not my thing.  I’m the cheap, quick and kid-friendly kind of crafty.  There’s no way I can pull off a gorgeous tablescape like the ones I saw on Pinterest.  So, I decided to do a kid’s table tablescape so I didn’t feel so very out of place.

There are three crafts on this tablescape: no-sew place mats, turkey napkin rings and turkey name cards.  All are easy and quick.  I’ll do the place mats today and the other two in the next couple days, so as not to overwhelm you and keep this post from being so long your fingers fall off from scrolling.

THANKSGIVING NO-SEW PLACE MATS
DIY No-Sew Placemats at Kid's Thanksgiving Table
Materials:
– Two fat quarters in coordinating fabrics
– Glue gun and glue sticks
– Iron
Directions:
– Iron your fat quarters and cut them in half.
DIY No-Sew Placemats at Kid's Thanksgiving Table
 – Place two halves right side together.
DIY No-Sew Placemats at Kid's Thanksgiving Table
– Slowly glue the edges together.  Press them firmly until the glue is mostly dry.  A thick line of glue will stick better than a thin one.  It will also take longer to dry, giving you more time to get the fabric pressed together.  Leave a few inches to turn your no-sew place mat right side out.
DIY No-Sew Placemats at Kid's Thanksgiving Table

– Turn the place mat right side out. Press with a hot iron. You glue will melt again, so don’t leave the iron too long or it will seep through the fabric and get on your iron. Just enough to press them. Let your no-sew place mats cool.

DIY No-Sew Placemats at Kid's Thanksgiving Table

That’s it.  Simple and easy peasy.  I’m thinking I’ll try to find something to do with them, since we won’t be using them as actual place mats at our house (Ha.)  A car caddy for Big J maybe?  He loves the green fabric…

You can use this coupon to save some moolah on your own Thanksgiving projects (or any projects!) until the end of the month.  Need some inspiration?  Check out the Craft Catalog and the Celebrate the Season site for lots of great project ideas.

Here’s a sneak peek at the whole table…  Come back tomorrow and Wednesday for the other tutorials.

DIY No-Sew Placemats at Kid's Thanksgiving Table

This post was written by Krista and originally appeared on While He Was Napping.
 

November 12, 2013 by Krista

{Printable} Always Be Thankful Chalkboard Printable

I’ve got a super fun printable poster for you today. It’s so great when this time of year comes around and everyone seems to be a little nicer and a little more thoughtful towards others. Except the guy that cut me off while I was picking up Big J from preschool today… But, I guess you can’t have everything. Wouldn’t it be nice if everyone behaved like that all the time?!  The being extra nice part, not the cutting people off in traffic. But, thankfully, getting cut off was just an annoyance and not a car accident or something like that. See… there’s always something to be thankful for.

Have you ever thought it would be helpful to have a cute little reminder to Always be Thankful? This printable should do just that!

ALWAYS BE THANKFUL

WM-Always-be-Thankful

Get your free copy of the Always be Thankful chalkboard printable HERE.

Click the link above to download the full quality, watermark-free print from Google Drive. You’re welcome to print as many as you like. All I ask is credit when it’s due and a link back to this page if you’d like to share this print on the web.

The file is formatted to 8×10″ and can be cropped smaller (5×7″ and 4×6″) with no problems. The free download is for personal use only. If you’d like a larger print, let me know and I’ll set you up a listing (and a deal!) in my Etsy Shop.  Thanks and Happy Holidays!

This post was written by Krista and originally appeared on While He Was Napping.

November 6, 2013 by Krista

2013 Gift Guide for Preschoolers

Okay, here’s installment #2 of this year’s Gift Guide: Preschoolers (ages 3-5).  These little guys are so busy and learning so much so fast that it can be hard to keep up with them… and keep them entertained.  Because of this, I am all about toys that have more than one possibility for play.  My kids are all about sensory play, things they can physically hold, touch, and manipulate.  So, I try to find activities and toys that fit both of those criteria.  I try to make their play educational and encourage imagination as well.

GIFT GUIDE FOR PRESCHOOLERS
DIY GIFTS
1.  Pencil Pouch I Spy Bag
(Awesome for in the car!)
2.  Homemade Play Dough
3.  Felt Car Mat
4.  Pirate Treasure Map for imaginative play
(same map, different adventures!)
5.  DIY Shaped Crayons
6.  Sparkle Bottles
7.  Felt Road Pieces
8.  DIY Watercolors
9.  Superhero Shirts
(These are onesies, but Big J was incredibly disappointed when Little J got some and he didn’t.
He has requested them this year and they will be in his stocking.)
  10.  Kid’s Science Experiments & Art Project Kit
(with FREE printable booklet)
11.  Story Stones
12.  Boredom Buster Jar
(sometimes you just need ideas!)
13.  New Apps 
(The link will take you to the posts I’ve written on our favorite Android Apps for Kids.
Big J earns his screen time, but we’re still pretty selective with his apps.
A gift card to Google Play (or the App Store for Applers)
would send my preschooler over the moon and we still get the okay on what he plays).
 
14.  DIY Watercolor Pages at Creative With Kids
15.  DVD Case to Coloring Case Upcycle At Handmade by Stacy Vaughn
16.  No-Sew Quiet Book at Our Cozy Nest
(This has a church theme, but you could do generic pages like colors, shapes, numbers and ABC’s)
17.  Crayon Roll at Make & Takes
18.  Car Caddy at Homemade by Jill
19.  ABC Quiet Book at While He Was Napping
(Also done in a church theme, but you could easily make it a favorite things, family photo, or animal book)
20.  Sponge Blocks at Inner Child Fun
21.  ABC Parking Lot Letter Match at I Can Teach My Child
(I love this idea!  I’m gonna try to figure out how to make it portable!)
22.  Encouraging Play Kits at The Imagination Tree
(This post has some great ideas to put a kit together)
23.  Floor Poof Cushion at Living With Punks
24.  Homemade Geoboard at Feels Like Home
25.  Personalized Book for the Kiddo at Fudge Banana Swirl
(Post has a link to purchase templates for super easy construction)
26.  Felt Play Mats at Free Time Frolics
(I love that these fold up.  A little storage pocket for the figurines would be great too.)
27.  No-Sew Fort Kit at Celebrate Everyday With Me
(Big J will be getting one of these this year!  Too much fun for the whole family!)
28.  Felt and Magnet Fishing Game at Real Purdy
(No Photo, but totally cute and super easy)
29.  Sensory Balloons at Tot Treasures
(Also no photo, but simple and fun.  Requires supervision!)
GIFTS TO PURCHASE
The Amazon links are affiliate links.  I receive a small commission of any purchase made through these links.  Your total cost is in no way affected and I appreciate your support.  Thank you.  All other links are NOT affiliate links and I, nor any part of While He Was Napping Blog, am in no way compensated for mention or inclusion of the links.
30.  Road Tape via Oh Sweet Babies
(This is outrageously expensive for US-based kiddos, due to international shipping.
If you’re located in Europe, it’s not too bad.  The rest of us may have to try a DIY version.)
31.  Preschool Workbooks or Pre-K Packs via Amazon
(You can also find FREE resources around the web, just Google it.  Big J loves these.)
32.  Counting Bears via Amazon
33.  Do A Dot Art Markers via Amazon
(Print off some pages to use them with.  Google “do-a-dot pages”)
34.  Preschool Board Games or card games via Amazon
(Candyland, Chutes & Ladders, Hungry Hungry Hippos, Don’t Break the Ice, just to name a few)
35.  Take Apart Airplane and other vehicles
(My mom got the boys a similar toy last year and it’s still a favorite)
36.  Pattern Blocks and Boards via Amazon
(we had these for months and the only time they came out to play was when Little J dumped them all over the floor.  As soon as I printed off some pattern pages though, Big J is all over these.  He needed more direction than just playing with the shapes themselves.  So, don’t forget the pattern pages!)
37.  LEGOs via Amazon
(We opted to skip the mega blocks – the big legos – and go straight to the basic ones.  When we gifted this two years ago to Big J they were above his skill set.  Now, he plays with his Legos at least 4-5 times a week.  We bought a set of basic blocks, a set of wheels and have gradually added sets over the years.  We like to make cars and both boys play with the completed vehicles for days.)
38.  Preschool-appropriate Puzzles via Amazon
39.  Gizmo Building Sets via Amazon
(We gifted this to Big J last year and he didn’t quite understand at first – he was 3.5 – but within a few months he was building with them all on his own.  He loves these enough, we may have to get other set so there are enough for both boys.)
40.  Books!  Books!  Books!  Books!
(I am a huge believer in books.  I get most of mine off of Amazon or half.com.  Check the used prices out and get discount shipping by shopping from the same seller.  I don’t mind used books as long as they aren’t totally trashed.  That way, I don’t have a panic attack when my children trash the book.)

What are you getting your preschoolers?
Other 2013 Gift Guides:
Babies & Toddlers

This post was written by Krista and originally appeared on While He Was Napping.

October 15, 2013 by Krista

DIY Spell Books with 12 Spells

I have been wanting some Spell Books to go with my Potion Bottles and Witch Hat.

I had a specific vision though. I wanted three spell books that didn’t open and one that did.

The open one, I wanted to have spells in it. Spells that sounded somewhat legit but weren’t super dark and scary. And not just one spell, but multiple spells.

So, I Googled that right up and guess what I found on the internet? EEK. In short, nothing that fit my vision. So, I had to make my own. I actually made up all the spells and designed all the pages. It was more time consuming than expected an, believe it or not, I don’t know any spells.

DIY SPELL BOOKSDIY Spell Books with step by step instructions and two ways to make them. The perfect finishing touch to your Halloween display.

Spell Book Materials:

– Books.  I got mine at Dollar Tree.  I pulled the dust jackets off at the store and the books I thought I could age the best were the ones I purchased.
– Coffee grounds or Tea bag and a small pot filled with hot water.  I used coffee.
– Oven and baking sheet
– Spells, printed on white paper and cut to the size of your book (You can purchase mine in my Etsy shop or make up your own)
– Tacky Glue
– Canvas (I used scrap pieces from a painter’s drop cloth)
– Hot glue gun and glue sticksDIY Spell Books


Spell Book Directions
STAINING THE PAGES:

DIY Spell Books

– Begin by printing off and cutting to size your spells. I HIGHLY suggest printing these on card stock on a laser printer. I was a little worried about the pages smearing and tearing when they’re wet, but I had no problems. Measure your book to find the dimensions you’ll need.

You can purchase the spells I designed in my Etsy shop or make up your own.  I did find a few online, but I wanted all of mine to coordinate with the same layout and I wanted more than I could find.
– I used the same staining method for the pages and books as I did for my Potion Bottle labels (see that post for photos of the process).  Boil the hot water on the stove and simmer with your coffee grounds or tea bags in the water for about ten minutes.
– Place a spell on the baking tray and cover it with a bit of the coffee mixture. Press it down so it’s nice and saturated.  Let it set for a few minutes if you want a darker stain. Drain any excess coffee back into the pot. Place the baking tray in a warm oven (I set mine to 200F). Let the paper dry in the oven for approximately 5-10 minutes. Keep an eye on it; paper can catch on fire, after all.
– Remove the pan from the oven. The paper will still be damp. Carefully, pull it off the tray and, if possible, hang it to dry. Mine took about 8-12 hours to dry, but I waited overnight to be sure I wouldn’t tear them on accident.
– Repeat for all the remaining pages.

DIY Witch's Potion Bottles

CONSTRUCTING THE CLOSED SPELL BOOKS:

DIY Spell Books

DIY Spell Books

For my closed spell books, I used real books. I wanted to cover the majority of the spines, as they had the book title and author’s name stamped on them. One of my books was titled Called Out of Darkness, which I deemed appropriate enough to remain uncovered. However, Every House Needs a Porch (or something similar) wasn’t quite what I was looking for.
– I measured the spine cover on the book and cut a piece of canvas to fit over it.  I stained it in the coffee mixture and then let it dry.

DIY Spell Books
– Once dry, I hot glued the cover onto the book. I actually used Mod Podge on one book. It gives a more form-fitting cover to the book, but made the canvas really stiff. Not a big deal on a book. I opted for hot glue on my second book for the sake of ease and speed. No drying time for hot glue.
–  I hot glued the excess canvas at the top of the books.
– Then I took the coffee mixture and a sponge brush and put it on the covers of the books. I also used a little dirt and some of the coffee grounds and rubbed them into the covers. Make it look worn and dirty. I attempted staining the cover on one book with some olive oil, but it eventually all dried out.

DIY Spell Books

 DIY Spell Books

– I used some stamps and stamped “Potions” on one book.  I also used hot glue to write out a title on another book.  The third (the book with the title on the spine) I left alone.

*Note: I did stain the pages of the open spell book too.  It looked funny with the stained pages and the off-white pages of the book.  I just poured the coffee mixture over the pages and let it seep through them.  Then, I used the sponge brush in the coffee to darken the edges to my liking.  Let it dry.  You’ll probably need to fan the pages out a bit.

DIY Spell Books

DIY Spell Books

INSERTING THE SPELL PAGES INTO THE OPEN BOOK:
– Once all the pages are dry, find where you want your spells in the book.  You could intersperse them through out the book or just put them all in one place.  I did the latter.  I glued the spells back-to-back and then put a line of glue down the spine inside the book and stuck the spells into the glue.  If you glue the spells throughout the book, simply glue each spell to a page in the book.  I did end up needing to tear about 5 pages out of the book so my papers would fit.  I’m sure those will pop up in another project though.

DIY Spell Books

DIY Spell Books
– Repeat with the remaining pages and let it all dry.
– To get the book to stay open, you may have to bend and work the pages a bit so the glue and once-wet paper isn’t so stiff.

Ta-da.  Set out your DIY Spell Books and get to spooking the neighbors.  Oh, the worst part of this is waiting for all the drying times.  Well, and the coffee part – at least for me.  I loathe the smell of coffee…

DIY Spell Books

This post was written by Krista and originally appeared on While He Was Napping.

  • « Previous Page
  • 1
  • …
  • 12
  • 13
  • 14
  • 15
  • 16
  • Next Page »

I'm Krista. Ringleader here on While He Was Napping, wife to my handsome Mr. Right & momma to my THREE energetic boys, Big J (9), Little J (6) & Little N (4). We FINALLY added a beautiful little girl to our family last December.

I’m knee-deep in Tonka trucks & Thomas trains. I survive our crazy days with Vanilla Coke, Sonic slushies, sweet snuggles and little giggles. When I tuck them in tight & kiss them good night, I get a little time to create & just be me.


It all happened
while (s)he was napping
Want More of My Story?

Privacy Policy

While He Was Napping respects your privacy and is committed to keeping any personal information collected on this website confidential. To find out what information we collect and how it is used or what options you have regarding your information, see our full privacy policy here. Creative Commons License The website found at whilehewasnapping.com and all subdomainsauthored and published by Krista is licensed under a Creative Commons Attribution-NonCommercial-NoDerivs 3.0 Unported License.

Pretty Chic Theme By: Pretty Darn Cute Design