While He Was Napping

momma gets stuff done

  • Home
  • About
  • Archive
  • Do It Yourself
    • Crafts
      • No Sew
      • Painting
      • Paper Crafts
      • Repurpose Projects
      • Vinyl
      • Washi Tape
      • Kid’s Crafts
      • Fonts
    • Sewing
    • Decorate
      • Home Decor
      • Holiday Decor
    • Celebrate
      • DIY Gifts
      • DIY Your Party
  • Recipes
    • Beverages
    • Appetizer
      • Bread
      • Other Appetizers
    • Snacks
    • Main Dish
      • Meat
        • Chicken
        • Beef
        • Pork
        • Seafood
      • Vegetarian
      • Slow Cooker
      • 30 Minute Meals
    • Dips & Sauces
    • Salads
    • Pasta
    • Soup
    • Dessert
      • Cookies
      • Brownies
      • Cupcakes and Cake
      • Box Mix Recipes
      • Other Sweet Treats
    • Breakfast Food
      • Pancakes
      • Waffles
      • Muffins
      • Other Breakfast Food
  • Family
    • Babies
      • Pregnancy
      • Newborns
      • The 1st Year
    • Toddlers
    • Preschoolers
    • Kindergartners
    • 6-8 Year Olds
    • The Grown Ups
      • Date Night
      • Romantic Gifts
    • Self Care
  • For the Home
    • Cleaning
    • Organizing
    • Emergency Preparedness
  • Travel
    • Travel Tricks & Tips
    • Traveling with Kids
  • Tech & Gadgets
    • Must-Have Apps
    • Techy Home Appliances
    • Gadgets & Electronics
    • Blogging Tips
  • Printables
    • Posters
      • Quote Printables
      • Subway Art Printables
    • Printable Organizers
    • Printable Journals
    • Learning Printables & Worksheets
    • LDS Printables
  • Holidays
    • New Year’s
    • Valentine’s Day
    • St. Patrick’s Day
    • Easter
    • Cinco de Mayo
    • Mother’s Day
    • Father’s Day
    • 4th of July
    • Back to School
    • Halloween
    • Thanksgiving
    • Christmas
    • Holiday & Seasonal Printables

October 3, 2013 by Krista

DIY Witch’s Potion Bottles

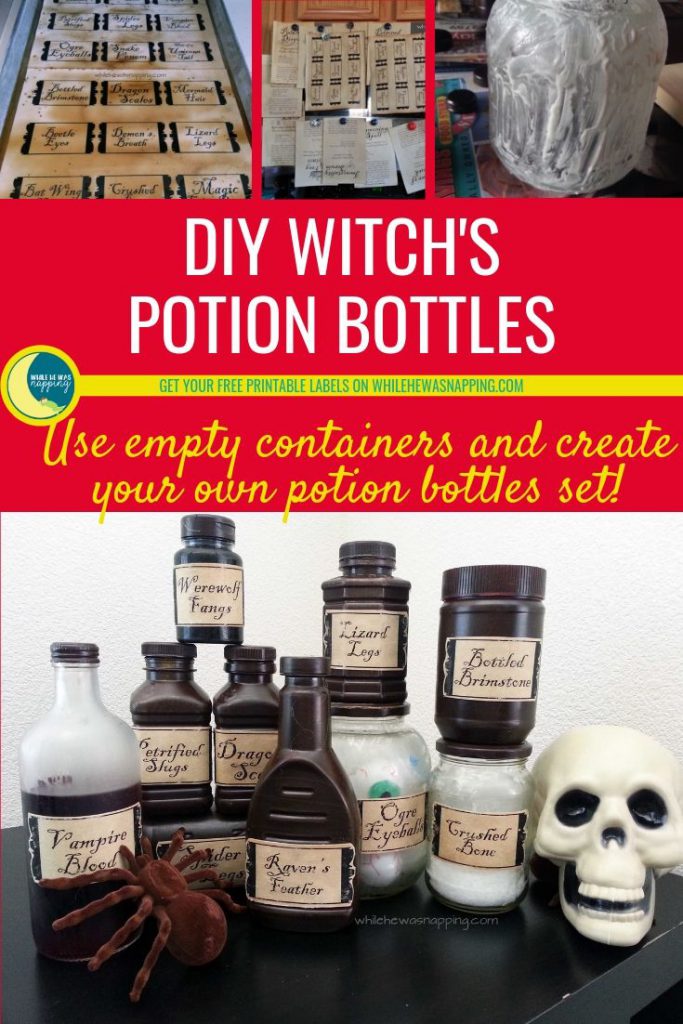
These fun and easy Potion Bottles are the perfect addition to your DIY Halloween Decor! It’s the perfect spooky decor project to upcycle all your empty bottles and there are even printable potion bottle labels for you to download that will make this Halloween craft even easier! Bring out all the spooks and step up your Halloween Witch Decor with a great set of DIY potion bottles for all your witchy decorating.

Make Your Own Potion Bottles


Materials:
– Various bottles and containers (I will go through the ones I used in just a bit)
– Matte brown spray paint
– Sandpaper
– Potion Labels
– Glue gun & glue sticks
– Coffee grounds
– Shallow pans/baking sheets & a small pot
– Oven & Stove
 
Directions
THE BOTTLES:
– Wash your containers and bottles.  Scrape all the labels and goo off.  I washed mine in the dishwasher and then soaked the bottles that still had labels or glue on them in hot water for about 20 minutes.  The hot water soak will loosen the glue on the labels.  Peel off the glue and labels.  I had a few that were particularly stubborn (those Swedes know how to attach a label!  One of the bottles I used was from IKEA…) and I used a Goo-Gone-soaked paper towel on them to get them clean.
– Use the spray paint and paint your bottles.  I did this with the majority of my bottles, but there were three glass bottles I left.  I’ll go over that process in a moment.  I started off with the idea to do a mod podge stain on them, but it was taking FOREVER to get the shade I wanted.  So, I canned that idea and just settled on the spray paint.  If you want a lighter finish on the bottles, stand back a little further than usual when you paint them.  That way, you’ll just “dust” them, instead of a full-on layer of paint.  I was painting these on my kitchen island one stormy day and didn’t have a lot of space to play with so they ended up a little darker than I had first planned on making them.  Make sure you paint the lids too.  Let dry thoroughly.
– Lightly sand the bottles to give them an aged appearance.  Be careful not to sand off too much paint.  This bottle was an old vitamin bottle, so I didn’t paint it.  But, you can get the idea of the texturing you’re after.
DIY Witch's Potion Bottles
 
 
For the glass bottles, I wanted to age them and started off sanding them with sand paper. I’m an impatient crafter and after about five minutes of practically immeasurable progress I ditched the sandpaper and grabbed my bottle of glass etching cream from the cupboard.  It worked fabulously.  The hardest part was trying to apply the paste randomly.  Dang OCD tendencies.  Let bottles and cream stand 5-10 minutes… or until you remember you’re in the middle of a project.  Rinse and wipe dry with a paper towel.  Don’t forget to paint the lids for these bottles.
 
DIY Witch's Potion Bottles
 
DIY Witch's Potion Bottles
 
THE LABELS:
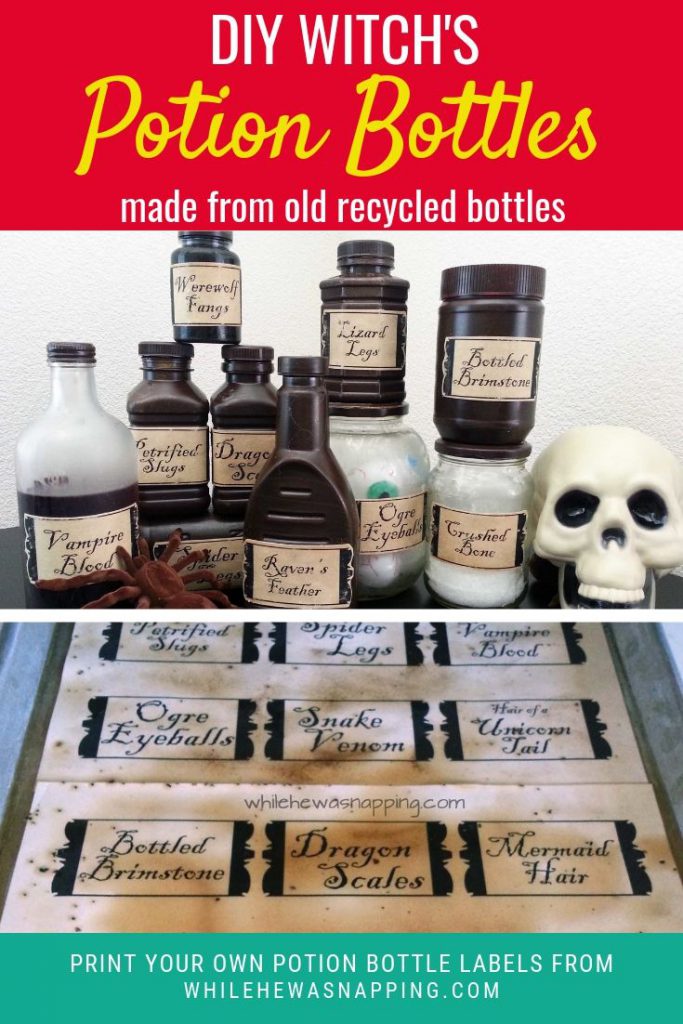
– Print off the DIY Witch’s Potion Bottles labels or make your own.  I used a laser printer to keep the ink from smearing.  I didn’t try it with an inkjet, so I don’t know how smeared they’d end up.  It might look like great aging, I really don’t know.  Also I printed mine on card stock.  Worked like a charm, none of them ripped.
– Preheat the oven to 200F (90C).
– On the stove heat about two (2) cups of water with a quarter (1/4) cup of coffee grounds.  I hate the smell of coffee, so this was the worst part for me.  Heat to warm, but not so warm you can’t touch it.  I had my hands in this up to my palms.
– Okay, now decide if you want to cut your labels apart before you stain them or after.  I did it after.  But, you might get some neater staining on the edges if you cut them apart before.  In a shallow pan, lay down your sheets of (or the cut apart) labels and use a small cup to pour the coffee over the paper.  Push the paper down against the pan to help it soak up the liquid.  Let stand 3-5 minutes or so.  The longer it stands the darker the labels will be.  Drain excess coffee back into the pot.
DIY Witch's Potion Bottles
 
 
–  Put the labels and the baking tray in the oven for 5-10 minutes.  If you cut the labels apart before you stained them, it’ll be closer to five.  If you didn’t cut them apart, it’ll be closer to 10.  When the paper is dry enough you can handle it without it tearing, take the tray out of the oven and carefully pick up the paper.  Holding the paper so that it is hanging over the pan, use a paper towel and gently dab it off.  This will remove any coffee grounds and extra liquid.  Hang to dry if possible.  (You can leave the paper in the oven longer and it will dry out faster.  Keep an eye out though.  Paper is flammable…)
DIY Witch's Potion Bottles
 
 
DIY Witch's Potion Bottles
 
 
– Once your labels are dry, cut them apart if you haven’t already, and use the glue gun to attach them to the bottles.  I found that gluing in stages worked the best.  And get as close to the edges as you can with the glue.  I started in the middle and put glue on that, then stuck it to the bottle.  Then I’d glue each end one at a time.
 
– Then I took sandpaper and lightly sanded the labels to age them.  Don’t go too crazy.  You’ll rip your stain off or tear the paper.  Lightly, my friends, is key.
 
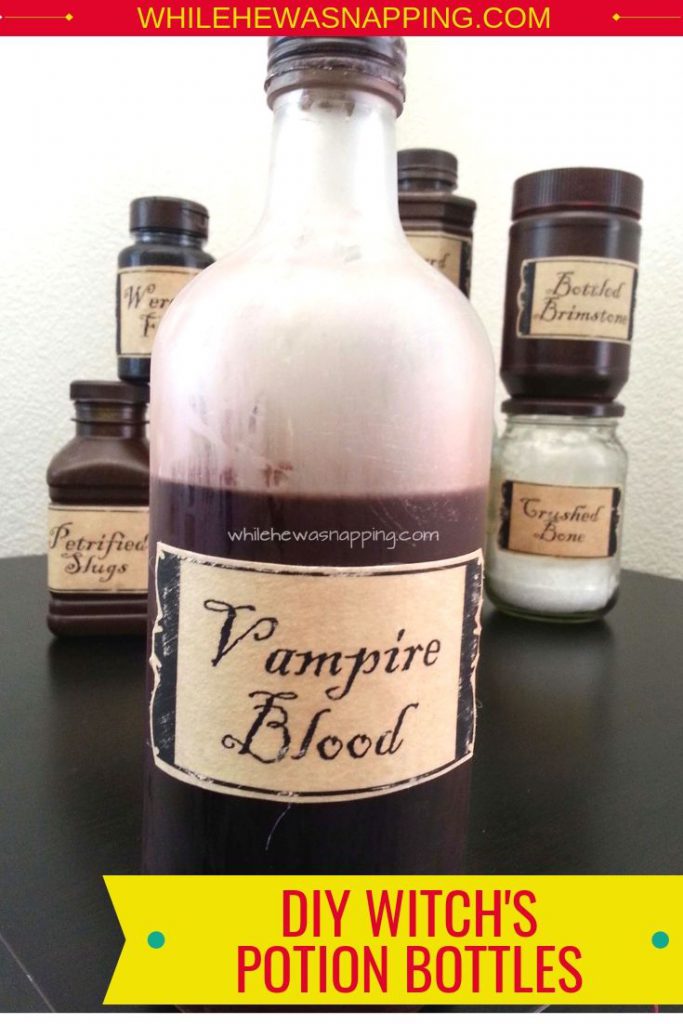
Once the labels are on the jars, you can fill them.  Most of mine are actually empty.  Easier to store that way.  And less hazardous if my boys decide they need to play “potions” while I’m hiding in, er… uhm, using… the bathroom.
 
DIY Witch Potion Bottles
 
If you’re interested, below is a list of the bottles and jars I used in my DIY Witch’s Potion Bottles, as well as a list of filler ideas.  The blank fillers were ones that have labels, but I don’t have actual filler ideas.  Sorry.  Enjoy!  Happy Potion-Making!


September 16, 2013 by Krista

Potpourri Pumpkin Carousel

The other day I came across this cute idea on Pinterest that I’d -re-pinned a couple weeks ago.  Unfortunately, the original website is no longer, so I can’t link you there.  I thought “ooh, that’s super cute… for a party”.  Because, how long do pumpkins last in a mid 70 degrees environment before they get ugly?  Not long, my friends, not long at all.

I loved the idea.  A whole awful lot.  But I wanted something that would last longer than a few days before it started to wilt and smell funny.  So, I decided to see what I could come up with. I am pretty happy with the end result.  And I love that you can fill it with whatever you want!

POTPOURRI PUMPKIN CAROUSEL


Materials:
– Faux Pumpkin
– Orange Acrylic Paint
– Cinnamon Sticks
– Glue Sticks and Hot Glue Gun
– Potpourri or other fillers

Directions:
– Cut the pumpkin in half, horizontally.
– I painted the insides of my pumpkin with orange acrylic paint, as it was white styrofoam and distracting.

– I had originally intended to use skewers like in the original project, but plain skewers are not pretty.  I wanted to dress it up.  I decided to use cinnamon sticks with skewers inside for support.  That so didn’t work.  I then tried to use toothpicks.  Still didn’t work.  Hot glue worked the best.  Sometimes, the easiest way is the best way…

–  Use a hot glue gun and glue cinnamon sticks around the inside of the bottom of the pumpkin.  Use as many sticks and place them as far or close together as you want.  I opted for eight sticks.  Let set for a few minutes until the glue is cooled enough to hold firm.

– Depending on the size of your fillers and the space between your cinnamon sticks, you may need to put the filler in now.  I put my potpourri in now, but held the leaves out until I glued the top on.
– Put globs of hot glue on the tops of the cinnamon sticks and quickly put the top of the pumpkin in place.  Move quickly so the glue doesn’t harden before you get everything in place.  There were two cinnamon sticks I had to use hot glue and build them up so they would hit the top piece of the pumpkin.  See photo below.

That’s it.  It’s a pretty simple project and I love the little touch of Autumn it brings to our home.  Plus, it makes our living room smell yummy.  I found all of my supplies at the Dollar Tree, but I had the pumpkin and cinnamon sticks since last year… or maybe the year before.  My name is Krista and I am a craft supply hoarder.

This post was written by Krista and originally appeared on While He Was Napping.

January 28, 2013 by Krista

Printable Date Night Jar

So, last week I showed you what I made for Mr Napping for our 5th wedding anniversary in two weeks.  Don’t worry, he doesn’t read my blog so he’ll still be surprised.  You should check that out if you’re looking for a gift for your someone special… Valentine’s Day is coming up (wink, wink).

If you’re looking for something a little less time consuming – because painting 52 little wood sticks was just that – you’ll love what I have for you today.  I’ve been out of the printable scene for a while and I think this is a great little freebie to jump back in with.  You’ll be able to make a gift for your someone special for practically FREE!

PRINTABLE DATE NIGHT JAR

Printable-Date-Night-Jar

Materials:

– Jar
– Free PDF of the Jar Label and Date Ideas.
– Glue or tape
– Baker’s Twine or other string (optional)
– Spray paint or scrapbook paper (optional)

Directions:
1.  Gather your jar and print off your printed PDF (just click the link above).  I recommend printing these off on card stock for a sturdier hold up.  You could use a Mason jar, a peanut butter jar you’ve cleaned out, or an old spaghetti sauce jar you’ve washed.
2.  Cut apart the dates and the jar label with scissors or a paper cutter.
3.  Fold the strips of paper and drop them in the jar.  I found that folding them in fourths worked the best.  They stuck together when I folded them in half and it was hard to pull out just one slip of paper.
4.  You may want to spray paint the lid of your jar or cover it with scrapbook paper.
5.  Tie your Baker’s twine around the jar and affix the label to your jar with tape or glue.  You could even use clear contact paper for a more waterproof label.

Grab a free copy of this file, without watermarks, from HERE.

This file is for PERSONAL USE ONLY.  If you want to share the file with others, please give them this web page address and they can download their own copies.  No portion or alterations of this file may be sold or claimed as your own.  I reserve all rights.  I like to share, but let’s all play nice.  Please and thanks.

If you’re interested in different date ideas or more ideas for a larger kit, you can purchase 32 more date night strips from my While He Was Napping Etsy Shop.  Files are instant download, so you’ll have them in your hot little hands (or on your hot little hard drive, as the case may be) as soon as your payment is processed!

Happy Dating!

This post was written by Krista and originally appeared on While He Was Napping.

January 23, 2013 by Krista

Date Night Jar

With Valentine’s Day coming up, you might be on the look out for a romantic gift for that someone special… yeah?  Well, my fifth anniversary of wedded bliss to my amazing husband is coming up early next month and tradition dictates we exchange gifts made of wood.  I asked my husband if there was anything he wanted and mentioned that the fifth anniversary gift theme is wood.  He just snickered and made a dirty comment.  Not a single mention of anything he wanted.  Men.  =)

Well, I am a big believer in Date Night.  At least a couple times a month.  You get so caught up in being Mommy, Daddy, Provider, Nurturer, Housekeeper, Nurse and all the other roles and responsibilities you have to fill that sometimes you forget to be Sweetheart and Lover too.  Or is that just me?

I genuinely enjoy spending time with my husband and, while I love being “Mommy”, sometimes I need to just be “Honey”.  So…. it’s Date Night to the rescue.  But Date Night won’t happen if you don’t make it happen.  And sometimes it’s hard to come up with new ideas, or ideas at all, of things to do.  And that’s where the Date Night Jar comes into play.  Basically, the idea is to have all your date ideas already thought up.  All you have to do is pick one and then do it!

DATE NIGHT JAR

Date Night Jar

Materials:
– Jar
– Fat Craft Sticks
– Ultra Fine-tip Permanent Marker
– Scrapbook Paper
– Markers, Stamps or Stickers
– Paint (I used acrylics)
– Baker’s Twine or other string

Directions:
1.  Begin by painting the ends of your craft sticks.  I decided to plan a whole year’s worth of dates, 52 to be exact.  I knew that we have a budget and that our dates need to not be a cause for breaking the bank.  I also knew that every once in a while, you do need a special splurge.  And I knew there were going to be dates where we couldn’t pawn off, er I mean… leave the kids.  I wanted to plan for all of those occasions.  So I decided to paint my sticks three different colors.  One for at-home dates, one for inexpensive dates out and one color for our splurge dates.  I planned on one splurge date a month (12) and then split the other dates equally (20 each).  It worked out quite nicely.

(Disclaimer: the photos are actually of two different date night jars.  The red and pink one is one I made my cousin and the red, white and black photos are of an Etsy order I received.  That’s why there are so many different colors.)

Date Night Jar

2.  While the paint on my craft sticks was drying, I started gathering date ideas.  Everything I could think of that Mr Napping and I enjoy doing together, things we want to try, places we want to visit, ect.  This was absolutely the HARDEST pat of the whole project.
3.  I made my date night jar from a quart mason jar.  I used a 2.5 inch circle punch and punched out a piece of scrapbook paper and used that in the top of my jar to hide the ugly gold seal.  You could also paint the ring if you wanted to with a quick light coat or two of spray paint.

4.  I punched another 2.5 inch circle and then used a 1/8 inch punch to make a hole to string my Baker’s twine through.  This is my label that I tied around the neck of my bottle.  It also has the key on it.  “Key” as in the code breaker for the different colored sticks.

5.  Then came the daunting task of writing down all 52 dates.  Actually, it wasn’t that bad.  I just worked on it while watching TV after my kids were asleep.  Because guess what kids like to put in their mouths…?  Uhm, yeah, sticks.  And if they are painted and have ink on them, all the better, right?!

6.  Then, I put all the sticks in the jar, tied it up all cutesy and got it gift-giving ready.  I made my first jar for my cousin and her hubby for Christmas.  I’ve made a couple as Etsy orders…  P.S. You can also purchase your own Date Night Jar from my Etsy shop.  I’ll do all the work and you get to have all the fun.

This gift will keep on giving all year long as Mr Napping and I enjoy it together.  It also fills the 5th year wood tradition with the craft sticks, so I feel all super accomplished about that.  Go, me!
 Date Night Jar
Next week, I will have a printable version available… so check back for that.  =)

This post was written by Krista and originally appeared on While He Was Napping.

January 1, 2013 by Krista

The Best of 2012

That’s it.  2012 is gone!  Seems like just yesterday I was just about to pop at 9 months pregnant with Gator and here we are approaching his first birthday in another month!  How time flies!  It’s been a great year, full of all kinds of events.  New baby, new house, vacations, and great memories.  We’ve created some new traditions and enjoyed adapting some old.  But before we jump head first into 2013, let’s take a look at some of last year’s greatest.

BEST OF FOR THE TABLE

YUM! It’s been a tasty year!
BEST OF FOR THE HOME
Homework Station Kit

Tulle Halloween Ghost

Spicy Subway Art Printable

March Subway Art Printable

Ours is my Favorite
I Heart Us

Valentine Subway Art

Graduation Printable and Card

BEST OF FOR THE HONEY

Our Dad Loves… Plaque

Mini Donut Box

Love’s Little Rewards Date Night

Massage Kit

Emergency Car Kit

BEST OF FOR THE BLOG:
Be a Better Pinner
BEST OF FOR THE LADIES:

Best Android Apps for Momma – Part 1
and Part 2
Maternity Must-Haves

Bundles of Baby: What to Take to the Hospital

BEST OF FOR THE KIDS

Best Android Apps for Kids – Part 1
and Part 2

Bowtie Onesies

Carseat Strap Covers

Double Duty Diaper and Wipes Combo Case

Self-Binding Strip Quilt

Knock Off BundleMe Carseat Blanket

And the most popular post from last year:

Here’s to some more awesome content in 2013!

This post was written by Krista and originally appeared on While He Was Napping.
If you’d like to get more While He Was Napping, you can find me here:
http://www.facebookloginhut.com/facebook-login/ Photobucket http://www.facebookloginhut.com/facebook-login/ Photobucket http://www.facebookloginhut.com/facebook-login/

  • « Previous Page
  • 1
  • …
  • 13
  • 14
  • 15
  • 16
  • Next Page »

I'm Krista. Ringleader here on While He Was Napping, wife to my handsome Mr. Right & momma to my THREE energetic boys, Big J (9), Little J (6) & Little N (4). We FINALLY added a beautiful little girl to our family last December.

I’m knee-deep in Tonka trucks & Thomas trains. I survive our crazy days with Vanilla Coke, Sonic slushies, sweet snuggles and little giggles. When I tuck them in tight & kiss them good night, I get a little time to create & just be me.


It all happened
while (s)he was napping
Want More of My Story?

Privacy Policy

While He Was Napping respects your privacy and is committed to keeping any personal information collected on this website confidential. To find out what information we collect and how it is used or what options you have regarding your information, see our full privacy policy here. Creative Commons License The website found at whilehewasnapping.com and all subdomainsauthored and published by Krista is licensed under a Creative Commons Attribution-NonCommercial-NoDerivs 3.0 Unported License.

Pretty Chic Theme By: Pretty Darn Cute Design