While He Was Napping

momma gets stuff done

  • Home
  • About
  • Archive
  • Do It Yourself
    • Crafts
      • No Sew
      • Painting
      • Paper Crafts
      • Repurpose Projects
      • Vinyl
      • Washi Tape
      • Kid’s Crafts
      • Fonts
    • Sewing
    • Decorate
      • Home Decor
      • Holiday Decor
    • Celebrate
      • DIY Gifts
      • DIY Your Party
  • Recipes
    • Beverages
    • Appetizer
      • Bread
      • Other Appetizers
    • Snacks
    • Main Dish
      • Meat
        • Chicken
        • Beef
        • Pork
        • Seafood
      • Vegetarian
      • Slow Cooker
      • 30 Minute Meals
    • Dips & Sauces
    • Salads
    • Pasta
    • Soup
    • Dessert
      • Cookies
      • Brownies
      • Cupcakes and Cake
      • Box Mix Recipes
      • Other Sweet Treats
    • Breakfast Food
      • Pancakes
      • Waffles
      • Muffins
      • Other Breakfast Food
  • Family
    • Babies
      • Pregnancy
      • Newborns
      • The 1st Year
    • Toddlers
    • Preschoolers
    • Kindergartners
    • 6-8 Year Olds
    • The Grown Ups
      • Date Night
      • Romantic Gifts
    • Self Care
  • For the Home
    • Cleaning
    • Organizing
    • Emergency Preparedness
  • Travel
    • Travel Tricks & Tips
    • Traveling with Kids
  • Tech & Gadgets
    • Must-Have Apps
    • Techy Home Appliances
    • Gadgets & Electronics
    • Blogging Tips
  • Printables
    • Posters
      • Quote Printables
      • Subway Art Printables
    • Printable Organizers
    • Printable Journals
    • Learning Printables & Worksheets
    • LDS Printables
  • Holidays
    • New Year’s
    • Valentine’s Day
    • St. Patrick’s Day
    • Easter
    • Cinco de Mayo
    • Mother’s Day
    • Father’s Day
    • 4th of July
    • Back to School
    • Halloween
    • Thanksgiving
    • Christmas
    • Holiday & Seasonal Printables

August 31, 2011 by Krista

It’s an EMERGENCY! Momma Edition

First, I want to thank everyone who left their congratulations on our big news.  We are definitely excited and I am counting the days until the temps drop below 90 degrees here!  It’s killing me!  My nesting instinct is in high gear already and My Mr. Right just rolls his eyes at each new projects I take on.  Mostly because he knows I’ll run out of energy before I complete it and he will have to help me.  But, he’s amazing and always steps up.  I have some fun stuff along the baby theme coming up, so be on the look out for that.  Now, let’s get down to business.


Being a busy momma, I have, on more than one occasion, run out the door with my purse flung over one shoulder, the diaper bag over the other and Little Monkey tucked under my arm while my other hand fumbles for the keys or the Sippy Little Monkey thought would be fun to throw or the toy slipping out of the diaper bag, all the while running down the stairs and up the hill to the parking lot..  After everything is in the car, the seat belts are buckled and our house is in the rearview mirror I realize, “Shoot, I never ________!”  Insert a variety of activities in the blank.  Finished my make-up, finished straightening my hair, put eyeliner on both eyes, found my matching sock (or knee high, if we’re on our way to church), painted the rest of my toes (which means some of them are painted… and some are not… new trend?  I think not). 


As I’ve mentioned before, My Mr. Right travels a lot with his job.  So, errands are done with Little Monkey and, if you have any experience with two-year olds, you know that their patience for sitting in a cart at the store or the hot car seat in the car is always ten times shorter than your errand list.  I try to run errands in the morning so that we are home in time for lunch and Little Monkey’s nap time.  In the rush of getting up and getting breakfast and dressed and ready, I always seemed to get shorted on some part of my routine.  Forget to brush my hair?  Yep.  Mascara on only one eye…?  Yeah, uhm, that one was awkward since I realized before our first stop and had 6 stops to make.  The looks I got were kind of finny though.  It’s simple things, but things that make a difference.  I got tired of being the harried, frazzled-looking mom while running errands.  The pity looks got old.  So… I came up with the emergency kit.  However, this baby doesn’t have band-aids, antibiotic ointment or cold compresses, no sirree.  Not that those things are bad.  But, this is Momma’s Emergency Kit.


2011-08-30_18-47-39_222        

Here’s the How:

1)  You will need:

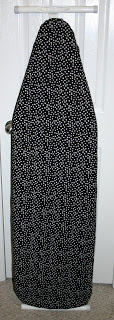
– A container of some sort.  I found my bag at Target in the travel-size products section.  It was a whopping $.99 and they had several designs to choose from.  I, myself, am a little obsessed with polka dots.  You could use a zippy bag or up-cycle an old sour cream container or whatever.  You don’t have to buy anything.

– Extras of your most trusted and favorite beauty supplies.  Some ideas:

– foundation, or at least a cover-up stick or tinted moisturizer

– lipgloss or chapstick

– mascara

– eyelash curler

– eye liner

– liquid to powder blush or a color stick

– eye shadow

– brow pencil

– nail polish remover pads

– extra pair of hosiery (or socks, or mittens, a scarf, whatever it is that you ALWAYS forget)

– Q-Tips

– nail clippers and file

– tweezers

– lotion

– $20 cash (or however much you prefer)

– small package of wet wipes


2)  You can put whatever you need or want in your kit.  Maybe you do want band-aids and antibiotic ointment in yours…  This is totally personalized to your needs and hectic life.  Just make sure that whatever you put in your kit can handle temperature changes.  It would be really lame (and not very helpful) if you went to use your foundation and it was frozen or something.  Depending on where you live, the temperature changes may be extreme.  You can check the labels on cosmetics for best storage temps.  Oh and if you’re up-cycling an old container, feel free to decorate your little heart out.

2011-08-30_18-42-33_386


3)  Take your “extras” and open any packages.  Packaging takes up space and this kit is meant to be compact.  Use a permanent marker and label them with the date you open(ed) them.  You should replace items approximately every three to six months, depending on the specific item.  Rotate your cosmetics if you realize something is coming up for replacement soon.  You’ll minimize waste. 


Most of my stuff I didn’t pay more than $2-3 for.  The exceptions are the brushes and the mascara.  (Little secret: check out the Dollar Store cosmetics aisle while you’re there.  The Maybelline blush and the Lorel eye shadow are slightly mis-tinted, but they are what you pay $4 for at Target, even down to the labeled packaging.  I can get over a little mis-tint for a 75% savings… Oh, and speaking of Target, they now carry the E.L.F. make-up line.  Check it out for your extras.  Most of their stuff is between $1-3 and I have been very satisfied with the quality.)

2011-08-30_18-42-14_226

2011-08-30_18-44-18_307

4)  This may be the most important step.  Ready?  Take your kit to the car!  Leave it there.  Tuck it under the passenger seat, in the glove compartment, or in the console.  You’ll want it somewhere out of the way, but still easily accessible.  Now, the next time you think, “Ah, I forgot to _______!” you’ll be covered. 


**Ok, please don’t apply make-up or remove toe nail polish or put on stockings or whatever while you are driving!  Be safe.  It won’t hurt you to take a couple minutes when you reach your destination to finish up whatever it is you need to do.  If you wreck your car, you will most definitely be late… and this emergency kit is fantastic, but that’s one thing it can’t fix.**


Now, go put your kit together and be the hottest, most put-together (and possibly fashionably late) lady out there!


Krista


Do you have any other ideas for what to put in your “emergency kit”?  Please share in the comments.  I’d love to get more ideas.

Pin It

August 28, 2011 by Krista

Coat Hooks

I’ve mentioned before that we have little space in our apartment.  And storage space is almost zilch.  So, back when it was still jacket weather (and that time is coming up again soon…), I had to come up with a solution to the coats and jackets that were haphazardly placed dropped around our home.  It was fairly simple and it has worked wonders.  It’s amazing.


2011-08-10_14-27-45_433


Here’s the How:

Materials:

A 1×6 Board, cut to your desired length.

Hooks and Hardware to hang, your choice of style and how many.

Drill

Screwdriver

Paint, if desired.


1)  You will need a board on which to attach your hooks.  You could attach them directly to the wall.  If you do this, you will need to locate the studs and hang them from those for stability.  My board is 23 inches long, which fits perfectly behind our front door.  Decide how long works for you.  Most home improvement stores will cut the board for you, for a small fee (sometimes, for free).

2)  Take your board and paint or stain it however you would like.  I started out with some green paint.  I ended up putting the whole thing together and decided I didn’t like the green.  It’s now brown instead and fits our decor better.  Let it dry completely.

DSC_2123

3)  Lay your hardware out on your board and mark the holes to drill for your hooks.  Start with a small drill bit and drill through your board.  You don’t want to make the holes too big or the screws won’t fit tightly.  Screw the hooks down to the board.  My screws stuck out the back a bit, so I asked My Mr.. Right if he would grind them down.  I got me a keeper, ‘cause he did just that.  I also attached a door stop to the top left corner of the board to help prevent our door from hitting the wall behind it.

DSC_2160

DSC_2161

4)  I then had My Mr. Right attach the board to the wall.  He drilled holes through the board and into the studs we were hanging our coat hooks from.  If you tighten your screws in past the surface of the board, you can fill the holes and you won’t even be able to see the screws holding your hooks to the wall.  We didn’t fill the holes because we’ll have to remove the hooks when we move in April.

2011-08-10_14-28-08_519

Step back and admire your new storage solution… and stop tripping over coats and jackets on the floor.  The best part of this whole project.


Krista


August 25, 2011 by Krista

Weekend Wander #44

Gah!  So, I didn’t get any facebook features done this week.  Sorry, peeps.  Hopefully, next week won’t be quite so hectic.  Anyways, this party is up a bit earlier than normal, but I’m exhausted.  So, you all party your little hearts out while I go take a nap.  But first, a few features from last week’s party.

Anna @ Ask Anna has some great suggestions for organizing a dorm room.  These tips are great for everyone though, so head over and check them out.  And then come organize my house… pretty please?!
Amanda @ City Girl Gone Coastal (btw, jealous!  I could use a beach fix right about now) has a great tutorial on making your own window frame.  I have a similar project in the works that I keep putting off.  Maybe seeing how cute her finished product is will give me a kick in the pants to get it done soon…
Over at Tales of a Trophy Wife you can find a great tutorial for recovering your ironing board.  My mom really needs a new cover for hers.  Is that a totally lame Christmas gift?  In any case, this is on the ‘possibilities’ list.  Btw, love. LOVE, L.O.V.E that fabric.
Congrats ladies.  Grab a featured button, if you’d like.
Thanks for linking everyone!
And let’s get this week a rockin’ and a rollin’!  Make sure you go a little mingling!  It’s a party, after all.  Don’t be lame and stand in the corner alone, go make some new friends!  And, GO!

August 23, 2011 by Krista

Back To School Printable

I know some of you have already started back to school already, maybe even a few weeks ago.  Here, the big day is next Monday for the traditional track schools (the year-round schools started a week or two ago).  My little family won’t be attending school this fall, but my sisters and brother will be.  My mom also works as a nurse for the district with the special needs children, so her schedule is very much determined by the schools as well.  I will admit that it’s been nice to have the school kids gone while Little Monkey naps… Less than impressive insulation lead to more than one way-too-short nap time this summer.  Here’s a printable for those of you who are going (or have already gone) back to school this year.

Click the images to download copies without a watermark.
SA Colors Subway Art


This little cutie is available in my Etsy Shop for just a few dollars.
Photo Subway Art


Good luck this year to all the students out there!  Learn lots! 

Krista

Pin It

August 22, 2011 by Krista

Blogging: Increasing Your Site Traffic

If you are new to Blogland, and even if you aren’t, you know that getting people to check out your site and it’s content is one of the biggest challenges of having a blog.  Some days are better than others and traffic fluctuates from month to month.  Here are a few tips and ways to get your stuff out there.

1.  Contribute to link parties.  A year into blogging and I still get the majority of my traffic from link parties I have participated in.  Link parties are collections hosted on one or more blogs that people can submit their ideas and projects to for others to browse.

If you do decide to join any parties, try to play by the host or hostess’ rules.  This often includes you displaying a link back to their site.  It’s only fair, right?  You display your stuff on their site and they get a little space on yours. There are ways to not allow partiers to link if they don’t have a link back to the host site now, so just do it.  I have found that a text link list, divided by days of the week, on my sidebar works best for me in terms of space on my blog.  The host site still gets their link on my homepage (and all of my other pages) and it’s easy for me to just go down my list when I’m linking up.  That way I don’t miss any parties I want to participate in.  I have not had any complaints from host sites about this method.
link parties

2.  Submit content to bigger sites.  It can be hard to put your stuff out there for people to reject, but the worst that can happen is that you’re told “No Thanks.”  If you complete a project with dollar store items, submit it to Dollar Store Crafts.  They might not post about it, but then again, they might.  I’ve gotten some great traffic from bigger sites.  Craft Gossip, One Pretty Thing and Tip Junkie are great sites to start with. 
Bigger Sites

3.  List your blog on blog directory sites.  This won’t get you a ton of traffic, but it will get your name out there to some who wouldn’t find you any other way.  Picket Fence Blogs and The Blog Guidebook are a couple sites you can list your site on for free.
Blog Directories

4.  Offer to do guest posts.  If you can get a post on a bigger blog, go for it.  Again, don’t count the little people out though.  A lot of times, smaller blogs have followers that larger blogs don’t.  Make sure your post is relevant to their site.  Don’t offer to do a sewing post on a food blog… The owner probably won’t take you up on the offer.

Accepting guest posts every once in a while can be helpful too.  You’ll get traffic from other blogs and it can be helpful when you want to keep your site active, but have real life going on too.  Moving?  Having a baby?  Vacation time?  Guest posters can contribute to your site and you both get a little exposure on each other’s sites, not to mention you can vacation without feeling like you need to check your blog.
Guest Post

5.  Social Media Networks.  This can be a two edged sword.  Why?  Every new platform you add offers your followers a new way to connect.  If someone doesn’t do much blog surfing or doesn’t have an RSS reader but spends time on Facebook everyday… well, Facebook is going to be easier and more convenient for them to follow you.  What’s the downside?  Every platform takes time to maintain and update.  Blogging, whether it’s for a profit or not, takes a lot of time.  It’s also a convenient way for others to share your content.  A quick click of the “Like” or “retweet” button and your content reaches all the friends of the button clicker.  There’s nothing better than advertising you don’t have to lift a finger for.
social media icons

6.  Allow (or request) your site to be listed in search engines.  Now that I have a decent amount of content on my site, I get quite a bit of traffic from Google searches.  You can add your site to Google HERE.  The major search engines are good enough for most people.  Google is the only one I’ve submitted to.  *Added:  As someone pointed out in the comments, you don’t have to submit your site to Google for them to find you.  I did notice an increase in my traffic from Google after I submitted my site though.  It’s like letting Google know that your site is legitimate and active.  It can help your content appear closer to the top in search results.  Site views with also help your content appear higher in search results.
search engines

7.  Discussion Boards and Forums.  I’ve had a couple of my links shared on various discussion boards and forums.  This will bring in traffic from people visiting larger websites.  You can’t really influence this, but if it happens, it’s always nice to say a quick thank you to the original poster.  Occasionally, I’ve had this lead to questions about the posted link and, eventually, other links are shared to my stuff too with more questions.  Letting the people who are following the link know that you are available and real makes you (and your site) more appealing.

8.  Advertising.  I have yet to actually pay for advertising.  There are several blogs that will button swap (display your button on their site while you display their button on your site).  It’s a win/win swap.  You can also sponsor giveaways.  I have sponsored my share of giveaways in exchange for free advertising.  I also accept sponsored giveaways for advertising on my site.  Sponsoring giveaways is often a little more affordable than outright purchase of ad space, especially on larger blogs and websites.

It doesn’t hurt to have business cards either.  Yes, business cards for a blog, even a hobby blog.  When someone asks what you like to do, pull out a card.  You don’t have to go into a huge explanation, they can check it out themselves later.
advertise

9.  Leave comments on other blogs.  This is a great tool, but there is a right way and a wrong way to do this.  Leave a valid, relevant comment.  Comment on something related to the post.  Let the blog owner know you actually read the post.  Don’t critique the post, project, recipe or whatever.  If you can’t say something nice, go comment somewhere else.  Who is going to go check out your site when you just pointed out everything (you think) is wrong with theirs?  It’s fine to link to your site in the comment, but “come see me” or “I follow you, come follow me” comments will cause more damage than help your case.  The link is an obvious invitation to come visit.  If I’m interested, I’ll follow your link.  Telling me to do so makes me feel like you’re bossing me around.  I don’t really like to be bossed around…
comments

10.  Don’t be afraid to share.  I was incredibly hesitant to publish (and advertise) my Ten Things I Hate About Your Blog post.  I felt like I was totally attacking other blogs by saying “If you have this and this and this, your blog is horrible”.  However, it is one of my more popular posts.  I was inspired to write the post by a similar one I found on Hope Studios.  I finally talked myself into pushing the ‘publish’ button when I realized I had been interested in the post on Hope Studios, maybe other people would be interested in this one.  It was a little scary waiting for reader reaction, but it turned out great.  You never know what people will like.  Just be tactful.
share it all

11.  Be patient.  If you are new to blogging, give it time.  The sites that have thousands of followers have been up and running for a while, often times for years.  Blogging is growing in popularity and the blogs that are starting up now are growing more quickly than my blog did in the beginning.  But it takes time to get your name and content out there.  There are millions and millions of blogs.  If you keep publishing good content, they will come.  The best bloggers focus on content, not numbers.  If you are all about the numbers, you will get frustrated, burned out and tired of blogging.  It takes time to grow a following.
patience

Number 11 is probably the most important, and the hardest, one to actually do.  I know I’m definitely still working on patience.  Yes, those are my stats up there.  As you can see, June was a fantastic traffic month.  July, not so much.  Could be that I only published 18 posts and took two weeks off of new content and linking to link parties (see how much linking up helps!?).  But, I’m ok with the rise and fall.  After all, aren’t roller coasters supposed to be fun? If blogging is a hobby, there is no reason to stress about the numbers. It’s supposed to be FUN!

Krista

  • « Previous Page
  • 1
  • …
  • 159
  • 160
  • 161
  • 162
  • 163
  • …
  • 231
  • Next Page »

I'm Krista. Ringleader here on While He Was Napping, wife to my handsome Mr. Right & momma to my THREE energetic boys, Big J (9), Little J (6) & Little N (4). We FINALLY added a beautiful little girl to our family last December.

I’m knee-deep in Tonka trucks & Thomas trains. I survive our crazy days with Vanilla Coke, Sonic slushies, sweet snuggles and little giggles. When I tuck them in tight & kiss them good night, I get a little time to create & just be me.


It all happened
while (s)he was napping
Want More of My Story?

Privacy Policy

While He Was Napping respects your privacy and is committed to keeping any personal information collected on this website confidential. To find out what information we collect and how it is used or what options you have regarding your information, see our full privacy policy here. Creative Commons License The website found at whilehewasnapping.com and all subdomainsauthored and published by Krista is licensed under a Creative Commons Attribution-NonCommercial-NoDerivs 3.0 Unported License.

Pretty Chic Theme By: Pretty Darn Cute Design