While He Was Napping

momma gets stuff done

  • Home
  • About
  • Archive
  • Do It Yourself
    • Crafts
      • No Sew
      • Painting
      • Paper Crafts
      • Repurpose Projects
      • Vinyl
      • Washi Tape
      • Kid’s Crafts
      • Fonts
    • Sewing
    • Decorate
      • Home Decor
      • Holiday Decor
    • Celebrate
      • DIY Gifts
      • DIY Your Party
  • Recipes
    • Beverages
    • Appetizer
      • Bread
      • Other Appetizers
    • Snacks
    • Main Dish
      • Meat
        • Chicken
        • Beef
        • Pork
        • Seafood
      • Vegetarian
      • Slow Cooker
      • 30 Minute Meals
    • Dips & Sauces
    • Salads
    • Pasta
    • Soup
    • Dessert
      • Cookies
      • Brownies
      • Cupcakes and Cake
      • Box Mix Recipes
      • Other Sweet Treats
    • Breakfast Food
      • Pancakes
      • Waffles
      • Muffins
      • Other Breakfast Food
  • Family
    • Babies
      • Pregnancy
      • Newborns
      • The 1st Year
    • Toddlers
    • Preschoolers
    • Kindergartners
    • 6-8 Year Olds
    • The Grown Ups
      • Date Night
      • Romantic Gifts
    • Self Care
  • For the Home
    • Cleaning
    • Organizing
    • Emergency Preparedness
  • Travel
    • Travel Tricks & Tips
    • Traveling with Kids
  • Tech & Gadgets
    • Must-Have Apps
    • Techy Home Appliances
    • Gadgets & Electronics
    • Blogging Tips
  • Printables
    • Posters
      • Quote Printables
      • Subway Art Printables
    • Printable Organizers
    • Printable Journals
    • Learning Printables & Worksheets
    • LDS Printables
  • Holidays
    • New Year’s
    • Valentine’s Day
    • St. Patrick’s Day
    • Easter
    • Cinco de Mayo
    • Mother’s Day
    • Father’s Day
    • 4th of July
    • Back to School
    • Halloween
    • Thanksgiving
    • Christmas
    • Holiday & Seasonal Printables

January 31, 2014 by Krista

{Printable} February Journal Calendar

How’s your Journal Calendar coming?  Well, here’s a peek at mine so far:

I will admit there were days I had to go back and fill in after the fact, but I won’t remember that in a couple months!  I probably won’t remember anything in a couple months, I’ll be a zombie mommy with sleep deprivation and a newborn!  All the more reason to write things down now, right?

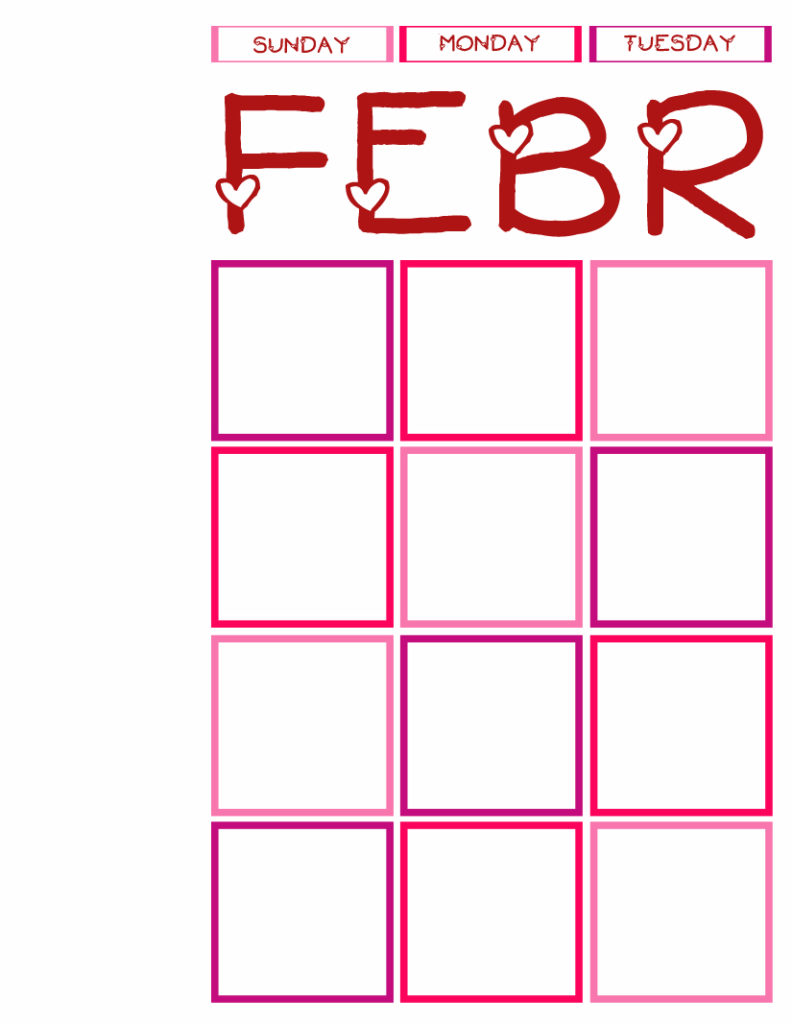
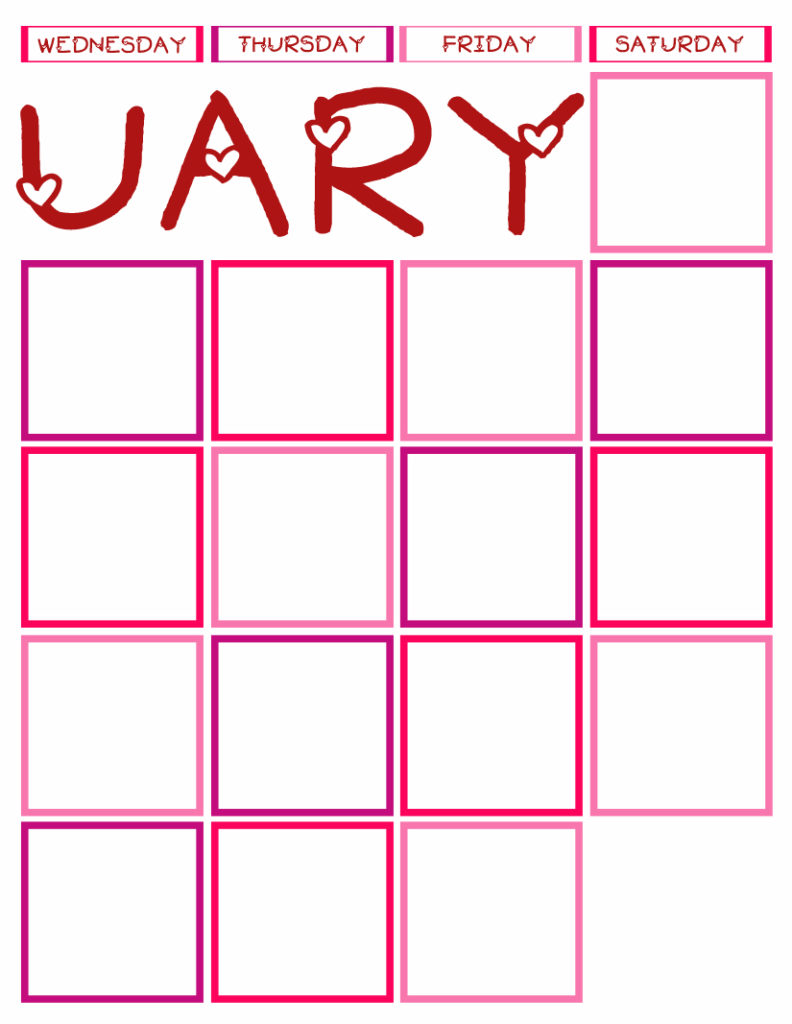
Here’s February’s Calendar.  Choose the corresponding pages for the style you like the most and print those.  These are formatted to 8×10″.  Right click, “save as” and print.  The whole set is still in my Etsy shop if you’d prefer a single time download for the rest of the year.  Then you can get it bound or whatever.
Calendar Journal 2014 Sun-Tues P&P

Calendar Journal 2014 Wed-Sat P&P
You can grab last month’s calendar here, in case you want to for whatever reason.

This post was written by Krista and originally appeared on While He Was Napping. 
 

January 30, 2014 by Krista

Chocolate Chip Egg-Free Cookie Dough

I love to bake and sweet treats are my favorite.  Cookies, cake, brownies, anything sweet and doughy is my kind of dessert (although I’m not gonna turn down fudge or anything either).  It’s been so hard not to take little snitches of the dough the last few months though!  Darn parasite.  I’m not usually terribly concerned about raw eggs, but while growing a person, I tend to be a little more cautious… So, it’s egg-free cookie dough to the rescue.  Egg-free recipes aren’t quite as good as regular cookie dough, in my opinion, but they come awfully close.  And when you haven’t had the real thing in months (and months and months), close enough is good enough. Especially, given the peace of mind that the little peanut is safe and sound.

I found a recipe on allrecipes.com, but all the reviews were about the changes people had made to the original (you can find the original at the link above).  So, instead of trying the original – no need to beat a dead horse- I just took the basics and adapted my own recipe.  I tweaked it a couple times, but finally came up with this.  YUM!

CHOCOLATE CHIP EGG-FREE COOKIE DOUGH
Ingredients:

– 1 1/2 cups Flour
– 3 Tbsp Granulated Sugar
– 1/3 cup Brown Sugar
– 1/2 cup Butter
– 1/2 tsp Salt
– 1 tsp Vanilla (I actually added closer to a tablespoon, but I like a strong vanilla favor.  A teaspoon is probably closer to what normal people like)
– 1/3 to 1/2 cup Milk
– 1 cup chocolate chips

Directions:
– Cream together butter and granulated sugar.  Add in brown sugar and flour.  Mix until combined, mixture will be crumbly.
– Add in salt and vanilla.
– Add 1/3 cup milk and mix well.  Add more milk if the dough is still dry.
– Add the chocolate chips.  Combine with a wooden spoon for best results.  I over-mixed one of my batches and it ended up being pretty sticky, so don’t mix excessively for a fluffier dough.
– Eat up!  I found this to be super tasty on graham crackers and in ice cream.  It made a good dip for apples too.

Store in an air-tight container in the fridge for up to a week.
Makes about 2 1/2 cups of dough.  Freezes wonderfully for up to 3 months.
** Be aware, there may be a small danger to consuming raw flour.  Most flour is heat-treated, but check your choice of flour to be sure.  Eat at your own risk.

I did bake a few of these, in case you’re looking for an egg-free cookie recipe.  They turned out okay and tasted just fine.  Mr. Napping actually really liked them.  A lot.  However, I did add 1/2 tsp of baking soda so I wouldn’t end up with pancake flat cookies.  Bake at 350F for 7-10 mins.

Other egg-free cookie dough recipes you might want to try:
– Chocolate Chip Egg-free Cookie Dough recipe at Center Cut Cook
– Egg-free Sugar Cookie, Chocolate Chip, and Cake Batter recipes at Willow Bird Baking.

This post was written by Krista and originally appeared on While He Was Napping.
 

January 29, 2014 by Krista

Printable Valentine Lip Balm Label

If you’re looking for a creative, useful and easy Valentine gift that isn’t overloaded with sugar, then I’ve got just the thing for you! These printable Valentine lip balm wrappers are the perfect way to dress up a little gift everyone will love – because, who doesn’t use lip balm?
 
Valentine Lip Balm Wrappers


VALENTINE LIP BALM LABELS MAKE EASY VALENTINE GIFTS

In 2012, I tried making my own lip balm. I did some research, bought my ingredients and it wasn’t long before I was totally hooked. I haven’t bought a single tube of lip balm since.

But whether you make your own or use your favorite brand from the store, these cute wrappers are a super easy and fun way to give a little valentine that doesn’t come with a sugar crash. And is actually useful too!


VALENTINE LIP BALM WRAPPERS

While I’d love to send you all a tube of lip balm with fun wrappers, I don’t have the hand muscles to write out that many address labels, so how about some printable labels instead?

You can make your own lip balms (my favorite recipe is below) or just wrap the labels around your favorite tubes you get at the store.

Easy peasy.

Just save, print, cut out and wrap. In 4 easy steps you’ll have Valentines you actually want and that won’t add to your waistline. Or your kids’ hyperactivity… You’re welcome.


MAKING YOUR OWN LIP BALM

Here’s my disclaimer on making your own lip balm: When you first decide to take this on, there is a bit of an investment.

This is a great project to split with some friends if cost is an issue. The shelf life of every ingredient is long enough that you won’t have to buy again for quite a while, depending on how much you make.

Affiliate Link Disclaimer

SUPPLIES NEEDED TO MAKE YOUR OWN LIP BALM:

  • Beeswax
  • Jojoba Oil
  • Liquid Vitamin E
  • Empty Lip Balm Tubes
  • Disposable Transfer Pipettes
  • Small glass measuring cup and small pot or a double boiler (I use the cup and pot method)


MEASURING YOUR WAX & OIL

  1. Disinfect and sanitize your lip balm tubes. You can boil them in water for 1-2 minutes or run them through a sanitize cycle in the dishwasher. Just make sure they are good and dry before you try to fill them.
  2. Measure out a 2 part wax and 1 part oil ratio into your glass measuring cup. I typically use approximately 3 Tbsp of wax and 1 to 1.5 Tbsp of oil. 

* Note: If you’re thinking, “Uhm, lady that’s bad math! That’s not a 2:1 ratio!” you’re right, it’s not. 

My husband carries his lip balm in his pants pocket and he likes it a little firmer so it doesn’t melt and get squishy from his body heat. I do more of a 3:1 ratio for him. That’s why there’s a little math discrepancy there.

You’ll have to play with the ratios a little to figure out what you prefer.


MELTING YOUR WAX AND OIL

  1. Carefully place the glass measuring cup in the small pot. Fill the small pot about 3/4 of the way full with water, being careful not to get any water in your glass measuring cup. If you get water in the measuring cup, your lip balm may not set up correctly.
  2. Place the pot, with the measuring cup in the water, on the stove over medium heat. You want the water to come to a rolling boil, but nothing so rapid as to overturn your measuring cup.
  3. Melt the wax completely and use a transfer pipette to mix the oil and melted wax together.
  4. Add 1-3 drops of liquid vitamin E oil for extra moisture and protection. The vitamin E even offers a little SPF protection which makes it perfect for wearing outdoors.
  5. Using the pipette, mix the melted wax and oils.

FILLING YOUR LIP BALM TUBES

  1. Stand your sanitized lip balm tubes up on a steady surface near the pot.
  2. Use the pipette to transfer melted wax into the tubes. Add as much wax as you can before it overflows, as the lip balm will compress and shrink as it cools down.

    Some times this is just a little trial and error. If you over flow a tube, just move to the next one and you can clean up any spillage after the lip balm cools with a paper towel.
  3. After the lip balm has cooled, place the lids on the tubes and snap into place. Use a paper towel to wipe up any lip balm that has gotten on the outside of the tubes or your work surface.


STORING YOUR LIP BALM

I store my lip balm tubes in the fridge to extend longevity, but jojoba and vitamin E typically have 1-2 year shelf life, minimum. Check the expiration dates on your oils because sometimes they sit in a warehouse before you ever get them. You’ll know the oils have gone bad if they start to smell rancid.

I’ve never made a batch with these ingredients and had them go bad. We use them too fast and I make 20-40 tubes at a time. This usually lasts us about 6 months or so.

I have used other oils and had my lip balm go rancid. If you use other oils, you’ll need to check their expected shelf life and expiration dates.

Once your tubes are cooled and cleaned you’re ready to apply some fun labels.


PRINTING YOUR VALENTINE LIP BALM LABELS


DOWNLOAD YOUR VALENTINE LIP BALM WRAPPERS!


ASSEMBLING YOUR VALENTINE LIP BALM GIFT

SUPPLIES NEEDED:

  • Wrapper label download. Hit that blue link above to download your labels
  • Printer paper or sticker paper to print your labels
  • Scissors or paper cutter
  • Glue stick or packing tape
  • Lip balm tubes to wrap

Valentine Chapstick Labels


DIRECTIONS:

  1. Download and save the file to your computer.
  2. Print the labels on your printer paper or sticker paper. If you use sticker paper, make sure you’re printing on the label side of the paper, not the backing. This will depend on your printer and you may need to do a test print of the labels to check it.
  3. Cut out the labels with the scissors or paper cutter.
  4. If you want to write a personalized message on the wrapper, do it now – before you put it on the tube. Your kids can still address their class valentines if they want with this method.
  5. Stick the wrapper labels to the lip balm tubes with the glue stick or packing tape if you used regular printer paper. If you used sticker paper, remove the backing and stick the labels to the chapstick tubes.

    Note: I still recommend covering the labels with packing tape, even if you print on sticker paper because it gives the label a little extra protection.

    If you print with an inkjet printer, the ink will still run and fade if you drop the tube in the tub or send it through the laundry, but little water drops and splashes won’t hurt it.

    If you print with a laser printer, the tape helps keep the label from rubbing off.


* Disclaimer: Due to different monitor and printer settings, I can’t guarantee color matching.


WANT MORE VALENTINE LIP BALM WRAPPER DESIGNS?

If you’d like 10 more designs that are a little more grown up, you can get the whole collection in my Etsy Shop, including one you can personalize after you print it. Just use a pen or marker to write your favorite initials on the tree trunk wrapper. 

Valentine Lip Balm Label Wrappers


January 28, 2014 by Krista

Vertical ‘Stained Glass’ Heart Garlands

So, last Fall I posted about our ‘Stained Glass’ Leaves the boys and I made.  We used the same technique to make these.  When you stumble on a good thing, add it to your arsenal.  I love the way these look in my kitchen window and that my boys tell everyone who visits “we made that”!

STAINED GLASS HEARTS  

Materials:
– Wax Paper
– Crayons
– Iron
– Scissors
– Thread or Fishing Line
– Hole Punch
– Knife
– Old towel, paper towels, newspaper or something else to protect your work surface and your iron.

Directions:
– Make the ‘stained glass’ like we did back in the Fall.  Refer to THIS POST for those directions.  The less wax between the sheets of wax paper, the better.  You just want the colors, not a solid sheet of crayon wax.
– After you’ve melted the crayons to your wax paper, let it cool.
– Use the scissors to cut heart shapes out of the wax paper sheet.  Cut various sizes, fat hearts, skinny hearts, tall hearts, and small hearts.  The more color variation you can get in each heart, the neater they will look.  If your kids are coordinated enough, let them help cut hearts (or let them use your heart paper punch if you have one large enough).

– Use the hole punch to make holes in the hearts.  I used a 1/16″ punch.  For vertical garlands, you’ll need a hole at the top and bottom of each heart, except the last heart on the string.  It just needs a top hole.  If you do horizontal garlands, your holes will be on each side.  Let the kiddos help string the hearts.
– Cut a length of thread and string each heart onto the garland.  You can use a small piece of Scotch tape to secure the hearts in place if you’re worried about them sliding.  Some of my heavier hearts (the ones with thicker wax in them) hung funny, so I just taped over the holes and the top and bottom to hold them right side up.
– Repeat for multiple strings of hearts.  Secure in a sunny window.  I just used a small piece of tape.  Enjoy!


This post was written by Krista and originally appeared on While He Was Napping.


January 28, 2014 by Krista

DIY Gel Air Fresheners

I posted last week about DIY toilet fizzers and trying to curb the swamp monsters that grow in our toilets.  Hopefully, between those and these air fresheners, our bathrooms will be cleaner and smell better with less of my time spent in rubber gloves, up to my elbows in the toilet. To check out the fizzers, click the link above.

So… I live in a house with three boys.  Two of which are toilet trained.  One of them is four years old.  If you have ever been in a men’s room, or walked by one, they don’t usually smell very good.  Granted, I don’t have hundreds of men using my bathrooms every day, but my four year old has… shall we say… less than careful aim.  Most of the time, everything makes it where it’s supposed to and the toilet even gets flushed.  But, if he’s in a hurry or just doesn’t care, it’s a stinkin’ mess.  Literally.  He’s old enough to use the restroom by himself, so I don’t always catch his carelessness right away.  Which often leaves my bathroom smelling more like a truck stop restroom.  Ew.

I first saw this idea on One Good Thing by Jillee.  If you’ve never been there, you should really go check it out.  In just a few minutes… of course.  I saw the idea and that’s about where I took off on my own and didn’t follow the directions, like at all.  So, if you don’t like my way, check out Jillee’s for a good alternative.

DIY GEL AIR FRESHENERS
 

Materials:
– 2 packets Knox Unflavored Gelatin
– 1 Tbsp Salt (keeps the gelatin from molding)
– 1 Tbsp Baking Powder (helps deodorize)
– 2 Cups Water
– Heat Resistant Jars with lids (I used three 4oz clean baby food jars)
– Essential Oils for fragrance (your choice – I used cedarwood and pine, lemon and lime, and peppermint and lavender combinations)
– Washi tape and paper (optional)
– Cinnamon sticks or other additives (optional)
– Food coloring (optional)

Directions:
– Mix 1 cup of hot water and the salt and baking powder together in a small saucepan on the stove.  Stir together until the salt and baking powder dissolve.
–  Remove the pan from the burner and SLOWLY pour the packets of gelatin into the water, stirring while you do so.  I dumped the first packet in all nonchalant and willy-nilly.  It foamed up and nearly overflowed.  I went slowly with the second packet and it worked out much better.
– Return to the burner and stir until gelatin dissolves.  Remove from burner and add 1 cup of cool water.  Mix together.
– Pour the gelatin mixture into your clean jar.  If you want to add color, put in a tiny drop of food coloring and mix it until well combined.  You don’t really even need a whole drop, I just shook the excess dye off the top of the dropper.
– Add your essential oils.  I did about five drops of each oil, ten drops total.  I made one with a cedarwood and pine combination, one with lemon and lime and the last with peppermint and lavender.  Scents are totally at your discretion.
– Put in any additives, if you want.  I broke up a cinnamon stick and put that in one jar.  Jillee used some silk flowers in hers.  Little figurines would be cute too.  If I didn’t think it would cause World War III, I’d have put a Lego man in one for the kids’ bathroom.
– Allow gelatin to set.  I put mine in the fridge overnight, just to help it out.
– Punch holes in the lids of the jars with a hammer and nail (or a screw will work too, I was too lazy to go looking for a nail).  Put the lids on the jars and decorate if you’d like.
–  Place in bathroom and ta-da!  Hopefully, things will smell much better from now on…

This post was written by Krista and originally appeared on While He Was Napping.


  • « Previous Page
  • 1
  • …
  • 70
  • 71
  • 72
  • 73
  • 74
  • …
  • 231
  • Next Page »

I'm Krista. Ringleader here on While He Was Napping, wife to my handsome Mr. Right & momma to my THREE energetic boys, Big J (9), Little J (6) & Little N (4). We FINALLY added a beautiful little girl to our family last December.

I’m knee-deep in Tonka trucks & Thomas trains. I survive our crazy days with Vanilla Coke, Sonic slushies, sweet snuggles and little giggles. When I tuck them in tight & kiss them good night, I get a little time to create & just be me.


It all happened
while (s)he was napping
Want More of My Story?

Privacy Policy

While He Was Napping respects your privacy and is committed to keeping any personal information collected on this website confidential. To find out what information we collect and how it is used or what options you have regarding your information, see our full privacy policy here. Creative Commons License The website found at whilehewasnapping.com and all subdomainsauthored and published by Krista is licensed under a Creative Commons Attribution-NonCommercial-NoDerivs 3.0 Unported License.

Pretty Chic Theme By: Pretty Darn Cute Design