While He Was Napping

momma gets stuff done

  • Home
  • About
  • Archive
  • Do It Yourself
    • Crafts
      • No Sew
      • Painting
      • Paper Crafts
      • Repurpose Projects
      • Vinyl
      • Washi Tape
      • Kid’s Crafts
      • Fonts
    • Sewing
    • Decorate
      • Home Decor
      • Holiday Decor
    • Celebrate
      • DIY Gifts
      • DIY Your Party
  • Recipes
    • Beverages
    • Appetizer
      • Bread
      • Other Appetizers
    • Snacks
    • Main Dish
      • Meat
        • Chicken
        • Beef
        • Pork
        • Seafood
      • Vegetarian
      • Slow Cooker
      • 30 Minute Meals
    • Dips & Sauces
    • Salads
    • Pasta
    • Soup
    • Dessert
      • Cookies
      • Brownies
      • Cupcakes and Cake
      • Box Mix Recipes
      • Other Sweet Treats
    • Breakfast Food
      • Pancakes
      • Waffles
      • Muffins
      • Other Breakfast Food
  • Family
    • Babies
      • Pregnancy
      • Newborns
      • The 1st Year
    • Toddlers
    • Preschoolers
    • Kindergartners
    • 6-8 Year Olds
    • The Grown Ups
      • Date Night
      • Romantic Gifts
    • Self Care
  • For the Home
    • Cleaning
    • Organizing
    • Emergency Preparedness
  • Travel
    • Travel Tricks & Tips
    • Traveling with Kids
  • Tech & Gadgets
    • Must-Have Apps
    • Techy Home Appliances
    • Gadgets & Electronics
    • Blogging Tips
  • Printables
    • Posters
      • Quote Printables
      • Subway Art Printables
    • Printable Organizers
    • Printable Journals
    • Learning Printables & Worksheets
    • LDS Printables
  • Holidays
    • New Year’s
    • Valentine’s Day
    • St. Patrick’s Day
    • Easter
    • Cinco de Mayo
    • Mother’s Day
    • Father’s Day
    • 4th of July
    • Back to School
    • Halloween
    • Thanksgiving
    • Christmas
    • Holiday & Seasonal Printables

June 19, 2013 by Krista

When Google Reader Disappears…

With only a few short weeks left until Google Reader is no more, this post was begging to be written.  I talked briefly about Reader alternatives in THIS POST.  If Feedly isn’t your thing though, then maybe Bloglovin’ is for you.  Bloglovin’ is a fabulous platform for keeping up with all your favorite blogs.  And if you want to make sure you stay up to date with While He Was Napping… I’ve made it super easy for you. Wink, wink.

Follow on Bloglovin

Still not sure about Bloglovin’?  Let me tell you why you should switch… and switch now:

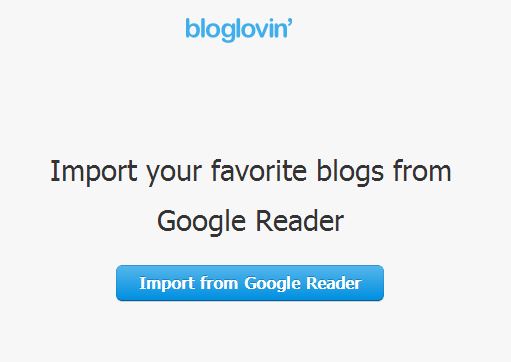
With the fabulous import tool, you can easily pull all of your current subscriptions into Bloglovin’ in just a matter of minutes or even less.  No worries about losing your favorite blogs or having to manually update your list.  Simply visit this page to import your current Google Reader subscriptions: 

http://www.bloglovin.com/import/reader

This will show up and all you have to do is click that great big blue button and specify which of your Google accounts you would like to sync, should you have more than one.  Bloglovin’ will then import your Google Reader subscriptions and you’re all set.  That’s it.

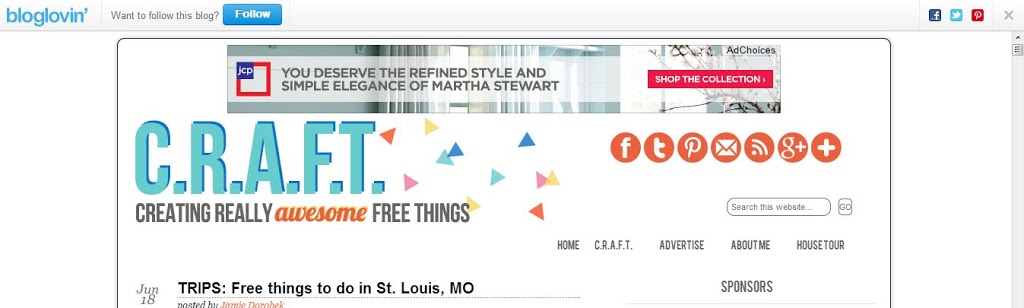
Another nice thing about Bloglovin’ is that you get to see the post on the actual blog.  Having designed my own blog, I know what kind of time goes into it.  What a pity that all those hours and hours of work and arranging and re-arranging be missed out on by those reading from a Reader.  With Bloglovin’ that’s not the case.  You see the post inside the Bloglovin’ navigation frame, but it’s on the actual blog.  You get the best of both worlds… simple and easy navigation through your chosen blog subscriptions and you get to see each blog.  (Plus, I believe that your page views actually count for the blogger this way.  I’m not completely positive on that though, so don’t quote me.  While every blogger will tell you page views don’t matter, they’re lying.  Page views do matter.  For lots of reasons.  But that’s a whole ‘notha post!  Just know that your fave bloggers will thank you for the numbers.)

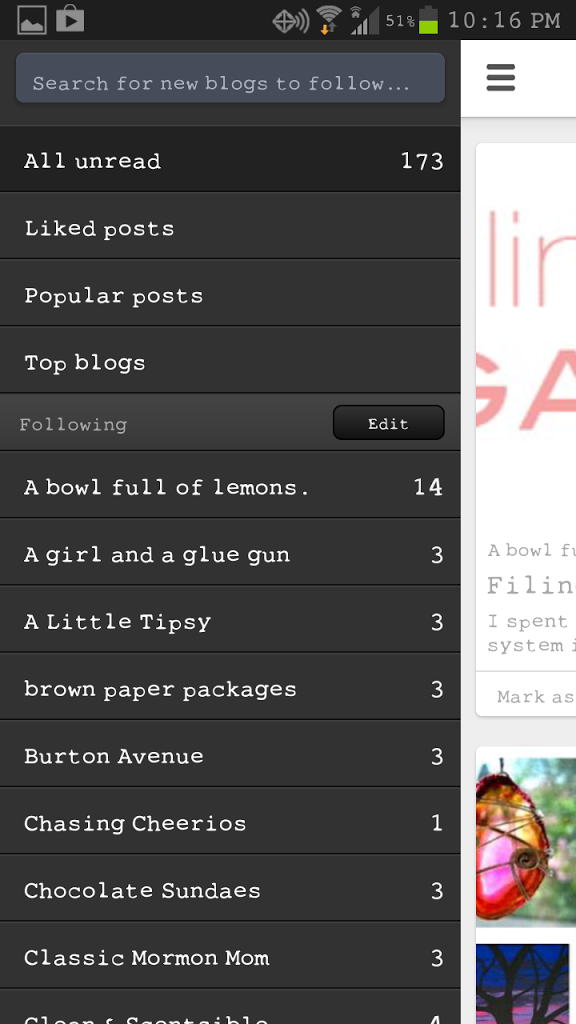
Notice in the photo that super teeny tiny gray box with itty bitty font in the bottom left corner?  It actually has the blog address there, meaning you are actually on that blog.  Notice the Bloglovin’ navigation buttons at the top, making for easy navigation through the blog.  Looks like I have some catching up to do on Kaysi’s blog… 173 unread posts… eeep.

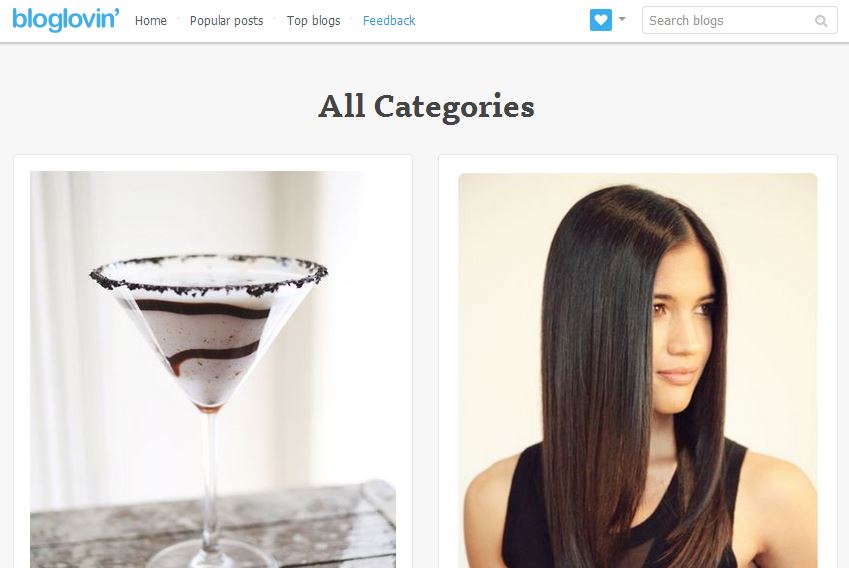
I love how easy it is to find and add new blogs to your Bloglovin’ account.  Like I said earlier, you actually view all the posts on the blog.  You can browse popular posts and top blogs, putting great, new, fresh content in easy access.  The photos are beautiful and enticing.

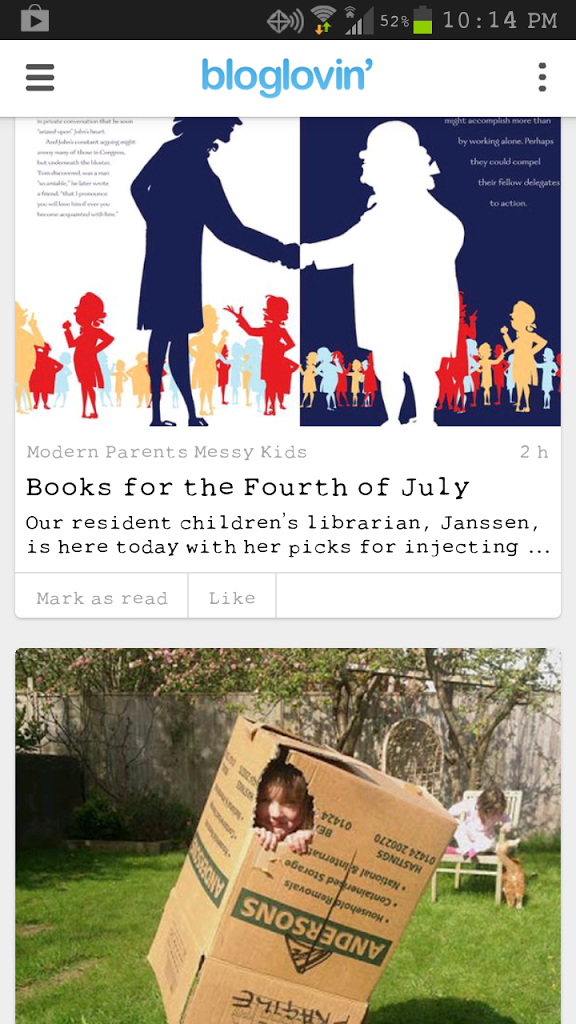
When you find something intriguing, which you will, it will again open on the actual blog.  So what if you decide you want more from this blogger?  Not to worry!  In the navigation frame, there’s a simple, yet hard to miss “Follow” button.  A simple click and you’re signed up to get all the goodies that blogger decides to share.  See it in the photo below?  Top left corner if you need a hint.

I’m not sure what the Bloglovin’ app is like for Apple devices, as I’ve never had any experience with it, but I do know it’s available.  I can’t imagine it’s subpar… if you have comments, please add them below.  I do know that the Android app is fabulous and I just might renege on my previous dedication and switch from Feedly, which admittedly, I haven’t used much.  {But, I don’t know that it’s Feedly’s fault… just not much time for a blog-reading binge.}  I love the clean and crisp layout.  Look at those big photos and the quick synapses is just enough to pique my interest or skip it today.  It’s not only easy to navigate and user-friendly, it’s pretty!

I can pull up my favorite blogs easily or I can see the most recent content.  

It’s still easy to find new blogs and fresh content with the top blogs and popular post features available on the mobile version as well.  And the search bar… looking for car trip activities?  Type it in.  Bam.

Tag your favorite posts or ones you want to come back to later – great baby shower idea and no one you know is expecting?  Like the post and then easily look it up when you need it.

So… are you convinced?  Let’s see.  Here’s the test: all you have to do is click the button below (there’s more good stuff coming your way if you do…) and then follow the link to sync your other Google Reader subscriptions.  Download the mobile app for your devices from the App or Play Stores and easily stay up to date on all your favorite blogs!  Don’t loose out on all your favorites just because Google Reader is disappearing!  Join Bloglovin’!

Follow on Bloglovin

http://www.bloglovin.com/import/reader

This post was written by Krista and originally appeared on While He Was Napping.
Never miss a thing:
http://www.facebookloginhut.com/facebook-login/ Photobucket http://www.facebookloginhut.com/facebook-login/ Photobucket http://www.facebookloginhut.com/facebook-login/

Join the newsletter for exclusive content and giveaways!

June 17, 2013 by Krista

Kid’s Felt Road & Track Set

This was actually one of Monkey’s Christmas gifts.  Yep, I am really THAT slow.  It actually was a pretty easy project and only took two hours or so, minus drying time.  When I, or Santa, gave it to him… well, he didn’t really play with it much.  I’m not sure it’s just because there were so many new toys or if he was still a bit young for the whole putting it together thing.  But he loves this felt road set now.

FELT ROAD & TRACK SET
DIY Felt Road

 
Materials:
– 36″x36″ Felt Sheet (I got mine at Michael’s in the kid’s craft section for about $4)
– Yellow Puffy or Dimensional Fabric Paint (bought mine at Wal-Mart for $1)
– Good scissors – they don’t have to be good, but it’ll make your life easier!
Directions:
– I just free-handed the different shapes and lengths of road pieces.  I used a piece of chalk and drew the shape, making minor adjustments until I was happy with it.
–  Then I cut out the pieces I’d drawn and used them as a pattern for the other pieces so there was some continuity in them.  You can make the road any shape you want, but these are the shapes and quantities I used:

2 – Semi Circles (They can make roundabouts or sharp curves)
2 – Swoopys (Creates a little jog in the road)
8 – Large Corners
8 – Small Corners
4 – Short Straights
8 – Medium Straights
12 – Long Straights

DIY Felt Road

– Once all the pieces are cut out, lay them out and draw the yellow lines down the middle of each piece with the puffy paint.  Let them dry completely.  The only pieces you need to put lines on both sides are the swoopy pieces.

Double-Sided-Felt-Road

– I had the idea to put velcro on the ends of the pieces, but that was more work than I wanted to take on at Christmastime.  Monkey is just careful and doesn’t complain about it.  The only issue is when Gator wants to play too, but he plays Godzilla…

Felt-Road1

These are super nice because they are compact.  We can pack the whole felt road set into a gallon size zipper bag and take them with us anywhere.  They are machine washable, should Gator grab the pieces with graham cracker goobers all over his hands.  They are durable and soft and a favorite at our house.  Totally worth a little bit of my time to have happy boys… Now I just need to make another set for Gator…

Now available in my Etsy Shop.

This post was written by Krista and originally appeared on While He Was Napping.

June 14, 2013 by Krista

Weekend Wander #127

Welcome, Friends!  

Sorry about the lack of posting this week… I was unexpectedly slammed with Etsy orders for these:

And doing 23 of them in 5 days left little time for much else.  Like dishes and laundry, let alone anything cool and fun.  I’m not complaining and I loved being able to help so many awesome dads get a  little personal shout out on just how fabulous they are.  I actually enjoyed making every single one (well, except maybe the last one… but that was mostly because I had to REmake it. Turns out, fixing projects isn’t nearly as fun as doing it the first time.) but I wouldn’t mind a little break right about now!  =)  I’ve weeded enough vinyl yo make my fingers hurt.

Funny story… my wedding ring has about 13 small diamonds in it.  I had a dream that these little diamonds kept falling out and I was trying to gather them up because I knew Mr Napping would be so mad if I lost them.  I kept picking them up and I’d turn my finger over and it was little vinyl dots stuck all over my fingers instead of diamonds!  Maybe I’ve had my share of vinyl for a little while…?

Anyway, I hope your week wasn’t as hectic and had some fun in it too.  Let’s take a look at some of the links from last week…  Please pin from the original source.  These awesome ladies deserve their props!

I am loving this freebie at Second Chance to Dream
These sweet potato bacon kebabs at Strong Mod look super delish.

I love this bag Bethany at Sweet Bee Buzzings made… WANT!

This foot wash would be worth it’s weight in gold at my house.
We’re always tracking in mud and dirt on our feet.
Make your own with the tutorial at Wonderfully Made.

There were sooo many more links I wanted to feature, but I’m running out of time to get this party up.
If you were featured, feel free to grab one of these:

<a href=”http://whilehewasnapping.blogspot.com”> <img src=”http://whilehewasnapping.com/wp-content/uploads/2013/06/WHWNWWFeatureButton.png” >


Thanks to everyone who linked and a super thank you to everyone who visited the links.  That’s what makes the party even more fun!  Mingle it up peeps!  And now for this week.  And… GO!

Photobucket

<a href=”http://whilehewasnapping.blogspot.com”> <img src=”http://i769.photobucket.com/albums/xx332/WhileHeWasNapping/WHWNWeekendWanderButton.png” >

This post was written by Krista and originally appeared on While He Was Napping.
Never miss a thing:
http://www.facebookloginhut.com/facebook-login/ Photobucket http://www.facebookloginhut.com/facebook-login/ Photobucket http://www.facebookloginhut.com/facebook-login/

Join the newsletter for exclusive content and giveaways!

June 10, 2013 by Krista

DIY Crayons

So, I have been lucky enough to try out some of Wholeport Crafts fantastic supplies.  They have tons and tons of silicone molds for great prices.  While the molds are fun for food, we’ve been having fun with them in other ways too!

Not too long ago we dug deep into our craft stash and came up with some cool projects to do.  One of those was…

DIY PUZZLE CRAYONS


Materials:
– Old crayons
– Silicone mold (we used this Puzzle Mold)
– Oven
Directions:
– Break up the old crayons into small pieces, small enough to fit into the molds.
– Heat the oven to 350F.
– Fill each of the mold cavities with the crayon pieces.  If you want all the same color, use all pieces of the same color.  If you like a “tie-dye” effect, mix up the crayon piece colors.
–  Bake for 10 minutes or until melted.  If you make mono-color crayons, stir the melted wax with a toothpick to get a single solid color.
–  Let cool overnight.
–  Get out the paper and let your kiddos go wild.
We did have a bit of an issue… our crayons hardened with a layer of clear wax on the top of the crayons.  Monkey got a little frustrated when the crayons didn’t “work” because it was writing with the clear wax.  I’m not sure why the crayons separated like that.  Maybe it was because I used the cheap crayons.  Maybe the oven was too hot.  Or cold.  Or maybe I looked at them wrong.  I don’t know.  If you have any ideas, clue me in so we don’t have this issue next time.

This post was written by Krista and originally appeared on While He Was Napping.
If you’d like to get more While He Was Napping, you can find me here:
http://www.facebookloginhut.com/facebook-login/ Photobucket http://www.facebookloginhut.com/facebook-login/ Photobucket http://www.facebookloginhut.com/facebook-login/

June 7, 2013 by Krista

Weekend Wander #126

Welcome back, everyone!  You should all be done with school by now… unless you’re dealing with the dreaded “summer school”.  Did you say that with your evil villain voice?  I hope so.  Whether summer has left you with more time to spend on projects or less, I hope you’re finding a little time to create!  So… What’cha been up to?

Sorry, I’m out of time for features… maybe I’ll get them added tomorrow…?
Thank you to everyone who linked last week.
I’d love if you’d grab a button or post a link back so others will come and party too, pretty please!

Photobucket

<a href=”http://whilehewasnapping.blogspot.com”> <img src=”http://i769.photobucket.com/albums/xx332/WhileHeWasNapping/WHWNWeekendWanderButton.png” >

You know what to do!  Link ’em party people!

Oh, really quick……

Have you entered the Pick Your Plum giveaway?  There’s still time!  Get your entries in!


Also, check out this awesome new service for backing up all those mobile photos instantly!  Don’t loose precious memories simply because you lost your phone!


This post was written by Krista and originally appeared on While He Was Napping.
If you’d like to get more While He Was Napping, you can find me here:
http://www.facebookloginhut.com/facebook-login/ Photobucket http://www.facebookloginhut.com/facebook-login/ Photobucket http://www.facebookloginhut.com/facebook-login/

  • « Previous Page
  • 1
  • …
  • 93
  • 94
  • 95
  • 96
  • 97
  • …
  • 231
  • Next Page »

I'm Krista. Ringleader here on While He Was Napping, wife to my handsome Mr. Right & momma to my THREE energetic boys, Big J (9), Little J (6) & Little N (4). We FINALLY added a beautiful little girl to our family last December.

I’m knee-deep in Tonka trucks & Thomas trains. I survive our crazy days with Vanilla Coke, Sonic slushies, sweet snuggles and little giggles. When I tuck them in tight & kiss them good night, I get a little time to create & just be me.


It all happened
while (s)he was napping
Want More of My Story?

Privacy Policy

While He Was Napping respects your privacy and is committed to keeping any personal information collected on this website confidential. To find out what information we collect and how it is used or what options you have regarding your information, see our full privacy policy here. Creative Commons License The website found at whilehewasnapping.com and all subdomainsauthored and published by Krista is licensed under a Creative Commons Attribution-NonCommercial-NoDerivs 3.0 Unported License.

Pretty Chic Theme By: Pretty Darn Cute Design