While He Was Napping

momma gets stuff done

  • Home
  • About
  • Archive
  • Do It Yourself
    • Crafts
      • No Sew
      • Painting
      • Paper Crafts
      • Repurpose Projects
      • Vinyl
      • Washi Tape
      • Kid’s Crafts
      • Fonts
    • Sewing
    • Decorate
      • Home Decor
      • Holiday Decor
    • Celebrate
      • DIY Gifts
      • DIY Your Party
  • Recipes
    • Beverages
    • Appetizer
      • Bread
      • Other Appetizers
    • Snacks
    • Main Dish
      • Meat
        • Chicken
        • Beef
        • Pork
        • Seafood
      • Vegetarian
      • Slow Cooker
      • 30 Minute Meals
    • Dips & Sauces
    • Salads
    • Pasta
    • Soup
    • Dessert
      • Cookies
      • Brownies
      • Cupcakes and Cake
      • Box Mix Recipes
      • Other Sweet Treats
    • Breakfast Food
      • Pancakes
      • Waffles
      • Muffins
      • Other Breakfast Food
  • Family
    • Babies
      • Pregnancy
      • Newborns
      • The 1st Year
    • Toddlers
    • Preschoolers
    • Kindergartners
    • 6-8 Year Olds
    • The Grown Ups
      • Date Night
      • Romantic Gifts
    • Self Care
  • For the Home
    • Cleaning
    • Organizing
    • Emergency Preparedness
  • Travel
    • Travel Tricks & Tips
    • Traveling with Kids
  • Tech & Gadgets
    • Must-Have Apps
    • Techy Home Appliances
    • Gadgets & Electronics
    • Blogging Tips
  • Printables
    • Posters
      • Quote Printables
      • Subway Art Printables
    • Printable Organizers
    • Printable Journals
    • Learning Printables & Worksheets
    • LDS Printables
  • Holidays
    • New Year’s
    • Valentine’s Day
    • St. Patrick’s Day
    • Easter
    • Cinco de Mayo
    • Mother’s Day
    • Father’s Day
    • 4th of July
    • Back to School
    • Halloween
    • Thanksgiving
    • Christmas
    • Holiday & Seasonal Printables

January 13, 2016 by Krista

How to Make a Snack Stadium for The Big Game

This shop has been compensated by Collective Bias, Inc. and its advertiser. All opinions are mine alone. #GameDayGlory #CollectiveBias

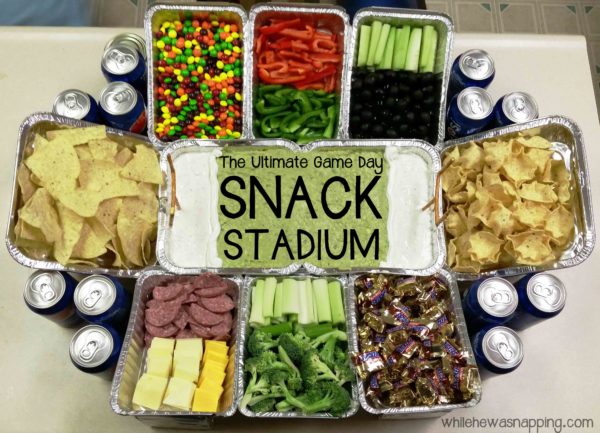
It’s nearly here! The Big Game is only weeks away! Game Day is a day of celebration and what’s a celebration without food? I’ll be completely honest, we aren’t big sports people in the Napping house. I’m probably the biggest sports fan… However, we are big fans of awesome food. And I love sharing amazing food in awesome presentations. If you do too, I have the prefect answer for how to present your Game Day munchies: a Snack Stadium.

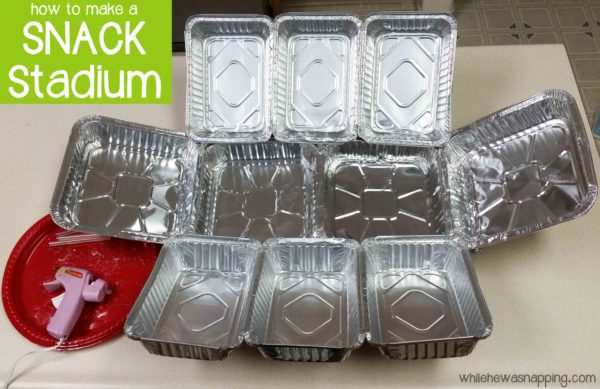
HOW TO MAKE A SNACK STADIUM

The Ultimate Game Day Snack Stadium Blimp View


Materials:
– Four 8×8″ aluminum foil pans
– Six 5×7″ aluminum foil pans
– Hot glue gun and extra glue sticks
– Pieces of cardboard for constructing supports
– Aluminum foil to cover cardboard pieces
– Tape, if desired

Direction:
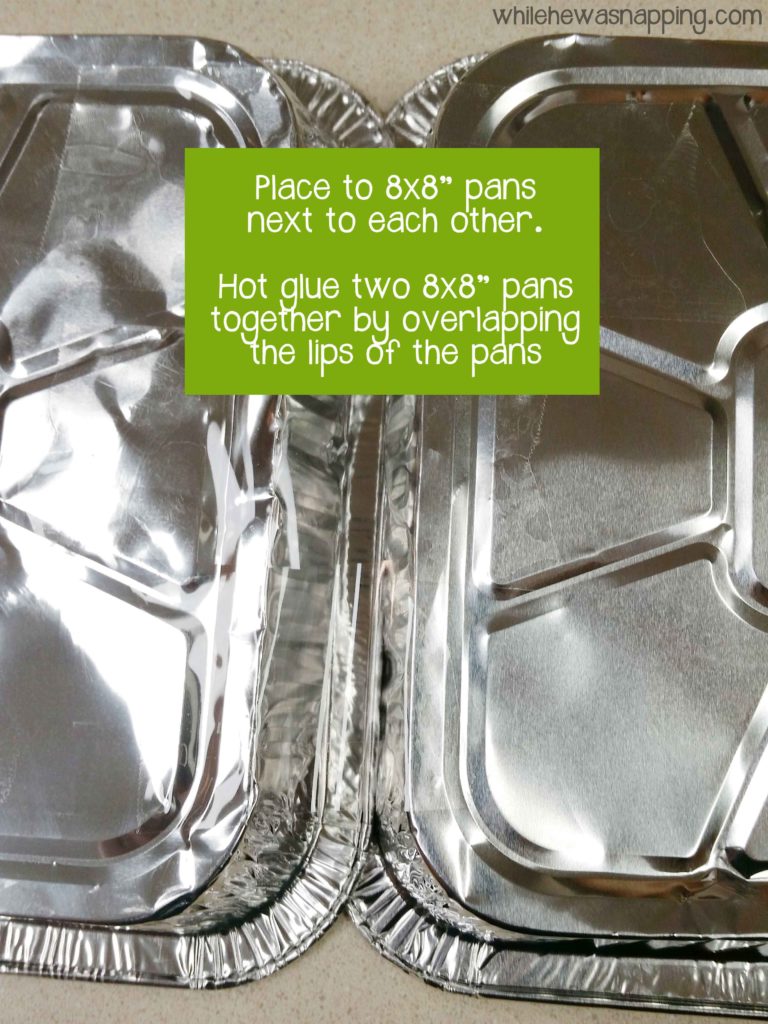
– Begin by laying out two of the 8×8″ pans side-by-side. Hot glue the lip of one pan on the top of the other pan. Press the pans together until the glue is cooled.

Snack Stadium for The Big Game with Aluminium Foil Pans Step 1
– Arrange the third 8×8″ pan at a slight angle to the two pans already glued together. A 30° angle is about right. This isn’t a math test though so you don’t need to pull out your protractor or anything. Glue it to the first two pans at the angle.

Snack Stadium for The Big Game with Aluminium Foil Pans Step 2
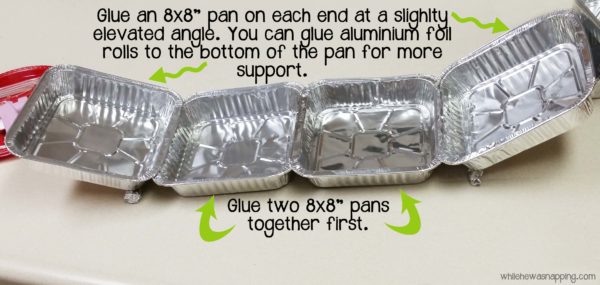
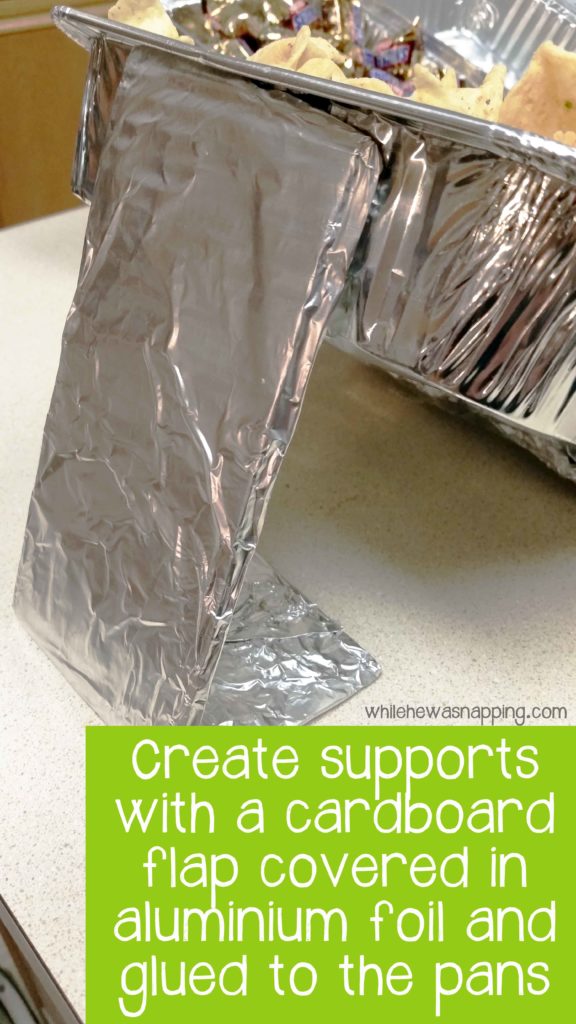
– As I began filling my pans, I found I needed more support on the end of the pan that was elevated. It will be easier to add supports now. I cut cardboard flaps off a box, scored them so they would bend and stand up and then wrapped the flaps in aluminum foil. I glued the aluminum foil support just under the lip on the pan. They worked perfectly. I made six of them.

Snack Stadium for The Big Game with Aluminium Foil Pans Supports
– Glue three 5×7″ pans together by the lips of the pans so they are in a row.
– Glue the three 5×7″ pans to the first set of 8×8″ pans with the end elevated to a 30° angle (approximately). Glue a support on each end of the line of 5×7″ pans.

Snack Stadium for The Big Game with Aluminium Foil Pans Step 4
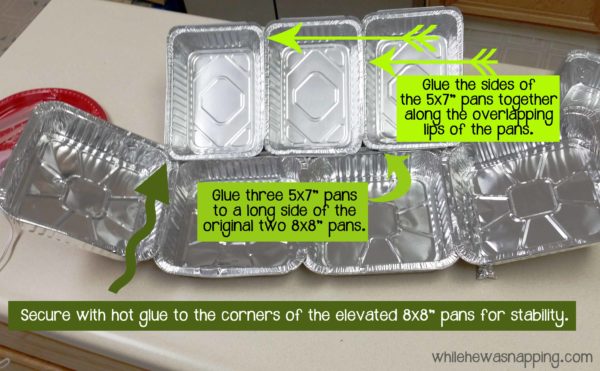
– Repeat the above steps on the other side of the first set of 8×8″ pans.
– When you get the remaining pans attached to the first set of 8×8″ pans, the elevated pans will meet at the corners of the original set of 8×8″ pans. Glue the corners of the elevated pans to each other for more stability.
– You may also want a few drops of glue attaching the 5×7″ pans to the original set of 8×8″ pans to help hold everything in place.

How to Make a Snack Stadium for The Big Game with Aluminium Foil Pans

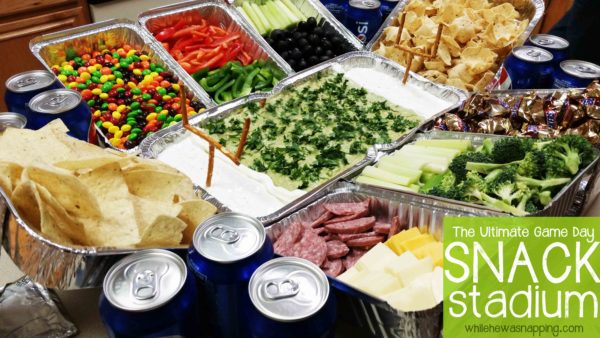
That’s it. Now comes the fun part: filling up the pans with amazing snacks! I used SNICKERS® Minis, Skittles®, a 12 pack of Pepsi™ 12 oz cans, TOSTITOS® Scoops Party Size, and TOSTITOS® Medium Chunky Salsa, all purchased at Walmart, in my stadium and filled in the remaining pans with some of our other favorite munchies. The best part of a snack stadium is that you can put in your favorites!

The Ultimate Game Day Snack Stadium

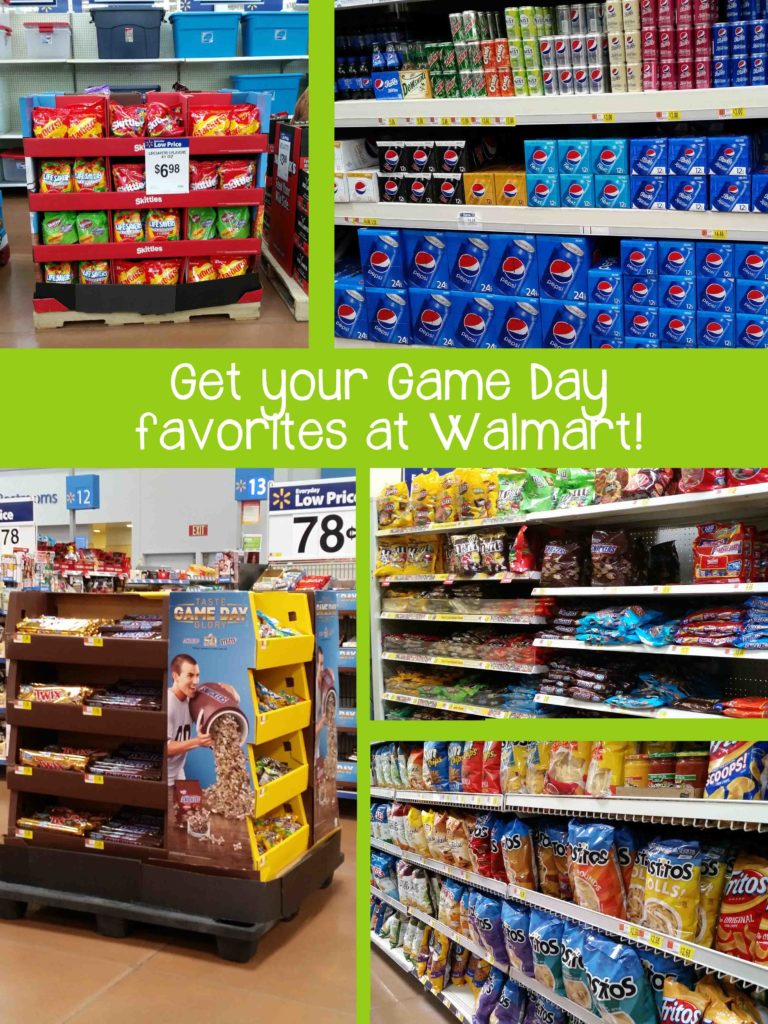
So, start planning your Big Game celebration! Find all the SNICKERS®, Skittles®, Pepsi™, and TOSTITOS® products you’ll need to make an amazing display on Walmart.com. Be sure to check out more amazing ideas to fuel your plans and build the best snack stadium ever!

Snack Stadium for The Big Game with Aluminium Foil Pans In Store

December 14, 2015 by Krista

Cork Reindeer Ornament

I have been wanting to make this cork reindeer ornament since I made my cork jewelry organizer. Yeah, almost three years ago… But, I made the cork jewelry organizer in February. After Christmas. So, I saved it. And saved it. Annnnnnd saved it. But no more! I have put those extra corks to great use and turned them into some fabulous Christmas ornaments! This would be great for little bit older kids – there was a little too much hot glue for my not-so-careful kiddos. But it was super cathartic for me… so there’s that.

CORK REINDEER ORNAMENT

Cork Reindeer Ornament


Materials:
– cork
– googly eyes
– small black or red pom pom
– 2 brown pipe cleaners
– paper clip and wire cutters
– glue gun and glue sticks

Cork Reindeer Ornament Materials

Directions:
– Hot glue the eyes in the middle of the cork, close together.Cork Reindeer Ornament glue on eyes
– Hot glue the pom pom on the end of the cork for the nose.
Cork Reindeer Ornament glue on nose
– Shape the pipe cleaners into antlers and hot glue them to the sides of the cork.
Cork Reindeer Ornament make antlers out of pipe cleaners

Cork Reindeer Ornament glue antlers to cork
– Shove the end of the paper clip into the top of the cork. Leave about an inch of space after the paper clip comes out of the cork. Use the wire cutters to carefully bend the paper clip into a small eye hook.  Secure with a bit of hot glue to keep it in place if desired.
Cork Reindeer Ornament paper clip in top of cork

Cork Reindeer Ornament cut paper clip about an inch from the cork

Cork Reindeer Ornament use round nose pliers to make an eye hook
– Attach a hook to the paper clip loop and hang it on your tree.

Cork Reindeer Ornament Trio

These went together so quickly that I ended up with three of them… so now we have three cork reindeer ornaments. Maybe I’ll slap years and names on the backs of those babies and give them to my boys as gifts. But seriously – so EASY! I would have (should have!) made them with the 8-11 year old girls I used to have Activity Days with a couple years ago. They would have loved these reindeer ornaments!

Cork Reindeer Ornament Rudolph Ornament

December 11, 2015 by Krista

Glass Snowman Ornament

This snowman ornament turned out cuter than expected, considering the simple materials. And that it was kind of a last-ditch effort to salvage the ornament I originally made. The original wasn’t as awesome as I’d pictured and I was rather disappointed with it at first. Luckily, attempt #2 turned out much better in the form of this cute snowman ornament. Quick, easy and cute. Just my kind of craft. Ready to make yours?

GLASS SNOWMAN ORNAMENT

Epsom Salt Snowman Ornament - Great project for kids


MAKING YOUR SNOWMAN ORNAMENT

Materials:
– Glass ornament. I used these glass disc-shaped ornaments I found on Amazon (affiliate link)
– Epsom salt
– School glue
– Hole punch
– Scissors
– Construction paper – orange and black
– Hook or paper clip to hang the ornament

Directions:
– Take the cap off the ornament carefully and set it aside. Pour some glue into the ornament. If you want the salts only on one side like I did it, be careful and only get glue on one side of the ornament. If you want the whole thing to have salts on it, pour the glue in and spread it around the entire ornament.

– Pour Epsom salt into the ornament and shake the ornament until salt covers all the glue. I left a little extra in the glass ornament too. You can leave it or empty it out, your choice.

– Use the hole punch to punch out circles from the black construction paper. If you want larger eyes (like I did) use the scissors to cut larger circles for the eyes also from the black construction paper.

Snowman Ornament using glass ball, black construction paper & glue stick

– Use the glue to put the eyes and mouth on the outside of the glass ornament.

Snowman Ornament cut eyes from construction paper and glue onto glass ball

– Cut a small triangle from the orange construction paper for the nose. Glue it on with the glue too.

Snowman Ornament made with a glass ball and construction paper
– Let the glue and Epsom salt dry and then carefully put the cap back on the top of the ornament. Attach a hook and hang on the tree.

Epsom Salt Snowman Ornament

That’s it. Who knew construction paper would work so well?! I was hoping to use craft foam to give it a little more dimension, but I didn’t have orange… or black. So, I improvised with the paper and it still turned out great. If the snowman pieces fall off I’ll use hot glue to stick them back on. I haven’t had a problem with them yet though. Despite the fact that my baby played Godzilla with the tree yesterday. Even attempted to ascend to the tip top… that boy will be the death of me.


A SNOWMAN ORNAMENT THE KIDS CAN MAKE

This was simple enough that my boys could have helped. They didn’t… because they were sent to bed early. We need to sing “Santa Claus is coming to Town” more often it seems. A more frequent reminder of all that’s at stake seems to be necessary.

Epsom Salt Snowman Ornament - Fun for the kids

Little J was pretty disappointed he didn’t get to make one… he thought they turned out great and wouldn’t stop touching it. His smile is pure joy. It’s my favorite.

Epsom Salt Snowman Ornament - The kids love these

All snowmen need a scarf, right? This little guy might get this little accessory in a day or two. And I just know you’re dying to know what was so awful with the first ornament that I had to try again… go ahead. You be the judge.

Snowman Ornament Disc Let It Snow Original

December 9, 2015 by Krista

15 Craft Stick Ornaments Your Kids Can Make

Our ornament mission continues… however, we’ve hit a little snag. My boys had a rough night yesterday – and by that I mean the whole day was pretty rough – so the ornament craft I was going to show off didn’t get made. So, instead I found 15 awesome craft stick ornaments to make with the kids! These are ornaments that both my boys (ages 6 & 3.5) are capable of making (mostly) on their own. So… are you ready for 15 craft stick ornaments that will rock your Christmas tree?! Let’s do this!

15 CRAFT STICK ORNAMENTS YOUR KIDS WILL LOVE TO MAKE

15 Craft Sticks Ornaments You Can Make With Your Kids


Angel Craft Stick Ornament found on Leaf and Letter HandmadeThis cute angel craft stick ornament has me swooning with the sheet music dress she’s all fancied up in. There’s a couple different sizes over on Leaf and Letter Handmade and I love the variety. Angels come in all shapes and sizes too… at least I think so.

Tin Soldier Craft Stick Ornament found on Remodelando La CasaThese Tin Soldier ornaments are giving me ornament envy. They are darling and I just love them. Growing up, my grandma had a movie that my cousins and I loved to watch with a tin soldier as the hero who rescues the beautiful ballerina in distress. I don’t even know what the movie was, but these Tin Soldier ornaments on Remodelando la Casa remind me of that little part of my childhood.

Santa & Friends Craft Stick Ornaments found on Creative Me Inspired You
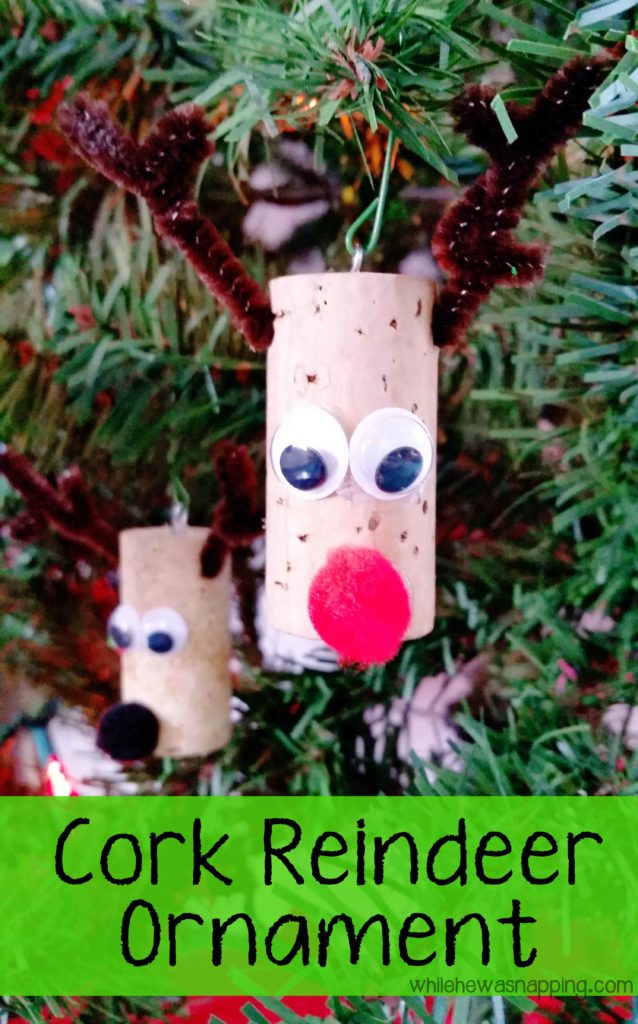
Because sometimes even Santa needs his buddies! I love this collection of adorable characters on Creative Me Inspired You. Big J is getting to the point where he actually likes to draw and color and will put in a decent little bit of effort – you should see the Star Wars battle he illustrated at church on Sunday. He’d like this especially. My younger two would like to sword fight with the sticks… ah, boys.

Colorful Trees Craft Stick Ornament found on Trisha Brink DesignDo these trees just make you happy or what?! I love the colors in these cute craft stick ornaments over on Trisha Brink Design. I might even have colored sticks like these in my craft bin I intended to use to teach Little J his colors. Sometimes, craft supply hoarding collecting pays off.

Christmas Tree Craft Stick Ornament found on Gingersnap CraftsMy favorite thing about these adorable trees over on Ginger Snap Crafts? The simplicity. This is the kind of craft that my boys have the skill, patience and attention span to do. I love the school glue option that means they can do it all themselves. And the option I have to use hot glue if the buttons pop off later and need a quick fix.

Star Craft Stick Ornament found on Happy HooligansThis cute star craft stick ornaments is something I want to make myself. Sometimes I just need to let a little glitter flow through my veins in my testosterone-overdosed house. I might even break out the glitter for these cute little stars that are over on Happy Hooligans.

Snowman Craft Stick Ornament found on A Day of WondersThese snowmen! Aren’t they just the cutest craft stick ornaments? I love the single stick construction and the simple, already-have-it materials that make this project on A Day of Wonders just so charming. This would be a great project for my kids, as we could break it up rather easily when their attention spans start to wane. I also love that the project coordinates with a book and these could be bookmarks too.

Santa Hat Craft Stick Ornament found on Buggy and BuddyMy Little J would love these cute craft stick ornament Santa hats that are over on Buggy and Buddy. He is completely fascinated with Santa Claus this year. And not in the he-brings-me-lots-of-presents way either. He just thinks Santa is one cool dude. And seriously, he is. And I love that these are simple and easy.

Stable Craft Stick Ornament found on Adventures of a DIY MomI am LOVING this stable ornament. Such a great project to help my boys focus on what really matters during the Christmas season. And still simple enough for my busy, busy wiggle worms. Over on Adventures of a DIY Mom, there’s also a white version. I can’t decide which I like better. And there’s lots of other great nativity ornaments at the bottom of the post too. Make sure you check those out too!

Snowman Head Craft Stick Ornament found on Cindy DeRosierThis looks like a fabulous project for my Big J! A little more detailed, but still easy and absolutely cute. I also like that this snowman craft stick ornament over on Cindy DeRosier could be done with any size craft stick for a bit of variation. Mini sticks would make a super cute tree ornament and jumbo sticks would be a fun wall hanging.

Star Wars Craft Stick Ornament found on Vicky BaroneMy boys would go CRAZY for these Star Wars craft stick ornaments over on Vicky Barone! Absolutely cRaZy! And it would go perfectly on our Star Wars Tree. I have already added these to our “to-make list” and can’t wait to do it with my boys. We might have to come up some of the other characters too. The new movie comes out in nine days and I can’t think of a better way to celebrate.

Reindeer Photo Craft Stick Ornament found on renajjonesPhoto frames and cute reindeer?! I love these craft stick ornaments! There’s some other cute reindeer ornaments over on Rena Jones too, but these reindeer frames are my favorites. Big J could do this, but it might be a bit above Little J’s abilities. It would be a great mom-son activity to do together. We’d just have to do them one at a time.

Sled Craft Stick Ornament found on While He Was NappingI have loved this sled ornament ever since it went live two years ago. While I wasn’t the mastermind behind this adorable little project, I’m so happy that it went up on my site and that Rebekah (who blogs over at Somewhere in the Middle) let While He Was Napping be it’s home. I made these last year with the 8-11 year old girls at church and then we tied them to plates of cookies and delivered them to some of the older people at church. The sleds were a total hit.

Reindeer Craft Stick Ornament found on Crafts by Courtney
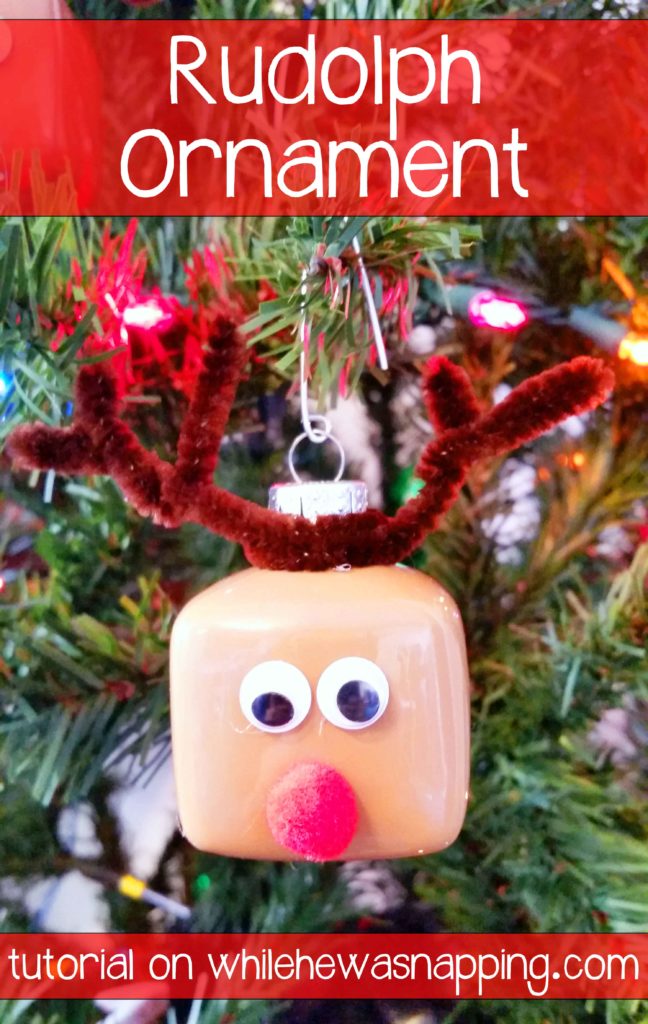
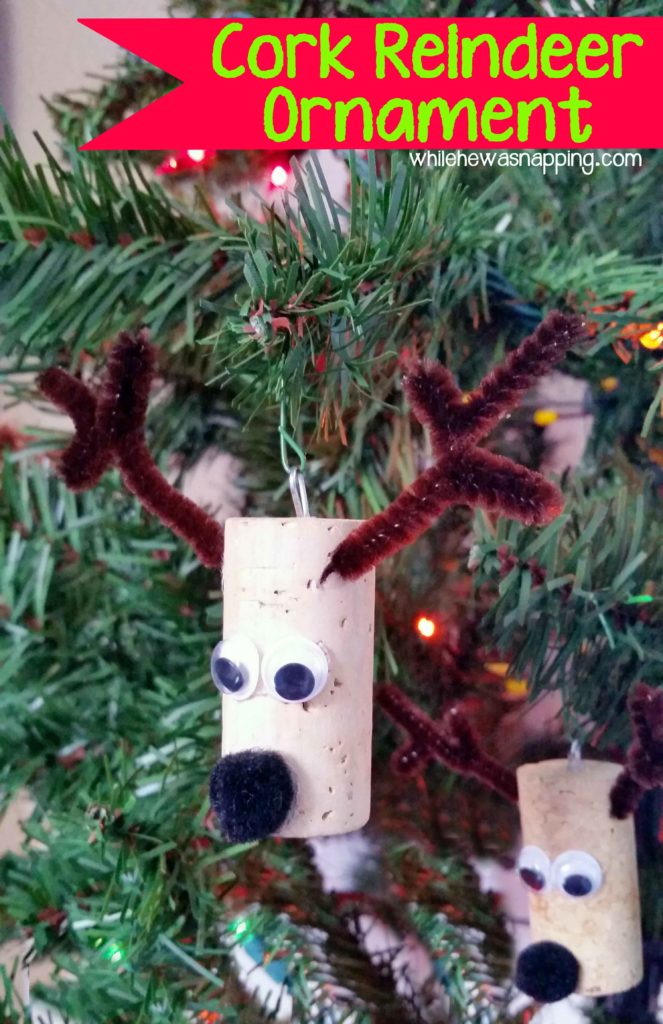
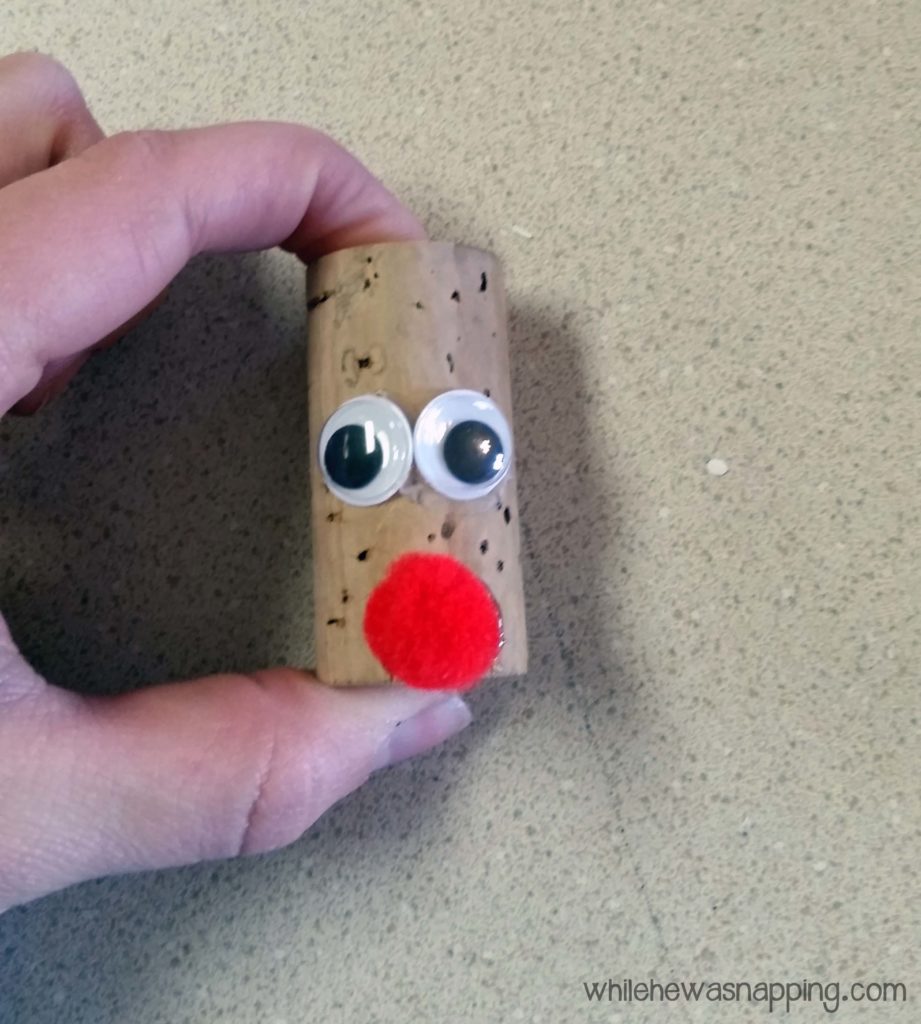
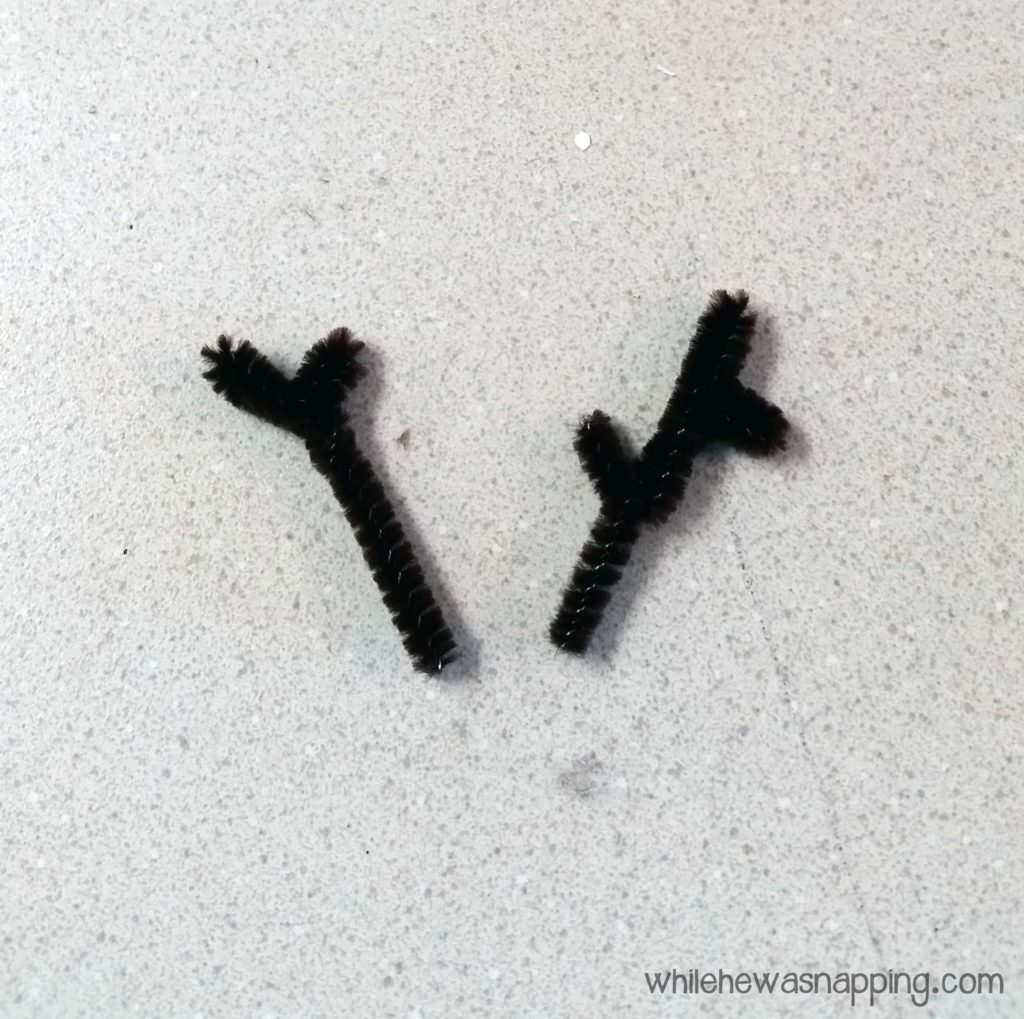
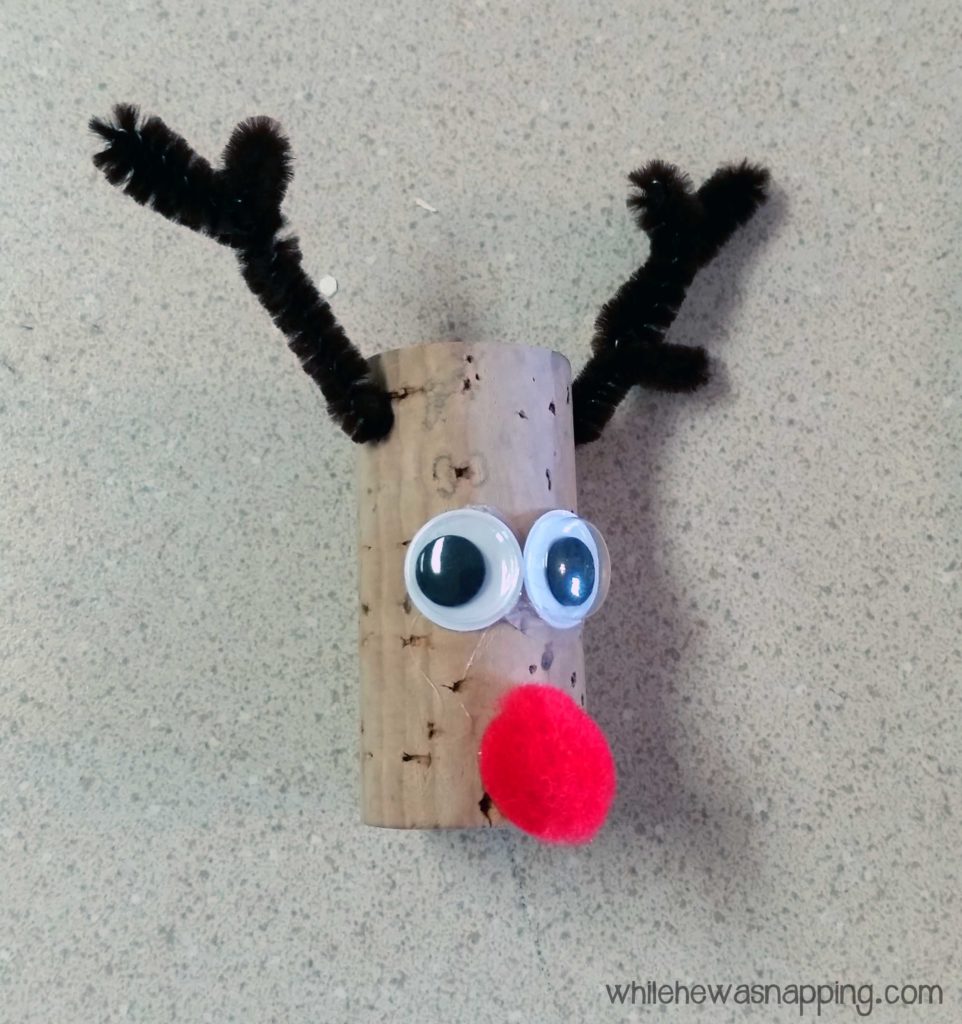
I am logging this Reindeer ornament over on Crafts by Courtney away for that entire week of Winter Break before Christmas gets here. It’s going to be one of my slow down activities to help me remind myself that Christmas isn’t about perfection, it’s about memories. And making craft stick ornaments with mom is a much better memory than playing on the tablets or watching movies all day… regardless of my kids’ opinion on that matter.

Snowflake Craft Stick Ornaments on Unsophisticated CookThese snowflakes aren’t exactly traditional ornament-size, but they are definitely impressive. And you could make some that are a little more traditional in sizing (like the little ones in this photo over on Unsophisticook) that you could hang on your tree. I love the more intricate designs of these snowflakes and Big J would enjoy creating these snowflakes with his hands. I think Little J would handle constructing the small snowflakes too.

So there you have it. Fifteen craft stick ornaments you can make with your little ones this Christmas season. Simple, fairly quick and oh so cute. Which craft stick ornaments are you going to try out?

December 7, 2015 by Krista

Glass Ball Rudolph Ornament

My boys and I are on an ornament mission this year. We are in the process of setting up our Christmas tree… for various reasons it’s taken us almost a week to get it all set up… But we are closing in on the home stretch. The worst part is over and tonight we get to decorate! I have a box of ornaments that I collected growing up and Mr Napping has his special ornaments as well. My boys don’t have much of their own yet. So, we’re changing that! We started with a fun Rudolph ornament. It’s super easy, even Little J (almost 4) was able to do most of it on his own and it only took about 10 minutes.

GLASS BALL RUDOLPH ORNAMENT

Rudolph Ornament DIY Christmas Ornament

Rudolph Ornament Materials:

– Glass Ball. I realize that’s a little misleading because I actually used these fun square Glass Ornaments (affilate link) and I love how they turned out! A regular round glass ornament would work just as well though. The larger your ornament the larger googly eyes and pom pom ball you’re probably going to want, so consider size when you’re looking at the glass ornaments.
– Brown acrylic paint
– Hot glue gun and glue sticks
– Brown pipe cleaner
– Googly eyes
– Red small pom pom ball
– Paper cup

Rudolph Ornament Directions:

– Carefully take the top off the ornament and set it aside where it won’t get smashed.
– Squeeze some brown paint into the ornament. How much paint you’ll need will partially depend on the size of your ornament. You want enough to cover the entire inside of the ornament with paint. We used about a tablespoon to a tablespoon and a half.
– Roll the paint around inside the ornament until it completely covers the interior of the ornament. Be careful and don’t let it roll out the hole when you do the top. You can put your finger over the hole or just be super careful.
– Use the hot glue gun to glue the googly eyes in the middle of the ornament,

Rudolph Ornament glue on googly eyes
– Glue the pom pom nose at the bottom.

Rudolph Ornament glue on red nose
– Twist the pipe cleaner around the top of the ornament up by the hole. Glue it in place.
– Place the ornament over the paper cup and use the pipe cleaner to hang it upside down inside the cup so the extra paint can drain out of the ornament. Let it sit 24-48 hours or until the paint is totally dry inside the ornament.

Rudolph Ornament Draining Paint

Rudolph Ornament Drain Paint
– When the paint is dry, put the ornament cap back on the glass ball.
– Make antlers out of the ends of the pipe cleaner. You kinda just have to play with it until you get it like you want it. I made antlers for three of these Rudolph ornaments and I did each set of antlers differently. The easiest way was to pinch the pipe cleaner together where you want to create points on the antlers. Arrange and tweak it to lay how you like it best.
– Attach a hook to your ornament cap and hang. I created hooks out of paper clips because I didn’t know where all our extra hooks were, so that’s an option if you don’t have a bunch of extras laying around. Or ribbon works well too.

Rudolph Ornament Christmas Kid Craft

I loved this Rudolph ornament project because they turned out great and my boys were able to do a lot of it on their own. It was also easy and quick enough to put together that my kids didn’t lose interest half way through and leave me to finish them all on my own. It was a great before-bedtime activity during the dreaded witching hour. And my boys are still pointing out their Rudolph ornaments to anyone who comes to our house and will listen to them brag…

Rudolph Ornament the best part

This was definitely my very most favorite part… They actually liked doing a project with mommy. My boys have never been ones to enjoy any kind of artistic creativity so it was kind of a big deal that they actually made Rudolph ornaments and they liked it!

  • « Previous Page
  • 1
  • 2
  • 3
  • 4
  • 5
  • 6
  • Next Page »

I'm Krista. Ringleader here on While He Was Napping, wife to my handsome Mr. Right & momma to my THREE energetic boys, Big J (9), Little J (6) & Little N (4). We FINALLY added a beautiful little girl to our family last December.

I’m knee-deep in Tonka trucks & Thomas trains. I survive our crazy days with Vanilla Coke, Sonic slushies, sweet snuggles and little giggles. When I tuck them in tight & kiss them good night, I get a little time to create & just be me.


It all happened
while (s)he was napping
Want More of My Story?

Privacy Policy

While He Was Napping respects your privacy and is committed to keeping any personal information collected on this website confidential. To find out what information we collect and how it is used or what options you have regarding your information, see our full privacy policy here. Creative Commons License The website found at whilehewasnapping.com and all subdomainsauthored and published by Krista is licensed under a Creative Commons Attribution-NonCommercial-NoDerivs 3.0 Unported License.

Pretty Chic Theme By: Pretty Darn Cute Design