While He Was Napping

momma gets stuff done

  • Home
  • About
  • Archive
  • Do It Yourself
    • Crafts
      • No Sew
      • Painting
      • Paper Crafts
      • Repurpose Projects
      • Vinyl
      • Washi Tape
      • Kid’s Crafts
      • Fonts
    • Sewing
    • Decorate
      • Home Decor
      • Holiday Decor
    • Celebrate
      • DIY Gifts
      • DIY Your Party
  • Recipes
    • Beverages
    • Appetizer
      • Bread
      • Other Appetizers
    • Snacks
    • Main Dish
      • Meat
        • Chicken
        • Beef
        • Pork
        • Seafood
      • Vegetarian
      • Slow Cooker
      • 30 Minute Meals
    • Dips & Sauces
    • Salads
    • Pasta
    • Soup
    • Dessert
      • Cookies
      • Brownies
      • Cupcakes and Cake
      • Box Mix Recipes
      • Other Sweet Treats
    • Breakfast Food
      • Pancakes
      • Waffles
      • Muffins
      • Other Breakfast Food
  • Family
    • Babies
      • Pregnancy
      • Newborns
      • The 1st Year
    • Toddlers
    • Preschoolers
    • Kindergartners
    • 6-8 Year Olds
    • The Grown Ups
      • Date Night
      • Romantic Gifts
    • Self Care
  • For the Home
    • Cleaning
    • Organizing
    • Emergency Preparedness
  • Travel
    • Travel Tricks & Tips
    • Traveling with Kids
  • Tech & Gadgets
    • Must-Have Apps
    • Techy Home Appliances
    • Gadgets & Electronics
    • Blogging Tips
  • Printables
    • Posters
      • Quote Printables
      • Subway Art Printables
    • Printable Organizers
    • Printable Journals
    • Learning Printables & Worksheets
    • LDS Printables
  • Holidays
    • New Year’s
    • Valentine’s Day
    • St. Patrick’s Day
    • Easter
    • Cinco de Mayo
    • Mother’s Day
    • Father’s Day
    • 4th of July
    • Back to School
    • Halloween
    • Thanksgiving
    • Christmas
    • Holiday & Seasonal Printables

March 11, 2015 by Krista

Pepperoni Stuffed Deviled Eggs

One of my favorite things about Spring is the food.  With warmer weather come the cooler, lighter foods.  I love a good hearty soup as much as anyone, but after the long winter months full of heavy holiday eating, I’m ready to lighten up my diet.  But, just because the food is lighter doesn’t mean it’s got less flavor.  Today, I will show you how to make some fantastic deviled eggs (a staple at any BBQ or picnic) and add a twist of flavor with some delicious pepperoni to make these Pepperoni Stuffed Deviled Eggs that will fly off the plate!

PEPPERONI STUFFED DEVILED EGGS

Hormel Pepperoni Stuffed Deviled Eggs

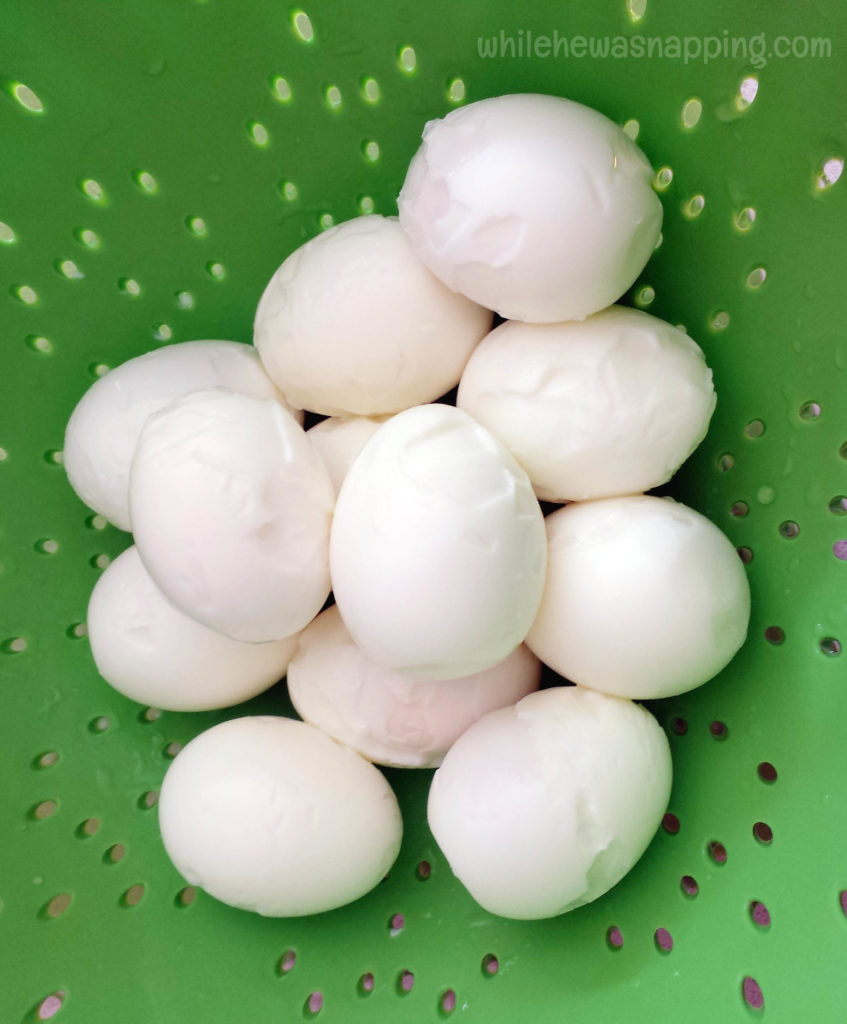
If you haven’t made boiled eggs in the instant pot, you really should try it. We do the 5-5-5 method. At pressure for 5 minutes, natural release for 5 minutes and then ice bath for 5 minutes. If you peel them while they are warm, the shells practically fall off. This is the only way we make boiled eggs now.

If you’re doing old school boiling on the stove, I wish I had some fantastic advice to share for always peeling the perfect egg, but more often than not, it seems mine come out looking like the Emperor from Star Wars… after he takes his hood off. The good news is that, even if you end up with Emperor eggs, they will still taste fabulous!

Pepperoni Deviled Eggs Peeled Boiled Eggs

Yield: 24 deviled eggs

Pepperoni Stuffed Deviled Eggs

Hormel Pepperoni Stuffed Deviled Egg Recipe

Classic deviled eggs with a delicious flavor burst that makes this BBQ and picnic food even better!

Prep Time 15 minutes
Cook Time 15 minutes
Total Time 30 minutes

Ingredients

  • 20 slices Pepperoni, Original Flavor
  • Pepperoni Minis
  • 1 dozen eggs
  • 1/2 tsp garlic powder
  • 1/2 tsp paprika
  • 1/2 cup Miracle Whip (you can substitute sour cream for a low-fat dish)
  • 1 Tbsp Ranch dressing (or ranch dip powder)

Instructions

  1. Begin by boiling your eggs.
  2. Peel the boiled eggs. Pepperoni Deviled Eggs Peeled Boiled Eggs
  3. Cut each egg in half and dump all the yolks into a bowl. Set the egg white halves aside.
  4. In the bowl of egg yolks, combine the garlic powder, the paprika and the Miracle Whip. Hormel Pepperoni Deviled Eggs Filling
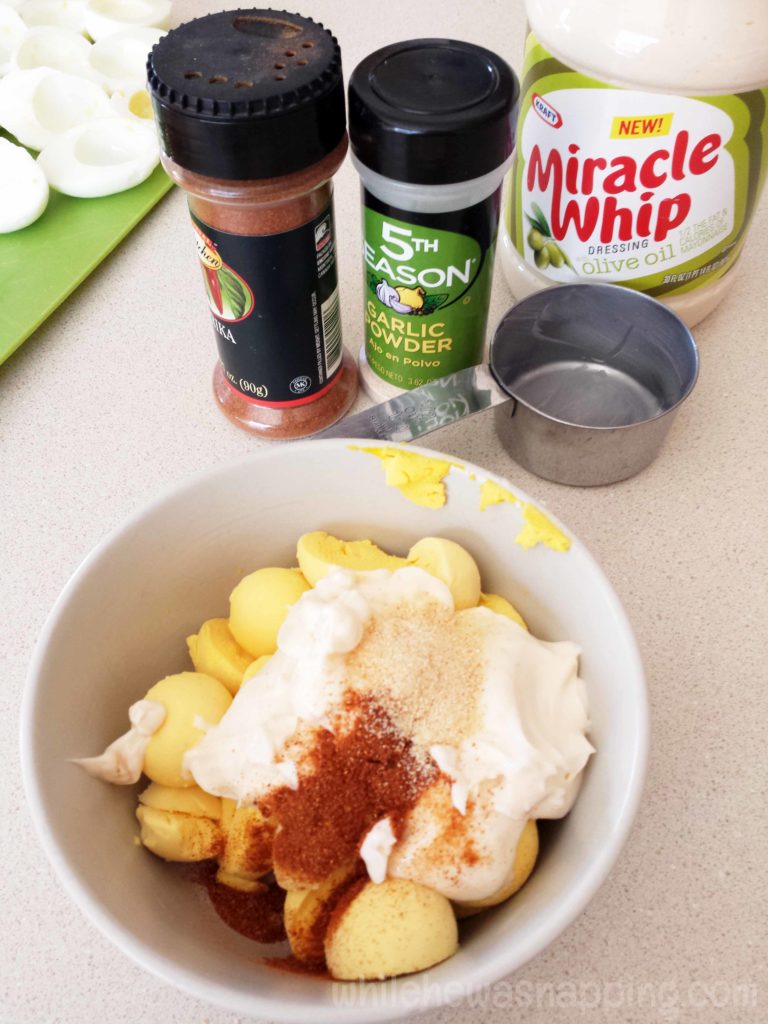
  5. Use a fork to break the yolks apart and stir the ingredients together until they are well combined.
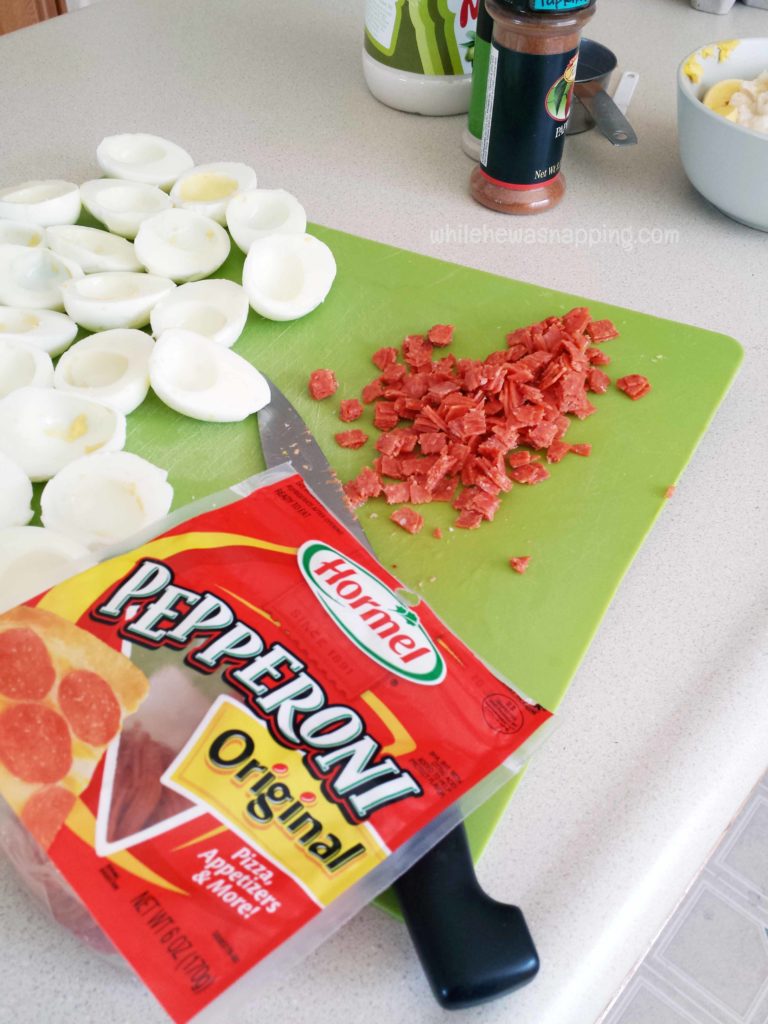
  6. Dice up the pepperoni slices into small squares. Stacking the pepperoni together makes the dicing easier and quicker. Hormel Pepperoni Stuffed Deviled Eggs
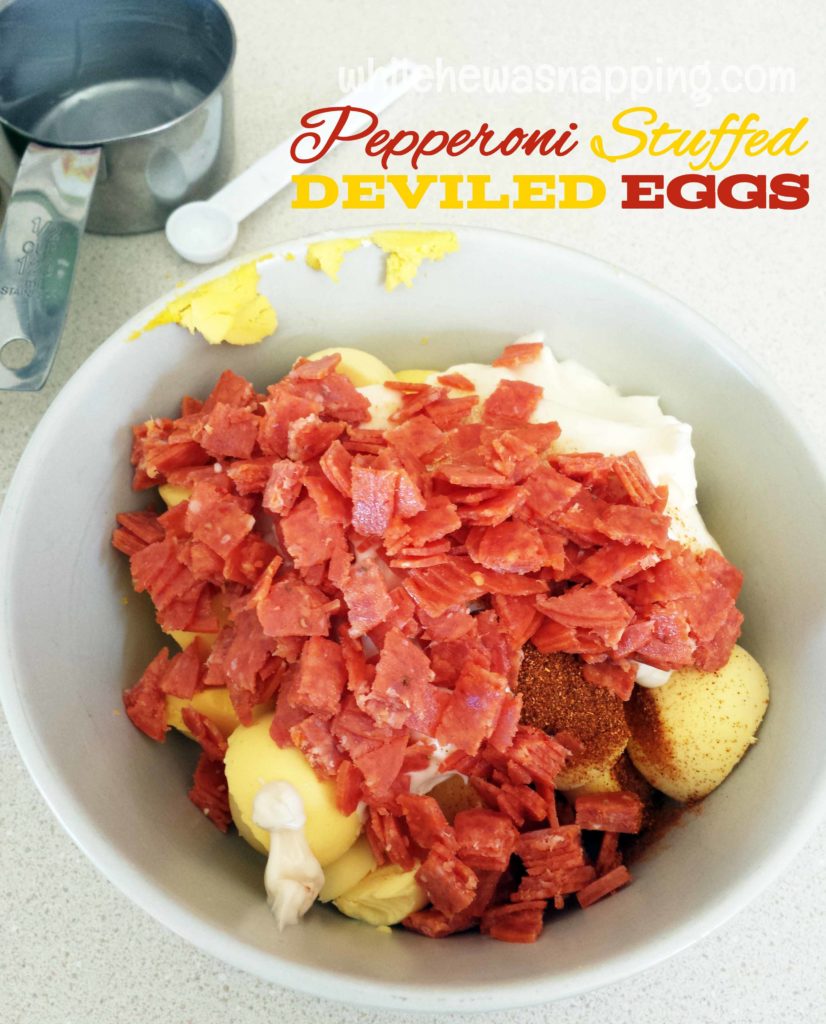
  7. Add the pepperoni dices and the ranch dressing to the egg yolk mixture and stir until evenly combined. Hormel Pepperoni Stuffed Deviled Eggs Filling
  8. Use a spoon to put some of the yolk mixture into each egg white half.
  9. Garnish with Pepperoni Minis and a sprinkle of paprika, if desired. Hormel Pepperoni Stuffed Deviled Eggs
  10. Refrigerate until ready to serve.
  11. Store any leftovers in an air tight container in the fridge for 2-3 days.

Nutrition Information:

Yield:

24

Serving Size:

1

Amount Per Serving: Calories: 52Total Fat: 4gSaturated Fat: 1gTrans Fat: 0gUnsaturated Fat: 2gCholesterol: 95mgSodium: 111mgCarbohydrates: 1gFiber: 0gSugar: 1gProtein: 4g
© Krista
Category: Appetizer

PEPPERONI STUFFED DEVILED EGGS PEOPLE WILL FIGHT OVER

I served these at a get-together with some friends and they were a HUGE hit, particularly with the men. Maybe pepperoni makes deviled eggs a more masculine food? They are so full of flavor they almost jumped off the plate.

That extra blast of flavor makes these pepperoni stuffed deviled eggs totally compelling to just inhale off the plate.

I may or may not have made another batch the next day. And then eaten six of them all at one time.  I’ll never tell.

Hormel Pepperoni Deviled Eggs

So, next time you need an appetizer for a Spring picnic or BBQ, let a bit of peperoni transform regular ole deviled eggs into delicious, can’t-eat-just-one Pepperoni Stuffed Deviled Eggs and be the talk of the party.

March 6, 2015 by Krista

Cute and Simple Monkey Cupcakes Anyone Can Make

On Wednesday, I shared my favorite cake recipe and showed you how to create marbled cupcakes.  They double really well as zebra-stripe cupcakes too.  Today, I’m going to share how I decorated the tops of those cupcakes.  They turned out super cute and were so incredibly easy; these are monkey cupcakes anyone can make.  I enjoy decorating cakes, but I’m not particularly skilled at it.  Okay, I barely make passing marks on cake decorating.  So, if I can do it, anyone can.

Baby N turned a year old this past Monday and we celebrated while Mr. Napping’s parents were here visiting.  I went all out for Big J’s first birthday and was so busy during the party and so exhausted afterward that I decided that huge parties just aren’t worth the work.  And I felt like I missed sharing my little boy’s special day because I was running around, worried about details the whole time.  So, in our house, the birthday person gets to choose the meal they want and the kind of cake they want.  Since Baby N is only one, momma got to choose for him.  I went with monkeys.  I’ll call my boys the inspiration on that one.


CUTE AND SIMPLE CUPCAKES ANYONE CAN MAKE:
MONKEYS & PALM/BANANA TREES

Monkey Cupcakes

Materials:
– M&M’s or miniature marshmallows
– Vanilla Wafers (knock offs are fine)
– Mini Chips Ahoy Cookies
– Banana Candies (I got a small amount of “Runts” in bulk at the grocery store and just pulled out the bananas for our trees)
– Brown Jelly Beans (I used Dr. Pepper Jelly Bellys, also found in the bulk section.  You could also use chocolate covered raisins or something similar)
– Pirouette Wafer Cookies
– Green Butterfly Gummy Candies (you could also use lime wedge gummies, but I couldn’t find them.  The butterflies were my only option, but they turned out great)
– Black icing gel
– Toothpicks or wooden skewers


Directions:
Monkey Cupcakes –
* You will need one vanilla wafer and one chips ahoy cookie for each monkey cupcake*
– Cut about a 1/4 inch off of one side on all your vanilla wafer cookies.  Save the tops to use on the palm tree cupcakes.  These were much easier to cut than I anticipated.  A steak knife made quick work of these cookies.
– Cut the Chips Ahoy cookies in half.  I used the same steak knife for these cookies, but found they crumbled more.  The key to keeping them intact was to go slowly with a sawing motion while putting pressure on opposite sides of the cookie with my thumb and index fingers.
– Draw nostrils and mouths on the vanilla wafer cookies with the gel icing.  This was the fun part.  You can put a little variety in these cupcakes by giving the monkeys different expressions.  A smiley monkey?  A crazy monkey?  A mischievous monkey?  The call is yours.
– On a freshly frosted cupcake, put one vanilla wafer at the bottom of the cupcake to make the monkey’s snout (Is that what it’s called?).  Put opposite halves of a Chips Ahoy cookie on each side just above the vanilla wafer for the ears.  Stick two M&M’s (preferably the same color) or two mini marshmallows just above the vanilla wafer and in between the Chips Ahoy halves. Put little gel icing dots on the M&M’s or mini marshmallows to give the monkey eyes pupils.
– Repeat.  And repeat.  And repeat.  Times two dozen.  It takes a little time to construct the monkeys, but they are so worth it.
DIY Monkey Cupcakes

Palm/Banana Tree Cupcakes
– Take the butterfly gummies and cut them in half horizontally, so that you have the top wings and the bottom wings.
– Cut the top wings apart on a slight diagonal line, so each piece is pointed at the end.
– Cut the bottom wing into a teardrop shape.  Discard (uhm, eat…) the leftover portion.
– Cut the Pirouette cookies in half with a serrated knife.
– Stack three of the gummies on top of each with the rounded ends together and the pointed ends together.  Put a toothpick or wooden skewer through the rounded part of the gummies.  Fan out the gummies to look like tree fronds.
– Stick the end of the toothpick that doesn’t have the gummies on it into one end of the Pirouette cookies.
– Crush the tops of the vanilla wafers onto crumbs.  You can use any broken Chips Ahoy cookies too.
– On a freshly frosted cupcake, sprinkle the vanilla wafer crumbs on top to create sand and stick the tree into the cupcake.
– Use a small dab of frosting to stick the coconuts or the banana candies under the bottom frond of the tree.

Palm Tree Cupcakes

Coconuts Palm Tree Cupcake

Palm Tree Cupcake

And there you have it.  Simple and cute monkey cupcakes anyone can make.  And what’s a monkey without his banana tree?  No worries, you’ve got those too.

Don’t forget to check out how you can make the insides of the cupcakes look like zebra stripes!

March 4, 2015 by Krista

How to Create Absolutely Scrumptious Marbled Cupcakes

Baby N had his first birthday on Monday.  I’m not sure exactly what happened to the previous year, but the calendar says that it has passed.  It’s been a fun year, for the most part, and my little baby is much more a boy than a baby now.  And this we had to celebrate.  Grandma and Grandpa even flew in to meet Baby N for the first time!  We definitely needed a celebration and what better way than with some incredibly cute and (beyond super) easy marbled cupcakes?!  These are incredibly easy and the results turn out great.  While I enjoy making cakes, I’m not terribly skilled at it.  These were perfect!  I decorated the tops with monkeys and palm/banana trees; which turned out really cute, but I’ll show you that later this week.


HOW TO CREATE MARBLED CUPCAKES

Zebra Stripe Marbled Cupcakes

Print This Recipe
Marbled Cupcakes

Prep time:  25 mins

Cook time:  25 mins

Total time:  50 mins

Serves: 2 dozen cupcakes

Super simple White Chocolate Marbled cupcakes that are the perfect level of sweetness and visually awesome.
Ingredients
  • 1½ c white sugar
  • 3 eggs
  • 2¼ c white flour
  • 1¼ c milk
  • ¾ cup butter (1½ sticks)
  • 1 tbsp vanilla extract
  • 2½ tsp baking powder
  • 4 tbs cocoa powder (optional)
Instructions
  1. Preheat oven to 350F
  2. Cream sugar and butter with a mixer.
  3. Beat in eggs.
  4. Add vanilla.
  5. In a medium bowl, combine flour and baking powder
  6. Add to creamed mixture. Mix well.
  7. Stir in milk until batter is smooth.
  8. Split batter in half and add the cocoa to one of the bowls. Mix well.


  9. Line cupcake pans with liners.
  10. Place a dollop of white batter in each cupcake liner with a spoon. It doesn't have to cover the entire bottom of the liner.
  11. Put a dollop of chocolate batter in on top of and next to the white batter in each liner.
  12. Repeat until the liners are ¾ full.
  13. Turn the preheated oven down to 325F and bake for 20-25 mins
Notes
Cake is done when it springs back to the touch.
3.2.2925


Don’t forget to check out how to make cute monkeys and palm trees to decorate your cupcakes!  It’s super easy and anyone can do it!

February 23, 2015 by Krista

The Best Triple Chocolate Thin Mint Brownie Pie

Are you a lover of all things Girl Scout Cookie? I know I sure am! And with Girl Scout cookie season upon us, now is the time to stock up the freezer with your favorites. I’m definitely guilty of eating right out of the package, but this Triple Chocolate Thin Mint Brownie Pie is to die for!

So, get your order in and save a box of Thin Mints for this delectable dessert. Your local little pig-tailed Girl Scouts will thank you. And so will your taste buds! Seize the brownie pie, my friend!


Triple Chocolate Thin Mint Brownie Pie


TRIPLE CHOCOLATE THIN MINT BROWNIE PIE WHEN IT’S NOT GIRL SCOUT COOKIE SEASON?

I love supporting our local girl scout troops, but I’m the first to admit that $5 a box is a bit steep for my budget. I stock up what I can, but when our freezer stash is out, we head to Wal-Mart when we’re jonesing for some Thin Mint cookies. The Great Value Fudge Mint cookies are a sufficient substitute.

And at less than half the price, it’s okay to use nearly a whole package in a Thin Mint Brownie Pie and not feel guilty. At least about the cost. The calories might be a different story. But, sometimes you just got have a little bit of heaven.

Because this pie is a little bit of heaven.


A PI PLATE AS AMAZING AS TRIPLE CHOCOLATE THIN MINT BROWNIE PIE

The best pie deserves an amazing pie plate, right? One that cooks evenly, makes your dessert look fantastic and if you get the coolest mathematical surprise when you start to serve that piece of heaven, all the better right? This awesome Pi Plate is my go to for all pies – the dinner and dessert variety. You can check these out on Etsy or even order your own custom design. Perfect for holidays, special occasions and gifts too!

Thin Mint Brownie Pie in Pi Plate


SERVE A TRIPLE CHOCOLATE THIN MINT BROWNIE PIE TREAT EVERYONE WILL RAVE ABOUT

My favorite thing about this pie is how insanely easy it is to put together a decadent dessert that people will think you slaved over! In less than an hour, you will have dessert ready to wow your dinner guests without spending your afternoon rolling doughs, mixing batters and waiting on bake times. Put Triple Chocolate Thin Mont Brownie Pie on your dessert plan today!

Girl Scout Thin Mint Brownie Pie

Yield: 12 pieces

The Best Triple Chocolate Thin Mint Brownie Pie

Girl Scout Thin Mint Brownie Pie

Take your thin mint cookie obsession and kick it into overload with this amazing triple chocolate thin mint brownie pie that takes less than an hour to whip up!

Prep Time 20 minutes
Cook Time 35 minutes
Total Time 55 minutes

Ingredients

  • 1 box brownie mix
  • Ingredients required for your brownie mix, typically includes: 1 egg, 1/4 cup water and 1/2 cup oil. I use 1/4 cup oil and 1/4 cup applesauce to make them a little less oily and unhealthy. But these are triple chocolate brownies... you might not be too concerned about the calories.
  • 1/3 cup chocolate syrup
  • 1 package Thin Mint Cookies

Instructions

Preheat the oven as directed on the back of the brownie mix box.

Mix up the brownies as per the instructions on the back of the box. Substitiute half the oil with applesauce for a less oily brownie.

Pour half the batter into the bottom of a lightly-greased 8-inch pie plate.

Put down a layer of mint cookies.

Pour the chocolate syrup on top of the cookies and spread with a spatula to evenly cover the cookies.

Pour the rest of the batter on top of the syrup and gently shake the pan to level out the batter.

Bake as directed on the brownie box or until a toothpick inserted into the pie comes out clean.

Cool, slice and serve with a scoop of ice cream or frozen yogurt.

Nutrition Information:

Yield:

12

Serving Size:

1 slice

Amount Per Serving: Calories: 558Total Fat: 25.9gSaturated Fat: 10.4gCholesterol: 14mgSodium: 357mgCarbohydrates: 81.6gFiber: 2gSugar: 21.4gProtein: 4.3g
© Krista
Category: Dessert

Looking for a dinner pie that will rock your dinner table? Check out this Chicken Pot Pie with crust so flaky and delicious, leftovers will be no problem. Or, for a busy week night, check out this Chicken Pot Pie Casserole option – ready in 30 minutes!


February 20, 2015 by Krista

Liege Waffles: The Most Amazing Waffles on Earth

After my brother-in-law raved about liege waffles on one of our trips to Utah, we decided we needed to try them.  But, we just never had time to do it while we were there.  That didn’t deter my sweet husband and he opted to try them at home.  We hit a snag, but I’ll get to that in a few minutes.  These were so delicious, we made them and crepes for Christmas breakfast… for nearly 20 people and they were demolished.  I was so sad there were no leftovers!  And I am not really a leftover kind of girl.  These liege waffles are heaven smothered in biscoff butter, whipped cream, berries and chocolate.

LIEGE WAFFLES
Liege Waffles Hero

Yield: 12 Waffles

Leige Waffles: The Most Amazing Waffles on Earth

Liege Waffles Hero

The most amazing waffles you will ever make. A little time demanding, but sooo worth it. Make extra, because you'll want leftovers and these waffles freeze great! It's like eating heaven for breakfast.

Prep Time 1 hour
Cook Time 25 minutes
Additional Time 4 hours
Total Time 5 hours 25 minutes

Ingredients

  • 1/4 ounce active yeast (one packet or measure it out with a kitchen scale)
  • 1 1/2 Tbsp granulated sugar
  • 3/4 cup warm milk (around 100F or 40C)
  • 3 eggs
  • 1 cup melted butter
  • 1 Tbsp vanilla
  • 3 cups flour
  • 1/2 tsp salt
  • 3/4 - 1 cup pearl sugar (see text below recipe box)

Instructions

Add yeast and sugar to the warm milk and let stand for 10-15 minutes until the yeast softens and forms a foam.

Mix eggs, butter, and vanilla extract until evenly blended. Add to the yeast mixture and combine thoroughly.

Stir together salt and flour in a large bowl. Add the egg-yeast mixture to the flour, slowly mixing until a soft dough is formed.

Refrigerate in a covered bowl for 4-24 hours.

Cover with a clean kitchen towel and let warm back to room temperature.

Knead in the pearl sugar, but don't over handle the dough.

Pre-heat a Belgium Waffle iron. You can use a standard waffle iron, but the deeper pockets in a Belgium waffle hold more yummy toppings and don't crush the sugar pearls as badly.

Divide dough into 12 balls. Cover dough balls with the kitchen towel.

Lightly butter or grease the waffle iron. Place dough balls, one at a time, in the waffle iron and cook until golden brown. Cool for 2-3 minutes. The sugar is super hot and can cause burns if it's eaten immediately off the iron.

Repeat last step until all waffles have been cooked.

Finish off with your desired toppings. Berries, fresh fruits, whipped cream, chocolate chips, cinnamon, Biscoff butter and nuts are our favorites!

Notes

The dough for these waffles can be made as much as a day ahead or a few as 4 hours, which is perfect for breakfast or brunch events. The time-intensive work can be done ahead of time and then you just cook the waffles when you're ready to serve them. Just keep the dough in the fridge until you are ready to knead the pearl sugar into the dough and cook.

These waffles freeze great and it doesn't take much longer to make extra - you'll want leftovers, I promise! You can re-warm the waffles in the toaster to keep the crunchy outside texture.

You can make your own pearl sugar. It takes a little time and patience, but it is super cheap. Click here to see the recipe!

Recommended Products

As an Amazon Associate and member of other affiliate programs, I earn from qualifying purchases.

  • Belgian Pearl Sugar
    Belgian Pearl Sugar
  • Gluten-Free Active Dry Yeast
    Gluten-Free Active Dry Yeast

Nutrition Information:

Yield:

12

Serving Size:

1 waffle

Amount Per Serving: Calories: 343Total Fat: 17.1gSaturated Fat: 10.3gCholesterol: 83mgSodium: 230mgCarbohydrates: 42.6gFiber: 1gSugar: 18.5gProtein: 5.5g
© Krista
Category: Breakfast

What makes these waffles so amazing is the yeast-risen dough and the pearl sugar.  It makes a delicious, dense waffle and the pearl sugar makes these suitable to be topped with fruit or chocolate… or both, as you can see in my photo.  You can purchase pearl sugar on Amazon (or you can get it here a little cheaper if you already have an Amazon order just waiting to be submitted), at Whole Foods, IKEA and in some World Market locations.  If you like a sweeter waffle, add more of the sugar pearls. 

Leige Waffles Sugar Pearls

After a failed trip to our World Market and deciding that the 20 minute drive across town to Whole Foods wasn’t worth it after the phone call we made to a very confused Whole Foods staff for the off-chance they actually did have it.  We were a bit discouraged.  But guess what?  You can make your own! if Prime shipping isn’t fast enough (or an option) and your nearest Whole Foods, World Market and IKEA are just too far, grab a small sauce pan and two ingredients and get ready to DIY Pearl Sugar right at home with yesterday’s post.

Leige Waffles

  • « Previous Page
  • 1
  • …
  • 8
  • 9
  • 10
  • 11
  • 12
  • …
  • 30
  • Next Page »

I'm Krista. Ringleader here on While He Was Napping, wife to my handsome Mr. Right & momma to my THREE energetic boys, Big J (9), Little J (6) & Little N (4). We FINALLY added a beautiful little girl to our family last December.

I’m knee-deep in Tonka trucks & Thomas trains. I survive our crazy days with Vanilla Coke, Sonic slushies, sweet snuggles and little giggles. When I tuck them in tight & kiss them good night, I get a little time to create & just be me.


It all happened
while (s)he was napping
Want More of My Story?

Privacy Policy

While He Was Napping respects your privacy and is committed to keeping any personal information collected on this website confidential. To find out what information we collect and how it is used or what options you have regarding your information, see our full privacy policy here. Creative Commons License The website found at whilehewasnapping.com and all subdomainsauthored and published by Krista is licensed under a Creative Commons Attribution-NonCommercial-NoDerivs 3.0 Unported License.

Pretty Chic Theme By: Pretty Darn Cute Design