While He Was Napping

momma gets stuff done

  • Home
  • About
  • Archive
  • Do It Yourself
    • Crafts
      • No Sew
      • Painting
      • Paper Crafts
      • Repurpose Projects
      • Vinyl
      • Washi Tape
      • Kid’s Crafts
      • Fonts
    • Sewing
    • Decorate
      • Home Decor
      • Holiday Decor
    • Celebrate
      • DIY Gifts
      • DIY Your Party
  • Recipes
    • Beverages
    • Appetizer
      • Bread
      • Other Appetizers
    • Snacks
    • Main Dish
      • Meat
        • Chicken
        • Beef
        • Pork
        • Seafood
      • Vegetarian
      • Slow Cooker
      • 30 Minute Meals
    • Dips & Sauces
    • Salads
    • Pasta
    • Soup
    • Dessert
      • Cookies
      • Brownies
      • Cupcakes and Cake
      • Box Mix Recipes
      • Other Sweet Treats
    • Breakfast Food
      • Pancakes
      • Waffles
      • Muffins
      • Other Breakfast Food
  • Family
    • Babies
      • Pregnancy
      • Newborns
      • The 1st Year
    • Toddlers
    • Preschoolers
    • Kindergartners
    • 6-8 Year Olds
    • The Grown Ups
      • Date Night
      • Romantic Gifts
    • Self Care
  • For the Home
    • Cleaning
    • Organizing
    • Emergency Preparedness
  • Travel
    • Travel Tricks & Tips
    • Traveling with Kids
  • Tech & Gadgets
    • Must-Have Apps
    • Techy Home Appliances
    • Gadgets & Electronics
    • Blogging Tips
  • Printables
    • Posters
      • Quote Printables
      • Subway Art Printables
    • Printable Organizers
    • Printable Journals
    • Learning Printables & Worksheets
    • LDS Printables
  • Holidays
    • New Year’s
    • Valentine’s Day
    • St. Patrick’s Day
    • Easter
    • Cinco de Mayo
    • Mother’s Day
    • Father’s Day
    • 4th of July
    • Back to School
    • Halloween
    • Thanksgiving
    • Christmas
    • Holiday & Seasonal Printables

July 14, 2014 by Krista

Washi Tape Summer Boredom Buster Jars

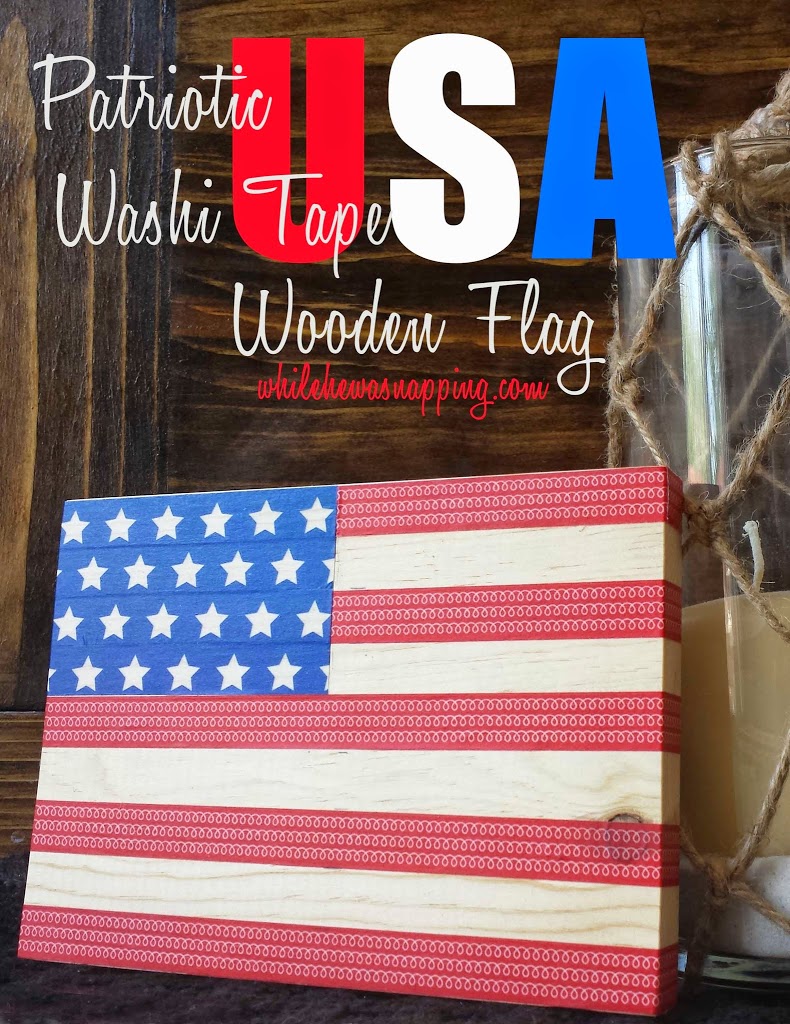
Well, hello friend! I’m so glad you came to visit today! Looking for a boredom buster activity to help you out with the kids? Thousands of people on Pinterest have loved this Washi Tape Boredom Buster Jar and I know you will too.

Here’s a question for you…Can you feel it? Feel what? The warmer weather, the longer days. The school bell’s last ring of the year.

It won’t be long now before school is out and the kids are home!

Every. Single. Day.

Does that make you a little nervous? Because it makes me nervous.

Day after day after day of refereeing the Brother Bickering Match isn’t my idea of a good time. Back when I didn’t spend my days chasing three little hooligans and trying to keep them entertained all day, I lived for summer. Now, I’m a little apprehensive when summer hits full force.

We live in the desert, which means that it’s too hot to play outside from about 11 am until around 5 pm.  That’s a lot of hours inside. Climbing and bouncing off the walls. Pulling out every toy we own, all at once. Hiding in the closet eating chocolate.

That last one might be me.

I have a hard time coming up with ideas of things for us to do on the spot and my boys get tired of the same thing all the time. So, I put together a list and then made us our very own Boredom Buster Jar. Actually, two jars… they wouldn’t all fit in one! There’s no excuse now. Let the fun begin!

WASHI TAPE BOREDOM BUSTER JARS


Materials:
– Craft sticks
– Permanent Marker
– Washi Tape in seven designs
– Jars or containers to hold your sticks

Directions:
– Gather ideas of activities your kids would like to do. Include things like projects you can make together, things they can do on their own, activities that will help get the wiggles out, and even places to go. I had a running list on my phone that I kept adding to for about two or three weeks. When I came upon something else I thought my kids would enjoy, I’d add it to the list.

Want a great list in just a few seconds? Check out my list with 168+ activities and ideas of things to put on your craft sticks!

– Write each activity on a craft stick with a permanent marker. Doesn’t need to be fancy, just legible. You could type them up on the computer, print them out and then glue them on the sticks – but that’s too time intensive for me.


DIVIDING THE ACTIVITIES INTO CATEGORIES

I divided the categories up so that my kids would be able to use the boredom jar on their own.

By putting the activities into categories, I was able to control the kind of activity and still allow my kids to choose what they wanted to do, randomly or by picking sticks until they found something they liked.

I thought about our typical day and the kinds of activities we like to do. Then I considered how involved I am in different parts of my children’s days. I came up with seven categories.

My categories were:

  • Things we can do
  • Things we can make
  • Energy Bug – activities that help focus their bouncing off the walls into something a little less destructive
  • Quiet time activities – things for my preschooler to do on his own while his brothers nap
  • Family activities – things we wanted to do as a family, like outings. This was perfect for weekends!
  • Outside play time – activities to do outside. A lot of these involved water
  • Fun with food – activities to do with food, often ending with snack time

– Tape each stick in a single category with the same color washi tape. You could also paint the ends or use some other method of distinguishing the sticks.  Washi tape was quick, easy, and mess-free. If you have a problem with the tape sticking, a small piece of scotch tape or a swipe with a glue stick should fix the problem.

– Store your sticks in a jar (or jars…) and the next time boredom strikes, prepare to be a superhero!

Did you download my list of 168+ activity ideas to put on your craft sticks?
GET IT NOW!
I did the hard part for you, the rest is cake. And you’ll be so glad when you need a distraction and you can just grab the boredom jar and quell the storm.
Maybe the jar is too much? Just print the list!

PROMISE, it’ll be a lifesaver.

June 11, 2014 by Krista

Washi Tape USA Flag Craft

I’m super excited to be part of Jen’s {from Girl in the Garage} Red, White and Blue Inspiration Series.  There have been some fun projects so far, which I’ll show off a little more in a minute or two.  You’re gonna want to check them out.  But first… I’m going to share a fun and super easy USA flag craft for your patriotic enjoyment!

This project is incredibly simple and took me about 20 minutes to do.  The supplies are simple and you can easily take this idea and run with it… how cute would these be as smaller, drink coasters?!

WASHI TAPE USA FLAG CRAFT

SUPPLIES NEEDED TO CREATE ONE USA FLAG CRAFT

Affiliate Link Disclaimer

– One 1″x6″ board cut at 7.5″ long.  You can get it at Lowe’s or Home Depot and if you ask nice, they’ll even cut it for you.
– Red Washi Tape – I like to buy washi tape on Etsy (SOLID RED | RED POLKA DOTS | RED CHEVRON | RED STRIPES)
– Blue Washi Tape – The blue star tape I used can be found on ETSY or AMAZON
– Craft Knife (I have THIS ONE in both the knife and swivel knife and really like them)
– Ruler
– Pencil
– Sandpaper (optional, but recommended)
– Polyurethane (optional, but also recommended)


DIRECTIONS TO CREATE YOUR USA FLAG CRAFT

MEASURE FIRST!

– If you want to shape your board and clean up any rough edges or imperfections, do so now.  I just took a quick swipe along the edges with sandpaper to get any splintery slivers and take a little of the edge off.
– Lay your board down horizontally.  Measure out 3.75″ from the top, left side of your board.  Mark it with your pencil. This space will be for the blue stars.

– Measure the stripes on your flag.  I did it the super technical way and just used a roll of washi tape to measure the width of each stripe.  Fancy, huh?

APPLY THE RED STRIPES

– Start with whichever tape you want, I did the red.  Following the measurements your marked on your board, lay down strips of tape.  I wrapped the edges of the board as well as the face.
– Skip every other line to create the white stripes in between the red ones.  If you want a truer white than the board you’re using, you could paint the board before you begin.  Because I am using pine, it’s a pretty light color already and I really like the wood grain in it.

NOW FOR THE BLUE

– When you finish with the red, switch to the blue tape and start in the top left corner, carefully laying down strips of that tape.
– Make sure your stars face the way you want them to and remember to stagger each row if you want them offset, like they are on a real flag.

– Use your craft knife to get precise straight(ish) lines where the blue square stops.  I wasn’t too particular, but use your ruler if you want it to be straight and even.

That’s it.  You’re done!


HELPFUL TIPS AND TRICKS

I did end up going over the board with a layer of polyurethane to help hold the tape in place.  (A glue stick will also help if your tape keeps coming up.)  It actually added an antique look to the flag, which was kind of neat.

I think these USA Flag Crafts would make super cute coasters if you scaled the proportions down a bit.

There are some great options to display your USA flag craft. Sawtooth hangers are inexpensive and easy to install. The real no muss, no fuss solution.

I ended up drilling a couple holes and then looped some picture hanging wire through them and tied some ribbon on it for a little more cutesy finish and hung it on our door.


THE BEST PART?

I like that it’s not huge, but the bright colors will still draw the eye.  It’s a nice wreath alternative.  Because, seriously, who has the room to store a wreath for every holiday?  Uh, not me.  A 5×7″ wooden board, I can probably handle though.


As I mentioned, there are some other really great projects from some super talented bloggers.  Don’t miss the other great features in this series!  Check them all out!


*After some looking around… I found the red swirly washi tape HERE and the blue star tape HERE.  These are not affiliate links, just what I found with my own Google searches. Hopefully, they will help you complete your own washi tape USA flag craft.


This post was written by Krista and originally appeared on While He Was Napping.


November 14, 2013 by Krista

Inspirational Quote Frames {With Printable Quotes}

Welcome! Do you love a good inspirational quote? I do. Always have. Inspirational quotes are just what I need when I’m feeling a little low. Like I’ve been knocked down and all I really want to do is crawl back to bed and spend the rest of the day – or week – with the covers over my head. These easy and inexpensive inspirational quote frames are the perfect way to display that little boost.

This took me about 20-30 minutes to put together… quick and easy. I also did it with a group of five 8-11 year old girls and it took them 90 minutes to do. But, everyone went home with a completed frame and they were happy with how they turned out, even though there were a few who thought they made little mistakes.  Live and learn, right?

INSPIRATIONAL QUOTE FRAMES

Inspirational Quote Frame
 Affiliate Link Disclaimer

INSPIRATIONAL QUOTE FRAME MATERIALS:

– Cheap picture frame (this is the kind we used, but I got them at Wal-Mart in the kid’s craft section for $0.97/each. If you’re looking to get a lot of frames, here they are even cheaper!)
– Scrapbook Paper – I love this pad and it’s bright colors
– Tacky Glue
– Scissors
– Pencil
– Baker’s Twine or Ribbon
– Two small clothes pins (like this – not the mini ones, but the one that are about an inch long.)
– Inspirational Quotes (you can use the ones I made up for my girls by clicking on the link and downloading.  18 quotes in one PDF file.  For personal use only please.  If you share the quotes, link to this page and not the download page, pretty please and thanks!).
 

DIRECTIONS TO MAKE YOUR INSPIRATIONAL QUOTE FRAME:

– Choose a scrapbook paper and flip it over so the printed side is down.  Trace around your frame, both inside the hole and the outside edge.
– Trace another separate rectangle (just inside the hole).  Make sure you flip this one over, as the pencil marks will be visible if you don’t.  We had some girls use coordinating paper for this, but I just used the same paper.  This will make the “back” to your frame.  See image below.  The black rectangles are what you should have traced on your paper.
Inspirational Quote Frame
– Cut out the middle rectangle of the top tracing by poking a small hole in the middle and then cutting on the line you traced.  We had a couple girls cut through to the middle.  We just showed them how to glue the paper down so the cut wasn’t as noticeable.
– Cut out the single rectangle about 1/2 inch bigger than it’s traced.  You’ll need the extra to sit on the lip/grooves of the back of the frame.  Cut bigger rather than smaller.  You can always take more off, it’s much harder to put it back on.  The girls looked at me like I was a moron when I said that, but guess how many had to go back and cut another back?  Hint: it was more than one!  See the image below for what pieces you will need.
Inspirational Quote Frame


– Glue the border (the top rectangle) to the frame with the tacky glue.
– Measure out a piece of ribbon or baker’s twine and cut it to fit inside your frame (just over six inches for a 4×6″ frame).  Glue the twine near the top on the inside edge of the frame.  Some of the girls used hot glue to speed up the drying time.

Inspirational Quote Frame

– Cut a slightly smaller rectangle and glue that to the inside “back” rectangle to make a little pocket you can store any extra inspirational quotes in.  *If I was smarter, I would have just cut the bottom of my “back” rectangle longer and folded it up to make the pocket.  That was too many steps ahead for my brain though.

Inspirational Quote Frames


–  Slide the “back” rectangle into the frame and secure the little tabs.
– Clip two clothes pins to the twine and hang your inspirational quote.  Ta-da!  

Inspirational Quote Frame


GIVE SOME LOVE & ENCOURAGEMENT WITH AN INSPIRATIONAL QUOTE FRAME GIFT!

Lots of steps, but it’s a pretty simple project, I promise.  I love that the quotes can be changed so easily and they are easy to keep track of with the storage pocket on the back.  This would be a great gift for older kids to make grandma and grandpa or a friend for Christmas, birthdays, Grandparent’s Day. Because, who can’t use a little encouragement through out the day; and, these Inspirational Quote Frames are the perfect way to share that little bit of love!


October 3, 2013 by Krista

DIY Witch’s Potion Bottles

These fun and easy Potion Bottles are the perfect addition to your DIY Halloween Decor! It’s the perfect spooky decor project to upcycle all your empty bottles and there are even printable potion bottle labels for you to download that will make this Halloween craft even easier! Bring out all the spooks and step up your Halloween Witch Decor with a great set of DIY potion bottles for all your witchy decorating.

Make Your Own Potion Bottles


Materials:
– Various bottles and containers (I will go through the ones I used in just a bit)
– Matte brown spray paint
– Sandpaper
– Potion Labels
– Glue gun & glue sticks
– Coffee grounds
– Shallow pans/baking sheets & a small pot
– Oven & Stove
 
Directions
THE BOTTLES:
– Wash your containers and bottles.  Scrape all the labels and goo off.  I washed mine in the dishwasher and then soaked the bottles that still had labels or glue on them in hot water for about 20 minutes.  The hot water soak will loosen the glue on the labels.  Peel off the glue and labels.  I had a few that were particularly stubborn (those Swedes know how to attach a label!  One of the bottles I used was from IKEA…) and I used a Goo-Gone-soaked paper towel on them to get them clean.
– Use the spray paint and paint your bottles.  I did this with the majority of my bottles, but there were three glass bottles I left.  I’ll go over that process in a moment.  I started off with the idea to do a mod podge stain on them, but it was taking FOREVER to get the shade I wanted.  So, I canned that idea and just settled on the spray paint.  If you want a lighter finish on the bottles, stand back a little further than usual when you paint them.  That way, you’ll just “dust” them, instead of a full-on layer of paint.  I was painting these on my kitchen island one stormy day and didn’t have a lot of space to play with so they ended up a little darker than I had first planned on making them.  Make sure you paint the lids too.  Let dry thoroughly.
– Lightly sand the bottles to give them an aged appearance.  Be careful not to sand off too much paint.  This bottle was an old vitamin bottle, so I didn’t paint it.  But, you can get the idea of the texturing you’re after.
DIY Witch's Potion Bottles
 
 
For the glass bottles, I wanted to age them and started off sanding them with sand paper. I’m an impatient crafter and after about five minutes of practically immeasurable progress I ditched the sandpaper and grabbed my bottle of glass etching cream from the cupboard.  It worked fabulously.  The hardest part was trying to apply the paste randomly.  Dang OCD tendencies.  Let bottles and cream stand 5-10 minutes… or until you remember you’re in the middle of a project.  Rinse and wipe dry with a paper towel.  Don’t forget to paint the lids for these bottles.
 
DIY Witch's Potion Bottles
 
DIY Witch's Potion Bottles
 
THE LABELS:
– Print off the DIY Witch’s Potion Bottles labels or make your own.  I used a laser printer to keep the ink from smearing.  I didn’t try it with an inkjet, so I don’t know how smeared they’d end up.  It might look like great aging, I really don’t know.  Also I printed mine on card stock.  Worked like a charm, none of them ripped.
– Preheat the oven to 200F (90C).
– On the stove heat about two (2) cups of water with a quarter (1/4) cup of coffee grounds.  I hate the smell of coffee, so this was the worst part for me.  Heat to warm, but not so warm you can’t touch it.  I had my hands in this up to my palms.
– Okay, now decide if you want to cut your labels apart before you stain them or after.  I did it after.  But, you might get some neater staining on the edges if you cut them apart before.  In a shallow pan, lay down your sheets of (or the cut apart) labels and use a small cup to pour the coffee over the paper.  Push the paper down against the pan to help it soak up the liquid.  Let stand 3-5 minutes or so.  The longer it stands the darker the labels will be.  Drain excess coffee back into the pot.
DIY Witch's Potion Bottles
 
 
–  Put the labels and the baking tray in the oven for 5-10 minutes.  If you cut the labels apart before you stained them, it’ll be closer to five.  If you didn’t cut them apart, it’ll be closer to 10.  When the paper is dry enough you can handle it without it tearing, take the tray out of the oven and carefully pick up the paper.  Holding the paper so that it is hanging over the pan, use a paper towel and gently dab it off.  This will remove any coffee grounds and extra liquid.  Hang to dry if possible.  (You can leave the paper in the oven longer and it will dry out faster.  Keep an eye out though.  Paper is flammable…)
DIY Witch's Potion Bottles
 
 
DIY Witch's Potion Bottles
 
 
– Once your labels are dry, cut them apart if you haven’t already, and use the glue gun to attach them to the bottles.  I found that gluing in stages worked the best.  And get as close to the edges as you can with the glue.  I started in the middle and put glue on that, then stuck it to the bottle.  Then I’d glue each end one at a time.
 
– Then I took sandpaper and lightly sanded the labels to age them.  Don’t go too crazy.  You’ll rip your stain off or tear the paper.  Lightly, my friends, is key.
 
Once the labels are on the jars, you can fill them.  Most of mine are actually empty.  Easier to store that way.  And less hazardous if my boys decide they need to play “potions” while I’m hiding in, er… uhm, using… the bathroom.
 
DIY Witch Potion Bottles
 
If you’re interested, below is a list of the bottles and jars I used in my DIY Witch’s Potion Bottles, as well as a list of filler ideas.  The blank fillers were ones that have labels, but I don’t have actual filler ideas.  Sorry.  Enjoy!  Happy Potion-Making!


  • « Previous Page
  • 1
  • …
  • 3
  • 4
  • 5

I'm Krista. Ringleader here on While He Was Napping, wife to my handsome Mr. Right & momma to my THREE energetic boys, Big J (9), Little J (6) & Little N (4). We FINALLY added a beautiful little girl to our family last December.

I’m knee-deep in Tonka trucks & Thomas trains. I survive our crazy days with Vanilla Coke, Sonic slushies, sweet snuggles and little giggles. When I tuck them in tight & kiss them good night, I get a little time to create & just be me.


It all happened
while (s)he was napping
Want More of My Story?

Privacy Policy

While He Was Napping respects your privacy and is committed to keeping any personal information collected on this website confidential. To find out what information we collect and how it is used or what options you have regarding your information, see our full privacy policy here. Creative Commons License The website found at whilehewasnapping.com and all subdomainsauthored and published by Krista is licensed under a Creative Commons Attribution-NonCommercial-NoDerivs 3.0 Unported License.

Pretty Chic Theme By: Pretty Darn Cute Design