While He Was Napping

momma gets stuff done

  • Home
  • About
  • Archive
  • Do It Yourself
    • Crafts
      • No Sew
      • Painting
      • Paper Crafts
      • Repurpose Projects
      • Vinyl
      • Washi Tape
      • Kid’s Crafts
      • Fonts
    • Sewing
    • Decorate
      • Home Decor
      • Holiday Decor
    • Celebrate
      • DIY Gifts
      • DIY Your Party
  • Recipes
    • Beverages
    • Appetizer
      • Bread
      • Other Appetizers
    • Snacks
    • Main Dish
      • Meat
        • Chicken
        • Beef
        • Pork
        • Seafood
      • Vegetarian
      • Slow Cooker
      • 30 Minute Meals
    • Dips & Sauces
    • Salads
    • Pasta
    • Soup
    • Dessert
      • Cookies
      • Brownies
      • Cupcakes and Cake
      • Box Mix Recipes
      • Other Sweet Treats
    • Breakfast Food
      • Pancakes
      • Waffles
      • Muffins
      • Other Breakfast Food
  • Family
    • Babies
      • Pregnancy
      • Newborns
      • The 1st Year
    • Toddlers
    • Preschoolers
    • Kindergartners
    • 6-8 Year Olds
    • The Grown Ups
      • Date Night
      • Romantic Gifts
    • Self Care
  • For the Home
    • Cleaning
    • Organizing
    • Emergency Preparedness
  • Travel
    • Travel Tricks & Tips
    • Traveling with Kids
  • Tech & Gadgets
    • Must-Have Apps
    • Techy Home Appliances
    • Gadgets & Electronics
    • Blogging Tips
  • Printables
    • Posters
      • Quote Printables
      • Subway Art Printables
    • Printable Organizers
    • Printable Journals
    • Learning Printables & Worksheets
    • LDS Printables
  • Holidays
    • New Year’s
    • Valentine’s Day
    • St. Patrick’s Day
    • Easter
    • Cinco de Mayo
    • Mother’s Day
    • Father’s Day
    • 4th of July
    • Back to School
    • Halloween
    • Thanksgiving
    • Christmas
    • Holiday & Seasonal Printables

January 27, 2012 by Krista

Weekend Wander #65

Welcome, welcome.  Let’s just get right into this, shall we?  There were some pretty fabulous link last week?  Did you check them out?!  Here are some of my faves:

Craft Room Organization @ Saving4Six
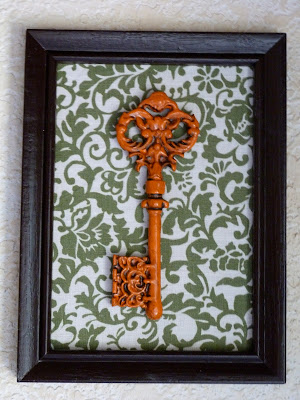
Totally JEALOUS!
Handwritten Lampshade @ Joyful Homemaker
DIY Terrariums @ Small Garden Love
Man, oh man… If only I didn’t have a two-year-old…
Congrats, ladies!  Grab a button in the sidebar if you’d like one.  Thank you to everyone who linked up.  There were so many awesome projects and ideas shared.  Your talent continues to impress.
Ok, real quick, a little housekeeping…
1.  Make sure you enter the Cutting Edge Stencils giveaway.  This is a super fantastic way to liven up your home.  The Cutting Edge Stencils staff is amazing to work with.  And $50 worth of product for free?  Yes, please.  So, go get on that.  After you link up, of course.
2.  Don’t forget Bundles of Baby starts Sunday, January 29, 2012.  I’ve got some super fun baby stuff to share with you.  There will also be a baby-themed link party.  So, bring your baby game and show it off.  I’ll try to do some features from that linky through out Bundles of Baby.
3.  And, just a heads up, I have the link parties set to post for the next month or so.  However, if I don’t get time to do features, I’m sorry.  Life will be getting a little hectic and crazy around here for a while.  Please continue to link and visit each other and I’ll get my head back in the game ASAP.  And make sure you check out the Bundles of Baby series that will last all next month.  Even if you don’t have any babies, you probably know someone that does… 

Ok, the good part.  And…. GO!

January 25, 2012 by Krista

I Love Us {Printable}

I really like this quote.  It’s so true.  My Mr Right and I are amazing together.  Don’t get me wrong, we fight and argue, just like most couples.  But, we get along really well.  When I was pregnant with Little Monkey, My Mr Right lost his job a week after we got the pink lines on the pregnancy test.  He was unemployed for almost six months.  We spend every single day together.  It was amazing.  Every day wasn’t fantastic and magical, and we disagreed and argued, but I’m so grateful we had that time together before we brought children into our family.  We are awesome.  I love us.

Maybe there’s an “us” you love too?  Shout it from the rooftops… or picture frame or card or whatever.  For your printing pleasure… click HERE to get a watermark-free copy
.

January 24, 2012 by Krista

In Case Of Emergency Kit

Some of the men in my life are SOO hard to gift for.  My husband is the kind that is incredibly particular about what he wants.  He is a computer geek to the max.  And I am not.  I don’t know enough to get “the good stuff”.  My dad is one of those guys that has everything and wants nothing.  Except he doesn’t really have everything, he just doesn’t care.  So, Christmas is rough.  I have to get them both gifts!  So, this past Christmas, they both got an In Case Of Emergency Kit.  It was a fairly inexpensive gift, $15-$20.  I got most of the stuff at the Dollar Tree.  This fits under the seat in my dad’s truck and in the back of our Jeep.

Here’s the How:
Supplies-
– #10 Can with lid
– Variety of items.  Examples:  Utility knife, electrical tape, duct tape, rain poncho, individually packaged and sealed beef jerky, individually packaged trail mix, rope, bungee cords, water purification tablets, band-aids, triple antibiotic ointment, flash light and extra batteries, tissues, small screwdriver set, small sewing kit, manicure set, chapstick, matches, superglue, toilet paper, emergency blanket, hand sanitizer, tire gauge, shoelaces, heat pack, lighter, alcohol swabs, aspirin, eye drops, other first aid items, ect.

Directions-
1.  Put all your items inside your can.  I had to unwrap some of the items.  Some didn’t fit in the can in the packages and some of the items I split between my dad’s kit and my hubby’s kit.

2.  I made labels to attach to the front of the cans.  And a contents label for the back.  I just taped the lids shut with packing tape.  I wanted an easy way to seal the can, but I want it to be easy to get into as well.  Since, well, “emergency” usually means “hurry”.

You can download the labels at 4shared.  The first link is the main label.  There are two variations of the contents label.  You can download the image and make any needed changes in Paint or Photoshop.

http://www.4shared.com/photo/_twkM1Fj/Emergency_Kit_Label.html
http://www.4shared.com/photo/dJCMk3wI/Emergency_Kit_Contents_Label.html
http://www.4shared.com/photo/iBZJ4m29/Emergency_Kit_Contents_Label_2.html

January 24, 2012 by Krista

Review & Giveaway: Cutting Edge Stencils

I’m just going to cut right to the chase here.  That way we can get to the really good part!  Stenciling.  Ever tried it?  I had done little stencil projects, but nothing that involved an entire wall or anything.  What I knew about stenciling could fill… a very small container.  Pregnancy brain is making me draw a blank at the moment.  Anyway, I saw a few other blogger that had used stencils in some of their projects and they had some impressive results.  But, they were bloggers that had built their own furniture and taken on some projects that I never would have (especially nine months pregnant!).

And then I got an email.  Cutting Edge Stencils wanted to know if I’d be interested in reviewing one of their products.  Since we’re renting, my first thought was “not in this house.”  But, while we were at my parent’s house for dinner, my mom brought up an idea she had for her bedroom.  She wanted to put a large tree on the wall and make it a Family Tree.  Then she turned to me and said “You’re the creative one.  Do that for me, ok?”  I had that deer-in-the-headlights look for about ten seconds and then remembered that email.

First off, let me say that working with Cutting Edge Stencils was fantastic.  They were quick and responsive and so willing to work around my crazy, hectic holiday schedule.  Shipping was fast and everything arrived in great condition.  I would definitely order from them again.  Not only that, their variety and selection of stencils is fabulous.  They really do have something that will appeal to everyone.  I knew I was looking for a tree; but, even then, it was hard to choose which tree!  And, one of my favorite things about stencils is that they are re-usable.  So, even though this was done in my mom’s house, I can use this again some day when we have a cute little nursery to decorate, or a sunny entry way, or somewhere else in our home – when we get one…

[All images courtesy of Cutting Edge Stencils]

So, I got this awesome box and was totally excited to check it out.  But, due to the aforementioned holiday craziness, the box sat in my parent’s living room for a couple weeks… It didn’t occur to me to unroll the stencil… fortunately, it didn’t cause any major issues or damage to the stencil.

Now, I’m no pro when it comes to stenciling.  Cutting Edge Stencils provides some great how-to videos to help those of us who are less than experienced (or completely clueless, like me).  These were super helpful, so don’t be intimidated.  These videos will walk you through it, step-by-step.

After the crazy died down, we set aside a day and planned to get this tree on the wall.  We used Valspar paint samples from Lowe’s.  My mom chose a brown for the tree trunk and branches and two shades of green for the leaves.  The paint samples were more than enough to cover the entire stencil.  And we spent most of our day trying to decide on which colors.  My mom is a little OCD and indecisive… not a productive combination.

This is the wall before

.
The first part of the stencil was super easy to put up and paint.  It’s suggested to use a paint roller, which i did for the tree trunk.  I ended up using a sponge brush for the smaller branches and leaves though so I had better control over what colors went where.  After I did the first part, I made my mom wait for 15 minutes so the paint wouldn’t drip or leak.  Apparently, that’s where I get my patience from (or lack thereof).

The second part of the stencil was a little more difficult.  We had to line up the trunk of the tree, but that part was pretty easy.  Because the top of the tree was all one stencil it was pretty big.  That made it was so large and had a lot of bridges and detail, it was hard to get everything to lay flat on the wall all at once.  I ended up doing the top in two sections.  I got the left part laid down and then painted.  Well, mostly.  The stencil fell off the wall once and we had to re-align it.  {Note to self: splurge on new painter’s tape…}  We let that dry overnight (mostly because it was after 9pm and I’d decided I had smelled enough paint fumes for the time being.)  We took the stencil down for the night.  I came back the next day and we re-positioned the stencil, lining it up in the middle and working outward to get the right side to lay well.  It worked out just fine.

TA-da!  This is the finished stencil.  
My mom has since gone back in and bridged all the gaps.  
OCD, remember?

The total time I spent painting was maybe two and a half hours.  It took probably about an hour or so to do the lay out of the stencil.  Laying down the bottom piece was super easy.  The top piece took a little longer (especially since we had to put it up again after it fell down).

The only things I didn’t love about the actual stencil was that it was clear.  I’d make it in a semi-frosted finish.  The clear stencil made it a little difficult to tell if I’d gotten all the pieces.  A semi-frosted finish would have made it a little easier.  This particular pattern may have been easier if the top of the tree had been two pieces instead of one big one, but it all worked out okay.  However, for a first time project, I’m happy with the way it all turned out.

Overall, it was a pretty easy project.  The results aren’t perfect and I will go back {eventually} and paint over the bridge gaps to make it a solid image.  The leaves on the tree were awfully forgiving and I didn’t worry too much about seepage or drips under the stencil.  We just call it ‘nature’s imperfection’.  There are some places I will have to go back and clean up a little.  But, if my OCD mother can deal with it, then I’d call it a success!

_______________________________________

Now, here’s the really fun part!  Cutting Edge Stencils wants to give one lucky While He Was Napping Reader the opportunity to try their hand at stenciling.  One winner will receive their stencil of choice (up to $50 in retail value).

I’m trying out Rafflecopter with this giveaway.  Simply select the entries you wish to complete, make sure you complete all steps in any multi-step entries and fill in any additional info required.  Submit and you’re good to go.  Let me know if you’re having problems with it.  I’ve entered a few giveaways with Rafflecopter before, but I’ve never hosted one with them, so… Thanks for being my guinea pigs.  =]  Good Luck!

P.S. Sorry you have to click the “Read More” link to get the entry form… I’m trying to figure out a way to make it show up without doing that.  If you know, clue a girl in, please?

a Rafflecopter giveaway

January 20, 2012 by Krista

Weekend Wander #64

I feel awful that I only got one post up this week!  Agh.  Especially since I actually have been super busy… some of the projects you’ll just have to join me for Bundles of Baby in a couple weeks and some of the busy has been things like laundry (I hate folding little tiny clothes), dishes (who knew we had so many bottles?!), and trying to re-arrange our house to accomodate all the things a baby needs (like, ya know, a bed…).

And, of course, going to the doctor.  Weekly visits just depress me.  There’s that hope that maybe this will be over soon, only to find out “yeah, just like last week.  I think you’ve got a few more weeks.”  Well, hopefully it will be over sooner, rather than later.  I’m anxious to meet the little one wreaking havoc on my guts.  And I am ready to sleep again, even if it’s only in short, interrupted, sporadic and unsatisfying bursts.  Oh and that minor detail of breathing…

I did hop on the Twitter bandwagon though, so… Come be my friend?  Pretty please?

Follow @WHWNKrista

Anyway, enough of that little ramble.  A few features from last week:

Anna has a fabulous series going on.  She’s helping you organize your house.  This will be a series I will get more involved in… In a couple months…  I’m running on fumes these days.  But, you should check it out!

I love skeleton keys.  Over at Bargain Bound, Emily found some cute ornaments.  I love what she did with them.

This is adorable.  I love all these furniture-turned-play-kitchens.  Every one of them is so different and unique, but still the same idea.  I want to make one so bad… but, it won’t happen as long as we’re in this house.  Guess I’ll just have to keep drooling over everyone else’s.  Over at 3KrazyChics, you can check out this awesome version.

Congrats ladies.  And thank you to everyone who linked up.  Sorry about all the mix-ups last week.  I’ve got a serious case of pregnancy brain.  It’s a miracle any of my projects are turning out…  =)  Now, the good part!  What’cha been doing?!

  • « Previous Page
  • 1
  • …
  • 139
  • 140
  • 141
  • 142
  • 143
  • …
  • 231
  • Next Page »

I'm Krista. Ringleader here on While He Was Napping, wife to my handsome Mr. Right & momma to my THREE energetic boys, Big J (9), Little J (6) & Little N (4). We FINALLY added a beautiful little girl to our family last December.

I’m knee-deep in Tonka trucks & Thomas trains. I survive our crazy days with Vanilla Coke, Sonic slushies, sweet snuggles and little giggles. When I tuck them in tight & kiss them good night, I get a little time to create & just be me.


It all happened
while (s)he was napping
Want More of My Story?

Privacy Policy

While He Was Napping respects your privacy and is committed to keeping any personal information collected on this website confidential. To find out what information we collect and how it is used or what options you have regarding your information, see our full privacy policy here. Creative Commons License The website found at whilehewasnapping.com and all subdomainsauthored and published by Krista is licensed under a Creative Commons Attribution-NonCommercial-NoDerivs 3.0 Unported License.

Pretty Chic Theme By: Pretty Darn Cute Design