While He Was Napping

momma gets stuff done

  • Home
  • About
  • Archive
  • Do It Yourself
    • Crafts
      • No Sew
      • Painting
      • Paper Crafts
      • Repurpose Projects
      • Vinyl
      • Washi Tape
      • Kid’s Crafts
      • Fonts
    • Sewing
    • Decorate
      • Home Decor
      • Holiday Decor
    • Celebrate
      • DIY Gifts
      • DIY Your Party
  • Recipes
    • Beverages
    • Appetizer
      • Bread
      • Other Appetizers
    • Snacks
    • Main Dish
      • Meat
        • Chicken
        • Beef
        • Pork
        • Seafood
      • Vegetarian
      • Slow Cooker
      • 30 Minute Meals
    • Dips & Sauces
    • Salads
    • Pasta
    • Soup
    • Dessert
      • Cookies
      • Brownies
      • Cupcakes and Cake
      • Box Mix Recipes
      • Other Sweet Treats
    • Breakfast Food
      • Pancakes
      • Waffles
      • Muffins
      • Other Breakfast Food
  • Family
    • Babies
      • Pregnancy
      • Newborns
      • The 1st Year
    • Toddlers
    • Preschoolers
    • Kindergartners
    • 6-8 Year Olds
    • The Grown Ups
      • Date Night
      • Romantic Gifts
    • Self Care
  • For the Home
    • Cleaning
    • Organizing
    • Emergency Preparedness
  • Travel
    • Travel Tricks & Tips
    • Traveling with Kids
  • Tech & Gadgets
    • Must-Have Apps
    • Techy Home Appliances
    • Gadgets & Electronics
    • Blogging Tips
  • Printables
    • Posters
      • Quote Printables
      • Subway Art Printables
    • Printable Organizers
    • Printable Journals
    • Learning Printables & Worksheets
    • LDS Printables
  • Holidays
    • New Year’s
    • Valentine’s Day
    • St. Patrick’s Day
    • Easter
    • Cinco de Mayo
    • Mother’s Day
    • Father’s Day
    • 4th of July
    • Back to School
    • Halloween
    • Thanksgiving
    • Christmas
    • Holiday & Seasonal Printables

March 22, 2011 by Krista

Placemat Apron & Giveaway

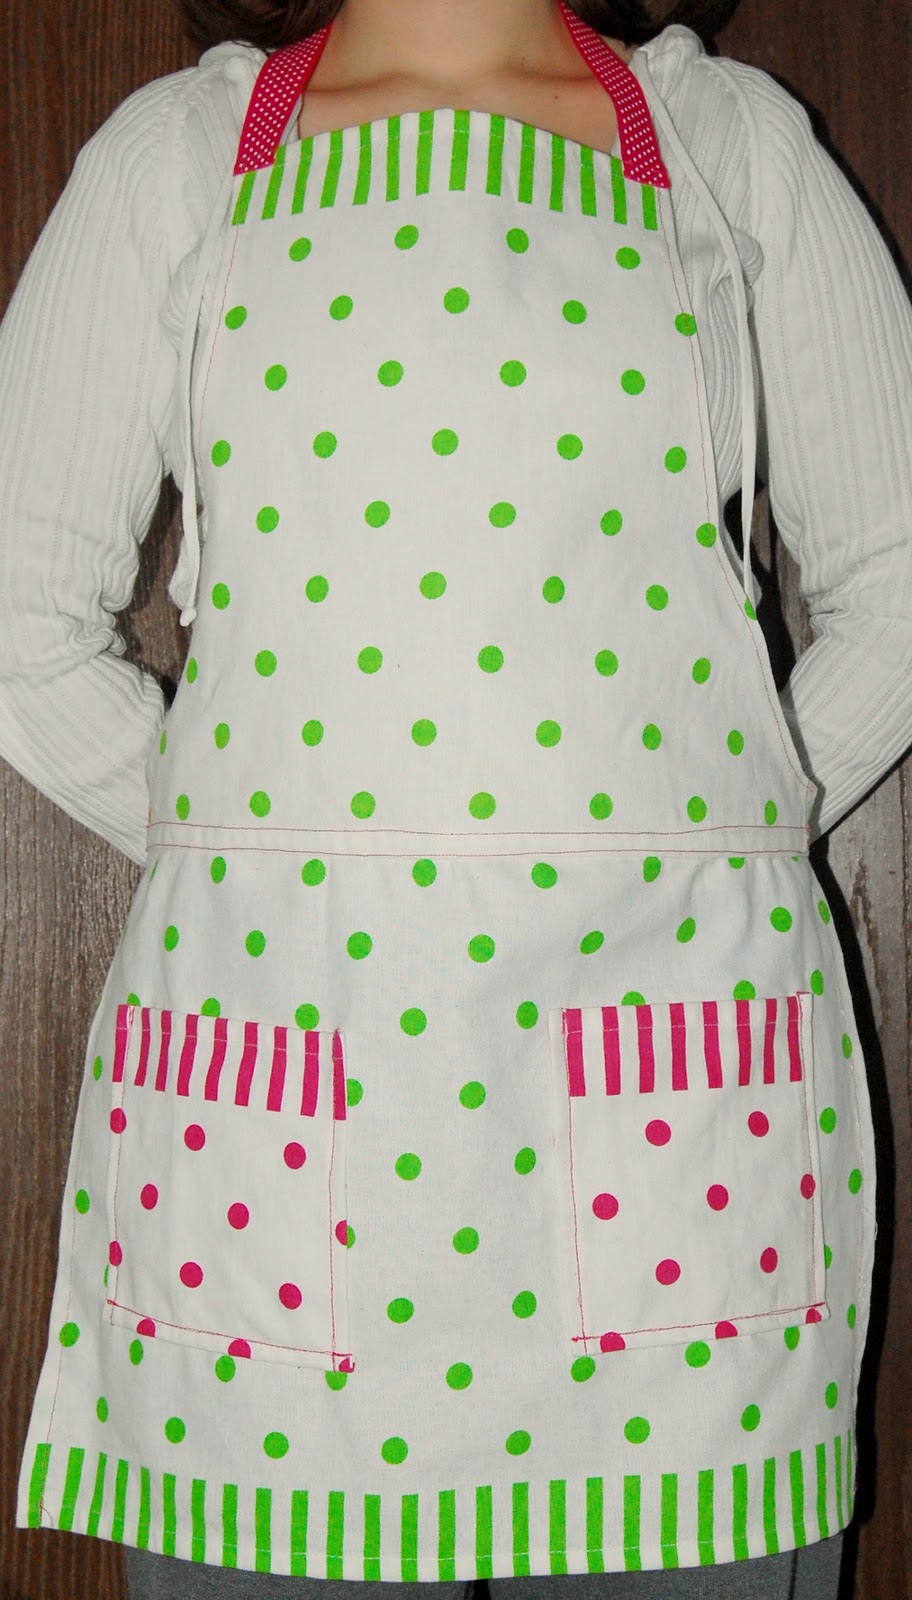
GIVEAWAY CLOSED!  Welcome, welcome.  Today is a BIG day: it’s my giveaway day in the Spring Fling Giveaways Event!  Woo Hoo!  Well, here is the little pretty you could get your hands on:

A Spring-y, fun and flirty apron.  Your call as to where you use it: kitchen, craft room, ect.  It’s got an adjustable, Velcro neck tie and two pockets.

First, I’m gonna tell you how to make your own… In case you are so inclined.  Actually, it’s pretty easy and it was rather frugal.  Ready?  Giveaway entry requirements are listed under the tute…

Here’s the How to:
1)  You will need three placemats, two identical and one coordinating.  I found mine at the Dollar Store.  Yeah, for real.  One suggestion, before you buy the placemats, check that they are the same width.  It’ll make things easier later on.  You will also want coordinating ribbon, Velcro and thread.


2)  Begin by sewing the two identical placemats together width-wise.  You will want to put the top one overlapping the bottom one.  Sew the edges of both placemats down, so there will be two seams.

3)  Next, measure out your ribbon for side ties.  I made mine about 15 inches long for each side.  Sew those on where the placemats over lap.  I sewed mine in-between the two placemats, but if your mats are the same size, you won’t have the extra hanging fabric I would have.  That’s why I did it in-between.

  
4) Fold the apron in half and cut the top placemat to create the arm holes and neckline.  I left my neckline straight.  I folded the slanted arm holes back, stitched it down and then applied Fray Check to the seam.  Or you can sew the seam under.  I didn’t like the way it made my top placemat lie when I had it on though.

5)  Measure out your ribbon for your neck ties.  If you choose to make it adjustable, one side should be about 1.5 times as long as the other side.  Sew the ribbon to the top of your apron.  Pin it on and try it on to see how it sits while you’re wearing it.  Make sure it’s in the right position before you sew.

6)  Pin your Velcro on and sew it to the ribbon.  If you want it to be adjustable, make one side long and the other side just enough to securely attach.

7)  Ok, time for your pockets.  Take your coordinating placemat.  Decide how big you want your pockets and how many.  Cut them out.  Hem the edges.  Place the wrong side of the pocket on the right side of the apron in the arrange you desire.  Sew on.

TA-DA!  You’ve done it!  Fairly easy, right?  Only seven steps and total cost of this project: less than $5.  Out of pocket is a little more, but I still have ribbon, Velcro, thread and a little bit of my third placemat to use on other projects.  Not too shabby.

Ok, Now comes the best part!  Wanna snag this little baby for yourself?  Well, here’s what you gotta do:

GIVEAWAY CLOSED!
MANDATORY ENTRY: Follow While He Was Napping blog with GFC.  Just hit the follow button on the right sidebar.

EXTRA ENTRIES:
1)  Like WHWN on Facebook.
2)  Check out my Etsy and leave me a comment on your favorite item.
3)  Link up a recipe to the Recipe Exchange AND place the button on your blog.  Please include your link number at the party (hover over your image and the number will show up) and the link to your blog where you have placed the button in your comment.  If I can’t find both, this entry doesn’t count.
4)  Follow Ask Anna.

That’s a total of 5 possible entries per person.  Please leave a SEPARATE COMMENT FOR EACH ENTRY!  Giveaway ends March 25 at 11:59pm PDT.  Winner will be chosen via random.org and announced here on March 26.  If you win, you must contact me within 48 hours or a new winner will be chosen.  I will email you if you leave an email address… I won’t go hunting for one though.  I will verify the mandatory entry, as well as the winning entry method.  Again, PLEASE LEAVE A SEPARATE COMMENT FOR EACH ENTRY (or you won’t get the right amount of entires!).  Good Luck!

Krista


Visit thecsiproject.com

March 22, 2011 by Krista

Soft Pretzels

The Christmas after My Mr Right and I got married, my mother-in-law gave all of us this AWESOME recipe book with recipes from generations back, as well as ones she used in her family and recipes her kids and good friends use in their families.  It’s quite the feat, this recipe book, and one of my favorite resources.  This recipe is one of our very most favorites!

SOFT PRETZELS

Ingredients:
1Tbsp Yeast
1/8 Cup Warm Water
1 1/3 Cups Warm Water
1/3 Cup Brown Sugar
3 3/4 Cups Flour
1 Tsp. Salt

Directions
Dissolve yeast in 1/8 cup warm water. Add remaining ingredients and beat until smooth. Kneed until smooth.  Sometimes I just throw the stuff in the bread maker on the dough cycle… a lot less arm work.  Optional: Let dough rise in an ungreased bowl, uncovered, for 1 hour.  Divide into 12 pieces and shape into pretzels.

Bring to a boil:
1 Quart Water
3 Tbsp. Baking Soda
3 Tsp. Sugar
Drop pretzel into boiling mixture. About 15 to 20 seconds on each side, Place on cookie sheet. Sprinkle with course sea salt. Bake at 400° for 10 to 15 minutes, until golden brown.  Watch the bottoms… they over-cook first.

Yum!  This takes some time, but they are SOO worth it.  Store any extras in a bowl covered with a dish towel.  If you put them in an air-tight container it gets too moist and the pretzels absorb the salt crystals.  And they are always better fresh… we triple the recipe (for 8 people) and rarely have leftovers.  Carb overload?  Yes, please.

March 21, 2011 by Krista

Spring Fling Day 2

Don’t forget to link up to this week’s Weekend Wander.  And come share your favorite recipes at the Recipe Exchange!


Today is day two of the 14 days of Fabulous Giveaways!  April at Wildflowers and Whimsy is hosting this great party.  Each day, two new giveaways will begin.  Each giveaway lasts 3 days and takes place on the sponsor’s blog.  Each blog will post a reminder of which blog’s giveaways begin that day.  So come back everyday to find out where to go next to enter to win some pretty awesome stuff!

Today’s Giveaways:

Suze @ Time Well Spent has these up for grabs:


And Shawna @ A Very Dandoislion Life has this awesome set for some lucky girl!


Yesterday’s giveaways:

Go grab these cuties that Leighann @ A Crafty Southern Chick is giving away.  Also, up for grabs is a 20% off Coupon to her super cute Etsy!


And Amy @ Increasingly Domestic has this sweet set of goodies up for grabs!

Go get your name in for these fun things!

Come back tomorrow for more……


Krista

March 21, 2011 by Krista

Felt Play Mat

I first saw this idea a while back at A Girl and A Glue Gun.  I’ve blogstalked her for a long time.  She has since made several different versions and has inspired mommas all over blogland to try their hand at it.  I have been waiting for Little Monkey to get to the age where he’d appreciate, and actually play with, this rather than seeing how long it takes to destroy it.  I wouldn’t put it passed him to think, “Hey Mom, let’s see how strong felt really is!” as he rips the road off.  And I’m not about to try to sew it all.  Sorry, don’t have that time or patience.  That little scenario has held me back in making Little Monkey’s mat.  But, a friend’s little boy just had a birthday, so I took the opportunity to practice by making him one.  Cute, right?  Well, like I said – not my original idea – but this is one of those projects that you can customize for your child or even for each individual child.  That’s one of the reasons I love the idea.

Here’s the How:

1)  First, you will need two large sheets of felt, one black (for the road) and one of your color choice. (I bought mine in a package at Michael’s for $2)  You can use smaller sheets of black for your road, but I thought a single, large sheet would be easier than trying to piece it all together. You will also need an assortment of felt (usually between $.15-$.30 for a 8.5×11” sheet), a glue gun and glue sticks, scissors, yellow puffy paint and any other embellishing items you might want.
2)  I started off by laying my black felt sheet on top of my green one and pinning it down to hold it in place.  Then I began constructing the different places I wanted on my mat.  I did a park, houses, gas station, police station, fire station, a pond, a farm and an airport.  “Constructing” the town took the most time, by far.  But, I enjoyed making it all up.

3)  I then placed all my town pieces on my pinned mats, in the reverse layout of what I wanted the final project to look like.  I used a piece of chalk to draw out a road.  I cut the road out.

4)  Then I flipped everything: the road I turned over so you couldn’t see the chalk marks and the town pieces I  moved to the opposite side of the mat. 
5)  Then comes the fun part: glue everything down.  I used far less glue than I thought I would, but It still ended up being a fair amount.  There were a few things I didn’t secure down: the door on the fire station lifts up, the swing at the park isn’t secured, and the barn doors open.


6)  After it’s all glued down, grab some cars and test it out.  Once you know that it’s a great little play mat, put your little ones down for a nap.  Then, when the possibility of someone stepping on or playing with your mat has decreased, grab your yellow puffy paint.  Paint lines on your roads.  I also added stop signs to some of the roads.

The only thing I had to buy was the big felt ($4) and the Puffy paint ($1).  I had everything else on hand.  $5 for a totally awesome gift?  I’m a very happy camper.

So, go make your own play mat and check out the different versions of Kimbo’s at A Girl and a Glue Gun.  She also has a post with shout outs to versions other mommas have made!  It’s pretty awesome and a great resource.  Go create!

Krista


Visit thecsiproject.com

March 20, 2011 by Krista

Spring Fling Giveaways Day 1

Don’t forget to link up to this week’s Weekend Wander.  And come share your favorite recipes at the Recipe Exchange!


Today is day one of the 14 days of Fabulous Giveaways!  April at Wildflowers and Whimsy is hosting this great party.  Each day, two new giveaways will begin.  Each giveaway lasts 3 days and takes place on the sponsor’s blog.  Each blog will post a reminder of which blog’s giveaways begin that day.  So come back everyday to find out where to go next to enter to win some pretty awesome stuff!


Today’s Giveaways:

Go grab these cuties that Leighann @ A Crafty Southern Chick is giving away.  Also, up for grabs is a 20% off Coupon to her super cute Etsy!


And Amy @ Increasingly Domestic has this sweet set of goodies up for grabs!

Go get your name in for these fun things!

Come back tomorrow for more……


Krista

  • « Previous Page
  • 1
  • …
  • 188
  • 189
  • 190
  • 191
  • 192
  • …
  • 231
  • Next Page »

I'm Krista. Ringleader here on While He Was Napping, wife to my handsome Mr. Right & momma to my THREE energetic boys, Big J (9), Little J (6) & Little N (4). We FINALLY added a beautiful little girl to our family last December.

I’m knee-deep in Tonka trucks & Thomas trains. I survive our crazy days with Vanilla Coke, Sonic slushies, sweet snuggles and little giggles. When I tuck them in tight & kiss them good night, I get a little time to create & just be me.


It all happened
while (s)he was napping
Want More of My Story?

Privacy Policy

While He Was Napping respects your privacy and is committed to keeping any personal information collected on this website confidential. To find out what information we collect and how it is used or what options you have regarding your information, see our full privacy policy here. Creative Commons License The website found at whilehewasnapping.com and all subdomainsauthored and published by Krista is licensed under a Creative Commons Attribution-NonCommercial-NoDerivs 3.0 Unported License.

Pretty Chic Theme By: Pretty Darn Cute Design