While He Was Napping

momma gets stuff done

  • Home
  • About
  • Archive
  • Do It Yourself
    • Crafts
      • No Sew
      • Painting
      • Paper Crafts
      • Repurpose Projects
      • Vinyl
      • Washi Tape
      • Kid’s Crafts
      • Fonts
    • Sewing
    • Decorate
      • Home Decor
      • Holiday Decor
    • Celebrate
      • DIY Gifts
      • DIY Your Party
  • Recipes
    • Beverages
    • Appetizer
      • Bread
      • Other Appetizers
    • Snacks
    • Main Dish
      • Meat
        • Chicken
        • Beef
        • Pork
        • Seafood
      • Vegetarian
      • Slow Cooker
      • 30 Minute Meals
    • Dips & Sauces
    • Salads
    • Pasta
    • Soup
    • Dessert
      • Cookies
      • Brownies
      • Cupcakes and Cake
      • Box Mix Recipes
      • Other Sweet Treats
    • Breakfast Food
      • Pancakes
      • Waffles
      • Muffins
      • Other Breakfast Food
  • Family
    • Babies
      • Pregnancy
      • Newborns
      • The 1st Year
    • Toddlers
    • Preschoolers
    • Kindergartners
    • 6-8 Year Olds
    • The Grown Ups
      • Date Night
      • Romantic Gifts
    • Self Care
  • For the Home
    • Cleaning
    • Organizing
    • Emergency Preparedness
  • Travel
    • Travel Tricks & Tips
    • Traveling with Kids
  • Tech & Gadgets
    • Must-Have Apps
    • Techy Home Appliances
    • Gadgets & Electronics
    • Blogging Tips
  • Printables
    • Posters
      • Quote Printables
      • Subway Art Printables
    • Printable Organizers
    • Printable Journals
    • Learning Printables & Worksheets
    • LDS Printables
  • Holidays
    • New Year’s
    • Valentine’s Day
    • St. Patrick’s Day
    • Easter
    • Cinco de Mayo
    • Mother’s Day
    • Father’s Day
    • 4th of July
    • Back to School
    • Halloween
    • Thanksgiving
    • Christmas
    • Holiday & Seasonal Printables

October 8, 2010 by Krista

October Spooktacular: Halloween Hurricanes

So, I have seen these ALL over blogland, it’s by no means an original idea… BUT I see them over and over and I fall even more in lust with them!  They are just so gorgeous!  They are so versatile and can be used all year long, not just during Halloween season!  That’s my favorite part.  Followed closely by how SHOCKINGLY cheap and easy it was to make!  Cheap and easy may not always be a good thing… but in this case, it so is!  So… Here they are:

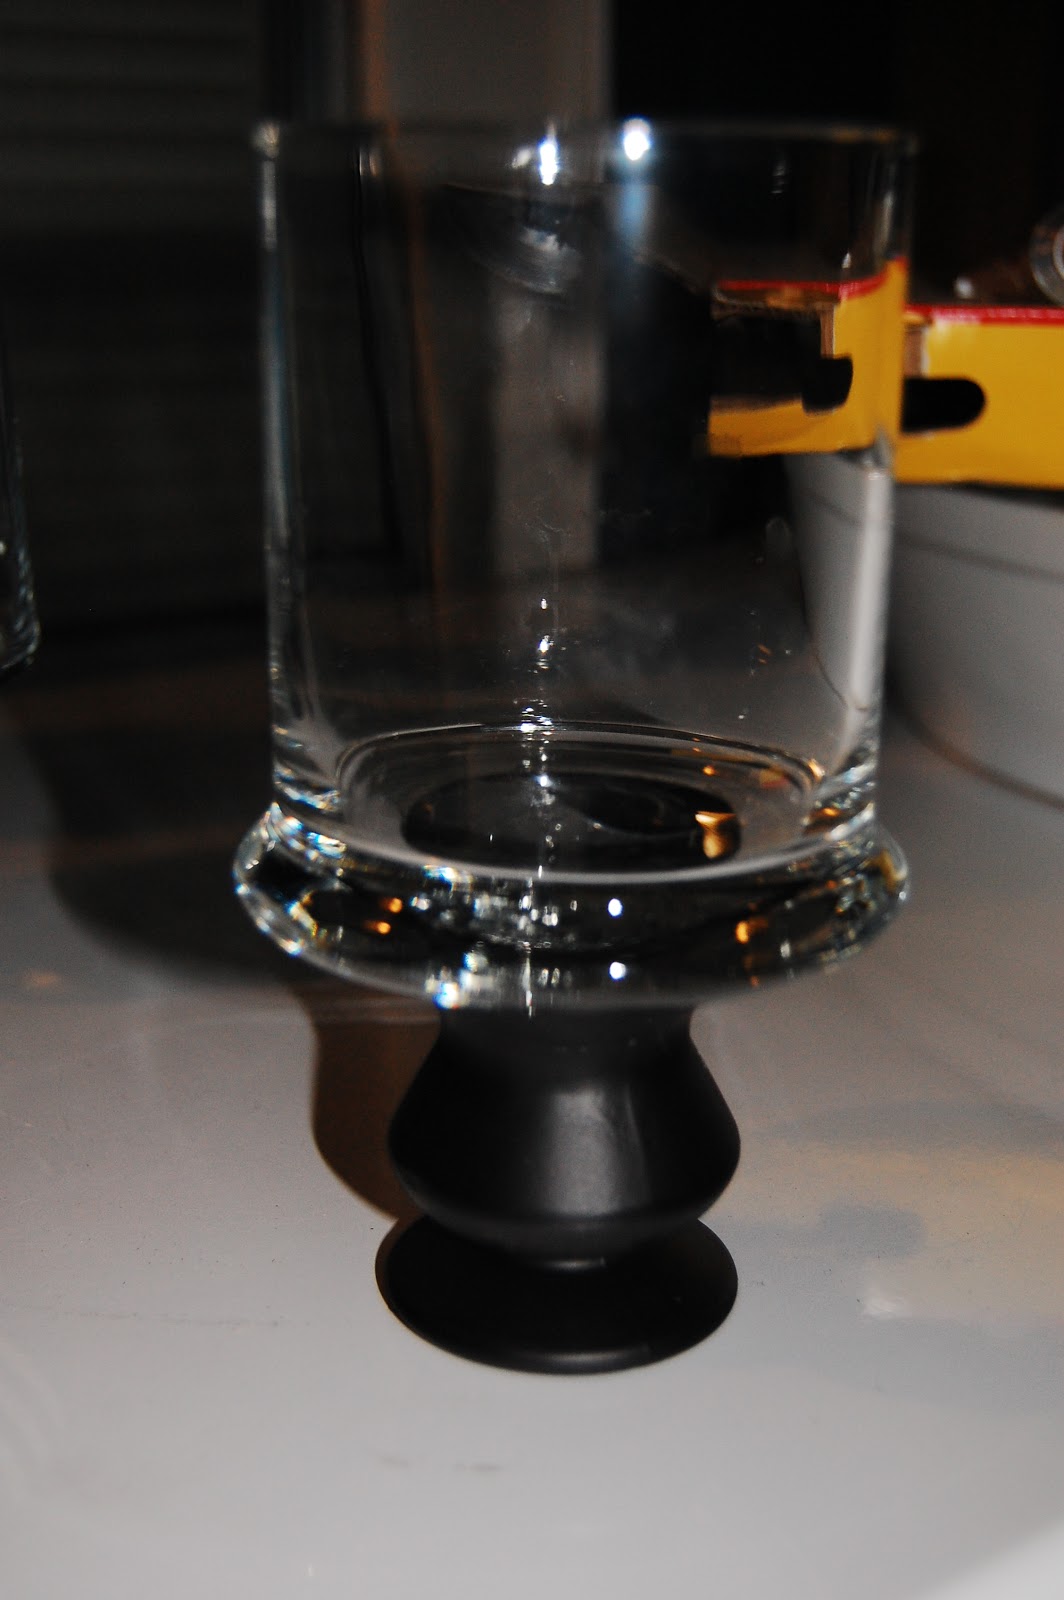
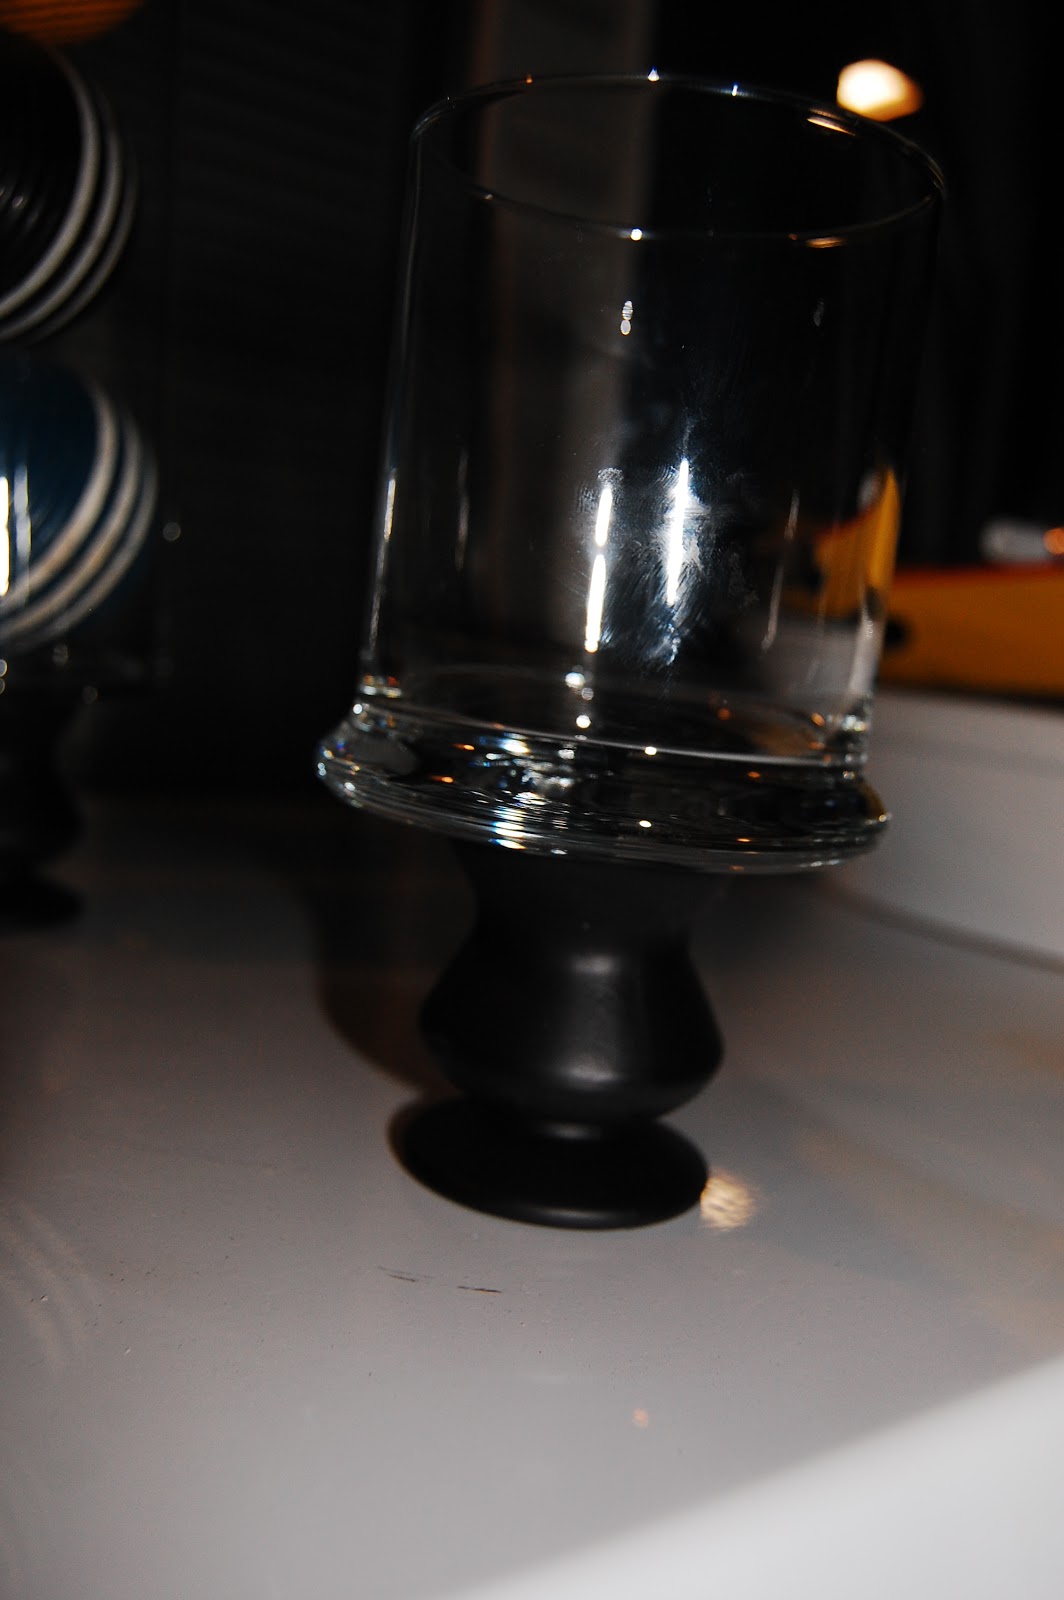
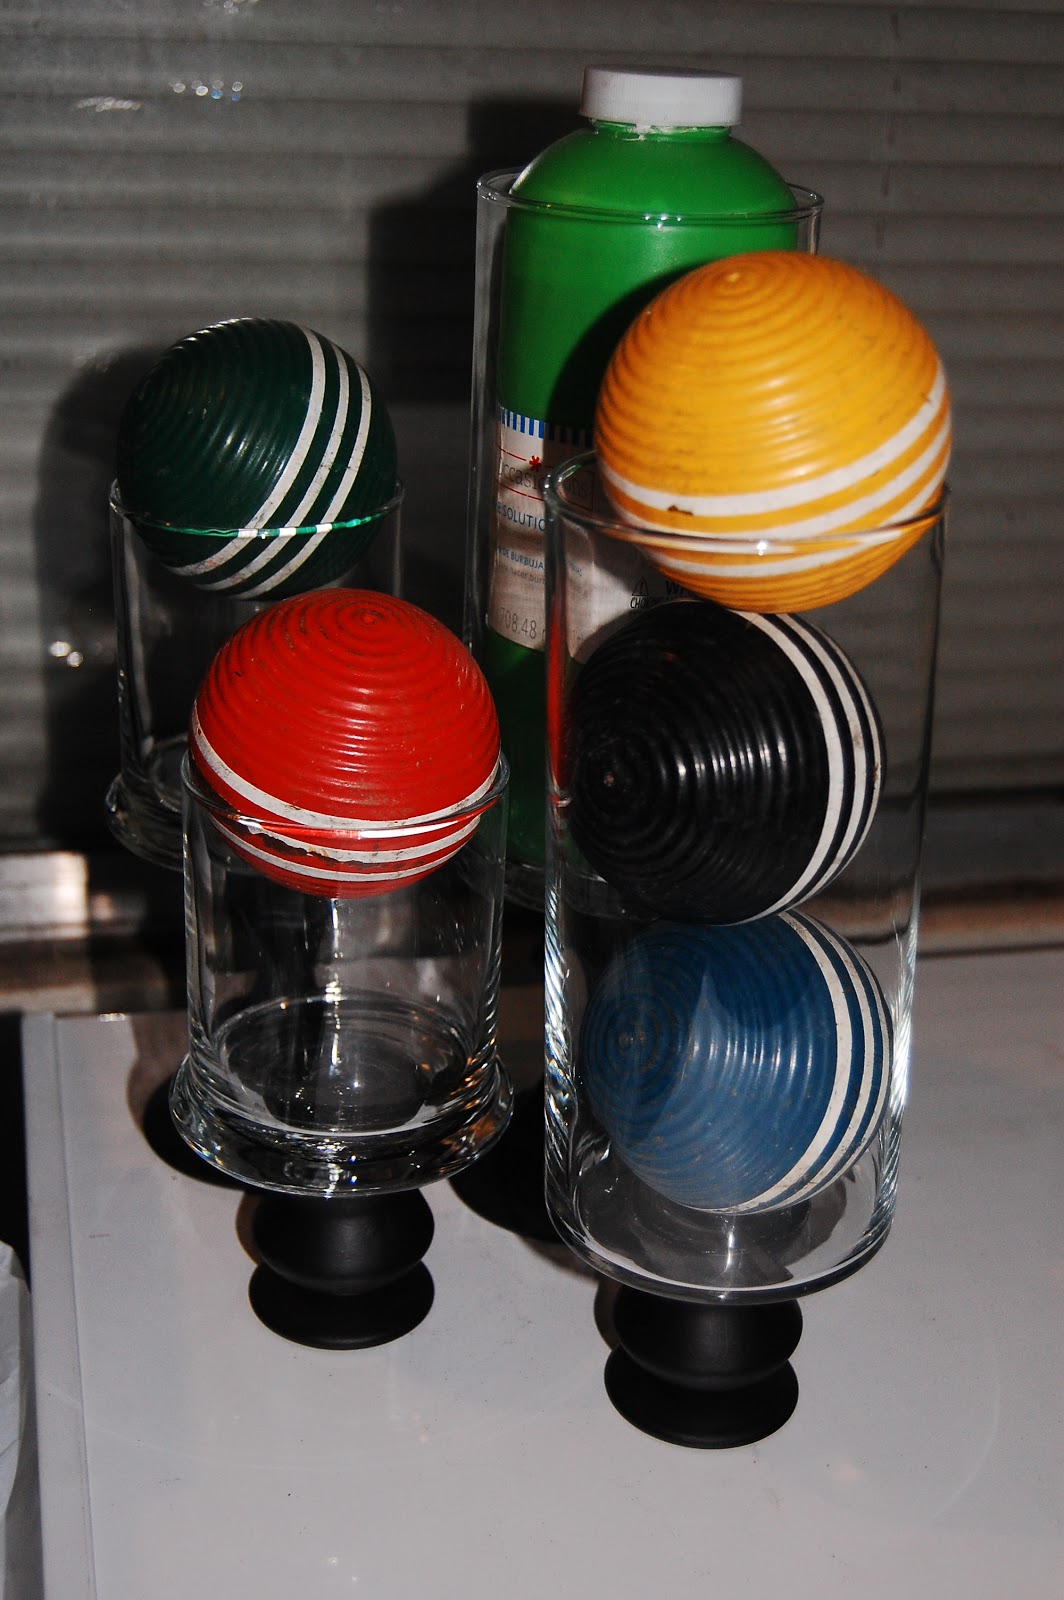
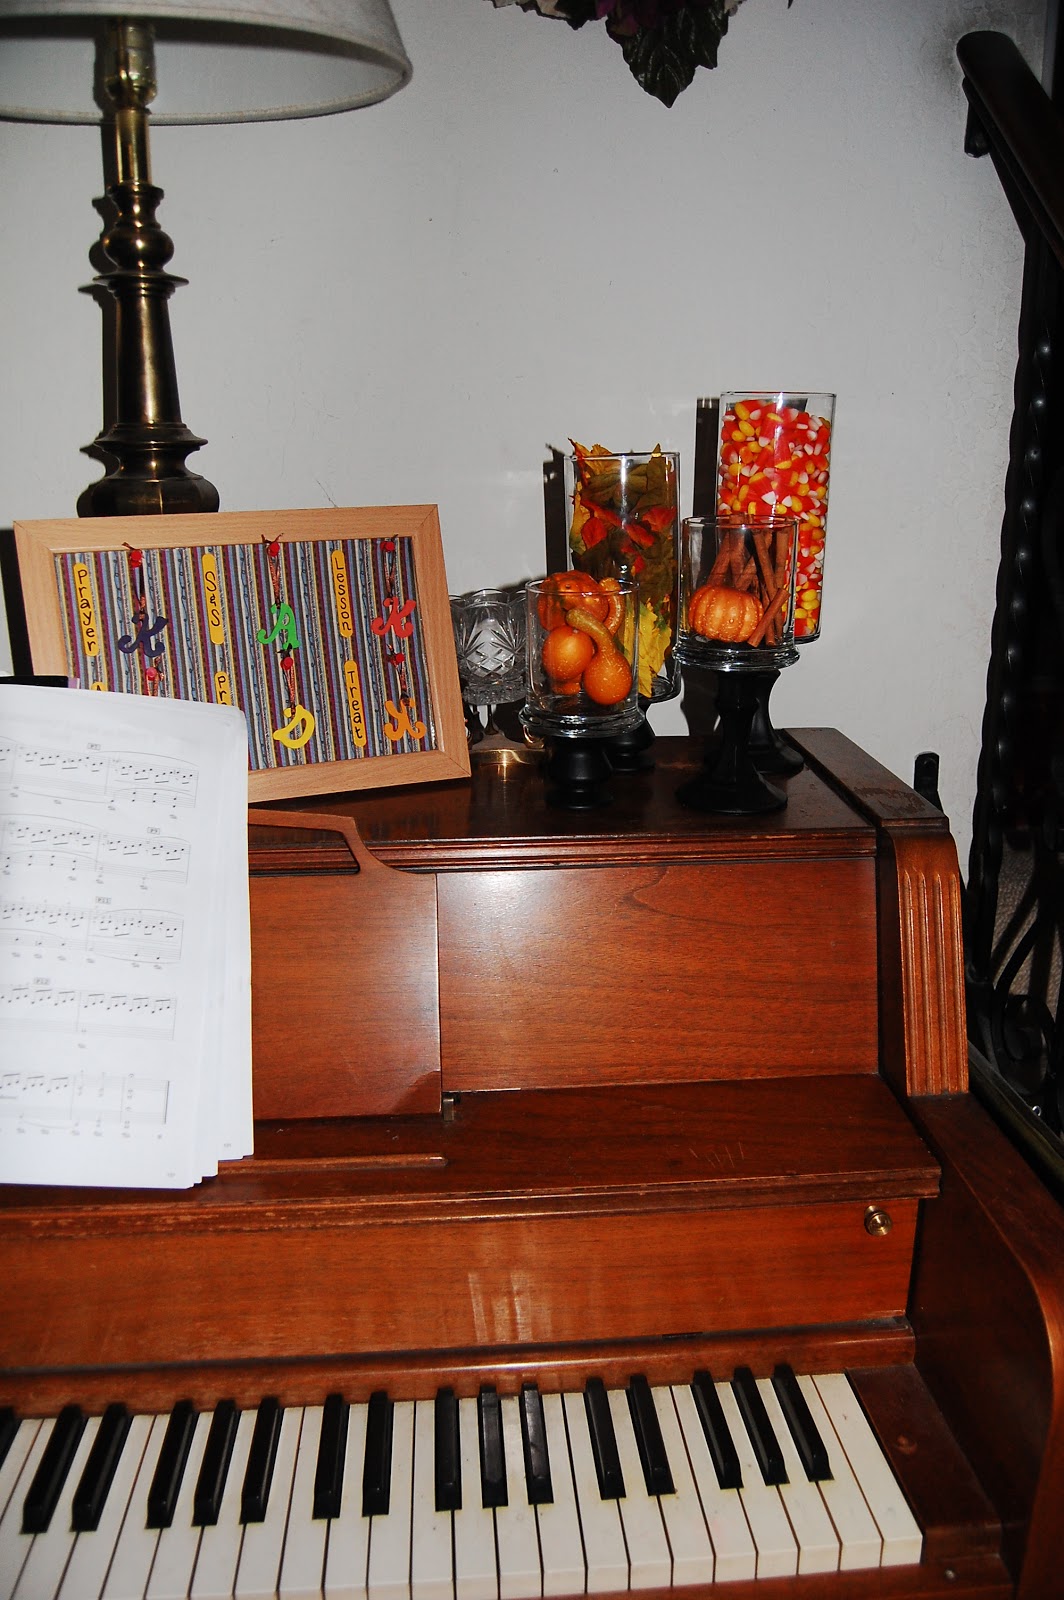
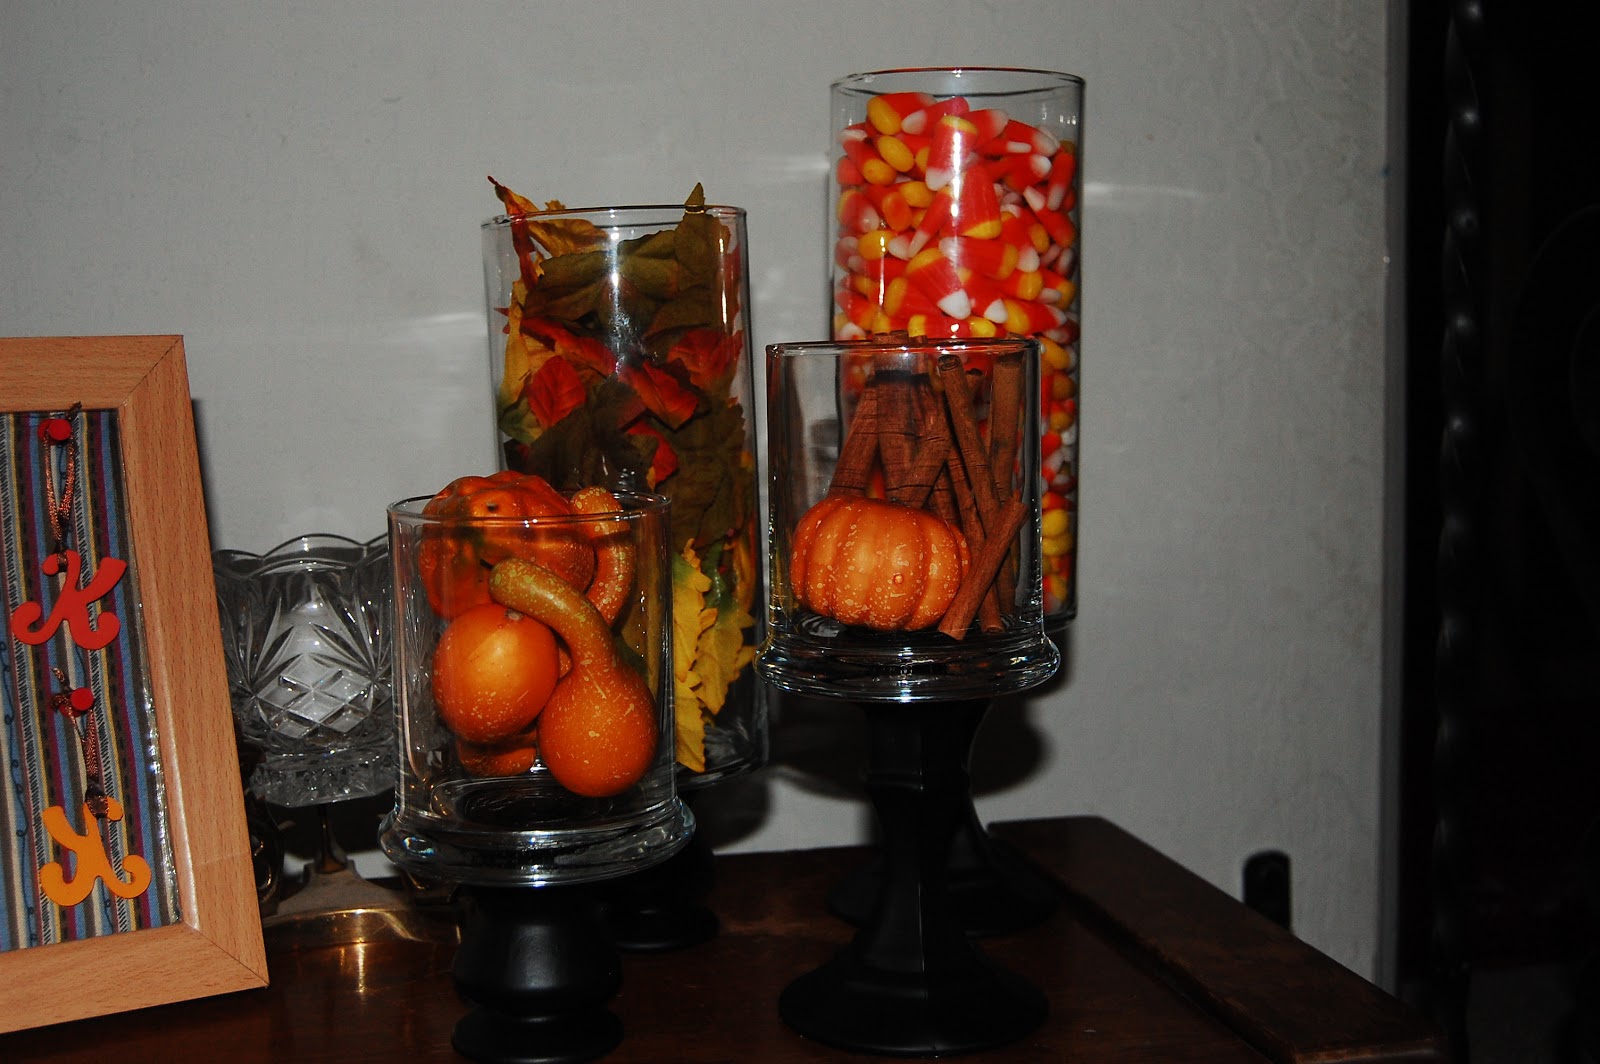
I failed to take “before” pictures!  I know, shame on me!  I bought two large vases and two small vases from the Dollar Store.  I also bought two tall candlesticks and two small ones (the small ones came in a package together).  I spray painted the candlesticks…. told you I have a spray paint obsession.  This is the step I added to all the other Hurricanes I’ve seen around.  I really like the way they turned out.  I let that dry, then used LockTite to glue each of the candlesticks to a vase.  I opted to vary the heights of my hurricanes by putting a tall vase on both a tall candlestick and a small one.  Thus, giving me four different heights.  I let those dry… it took like three or four days because I wasn’t thinking and the glue in the holes took a while longer to dry.  Anyways. 


Weigh the vases down so they dry securely.  I used croquet balls… and a big bottle of bubbles.  Hehehe.  After they are all dry, fill ’em up.

I put candy corn, faux leaves, styrofoam gourds, and cinnamon sticks in my hurricanes.  Place them all pretty like on the piano and sit back and enjoy!  And after Halloween… Christmas things will replace the Halloween things.  How easy and versatile.  LOVE IT!

 LOVE!!!

Pin It

October 7, 2010 by Krista

Craftsy ‘Cause I Can: TP Pumpkins

I’ve seen these around and thought they were cute, but wasn’t totally smitten.  I did have some fall fabric and TP, of course, so I thought “meh, why not?”  I put these together and guess what?!?  I love them.  I had to post about them to get everyone in the mood for the Halloween Party this weekend!  Check ’em out!

All I did was take some fat quarters, put my TP rolls in the middle, wrap the fabric up around the toilet paper and stuff the ends in the TP tube.  Then I took the cardboard that the fat quarters came wrapped around, rolled it up and shoved it in the top.  (Actually I did use half of an old TP roll that I saw in the trash – the other half was too squished to use though – on the fattest pumpkin.  That’s why the stem kinda goes off at a slight angle.)  That box of raffia I got off of Craigslist… yeah, took some of the ginormous pile of green that was in the box and tied it around the cardboard stems.  Fluff to perfection.  All done!  Easy peasy, and oh, so cute!

Pin It

October 5, 2010 by Krista

October Spooktacular: RIP Cupcakes

Aren’t these fun?  I was looking for cupcake ideas, because I love cupcakes, and saw a couple cute Halloween ideas.  Some were just a little too simple – crushed Oreo’s for dirt – and some were WAAY too hard – a whole haunted house on each cupcake!  I am, by no means, a professional baker; but, I do enjoy decorating cupcakes as long as it’s simple enough that I don’t get overwhelmed.   So, here’s an idea that anyone can do.  Let’s kick off October Spooktacular with a little extra pizzazz!

TOMBSTONE CUPCAKES
Pin It

Ingredients:
1 c white sugar
2 eggs
1 1/2 c white flour
3/4 c milk
1/2 butter
2 tsp vanilla extract
1 3/4 tsp baking powder
6 tbs cocoa (optional)  

*If I hadn’t forgotten I was nearly out of cocoa I would have put it in my recipe.  It would look better with the theme of the cupcake… and chocolate is my favorite.  But, I needed the little I had left for the frosting.  
Directions:
– Line each muffin tin hole with a cupcake wrapper.  Preheat the oven to 350F.
– Cream sugar and butter with an electric mixer.  
– Beat in the eggs.  Add vanilla.  
– Combine flour and baking powder, add to creamed mixture. 
– Mix well. Stir in milk until batter is smooth.
– Pour batter into cupcake wrappers.  Fill wrappers about 3/4 of the way full.
– Bake 18-25 mins, depending on your oven and altitude.  Cake is done when it springs back to the touch and you can cleanly insert and remove a toothpick into the center of the cupcakes.

CHOCOLATE FROSTING


Ingredients:
1/4 cup Butter
1 cup Powdered Sugar
2 Tbsp Milk
3 Tbsp Cocoa
1/2 tsp vanilla (or other flavoring, if desired)

Directions:
– Melt the butter in a microwave safe dish on high for about 20 seconds.  Stir and add 10 more seconds if it’s not melted yet. 
– Mix the powdered sugar into the butter.  
– Gently stir in the milk.  Start slowly or you’ll get a big poof of powdered sugar dust.  Mix well.
– If you’re flavoring the frosting add that now.
– Pull out some of the white frosting and put it in a zippy bag.  You’ll use it in a moment.  
– Add the cocoa and mix well.

TOMBSTONE AND WORMS DECOR

Ingredients:
Nutter Butter Cookies (I used generic, Dollar Tree Nutter Butter knock offs.  They didn’t taste quite as good, but they still worked.)
Gummy Worms
White Icing (Remember that little baggie you just filled up)

Directions:
– Cut the Nutter Butters in half with a knife.  I found it was best to score the cookie on both sides first and then carefully work my way through one side of cookie.  Flip and then cut the other cookie.  That gave me the cleanest edges.  But you can just chop them too, it’ll be in the frosting anyway…
– With the white icing, go around the top curved edge of the cookie and then write “RIP” or whatever other message you want on the cookie.  It’s not a lot of space so short messages work best.  
– Stick your gummy worms on and serve!

You could do the crushed chocolate cookies on top of the frosting too, for a more ‘dirt-like’ appearance.

Other fun topping ideas:
– candy pumpkins
– skeletons drawn on with the white icing
– plastic spider rings
– eyeball candies
– cotton candy spider webs


October 1, 2010 by Krista

October Spooktacular: Halloween Tiles

First off, I want to say “Welcome, October!  And all my crafty friends, a great big welcome to you!”  Today is October 1st, which means we get to kick off October Spooktacular!  I’m so excited for this event!  I hope you are too.  So let’s get to it!

Today is Fanciful Friday: Halloween Tiles!  I found this super cute digi scrapbook kit from Summertime Designs.  She’s got great stuff (and it’s free!(and for personal use only, of course.)).  Make sure you check her out!  I seriously spent like two days downloading her kits because they were all so great I had to have ALL of them!  Anyway, she’s got some incredibly cute Halloween kits.  I used “Happy Halloween” and “Fangs for the Memories” Kits to create this project.

This was super simple but I think it turned out fantastic.  Here’s what I did:

Take four 4 in standard tiles.  Mine were white, so out came the black spray paint.  I think I may have a spray paint addiction!  While that was drying, I opened up my ever trusty Photoshop (I heart Photoshop!) and put together my four collages.  One with a cat, a candy corn, a pumpkin and one with a bat.  Then I printed those on white cardstock and cut them out.  After making sure my tiles were dry, I put a layer of mod podge on the BACK of the cardstock and stuck it to the tile.  Don’t put mod podge on the front or it will smear your ink.  EEK!  Repeat with the other three tiles.  You may use these images for your own personal use, but please keep it to that.

Then I got this box of raffia on Craigslist… I have to show you this box…  Any guesses how much I paid for it?  Ok, actually my hubby went and got it.  He’s my master bargainer… $5.  That’s right I got this whole box for $5.  I love my husband.  Hehe.  Back to the tiles.

I took some of the raffia and added little embellishments to each tile with tacky glue.  I let that all dry.  Then, I used TiteLock glue to glue Halloween ribbons to hang them from.  Waa-lah!  All done!  I just love how they turned out. 

Want to get yourself a set?  Well, you’re in luck… I’m going to give one away.  Now, like I said earlier, Summer’s kits are for personal use only.  So… This giveaway set won’t look exactly like this set, but it will be the same idea and very similar.  I will get a picture of it up tomorrow The picture below is the set that is being given away.  Who doesn’t love free stuff?

Here’s how to enter:


Leave a separate comment for each.
1) Follow While He Was Napping. Leave me a comment saying you do. 
2) Leave a comment telling me your favorite thing about October or Halloween.
3) Become a Facebook fan.

Good Luck!  Giveaway will end next Sunday, October 10th at 11:00pm PST.  Open only to US residence, due to postage.  Sorry.  Winner will be chosen by Random.org and announced Monday morning  I will send you an email (so leave a valid address, if it’s not accessible on your profile).  If I can’t contact you another winner will be chosen.  Good Luck!

Check my side bar or link parties page for places I may have linked this to.

Pin It

October 1, 2010 by Krista

Subway Art Winner!

I have some exciting news!  We have a winner!  

CONGRATULATIONS JESSICA!  I’ve sent you an email.  As soon as you get back to me, I’ll get started and get your Subway Art on it’s way!
Thank you everyone that entered!  Without you my giveaways wouldn’t be near as successful.  Hehe.  Didn’t win this time?  Guess what, it’s your lucky day.  Check out today’s Fanciful Friday as we kick off October Spooktacular with another giveaway!
If you still want your own subway art, these are up in my Etsy shop.  There is also an option to buy just the vinyl so you can stick it where ever you want!  Take advantage of my low introductory pricing that is happening right now!  I also offer other subway art themes.

Let’s get ready to par-tay!!!  Welcome October Spooktacular!


  • « Previous Page
  • 1
  • …
  • 224
  • 225
  • 226
  • 227
  • 228
  • …
  • 231
  • Next Page »

I'm Krista. Ringleader here on While He Was Napping, wife to my handsome Mr. Right & momma to my THREE energetic boys, Big J (9), Little J (6) & Little N (4). We FINALLY added a beautiful little girl to our family last December.

I’m knee-deep in Tonka trucks & Thomas trains. I survive our crazy days with Vanilla Coke, Sonic slushies, sweet snuggles and little giggles. When I tuck them in tight & kiss them good night, I get a little time to create & just be me.


It all happened
while (s)he was napping
Want More of My Story?

Privacy Policy

While He Was Napping respects your privacy and is committed to keeping any personal information collected on this website confidential. To find out what information we collect and how it is used or what options you have regarding your information, see our full privacy policy here. Creative Commons License The website found at whilehewasnapping.com and all subdomainsauthored and published by Krista is licensed under a Creative Commons Attribution-NonCommercial-NoDerivs 3.0 Unported License.

Pretty Chic Theme By: Pretty Darn Cute Design