While He Was Napping

momma gets stuff done

  • Home
  • About
  • Archive
  • Do It Yourself
    • Crafts
      • No Sew
      • Painting
      • Paper Crafts
      • Repurpose Projects
      • Vinyl
      • Washi Tape
      • Kid’s Crafts
      • Fonts
    • Sewing
    • Decorate
      • Home Decor
      • Holiday Decor
    • Celebrate
      • DIY Gifts
      • DIY Your Party
  • Recipes
    • Beverages
    • Appetizer
      • Bread
      • Other Appetizers
    • Snacks
    • Main Dish
      • Meat
        • Chicken
        • Beef
        • Pork
        • Seafood
      • Vegetarian
      • Slow Cooker
      • 30 Minute Meals
    • Dips & Sauces
    • Salads
    • Pasta
    • Soup
    • Dessert
      • Cookies
      • Brownies
      • Cupcakes and Cake
      • Box Mix Recipes
      • Other Sweet Treats
    • Breakfast Food
      • Pancakes
      • Waffles
      • Muffins
      • Other Breakfast Food
  • Family
    • Babies
      • Pregnancy
      • Newborns
      • The 1st Year
    • Toddlers
    • Preschoolers
    • Kindergartners
    • 6-8 Year Olds
    • The Grown Ups
      • Date Night
      • Romantic Gifts
    • Self Care
  • For the Home
    • Cleaning
    • Organizing
    • Emergency Preparedness
  • Travel
    • Travel Tricks & Tips
    • Traveling with Kids
  • Tech & Gadgets
    • Must-Have Apps
    • Techy Home Appliances
    • Gadgets & Electronics
    • Blogging Tips
  • Printables
    • Posters
      • Quote Printables
      • Subway Art Printables
    • Printable Organizers
    • Printable Journals
    • Learning Printables & Worksheets
    • LDS Printables
  • Holidays
    • New Year’s
    • Valentine’s Day
    • St. Patrick’s Day
    • Easter
    • Cinco de Mayo
    • Mother’s Day
    • Father’s Day
    • 4th of July
    • Back to School
    • Halloween
    • Thanksgiving
    • Christmas
    • Holiday & Seasonal Printables

March 12, 2015 by Krista

Big Hero 6 Party: Amazingly Simple Food & Easy Decor Ideas

Everyone can probably agree that food is one of, if not the, most important aspect of a party.  It can make or break a host or hostess’ reputation.  Of course there are other important elements as well, but people will remember the food.  If your decor is stunning and awesome, they might remember that.  But if your food is sub-par, your party will forever be “when we had those soggy sandwiches?” or “that was the mushy wrap things that smelled weird, right?”  So, for our Big Hero 6 party, we did simple but delicious food.  Kid-friendly, but also adult-satisfying, food.  We did a small dinner and a popcorn bar with the movie.  I will give you the details on the popcorn bar next week, that was a ton of fun!

We have the reputation of making good food, so I wanted something yummy that makes everyone happy.  It’s a bonus if everyone can make their own the way they like it.  I themed the food to the movie and played off of words, as well as the visual aspects.  Let’s check out the full menu, shall we?

Big Hero 6 Party Ideas

BIG HERO 6 PARTY
AMAZINGLY SIMPLE FOOD

Big Hero 6 Party Food

– Mini Hiro (Hero) Sandwiches.  Hero sandwiches are also known as hoagies and subs, among other terms.  They are simple and delicious.  I wanted everyone to be able to make their own and make them the way they like it.  So, instead of large rolls or a true foot-long loaf, I opted for dinner rolls.  My deciding factor in this decision was that we were going to have about a dozen kids at this party.  Have you ever seen a three-year-old try to hold a foot-long sandwich?  And it’s even worse when it’s just a small piece of the sandwich.  So we did mini Heros and named them after one of the movie’s main characters.

Big Hero 6 Party Food Hiro Sandwiches

– Fruit tray. Since we were having a popcorn bar with the movie, I didn’t want a lot of sweets with dinner.  For the fruit tray, I chose ‘Wasabi’s Laser-Sliced Apples’, ‘Baymax Berries’ and Go-Go’s Mag-Lev Pineapple Discs.  It was simply apples sliced with our Apple Peeler Corer (affiliate link), whole strawberries and pineapple rings cut into wedges.  We dipped the apples in lemon juice to help keep them from browning.  You could use pineapple tidbits, if you can figure out how to get them out of the can in rings, so they still resemble Go-Go’s mag-lev discs.  I decided it would be easier to just cut them up myself.  Actually, Mr. Napping assembled the fruit trays.  Yep, he’s a keeper.

Big Hero 6 Party Food Fruit Tray

– Aunt Cass’ Melt-Your-Face-Off Chicken Wings.  Because chicken wings are delicious and I wanted something that was a little more grown-up food too.  We had three different kinds of chicken (confession: some were in strips, not wings) in varying levels of spiciness so everyone could enjoy it, regardless of their palate’s spice preference.  I just bought these frozen and popped them in the oven half an hour before guests started to arrive.

Big Hero 6 Party Food Aunt Cass Chicken Wings

– Fred’s Tropical Citrus Punch.  Blue raspberry Kool-Aid with pineapple juice and lemon slices in it.  I mixed up the Kool-Aid with 2 packets of powder, 1 1/2 gallons of water and 1 1/2 cups of sugar.  It’s more water and less sugar than called for in the directions.  Then I poured the pineapple juice that was in the pineapple rings in.  I’d guess it was around 1/3 to 1/2 cup of juice.  Then I sliced a lemon and put the slices in the Kool-Aid.  It was pretty much gone by the end of the party.

Big Hero 6 Party Food Fred's Tropical Punch

– Strawberry Honey Lemon(ade).  I have a thing for real lemonade, so it had to make an appearance at the party.  I mixed two cups lemon juice, 1/2 cup sugar and 1.5 gallons water together.  I had intended to use honey as the sweetener, but we had babies coming and I didn’t want to have to worry about them unintentionally being given honey.  I pureed one pound of strawberries and combined that with the lemon juice mixture.  Then add one tablespoon of vanilla extract.  I love vanilla in lemonade.  Feel free to omit it if it’s not your thing.

Big Hero 6 Party Food Honey Lemonade


EASY DECOR IDEAS

Because I had a budget for this party, I did really simple decor.  I wanted the focus to be the food, and the Go-Go’s Disc Toss game and the Build A Baymax activity.  I spent about $15 on decor.  Yes, that’s it.  I found some paper lanterns on clearance at Target.  I did buy some LED Waterproof Paper Lantern Party Lights (affiliate link) on Amazon to put inside them.  They were a little more spendy ($19 for 30), but I only used nine and the batteries are supposed to be replaceable.  They lasted almost two days before they died, but a single light wasn’t very bright and we ended up putting three in each lantern.  Overall, I was pretty happy with them.


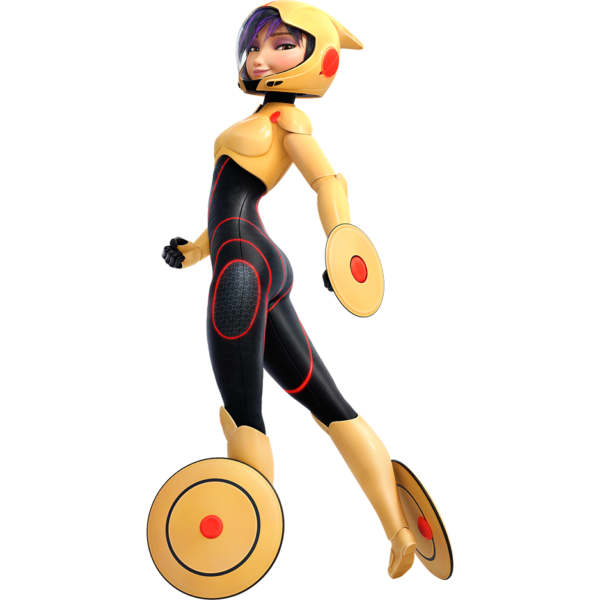
That was as fancy as I got though.  I stuck to balloons and streamers after that.  I did put Baymax eyes on the white balloons.  I’d seen it on Here Comes the Sun and I loved Kelly’s idea.  They turned out even better than I remembered, especially for just being sharpie on a balloon.

Big Hero 6 Party Food Table

Want more Big Hero 6?  You can check out Go-Go’s Disc Toss Game to get the kids moving and the Build-A-Baymax activity that calmly entertained 6 kids for over 20 minutes!  Great for parties, but they also work for an afternoon boredom buster too!

March 11, 2015 by Krista

Pepperoni Stuffed Deviled Eggs

One of my favorite things about Spring is the food.  With warmer weather come the cooler, lighter foods.  I love a good hearty soup as much as anyone, but after the long winter months full of heavy holiday eating, I’m ready to lighten up my diet.  But, just because the food is lighter doesn’t mean it’s got less flavor.  Today, I will show you how to make some fantastic deviled eggs (a staple at any BBQ or picnic) and add a twist of flavor with some delicious pepperoni to make these Pepperoni Stuffed Deviled Eggs that will fly off the plate!

PEPPERONI STUFFED DEVILED EGGS

Hormel Pepperoni Stuffed Deviled Eggs

If you haven’t made boiled eggs in the instant pot, you really should try it. We do the 5-5-5 method. At pressure for 5 minutes, natural release for 5 minutes and then ice bath for 5 minutes. If you peel them while they are warm, the shells practically fall off. This is the only way we make boiled eggs now.

If you’re doing old school boiling on the stove, I wish I had some fantastic advice to share for always peeling the perfect egg, but more often than not, it seems mine come out looking like the Emperor from Star Wars… after he takes his hood off. The good news is that, even if you end up with Emperor eggs, they will still taste fabulous!

Pepperoni Deviled Eggs Peeled Boiled Eggs

Yield: 24 deviled eggs

Pepperoni Stuffed Deviled Eggs

Hormel Pepperoni Stuffed Deviled Egg Recipe

Classic deviled eggs with a delicious flavor burst that makes this BBQ and picnic food even better!

Prep Time 15 minutes
Cook Time 15 minutes
Total Time 30 minutes

Ingredients

  • 20 slices Pepperoni, Original Flavor
  • Pepperoni Minis
  • 1 dozen eggs
  • 1/2 tsp garlic powder
  • 1/2 tsp paprika
  • 1/2 cup Miracle Whip (you can substitute sour cream for a low-fat dish)
  • 1 Tbsp Ranch dressing (or ranch dip powder)

Instructions

  1. Begin by boiling your eggs.
  2. Peel the boiled eggs. Pepperoni Deviled Eggs Peeled Boiled Eggs
  3. Cut each egg in half and dump all the yolks into a bowl. Set the egg white halves aside.
  4. In the bowl of egg yolks, combine the garlic powder, the paprika and the Miracle Whip. Hormel Pepperoni Deviled Eggs Filling
  5. Use a fork to break the yolks apart and stir the ingredients together until they are well combined.
  6. Dice up the pepperoni slices into small squares. Stacking the pepperoni together makes the dicing easier and quicker. Hormel Pepperoni Stuffed Deviled Eggs
  7. Add the pepperoni dices and the ranch dressing to the egg yolk mixture and stir until evenly combined. Hormel Pepperoni Stuffed Deviled Eggs Filling
  8. Use a spoon to put some of the yolk mixture into each egg white half.
  9. Garnish with Pepperoni Minis and a sprinkle of paprika, if desired. Hormel Pepperoni Stuffed Deviled Eggs
  10. Refrigerate until ready to serve.
  11. Store any leftovers in an air tight container in the fridge for 2-3 days.

Nutrition Information:

Yield:

24

Serving Size:

1

Amount Per Serving: Calories: 52Total Fat: 4gSaturated Fat: 1gTrans Fat: 0gUnsaturated Fat: 2gCholesterol: 95mgSodium: 111mgCarbohydrates: 1gFiber: 0gSugar: 1gProtein: 4g
© Krista
Category: Appetizer

PEPPERONI STUFFED DEVILED EGGS PEOPLE WILL FIGHT OVER

I served these at a get-together with some friends and they were a HUGE hit, particularly with the men. Maybe pepperoni makes deviled eggs a more masculine food? They are so full of flavor they almost jumped off the plate.

That extra blast of flavor makes these pepperoni stuffed deviled eggs totally compelling to just inhale off the plate.

I may or may not have made another batch the next day. And then eaten six of them all at one time.  I’ll never tell.

Hormel Pepperoni Deviled Eggs

So, next time you need an appetizer for a Spring picnic or BBQ, let a bit of peperoni transform regular ole deviled eggs into delicious, can’t-eat-just-one Pepperoni Stuffed Deviled Eggs and be the talk of the party.

March 10, 2015 by Krista

Big Hero 6 Party Games: Build A Baymax

At our Big Hero 6 party this past weekend, we had two games.  Activities might actually be a better way to describe it.  We didn’t have winners, just fun.  I shared Go-Go’s Disc Toss yesterday and today’s Big Hero 6 gem is Build A Baymax.  This was easily the favorite (planned) activity at the party.  And the cheapest.  For three-and-a-half dollars, I had six fully-entertained 3 to 7 year olds for at least 20 minutes… that’s how long the marshmallows lasted.  Next time I’ll spring for an extra bag.

BIG HERO 6 PARTY GAMES
BUILD A BAYMAX

Big Hero 6 Party Ideas

Materials:
– 1 box of toothpicks
– 1 bag of mini marshmallows
– 1 bag of regular marshmallows

Build A Baymax Station

Directions:
– This is the best part… there aren’t really any directions.  I didn’t give the kids much instruction on this.  I started building a “demo” version.  Big J came over and thought it looked pretty fun and he was mid-construction when the guests started showing up.  He showed the other kids what to do…  Seriously.  I didn’t really even supervise this activity a whole lot.  I checked back in every-so-often to make sure they weren’t just inhaling the marshmallows, sticking them in each other’s hair or poking each other with the toothpicks, but they all did really well.  It was marvelous.

Building Baymax

Marshmallow Baymax
– One word of advice: I am super glad I put the sheet down underneath the table.  A couple marshmallows fell off and were stepped on, but all I had to do was throw the sheet in the washer and bam! Clean up was done!

Build A Baymax aftermath

Obviously, the kids strayed from building Baymax to building other things.  But I was totally okay with that.  They made some cool-looking little houses and things… and there’s even a couple poofy robots in that mess.  This was so fun for the kids.  My two oldest wanted to do more marshmallow building the next day and another one told me all about how much fun it was to build with marshmallows at church.  Two days later.  I’ll call this one a win.  This activity will surely be making a re-appearance this summer when this momma is at her wit’s end and needs a few minutes to eat the secret chocolate chips alone in the closet.  And maybe I’ll sneak a handful of marshmallows too…


Don’t forget to check out this fun game to get the kids up and moving!  Do something constructive with that sugar high!

March 9, 2015 by Krista

Big Hero 6 Party Games: Go-Go’s Disc Toss

This past weekend we decided that we needed to have a party.  Because well, sometimes, you just need to have a party!  My boys absolutely adore Big Hero 6 and it came out on video a couple weeks ago.  And we love movies.  So… we had ourselves a little (or maybe not so little) party!  It was a total blast and everyone had so much fun.  We started off with some science experiments and activities, followed that up with a light dinner and then topped the night off with a popcorn bar and a viewing of Big Hero 6 on our “Big Screen”.  So, stick around this week for all the details on our fun party.

Let’s start off with the party games.  We had two games, but I’ll start with Go-Go’s Disc Toss.  Our guests ranged in age from Baby N who just turned one to our friend’s second grader.  We had 10 kids and their parents at our soiree.  The games were enjoyed by all, even though the younger kids didn’t completely understand the rules or play by them.  But that’s okay, we’re in it for the fun!  The adults even took a few throws.

BIG HERO 6 PARTY GAMES
GO-GO’s DISC TOSS

Big Hero 6 Party Ideas

Materials:
– Yellow Paper Plates
– Black Sharpie Marker
– Bowl (or something else round that you can trace your black line onto your plates with.)
– Red Copy Paper or Card Stock
– 3-inch Circle Punch
– Red Masking Tape
– Glue stick, tape or hot glue

Big Hero 6 Game GoGo's Disc Toss

Directions:
GAME SET UP –
– Create the discs.  First, punch out circles from the red copy paper or trace them and then cut them out with scissors.  Use the sharpie and the bowl to trace a black line around the edge of the plate.  Glue the red circles into the middle of the plate.  Just eyeball it, it doesn’t have to be perfect.  You can see the image I used to re-create the discs from below.  Mine look more like the discs on her feet than the ones on her hands, because they looked easier to replicate.

GoGo_Suit_back_Render

Image Source

– Create the game board/playing field.  Call it whatever you want.  We opted to do this inside (we are still pinching pennies so we can landscape our backyard, fingers crossed for this spring, but sending a bunch of kids out to romp through all the weeds and goat heads sounded like a less-than-great idea).  Using the masking tape (which I found in the paint department of Wal-Mart, by the way), I taped out a board on the carpet.  We often use masking tape to create roads, so this was pretty familiar and it’s really easy and only takes about 15 minutes to set up.  Taping out the numbers in each space took the longest.  I just did a big rectangle and then taped off sections and added a triangle in the last section.  That’s it.  You’re ready to play.

GoGo's Disc Toss
PLAYING THE GAME –
– One at a time, players stand at a pre-determined distance from the board.  I marked this with a piece of tape.  They then throw their “discs” and are awarded with the points their disc lands on.  You can opt to make rules that the highest/lowest points are awarded for discs that land on two scores.  You can also make the rule that discs have to be completely on the game board to be awarded points.  We went with awarding the highest points and didn’t make the last rule.  Our guests were pretty little and I wanted them to have fun.  Honestly, we didn’t even keep score really.  And they all loved it.

Big Hero 6 Disc Toss

Masking tape: $3 (but I only used maybe a quarter of the roll)
Yellow plates: 20 for $0.97
Red copy paper: $1.34 for 20 (or so) sheets (I only used one piece of paper)
Sharpie and glue: on hand.
TOTAL: Barely over $5 out of pocket and I didn’t use all the supplies so I have those leftover next time we play (or for something else entirely).  Totally worth it.


Check out the HIT of the party that cost me a whopping $3!  The kids LOVED this!

March 6, 2015 by Krista

Cute and Simple Monkey Cupcakes Anyone Can Make

On Wednesday, I shared my favorite cake recipe and showed you how to create marbled cupcakes.  They double really well as zebra-stripe cupcakes too.  Today, I’m going to share how I decorated the tops of those cupcakes.  They turned out super cute and were so incredibly easy; these are monkey cupcakes anyone can make.  I enjoy decorating cakes, but I’m not particularly skilled at it.  Okay, I barely make passing marks on cake decorating.  So, if I can do it, anyone can.

Baby N turned a year old this past Monday and we celebrated while Mr. Napping’s parents were here visiting.  I went all out for Big J’s first birthday and was so busy during the party and so exhausted afterward that I decided that huge parties just aren’t worth the work.  And I felt like I missed sharing my little boy’s special day because I was running around, worried about details the whole time.  So, in our house, the birthday person gets to choose the meal they want and the kind of cake they want.  Since Baby N is only one, momma got to choose for him.  I went with monkeys.  I’ll call my boys the inspiration on that one.


CUTE AND SIMPLE CUPCAKES ANYONE CAN MAKE:
MONKEYS & PALM/BANANA TREES

Monkey Cupcakes

Materials:
– M&M’s or miniature marshmallows
– Vanilla Wafers (knock offs are fine)
– Mini Chips Ahoy Cookies
– Banana Candies (I got a small amount of “Runts” in bulk at the grocery store and just pulled out the bananas for our trees)
– Brown Jelly Beans (I used Dr. Pepper Jelly Bellys, also found in the bulk section.  You could also use chocolate covered raisins or something similar)
– Pirouette Wafer Cookies
– Green Butterfly Gummy Candies (you could also use lime wedge gummies, but I couldn’t find them.  The butterflies were my only option, but they turned out great)
– Black icing gel
– Toothpicks or wooden skewers


Directions:
Monkey Cupcakes –
* You will need one vanilla wafer and one chips ahoy cookie for each monkey cupcake*
– Cut about a 1/4 inch off of one side on all your vanilla wafer cookies.  Save the tops to use on the palm tree cupcakes.  These were much easier to cut than I anticipated.  A steak knife made quick work of these cookies.
– Cut the Chips Ahoy cookies in half.  I used the same steak knife for these cookies, but found they crumbled more.  The key to keeping them intact was to go slowly with a sawing motion while putting pressure on opposite sides of the cookie with my thumb and index fingers.
– Draw nostrils and mouths on the vanilla wafer cookies with the gel icing.  This was the fun part.  You can put a little variety in these cupcakes by giving the monkeys different expressions.  A smiley monkey?  A crazy monkey?  A mischievous monkey?  The call is yours.
– On a freshly frosted cupcake, put one vanilla wafer at the bottom of the cupcake to make the monkey’s snout (Is that what it’s called?).  Put opposite halves of a Chips Ahoy cookie on each side just above the vanilla wafer for the ears.  Stick two M&M’s (preferably the same color) or two mini marshmallows just above the vanilla wafer and in between the Chips Ahoy halves. Put little gel icing dots on the M&M’s or mini marshmallows to give the monkey eyes pupils.
– Repeat.  And repeat.  And repeat.  Times two dozen.  It takes a little time to construct the monkeys, but they are so worth it.
DIY Monkey Cupcakes

Palm/Banana Tree Cupcakes
– Take the butterfly gummies and cut them in half horizontally, so that you have the top wings and the bottom wings.
– Cut the top wings apart on a slight diagonal line, so each piece is pointed at the end.
– Cut the bottom wing into a teardrop shape.  Discard (uhm, eat…) the leftover portion.
– Cut the Pirouette cookies in half with a serrated knife.
– Stack three of the gummies on top of each with the rounded ends together and the pointed ends together.  Put a toothpick or wooden skewer through the rounded part of the gummies.  Fan out the gummies to look like tree fronds.
– Stick the end of the toothpick that doesn’t have the gummies on it into one end of the Pirouette cookies.
– Crush the tops of the vanilla wafers onto crumbs.  You can use any broken Chips Ahoy cookies too.
– On a freshly frosted cupcake, sprinkle the vanilla wafer crumbs on top to create sand and stick the tree into the cupcake.
– Use a small dab of frosting to stick the coconuts or the banana candies under the bottom frond of the tree.

Palm Tree Cupcakes

Coconuts Palm Tree Cupcake

Palm Tree Cupcake

And there you have it.  Simple and cute monkey cupcakes anyone can make.  And what’s a monkey without his banana tree?  No worries, you’ve got those too.

Don’t forget to check out how you can make the insides of the cupcakes look like zebra stripes!

  • « Previous Page
  • 1
  • …
  • 43
  • 44
  • 45
  • 46
  • 47
  • …
  • 231
  • Next Page »

I'm Krista. Ringleader here on While He Was Napping, wife to my handsome Mr. Right & momma to my THREE energetic boys, Big J (9), Little J (6) & Little N (4). We FINALLY added a beautiful little girl to our family last December.

I’m knee-deep in Tonka trucks & Thomas trains. I survive our crazy days with Vanilla Coke, Sonic slushies, sweet snuggles and little giggles. When I tuck them in tight & kiss them good night, I get a little time to create & just be me.


It all happened
while (s)he was napping
Want More of My Story?

Privacy Policy

While He Was Napping respects your privacy and is committed to keeping any personal information collected on this website confidential. To find out what information we collect and how it is used or what options you have regarding your information, see our full privacy policy here. Creative Commons License The website found at whilehewasnapping.com and all subdomainsauthored and published by Krista is licensed under a Creative Commons Attribution-NonCommercial-NoDerivs 3.0 Unported License.

Pretty Chic Theme By: Pretty Darn Cute Design