While He Was Napping

momma gets stuff done

  • Home
  • About
  • Archive
  • Do It Yourself
    • Crafts
      • No Sew
      • Painting
      • Paper Crafts
      • Repurpose Projects
      • Vinyl
      • Washi Tape
      • Kid’s Crafts
      • Fonts
    • Sewing
    • Decorate
      • Home Decor
      • Holiday Decor
    • Celebrate
      • DIY Gifts
      • DIY Your Party
  • Recipes
    • Beverages
    • Appetizer
      • Bread
      • Other Appetizers
    • Snacks
    • Main Dish
      • Meat
        • Chicken
        • Beef
        • Pork
        • Seafood
      • Vegetarian
      • Slow Cooker
      • 30 Minute Meals
    • Dips & Sauces
    • Salads
    • Pasta
    • Soup
    • Dessert
      • Cookies
      • Brownies
      • Cupcakes and Cake
      • Box Mix Recipes
      • Other Sweet Treats
    • Breakfast Food
      • Pancakes
      • Waffles
      • Muffins
      • Other Breakfast Food
  • Family
    • Babies
      • Pregnancy
      • Newborns
      • The 1st Year
    • Toddlers
    • Preschoolers
    • Kindergartners
    • 6-8 Year Olds
    • The Grown Ups
      • Date Night
      • Romantic Gifts
    • Self Care
  • For the Home
    • Cleaning
    • Organizing
    • Emergency Preparedness
  • Travel
    • Travel Tricks & Tips
    • Traveling with Kids
  • Tech & Gadgets
    • Must-Have Apps
    • Techy Home Appliances
    • Gadgets & Electronics
    • Blogging Tips
  • Printables
    • Posters
      • Quote Printables
      • Subway Art Printables
    • Printable Organizers
    • Printable Journals
    • Learning Printables & Worksheets
    • LDS Printables
  • Holidays
    • New Year’s
    • Valentine’s Day
    • St. Patrick’s Day
    • Easter
    • Cinco de Mayo
    • Mother’s Day
    • Father’s Day
    • 4th of July
    • Back to School
    • Halloween
    • Thanksgiving
    • Christmas
    • Holiday & Seasonal Printables

Archives for October 2013

October 4, 2013 by Krista

Weekend Wander #143

Welcome, my friends!  How was your week?  If you’ve joined us this week, a super big welcome to you!  It must be October, there are Halloween posts everywhere!  I love it.  So fun!  We didn’t celebrate Halloween when I was growing up, my mom thought it was to gruesome and yucky.  I don’t like the gruesome and yucky, but the scary and creepy I can get behind.  A quick recap, in case you missed any of it:

Chalkboard Halloween Poem Printable
DIY Potion Bottles
20 Halloween Projects, Recipes & Kid’s Activities
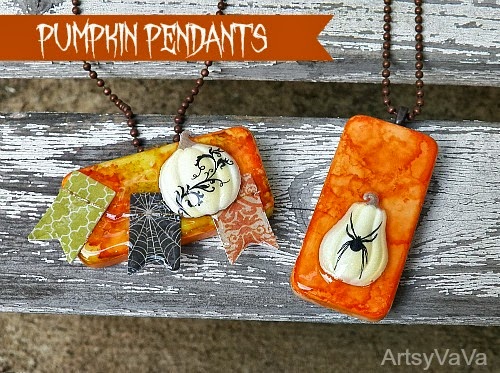
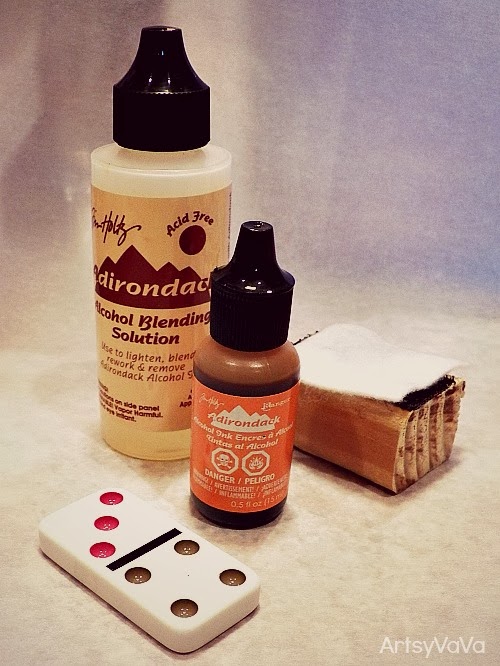
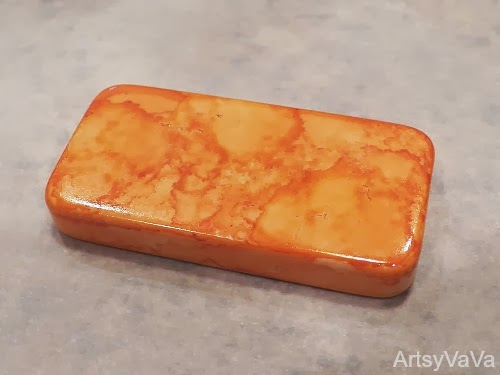
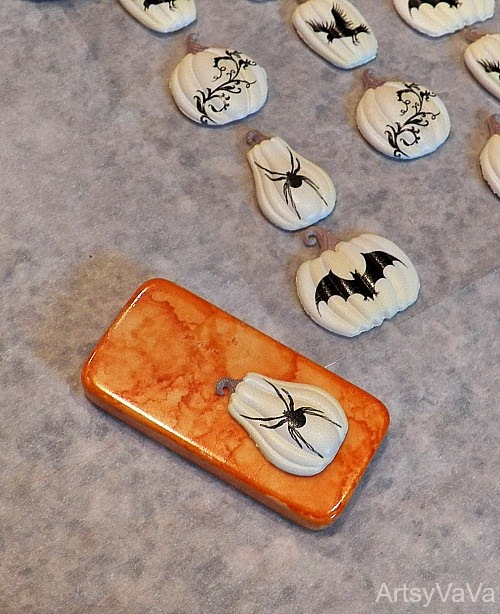
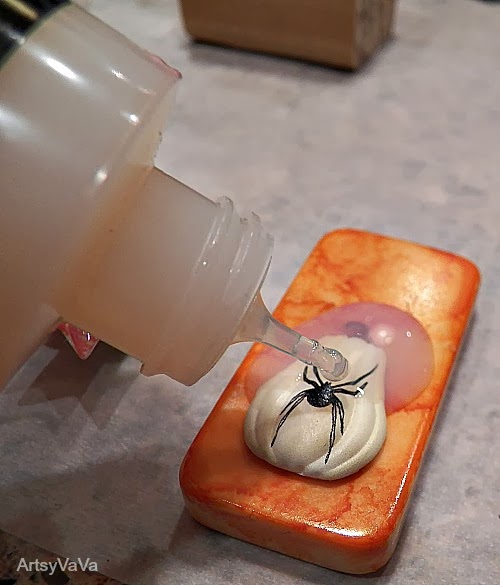
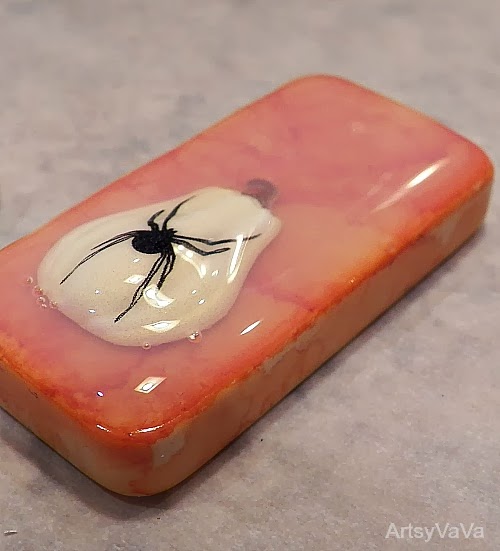
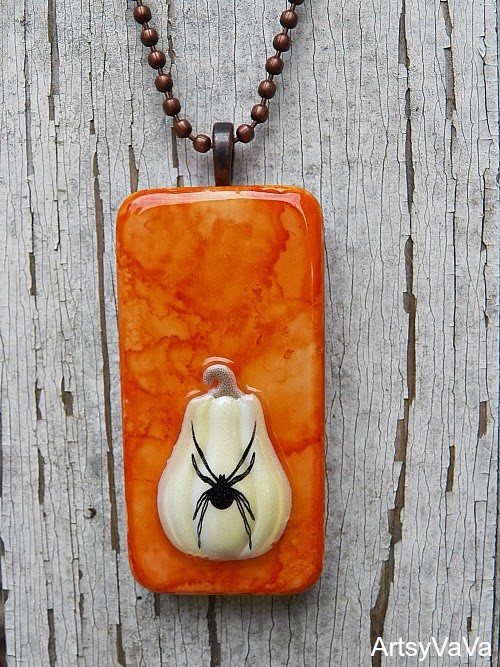
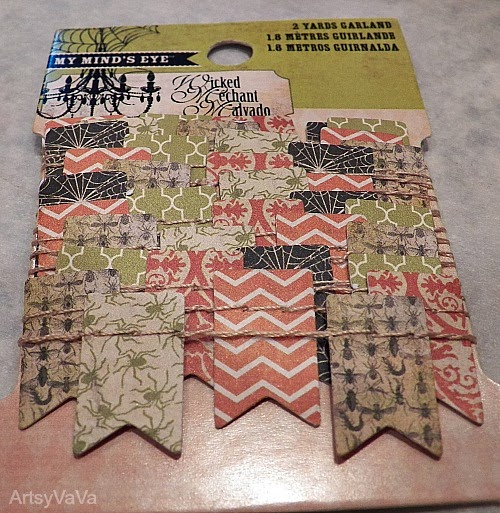
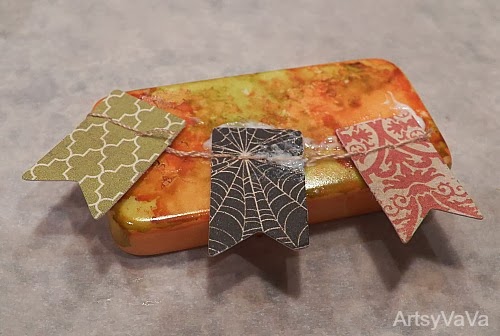
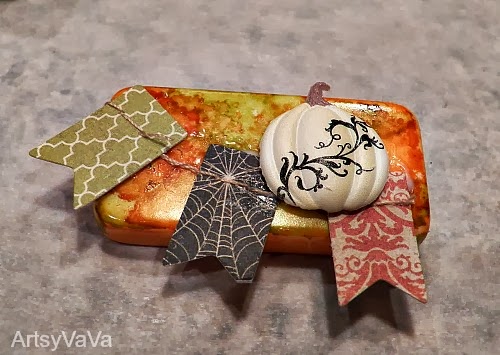
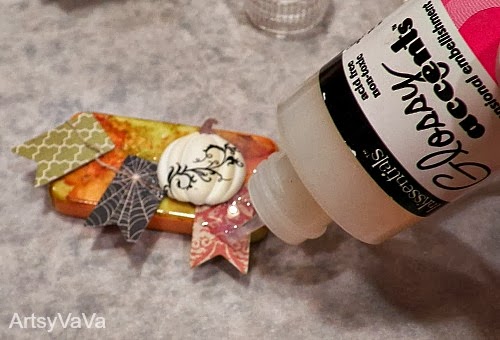
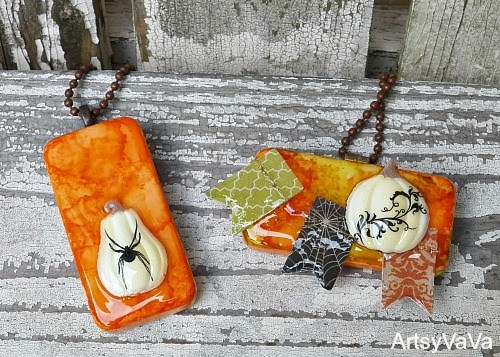
Pumpkin Pendants {Artsy VaVa Contributor Post}
And from last week:
If you don’t watch Big Bang Theory, you should.
Check out Raj’s Superman Mug over at Craft A Spell.
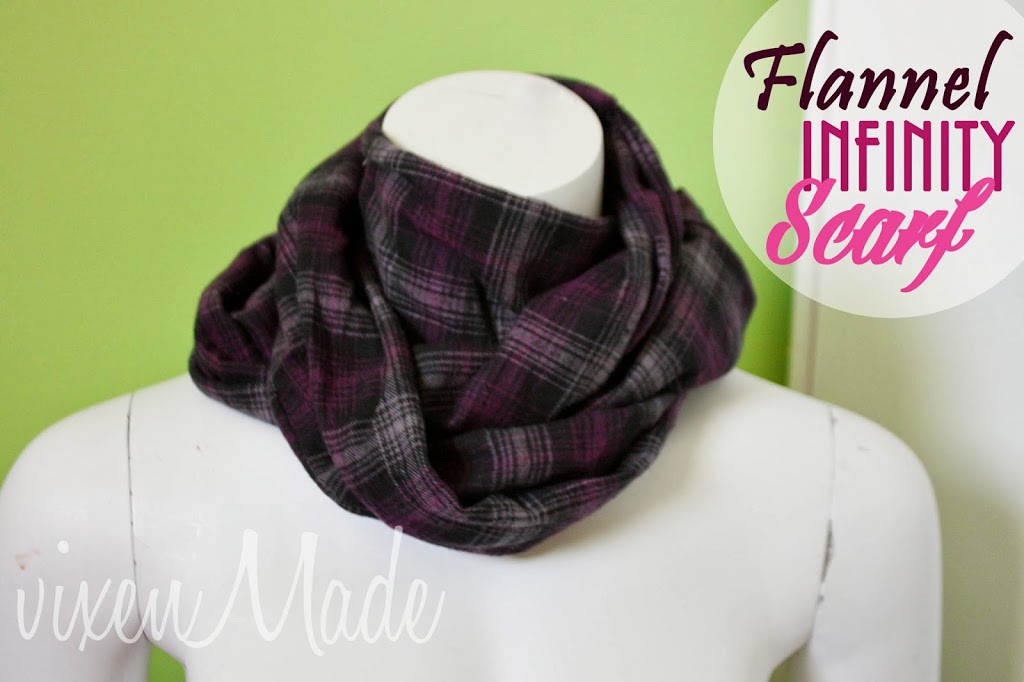
How warm and cozy does this adorable scarf look?
Check out the details at Vixen Made!

Ready to Party?  Annnnnnnddd… GO!


This post was written by Krista and originally appeared on While He Was Napping.


October 3, 2013 by Krista

DIY Witch’s Potion Bottles

These fun and easy Potion Bottles are the perfect addition to your DIY Halloween Decor! It’s the perfect spooky decor project to upcycle all your empty bottles and there are even printable potion bottle labels for you to download that will make this Halloween craft even easier! Bring out all the spooks and step up your Halloween Witch Decor with a great set of DIY potion bottles for all your witchy decorating.

Make Your Own Potion Bottles


Materials:
– Various bottles and containers (I will go through the ones I used in just a bit)
– Matte brown spray paint
– Sandpaper
– Potion Labels
– Glue gun & glue sticks
– Coffee grounds
– Shallow pans/baking sheets & a small pot
– Oven & Stove
 
Directions
THE BOTTLES:
– Wash your containers and bottles.  Scrape all the labels and goo off.  I washed mine in the dishwasher and then soaked the bottles that still had labels or glue on them in hot water for about 20 minutes.  The hot water soak will loosen the glue on the labels.  Peel off the glue and labels.  I had a few that were particularly stubborn (those Swedes know how to attach a label!  One of the bottles I used was from IKEA…) and I used a Goo-Gone-soaked paper towel on them to get them clean.
– Use the spray paint and paint your bottles.  I did this with the majority of my bottles, but there were three glass bottles I left.  I’ll go over that process in a moment.  I started off with the idea to do a mod podge stain on them, but it was taking FOREVER to get the shade I wanted.  So, I canned that idea and just settled on the spray paint.  If you want a lighter finish on the bottles, stand back a little further than usual when you paint them.  That way, you’ll just “dust” them, instead of a full-on layer of paint.  I was painting these on my kitchen island one stormy day and didn’t have a lot of space to play with so they ended up a little darker than I had first planned on making them.  Make sure you paint the lids too.  Let dry thoroughly.
– Lightly sand the bottles to give them an aged appearance.  Be careful not to sand off too much paint.  This bottle was an old vitamin bottle, so I didn’t paint it.  But, you can get the idea of the texturing you’re after.
DIY Witch's Potion Bottles
 
 
For the glass bottles, I wanted to age them and started off sanding them with sand paper. I’m an impatient crafter and after about five minutes of practically immeasurable progress I ditched the sandpaper and grabbed my bottle of glass etching cream from the cupboard.  It worked fabulously.  The hardest part was trying to apply the paste randomly.  Dang OCD tendencies.  Let bottles and cream stand 5-10 minutes… or until you remember you’re in the middle of a project.  Rinse and wipe dry with a paper towel.  Don’t forget to paint the lids for these bottles.
 
DIY Witch's Potion Bottles
 
DIY Witch's Potion Bottles
 
THE LABELS:
– Print off the DIY Witch’s Potion Bottles labels or make your own.  I used a laser printer to keep the ink from smearing.  I didn’t try it with an inkjet, so I don’t know how smeared they’d end up.  It might look like great aging, I really don’t know.  Also I printed mine on card stock.  Worked like a charm, none of them ripped.
– Preheat the oven to 200F (90C).
– On the stove heat about two (2) cups of water with a quarter (1/4) cup of coffee grounds.  I hate the smell of coffee, so this was the worst part for me.  Heat to warm, but not so warm you can’t touch it.  I had my hands in this up to my palms.
– Okay, now decide if you want to cut your labels apart before you stain them or after.  I did it after.  But, you might get some neater staining on the edges if you cut them apart before.  In a shallow pan, lay down your sheets of (or the cut apart) labels and use a small cup to pour the coffee over the paper.  Push the paper down against the pan to help it soak up the liquid.  Let stand 3-5 minutes or so.  The longer it stands the darker the labels will be.  Drain excess coffee back into the pot.
DIY Witch's Potion Bottles
 
 
–  Put the labels and the baking tray in the oven for 5-10 minutes.  If you cut the labels apart before you stained them, it’ll be closer to five.  If you didn’t cut them apart, it’ll be closer to 10.  When the paper is dry enough you can handle it without it tearing, take the tray out of the oven and carefully pick up the paper.  Holding the paper so that it is hanging over the pan, use a paper towel and gently dab it off.  This will remove any coffee grounds and extra liquid.  Hang to dry if possible.  (You can leave the paper in the oven longer and it will dry out faster.  Keep an eye out though.  Paper is flammable…)
DIY Witch's Potion Bottles
 
 
DIY Witch's Potion Bottles
 
 
– Once your labels are dry, cut them apart if you haven’t already, and use the glue gun to attach them to the bottles.  I found that gluing in stages worked the best.  And get as close to the edges as you can with the glue.  I started in the middle and put glue on that, then stuck it to the bottle.  Then I’d glue each end one at a time.
 
– Then I took sandpaper and lightly sanded the labels to age them.  Don’t go too crazy.  You’ll rip your stain off or tear the paper.  Lightly, my friends, is key.
 
Once the labels are on the jars, you can fill them.  Most of mine are actually empty.  Easier to store that way.  And less hazardous if my boys decide they need to play “potions” while I’m hiding in, er… uhm, using… the bathroom.
 
DIY Witch Potion Bottles
 
If you’re interested, below is a list of the bottles and jars I used in my DIY Witch’s Potion Bottles, as well as a list of filler ideas.  The blank fillers were ones that have labels, but I don’t have actual filler ideas.  Sorry.  Enjoy!  Happy Potion-Making!


October 2, 2013 by Krista

{Printable} Halloween Chalkboard Poem

Welcome to Day 2 of this year’s October Spooktacular! Did you check out yesterday’s project? Virginia shared a super adorable set of pumpkin pendants! Be sure to check them out.
Now are you ready for some more amazing Spooktacular fun today? Keep reading and you’ll be rewarded with free printables. That’s right, free. You know you want it. Let’s get to it, shall we?!
October-Spooktacular-4-Button

So, I haven’t jumped on the chalkboard bandwagon yet, as far as printables are concerned.  But, that’s about to change.  I’ve got a printable for you that will add some haunted, spooky Halloween goodness to your decor. Because who doesn’t love a good chalkboard printable? You’ll love this Halloween Chalkboard Poem, I promise.

Last month, I posted on Over the Big Moon, a DIY chalkboard tutorial and displayed it with Fall decor and Halloween decor.  The poem is my own little creation and first appeared on my Halloween Chalkboard.

DIY Chalkboard

So, for your printing pleasure:
Click HERE to download your watermark-free version of this Halloween Chalkboard Poem. You’ll have to download the file, save it to your computer and then print it. If you have any problems, let me know!
 Halloween Chalkboard Printable Poem

This Halloween Chalkboard Poem is formatted to 8×10″ and designed to be printed on white paper or card stock.  Enjoy the print!

And now comes all the legal disclaimers… I retain all copyrights.  Print is for personal use only.  This print, nor any form or part of this print, may be sold, altered or transformed for profit, monetary or otherwise. Thank you for respecting the time and creativity that went into designing this image.

If you would like to share this Halloween Chalkboard Poem printable, please link back to this page and not the download page.  Thank you. You’re the best.

This post was written by Krista and originally appeared on While He Was Napping.

October 1, 2013 by Krista

{Artsy VaVa} Pumpkin Pendants

Today, we get to meet another one of my contributors!  Virginia from Artsy VaVa is here to share a super cute tutorial on how to make your own Fall or Halloween-inspired pendants!  So, here’s Virginia…

______________________________________________________
It’s October!
And, with that,  it feels as though Fall has officially begun.  The air is a little cooler, leaves are becoming a little more colorful, and pumpkins are popping up everywhere.
Add a little touch of Autumn to your wardrobe with these adorable pumpkin pendants.


Supplies:
Dominoes
Alcohol Inks
Alcohol Blending Solution
Alcohol Ink Applicator With Felt
3D Pumpkins: We found ours in the scrapbook section.
Paper Banner: Also found in the scrapbook section.
Glue
Glossy Accents
Jewelry Bails
Add a few drops of alcohol ink to the felt applicator.
 Add a drop or two of the blending solution.
Start dabbing the ink onto the domino.
For our first pendant we used orange alcohol ink.

 Don’t forget the sides of the Domino.

Once the ink is dry, glue on a pumpkin.

Cover the domino and pumpkin with Glossy Accents.
This will go on cloudy but will dry clear.
Use a toothpick or pin to pop any bubbles.

Once the Glossy Essentials is dry,
glue a jewelry bail onto the back of the Domino using E6000.

Adorable!

For the second pendant,
dab on orange and green alcohol ink to the Domino.


Allow to dry and glue the paper banner onto the Domino.
The strings of the banner made it too long,
so they were cut to the appropriate length.


Add a pumpkin and cover with Glossy Accents.


Once dry, add a bail to the back.


This would be a great project to do with kids.
These also make great magnets.
Just glue a magnet onto the back instead of the bail.


What is your favorite thing about Fall?______________________________________________________

Those are pretty darn cute!  My kids would love those.  I love the little spider.  Creepy, but not gross.  and the banner on the other one… ahh, too cute.  I would never have thought of that.  Thanks, Virginia!  Go check out all the other fun things over at Artsy VaVa now!


This post was written by Krista and originally appeared on While He Was Napping.

  • « Previous Page
  • 1
  • 2
  • 3
  • 4

I'm Krista. Ringleader here on While He Was Napping, wife to my handsome Mr. Right & momma to my THREE energetic boys, Big J (9), Little J (6) & Little N (4). We FINALLY added a beautiful little girl to our family last December.

I’m knee-deep in Tonka trucks & Thomas trains. I survive our crazy days with Vanilla Coke, Sonic slushies, sweet snuggles and little giggles. When I tuck them in tight & kiss them good night, I get a little time to create & just be me.


It all happened
while (s)he was napping
Want More of My Story?

Privacy Policy

While He Was Napping respects your privacy and is committed to keeping any personal information collected on this website confidential. To find out what information we collect and how it is used or what options you have regarding your information, see our full privacy policy here. Creative Commons License The website found at whilehewasnapping.com and all subdomainsauthored and published by Krista is licensed under a Creative Commons Attribution-NonCommercial-NoDerivs 3.0 Unported License.

Pretty Chic Theme By: Pretty Darn Cute Design