While He Was Napping

momma gets stuff done

  • Home
  • About
  • Archive
  • Do It Yourself
    • Crafts
      • No Sew
      • Painting
      • Paper Crafts
      • Repurpose Projects
      • Vinyl
      • Washi Tape
      • Kid’s Crafts
      • Fonts
    • Sewing
    • Decorate
      • Home Decor
      • Holiday Decor
    • Celebrate
      • DIY Gifts
      • DIY Your Party
  • Recipes
    • Beverages
    • Appetizer
      • Bread
      • Other Appetizers
    • Snacks
    • Main Dish
      • Meat
        • Chicken
        • Beef
        • Pork
        • Seafood
      • Vegetarian
      • Slow Cooker
      • 30 Minute Meals
    • Dips & Sauces
    • Salads
    • Pasta
    • Soup
    • Dessert
      • Cookies
      • Brownies
      • Cupcakes and Cake
      • Box Mix Recipes
      • Other Sweet Treats
    • Breakfast Food
      • Pancakes
      • Waffles
      • Muffins
      • Other Breakfast Food
  • Family
    • Babies
      • Pregnancy
      • Newborns
      • The 1st Year
    • Toddlers
    • Preschoolers
    • Kindergartners
    • 6-8 Year Olds
    • The Grown Ups
      • Date Night
      • Romantic Gifts
    • Self Care
  • For the Home
    • Cleaning
    • Organizing
    • Emergency Preparedness
  • Travel
    • Travel Tricks & Tips
    • Traveling with Kids
  • Tech & Gadgets
    • Must-Have Apps
    • Techy Home Appliances
    • Gadgets & Electronics
    • Blogging Tips
  • Printables
    • Posters
      • Quote Printables
      • Subway Art Printables
    • Printable Organizers
    • Printable Journals
    • Learning Printables & Worksheets
    • LDS Printables
  • Holidays
    • New Year’s
    • Valentine’s Day
    • St. Patrick’s Day
    • Easter
    • Cinco de Mayo
    • Mother’s Day
    • Father’s Day
    • 4th of July
    • Back to School
    • Halloween
    • Thanksgiving
    • Christmas
    • Holiday & Seasonal Printables

October 10, 2011 by Krista

October Spooktacular: Pinterest Round-Up

There are soooo many good ideas out there and I have no where near the time, or budget, to try them all.  Luckily there’s Pinterest.  It’s super easy to save the ideas you love.  So, from my Halloween Pinterest Board to you:

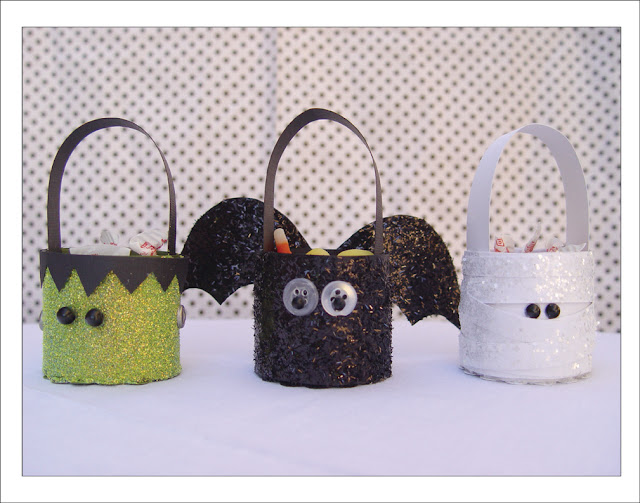
How adorable are these little treat baskets?!  Kiki Creates did an awesome job with these!  My favorite is probably the bat…

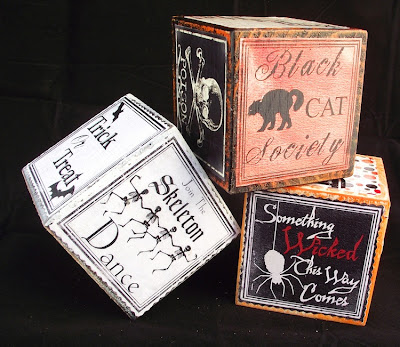
These blocks over at Mod Podge Rocks has me all a flutter.  I love them.  They are super cute.  Wish I had some where to set up the saw…

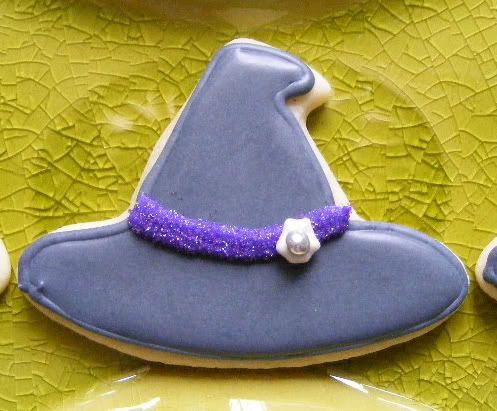
I LOVE these cookies!  They are perfect for a little sweet and spooky treat!  The Domestic Sugar Bake Shop has me drooling for some of these cuties.

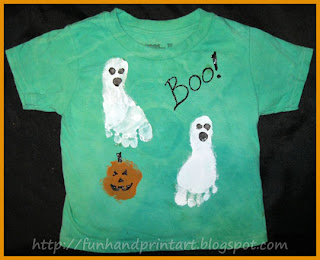
I might have to do this with the little kidlets next year.  How cute are these Halloween shirts over at Handprint and Footprint Art.  And a fun keepsake too. 

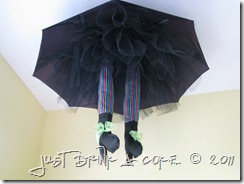
This year I’m on a witch kick.  I just can’t get enough.  This idea over at Just Drink a Coke has me so smitten.  I wish I had somewhere to hang one of these fun little dears.

IMG_8917

These are gross and cute all at the same time!  Perfect for a Halloween bash!  Annie’s Eats will tell you just how to get your own bleeding brain cupcakes.
Pinned Image
Some Martha Stewart inspiration… what a fun display.  This would be so much fun to put together.

More Martha.  I think this is too much fun!  A whole lot of work (which is why I won’t be attempting this), but the finished project is fantastic.

Ca-ute!

This is also a Martha Stewart idea.  However, the first time I saw them was as a prize we got for winning a Halloween Scavenger Hunt with some friends.  I ate the whole dang bag, by myself. 

These cute trees would be fun to put together as some center pieces.  If you have older kiddos, let them help.  It would be fun to see what each kid designs.

Haunted Forest Centerpiece

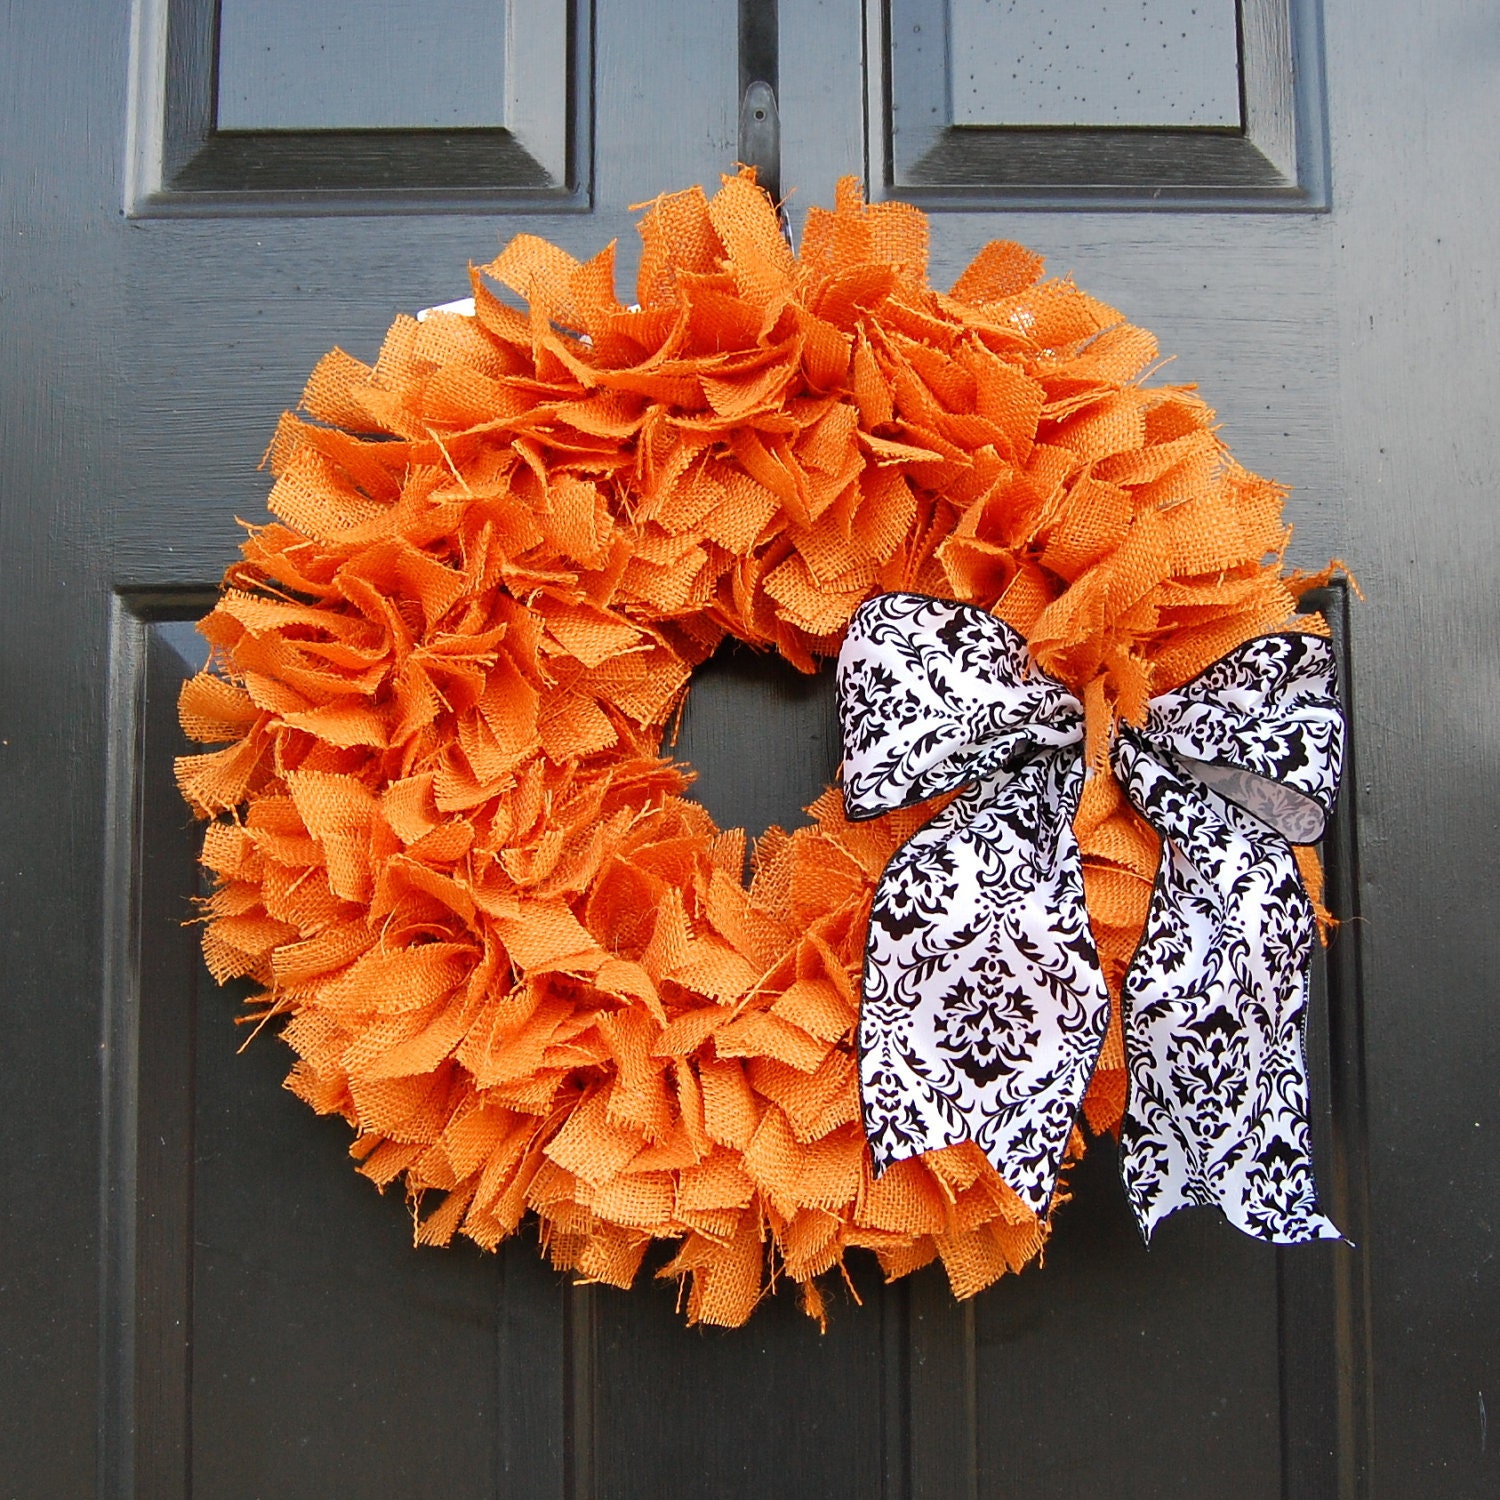
This is a stellar wreath for Halloween.  I love the texture of the burlap.  The color is fabulous.  And that black and white damask ribbon… swoon.  I found this in The Simple Standard etsy shop. 

Halloween Burlap Rag Wreath

This little dress over at SugarBee Crafts makes me itch for a little girl…

And some links from The Halloween Party thus far:

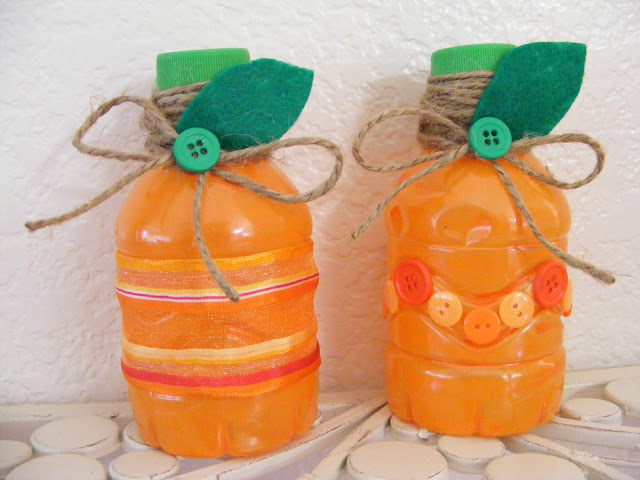
I love these pumpkin water bottles at Bacon Time.  How fun would it be to make some with faces too?!

This is the perfect kid’s Halloween craft.  The House of Bledsoe will show you how to make your own spooky little haunted house!

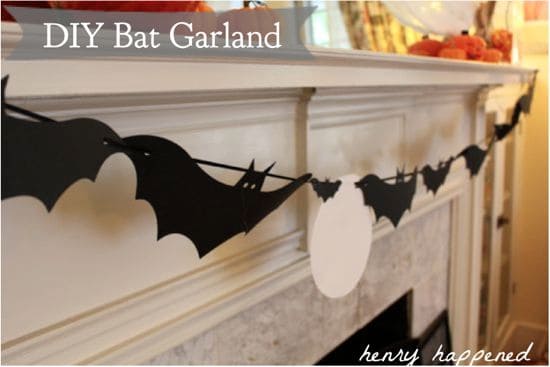
I’m loving the bat garland over at Henry Happened.  This is too good to just be construction paper…
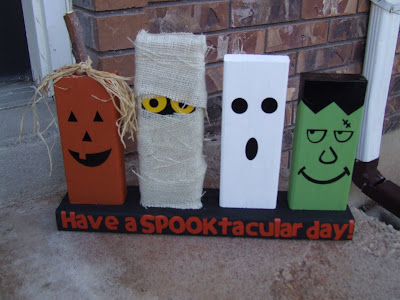
I love these 2×4 Halloween characters!  Find instructions for your own over at Keeping It Simple!

Well, there’s a good handful to get you started.  To see all the other goodness I’ve pinned, you can check out my Halloween Pinterest Board.  For even more great ideas, spend hours and hours browsing here.  Don’t forget to link up YOUR Halloween goodness to the Halloween Link Party!

Krista

October 10, 2011 by Krista

October Spooktacular: Jack-O-Lantern Jar

This is super easy and incredibly inexpensive.  Save an old bottle… Make a cute Jack-o-lantern.  No pumpkin gutting required.  And you’ll be done in an hour, tops.
 DSC_3850
Here’s the How:
Supplies-
– An old jar (I used a pickle jar, it was the perfect shape)
– Orange paint (or red and yellow, in my case.  I had to make my own orange)
– Black vinyl

1)  Wash the jar and let it dry.  Soak it in some warm water for about ten minutes to help remove any labels.  Let it dry completely.

2)  Pour some paint (or mix the paint to the color you want, since apparently you’re out of orange paint…) and paint the INSIDE of the jar.  This will give you a shiny finish.  If you paint the outside, you’ll get a matte finish.  Your choice.  P.S. the vinyl will be easier to apply if you paint the inside, but still, your call.

3)  I used the font ‘Punkinhead’ and cut out some Jack-o-lantern faces that I liked with my Cricut.  (P.S. It’s a free font, for personal use only.)  If you don’t have a craft cutter, go old fashioned and grab some scissors.  I am rediscovering the love I have for that silly machine.  It does more than just sit on my shelf… imagine that.  =)  However, I do prefer my Expression over my little one.  

e   k   q

4)  And moving right along. use transfer tape or masking tape (I prefer the latter) and transfer your vinyl faces to the jar.  I did three faces around the jar so you can see a face, regardless of where you are in relation to the jar…  That way I can use it as a centerpiece.
DSC_3853
5)  Using a hot glue gun, glue a green ribbon around the mouth of the jar.  Ta-da!  You’re done.  And you can use this as decor into November by simply removing the Jack-o-lantern faces.
 DSC_3854DSC_3857  
Krista

Pin It

October 9, 2011 by Krista

October Spooktacular: Cheese Cloth Ghosts

I remember doing this when I was little, in maybe 4th grade.  I thought it was very cool then and, I guess I’m still a kid at heart, because I still think it’s pretty cool.  I was going to have Little Monkey help, but he was more interested in Mickey Mouse Clubhouse and it ended up being a project where he would’ve played in the glue and then needed a bath.  So… I did it myself, but this is definitely something you could do with your older grade school kids.
  DSC_3837          
Here’s the How:

Supplies:
– Cheese cloth (this isn’t expensive and you can find it in the kitchen aisle of Fred Meyer, Wal-Mart and the like or you can buy it online HERE)
–  Mod Podge  (or see the note at the bottom about using liquid laundry starch instead.  The starch worked a lot better)
–  Water
–  Things to make your supports (I used some bottles, small styrofoam balls from Dollar Tree and floral wire to make mine).  Some other ideas include paper cups turned upside down (or water bottles) with pencils stuck in the sides.
–  Googly eyes, candy pumpkins or other embellishments.  This is optional.

2011-09-20_11-51-45_109
1)  Construct your supports to hold up your cheese cloth while they dry.  I used a water bottle, a small bubble bottle and my bottle of mod podge.  I cut a small amount off my styrofoam balls so they would sit flat on the tops of my bottle lids.  I stuck them down with masking tape rolled into a circle.  Then, I used floral wire from a failed project and taped those to the sides of the bottles.

2011-09-20_11-46-16_829

2)  Mix up a concoction of 1 part water and 2 parts mod podge in a bowl.  Stir it well.
2011-09-20_12-05-40_516

3)  Lightly drape your cheese cloth over the supports so you know how much you need.  Cut it to the appropriate length.  You may want to do a double layer to provide more stability.  Lightly roll the cloth into a ball and dip it in the mod podge mixture.  Ring it out so it’s not dripping, but the more mod podge you leave, the better your ghosts will stand up.

2011-09-20_12-07-37_416

4)  Carefully, unfold the cheese cloth and drape it over your supports.  Arrange it so it falls and drapes well.  However, be aware that the more you handle it, the more it will stretch. 
2011-09-20_12-11-08_320

2011-09-20_12-51-17_641

5)  Let your ghosts dry for several hours (or overnight) and then remove them from their supports.  You can use googly eyes, candy pumpkins, a spider ring, a small necklace chain or whatever else your little heart desires to embellish and dress up your ghosts.   

2011-09-20_15-23-36_29
* I ended up spraying my ghosts with liquid laundry starch to help them stand up better.  The first couple ghosts I made, I used a much more watered down Mod Podge mixture and it just wasn’t enough.  If you have the laundry starch on-hand, skip the Mod Podge all together.  I didn’t have any though and it was 10pm on a Thursday night when My Mr Right was out of town, which is not a “run to the store” time around here…  So, splurge the whole 97 cents, save yourself some time and use the starch instead of the Mod Podge and water mixture.

DSC_3838

DSC_3846  DSC_3849

Set them out and enjoy a your spooky guests!

Krista

Pin It

October 7, 2011 by Krista

Weekend Wander #50

Welcome to the party! Let’s get this show on the road shall we?

The only rules are:
1.  Keep it family friendly, please.
2.  Please don’t link up a commercial site.
3.  Mingle.  No one likes a wall flower.  Visit some of the other links.

If you have Halloween themed projects, you can link them to the Halloween Link Party too!  And don’t forget to enter the costume contest!  And… GO!

October 6, 2011 by Krista

Say It On The Wall Giveaway

I’m sure by now you know all the amazing, endless possibilities of vinyl.  You can use it for wall decor, craft projects, personalized gifts, handmade toys, and so much more.  Well, I’ve got some fantastic news for you.  Say It On The Wall is back with another giveaway!

First, let me help get the excitement flowing:

Look at all that fun stuff you can do… and there are so many more possibilities.  Check out the Gallery over at Say It On The Wall for even more ideas.  There are all kinds of quotes for you walls, with lots of font options and colors to fit perfectly into your home.  Want a cute little family decal for your car?  There are also LDS Temple decals.

Laura has just started a “New Product of the Week” promotion, that will be going on from now until the end of the year.  There are some great Halloween products that would make some very cool decorations.  I’m just sayin…  Take a look at these super cute little Ghost Town decals…

So, are you totally stoked and ready to enter this giveaway?  Well, here’s the how:

1.  Simply “Like” Say It On The Wall on Facebook.  Leave a comment and tell Laura “Thanks for the giveaway!”
2.  For an extra entry, you can hop over to Say It On The Wall and follow the blog.  (Scroll down to the bottom of the page to find the “Follow” button.)

Make sure you leave SEPARATE comments here on my blog for each entry.  The winner will receive a $20 gift certificate to Say It On The Wall.  This giveaway will close October 17th at 9am PDT.  I will use random.org to select a winner and announce the results later that day.  Good Luck!

  • « Previous Page
  • 1
  • …
  • 152
  • 153
  • 154
  • 155
  • 156
  • …
  • 231
  • Next Page »

I'm Krista. Ringleader here on While He Was Napping, wife to my handsome Mr. Right & momma to my THREE energetic boys, Big J (9), Little J (6) & Little N (4). We FINALLY added a beautiful little girl to our family last December.

I’m knee-deep in Tonka trucks & Thomas trains. I survive our crazy days with Vanilla Coke, Sonic slushies, sweet snuggles and little giggles. When I tuck them in tight & kiss them good night, I get a little time to create & just be me.


It all happened
while (s)he was napping
Want More of My Story?

Privacy Policy

While He Was Napping respects your privacy and is committed to keeping any personal information collected on this website confidential. To find out what information we collect and how it is used or what options you have regarding your information, see our full privacy policy here. Creative Commons License The website found at whilehewasnapping.com and all subdomainsauthored and published by Krista is licensed under a Creative Commons Attribution-NonCommercial-NoDerivs 3.0 Unported License.

Pretty Chic Theme By: Pretty Darn Cute Design