While He Was Napping

momma gets stuff done

  • Home
  • About
  • Archive
  • Do It Yourself
    • Crafts
      • No Sew
      • Painting
      • Paper Crafts
      • Repurpose Projects
      • Vinyl
      • Washi Tape
      • Kid’s Crafts
      • Fonts
    • Sewing
    • Decorate
      • Home Decor
      • Holiday Decor
    • Celebrate
      • DIY Gifts
      • DIY Your Party
  • Recipes
    • Beverages
    • Appetizer
      • Bread
      • Other Appetizers
    • Snacks
    • Main Dish
      • Meat
        • Chicken
        • Beef
        • Pork
        • Seafood
      • Vegetarian
      • Slow Cooker
      • 30 Minute Meals
    • Dips & Sauces
    • Salads
    • Pasta
    • Soup
    • Dessert
      • Cookies
      • Brownies
      • Cupcakes and Cake
      • Box Mix Recipes
      • Other Sweet Treats
    • Breakfast Food
      • Pancakes
      • Waffles
      • Muffins
      • Other Breakfast Food
  • Family
    • Babies
      • Pregnancy
      • Newborns
      • The 1st Year
    • Toddlers
    • Preschoolers
    • Kindergartners
    • 6-8 Year Olds
    • The Grown Ups
      • Date Night
      • Romantic Gifts
    • Self Care
  • For the Home
    • Cleaning
    • Organizing
    • Emergency Preparedness
  • Travel
    • Travel Tricks & Tips
    • Traveling with Kids
  • Tech & Gadgets
    • Must-Have Apps
    • Techy Home Appliances
    • Gadgets & Electronics
    • Blogging Tips
  • Printables
    • Posters
      • Quote Printables
      • Subway Art Printables
    • Printable Organizers
    • Printable Journals
    • Learning Printables & Worksheets
    • LDS Printables
  • Holidays
    • New Year’s
    • Valentine’s Day
    • St. Patrick’s Day
    • Easter
    • Cinco de Mayo
    • Mother’s Day
    • Father’s Day
    • 4th of July
    • Back to School
    • Halloween
    • Thanksgiving
    • Christmas
    • Holiday & Seasonal Printables

August 12, 2011 by Krista

Weekend Wander #42

I can’t believe we’ve already done 41 of these parties!  And they just keep getting better!  From last week, here are some of my faves:

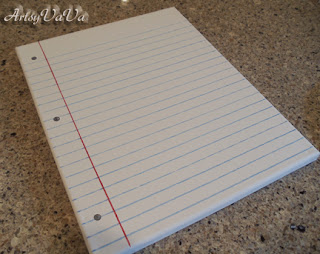
Artsy Va Va shared a great tutorial on making a notebook page canvas.  This would be adorable for back to school.  Do you have a child going off to college?  Dorm rooms need decor too…

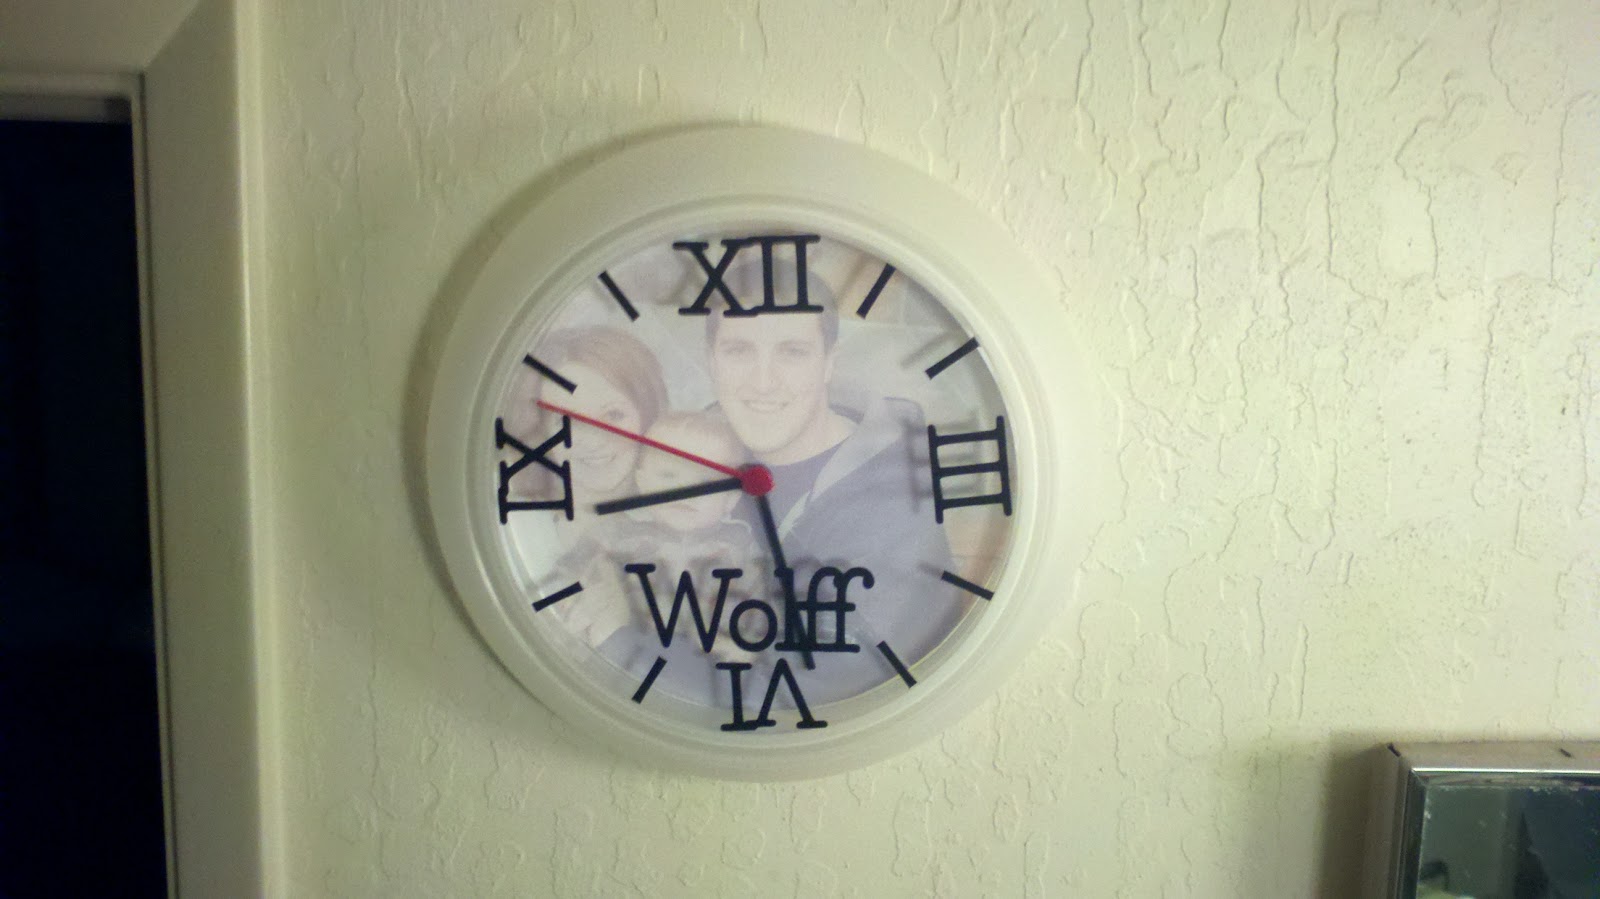
For Mamas shared a great tutorial on making your own photo canvases.  Is that a word?  It sounds kinda funny.  Anyway, Chrissy tells you step-by-step how to get a photo canvas without the expensive price tag.  I have some 16×20’s I bought at Jo-Ann’s like six months ago that I intend to, one day, do this to.

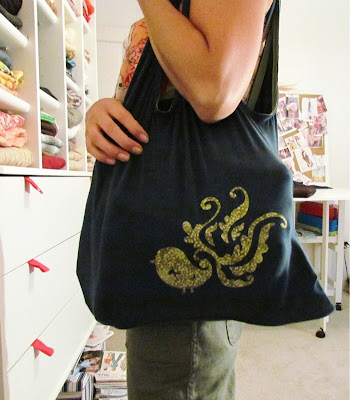
Tamara @ Etcetorize shared a clever way to make a super cute, and functional, tote bag.  Upcycles are the best!  I may have to go through my closet…
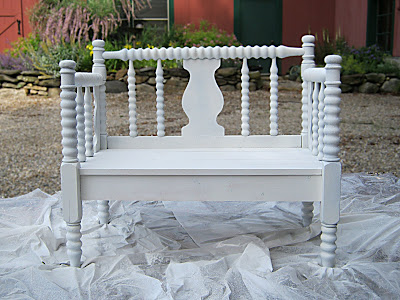
Can’t Stop Making Things has a super cute bench she crafted on display.  Check this beauty out.  It’s gorgeous!
Grab a featured button from the sidebar, ladies!  Fantastic Links!  They were all fantastic, it was so hard to choose just a few to share, but you can check out last week’s party here for more awesome inspiration.
And now, let’s get another party going!  You know the rules.  Anything goes as long as it’s family friendly.  Please no commercial sites.  Thanks.  Can’t wait to see what you’ve been doing.  Oh, and visit a link or two…  it’s not nice to link and run.  đŸ˜‰
And… GO!

August 10, 2011 by Krista

DIY Personalized Clock

So, if you’ve been around here much you’ve probably realized that I’m short on space and that because of such I like gifts and decor that don’t have to come down or be put away once the holiday passes.  So, this is more of a decor idea than a gift idea, but it’s one you can leave up all year long.  And, double bonus, it’s easy to change when you want something new.  What is it you ask?  Well, it’s a personalized clock!  Woot woot, right?  Ha, yeah, especially when I tell you it cost me about $2.  And I entered a giveaway for a similar (albeit, much nicer) clock and thought about getting one for my parents for Christmas, till I saw the price tag.  I scratched that right off my “to-buy” list.  $68 for a clock?  Not on my budget.  Ok, enough of the running of the mouth, uh… fingers?

Here’s the How:
1)  Buy a clock.  The quality and size is totally up to you.  However, if you want to be able to print your photo at home, keep it small.  You can always get larger prints from a photo center though, so don’t let size limit you.  I bought mine at IKEA for a buck.

2)  Do any adjustments to the photo you want to.  I lowered the opacity so it wasn’t so vibrant a photo.  Get it printed or print it on your home printer
3)  Decide where you want to place the photo.  I popped the plastic cover off and used that to help me place my photo.

4)  Trace around the plastic cover.  Cut just inside the line to allow for fit.  It’s better to cut big and need to trim than to cut too small.  Also, look at the center of the clock.  What does the spindle mechanism look like?  Are you going to have to cut around it?  I did.  Mark it on your photo if so.

5)  If you have a clock like I did where the spindle mechanism doesn’t remove you will have to cut a slit in your photo to place it under the hands.  If the spindle does remove, then by all means, do that instead.  It will result in a much cleaner finished product.  Choose a less important part of the photo and make a clean cut all the way to the center.  You will probably also need to cut out a small circle for the spindle mechanism.  Exacto knifes are great for this, but make sure they have a sharp blade and use firm pressure so you don’t just score your photo instead of cutting all the way through it.
6)  Position the picture under the arms.  Do this carefully.  When you have it in place, use a few dots of tacky glue to hold it still.  Note:  Make sure the photo is lined up with the numbers on the clock.  Top of the photo should be at the top of the clock.

7)  I then marked the placement of the numbers on the clock so I could accurately place them on the cover.  I just popped the cover back on and wrote on the cover with a dry erase marker.  This is where you could easily customize to your own taste.  No numbers, roman numerals, numeric, spell a word, whatever your little heart desires.

8)  I applied my numbers to the cover.  I used self-adhesive vinyl.  The good thing about this is that if I want to change it, it’s as easy as peeling the vinyl off and sticking new stuff on.  Can’t ask for easier.
9)  I also added a personalized name to the clock, just to make it a little more special.

It was a cheap project, and the results aren’t quite Pottery Barn quality, but sheesh… it’s just going in our bathroom!
If you are need vinyl numbers or lettering, let me know.  I can hook you up.  I’m awesome at custom Etsy orders.  A variety of fonts and colors available.

August 9, 2011 by Krista

DIY Lantern

Do you love easy and frugal decorating ideas?  Well then, here is a post for you.  I keep seeing those gorgeous old-timey lanterns in catalogues and on websites like Pottery Barn and Crate & Barrel.  I am so in love…. until the price tag catches my eye.  Move that puppy to the “I wish in a million years” list. 

Source

       
This simple design is $40 from Crate & Barrel.  FORTY BUCKS!  That’s almost a month’s worth of diapers in this household.  Not a splurge I can justify or even bring myself to contemplate. 

ZincHurricaneLLS9
Source

This baby is $80.  Are your eyes popping out of your head yet?  My jaw fell promptly to the floor when I saw that price tag.  These pieces are gorgeous, but no where near my budget.  So, I set out to make my own.

2011-08-09_14-25-41_610

This is my DIY version.  Cost me nothing, as I had everything on-hand already.  Much more manageable.

Here’s the How:
1)  I took four 5×7” picture frames (from the Dollar Tree) that I already had, removed the glass and spray painted the frames black.  Give ‘em a good two or three coats.  You can also do a clear sealant over them, but I didn’t and have had no problems with scratches.  My paint was a matte finish, it’s what I prefer.  A glossy finish may give it a little “newer” look, if that’s the look you like.  Make sure you paint both sides of the frames.  Clean the glass while it’s out of the frames.

2)  After your frames are thoroughly dry, put the glass back in and wipe off any fingerprints.  Then, glue them together along the edges to form a cube, except the top and bottom are open.  I use LocTite glue.  E6000 and Gorilla Glue are other glues you could consider.  I did a thin strip of glue all the way down the edge of the frame.  Brace them while they dry.  Let them dry really well (like over-night, at least).
2011-07-23_14-37-43_411

3)  I liked the lantern just like that.  But, I also liked the lantern from Crate & Barrel.  Yeah, the one with the $80 price tag.  So, I decided to take some vinyl and decorate the glass.  Vinyl is typically pretty easy to remove, so if I didn’t like it, I could take it back off.  I like it…
 2011-08-09_14-24-46_854

4)  I wanted to leave the top open so I could use a real candle in it without the worry of scorching anything.  I also decided to leave the bottom open for now.  If you want to close the bottom off you could use something as simple as a piece of cardboard painted black and glued to the base.  Or you could get a piece of plywood and cut it to the dimensions of your lantern, paint it to match and glue it to the base.  You could also consider putting a wire handle on it too.    

2011-08-09_14-25-22_668

A couple of weeks ago I found this idea on Remodelaholic.  Kari from The Sunset Lane did a similar project, but she made a chandelier with it.  It’s too cool.  Check it out.

August 8, 2011 by Krista

Hair, Hair, Get it Off of There

Summer is in full swing, and even winding down.  Are you trying to squeeze in a few more fun days before school starts back up?  We are.  We spend many of the evenings outside, when the temperatures drop to bearable.  The constant, crazy heat always means more bare skin.  We all have unwanted body hair.  Every single one of us.  And, these days, we don’t have to just live with it.  Regardless of where the hair is at on our bodies, there are ways to get it off.  But, which way is best?  Let’s take a look…

Shaving is simple, fast and cheap.  It’s generally pain-free, except for occasional nicks and razor burn.  A sharp blade and shaving cream can help reduce these occurrences.  I have tried both the expensive creams and razors and the cheap ones.  As long as you’re careful, it doesn’t really seem to matter which brand.  Although I do prefer a razor with at least three blades.  Because shaving only cuts the hair off at the skin, stubble develops within a couple days and needs to be repeated frequently.  But, I’m sure that’s not news.
Shaving works best on the legs and underarms.  Some women also shave the bikini line, although waxing will give longer lasting results (which, in my opinion is worth it, especially during swimsuit season).  Women should never use a razor on their face.

Source

Waxing works well on all body areas, from head to toe.  Waxing isn’t particularly cheap, but home kits are definitely affordable.  Doing your own waxing will take longer, especially if you’re inexperienced, than having it done in a spa or salon.  Sugaring is a variation of waxing.  The pro to sugaring is that it washes off with water.  Waxing is quite painful, especially the first few times.  Waxing typically lasts 3-6 weeks.

Source

Tweezing is a great way to maintain your already waxed skin.  Tweezing the eyebrows in the most common use.  Hair must be long enough to grasp between the tongs.  You don’t need to spend $10 on a pair of tweezers.  I find the La Cross brand to work well.

Source

Threading is a Middle Eastern technique that is becoming very popular in the United States.  Threading is typically done on the face.  Threading is faster than tweezing, especially when done by a professional.  Threading is usually very affordable.

Source

Shaving, waxing and tweezing are the most common and affordable methods.  Threading is steadily growing in popularity.  There are some other, more permanent, methods as well.

Laser hair removal works best on dark hair and light skin combinations.  I’ve never had laser hair removal, but I hear the pain is less than waxing, but more than tweezing.  Kind of like a rubber band being snapped against your skin.  Laser removal takes about 10 minutes, but you will need 5-6 sessions to complete the treatment.  Laser hair removal isn’t cheap.  Typical prices run anywhere from $150-$200 a session.  And treatments are only about 80% successful.

Source

Electrolysis is much more successful than laser removal because it actually kills the hair follicle, instead of just targeting the dark color like a laser does.  Electrolysis focuses on one hair at a time and, because of this, can take a large amount of time.  It’s ideal for smaller areas due to the tediousness of the process.  I’ve also never done electrolysis, but it’s supposedly more painful than laser removal (which didn’t sound all that fun to me anyway…).  It’ll cost you a pretty penny too, as the typical fee is $60 for a 30-minute session.  The con is you need about 15-30 visits to see the best results.  Ouch!  Physically and for the pocketbook.

Source

Krista

What’s your preferred hair removal method?

August 7, 2011 by Krista

DIY Luggage Tags at Someday Crafts

Hey Friends!  Today, I have an exciting announcement.  First, the amazing Michelle that runs Someday Crafts is having me over.  If you’ve never visited Someday Crafts, you better get yourself over there.  Michelle always posts some great ideas and she’s got some killer link parties (three of them, to be exact).  Michelle’s site is one of my go-to blogs for ideas, even if I’m just surfing back through those great link parties (one of which is organized categorically).  Today, I’ll be showing you how to make some personalized, customized luggage tags.  They are easy, practically free, versatile and will make spotting your suitcases at baggage claim a piece of cake.  Don’t travel much?  That’s okay, these are also fantastic for diaper bags, strollers, beach bags, coolers, and your kiddos backpacks.  Make them whatever size you want and include whatever information you’re comfortable with.  So head over to Someday Crafts and check these out.

Also, I know I’ve been hit and miss the last couple weeks (and actually, it feels a lot longer than that, as many of my posts for the last several weeks have been pre-scheduled.  Our summer has been a bit crazy, particularly this one… but I should be back and ready for action now).  I’ve got some great stuff coming your way.  New crafts, recipes, date and romance ideas, October Spooktacular is coming up again soon and, of course, there will be some giveaways.  All fun things.  But, you’ll just have to come back to get more info on all that great stuff.

  • « Previous Page
  • 1
  • …
  • 161
  • 162
  • 163
  • 164
  • 165
  • …
  • 231
  • Next Page »

I'm Krista. Ringleader here on While He Was Napping, wife to my handsome Mr. Right & momma to my THREE energetic boys, Big J (9), Little J (6) & Little N (4). We FINALLY added a beautiful little girl to our family last December.

I’m knee-deep in Tonka trucks & Thomas trains. I survive our crazy days with Vanilla Coke, Sonic slushies, sweet snuggles and little giggles. When I tuck them in tight & kiss them good night, I get a little time to create & just be me.


It all happened
while (s)he was napping
Want More of My Story?

Privacy Policy

While He Was Napping respects your privacy and is committed to keeping any personal information collected on this website confidential. To find out what information we collect and how it is used or what options you have regarding your information, see our full privacy policy here. Creative Commons License The website found at whilehewasnapping.com and all subdomainsauthored and published by Krista is licensed under a Creative Commons Attribution-NonCommercial-NoDerivs 3.0 Unported License.

Pretty Chic Theme By: Pretty Darn Cute Design