While He Was Napping

momma gets stuff done

  • Home
  • About
  • Archive
  • Do It Yourself
    • Crafts
      • No Sew
      • Painting
      • Paper Crafts
      • Repurpose Projects
      • Vinyl
      • Washi Tape
      • Kid’s Crafts
      • Fonts
    • Sewing
    • Decorate
      • Home Decor
      • Holiday Decor
    • Celebrate
      • DIY Gifts
      • DIY Your Party
  • Recipes
    • Beverages
    • Appetizer
      • Bread
      • Other Appetizers
    • Snacks
    • Main Dish
      • Meat
        • Chicken
        • Beef
        • Pork
        • Seafood
      • Vegetarian
      • Slow Cooker
      • 30 Minute Meals
    • Dips & Sauces
    • Salads
    • Pasta
    • Soup
    • Dessert
      • Cookies
      • Brownies
      • Cupcakes and Cake
      • Box Mix Recipes
      • Other Sweet Treats
    • Breakfast Food
      • Pancakes
      • Waffles
      • Muffins
      • Other Breakfast Food
  • Family
    • Babies
      • Pregnancy
      • Newborns
      • The 1st Year
    • Toddlers
    • Preschoolers
    • Kindergartners
    • 6-8 Year Olds
    • The Grown Ups
      • Date Night
      • Romantic Gifts
    • Self Care
  • For the Home
    • Cleaning
    • Organizing
    • Emergency Preparedness
  • Travel
    • Travel Tricks & Tips
    • Traveling with Kids
  • Tech & Gadgets
    • Must-Have Apps
    • Techy Home Appliances
    • Gadgets & Electronics
    • Blogging Tips
  • Printables
    • Posters
      • Quote Printables
      • Subway Art Printables
    • Printable Organizers
    • Printable Journals
    • Learning Printables & Worksheets
    • LDS Printables
  • Holidays
    • New Year’s
    • Valentine’s Day
    • St. Patrick’s Day
    • Easter
    • Cinco de Mayo
    • Mother’s Day
    • Father’s Day
    • 4th of July
    • Back to School
    • Halloween
    • Thanksgiving
    • Christmas
    • Holiday & Seasonal Printables

January 24, 2016 by Krista

Happiness is Homemade Link Party – 01/24

Welcome back to another week of Happiness is Homemade! I’m so glad you’re all here and so are my amazing co-hosts! We had some amazing links last week! Did you see that collection of chocolate desserts? I’m sure I had to wipe up a little drool… And there was a great slow cooker soup recipe or two as well. If you didn’t get to check them out, you really should. After you link up this week, of course. So, let’s just get to that shall we…. hmmmmm?

_________________________________________

Happiness is Homemade Hosts Image

This week flew by in my house and I am really not sure if that’s good or bad! Several chores were done that were long overdue; yet others still remain on the dreaded list to do. I think the rain and cold weather we’ve had helped get things done. One thing is for sure – there is not a short list of great recipes, DIY, crafts, and tips on last week’s Happiness is Homemade! We loved them all.

If you’re in the path of this nasty winter storm, stay safe and warm. Cozy up with a hot cup of tea or coffee while you browse our Link Party and check out what everyone has been up to.

After you’ve linked your latest and greatest posts, please remember to check out all of the Hosts and their blogs and give them some love.

This Week’s Features

asian-zoodles-0679

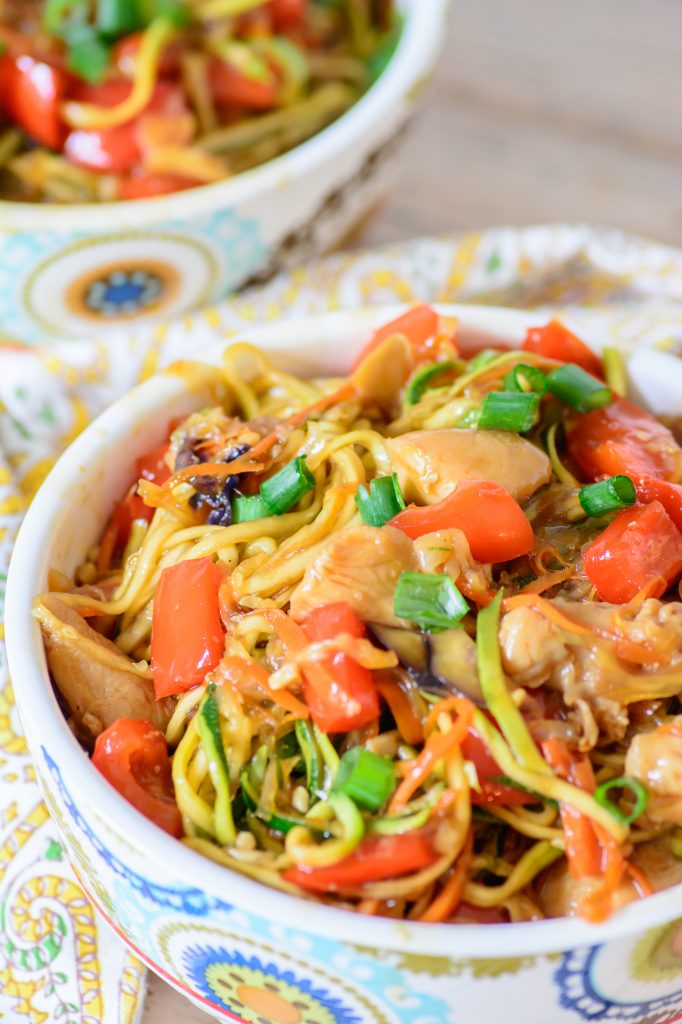
Honey Sriracha Chicken Zoodle Bowls from

Almost Supermom


applie-pie-cookies-2

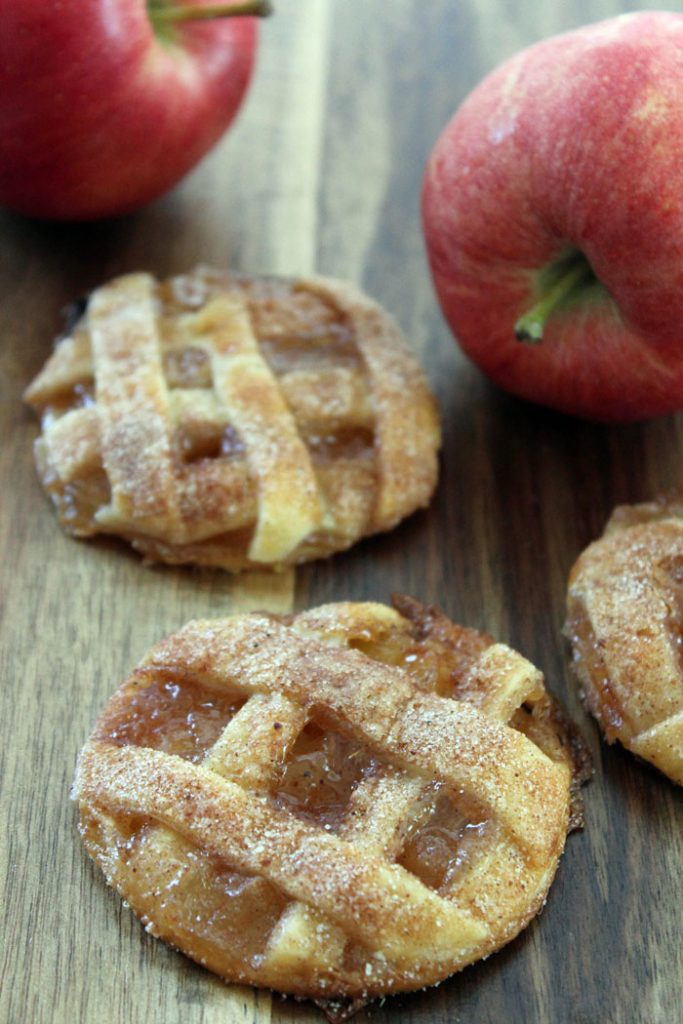
Apple Pie Cookies from

Shibley Smiles


10-valentine-ideas-around-the-net

10 Valentine Ideas From Around the Net from

Marilyn’s Treats


creative-valentines-day-boxes


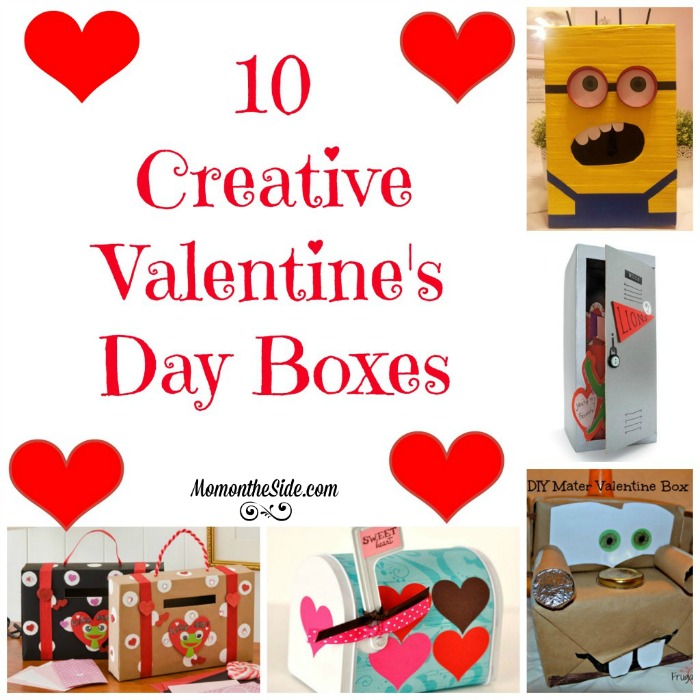
10 Creative Valentine’s Day Boxes from

Mom on the Side


MEET YOUR HOSTS

Image Map Peek Into Paradise Mommy Demand Blogghetti Painted Hinge Upstate Ramblings While Napping Ducks 'n Row Love Messy Messy Mess Labour Life Eclectic Red Barn That Recipe Lady Prefers 2 Save

Now, that’s enough talking!

Let’s get this party started!!!

Click to Tweet and tell others about Happiness is Homemade Link Party!

Tweet: Join us at #HappinessIsHomemade #LinkParty #bloggers #LinkUp your latest & greatest #creations http://bit.ly/1TgKcVR @WhileHesNapping


Happiness is Homemade Hosts Image

The rules are really simple! Make sure you visit a few other blogs and make some new friends along the way. Feel free to link up your favorite recipes, crafts or your latest DIY project. We want you you share it all! As always, please make sure to follow your hosts and co-hosts!! Link up your posts, make some friends, and earn the chance to be featured at Happiness Is Homemade Link Party! We will feature the favorite posts each week! Disclaimer: Adding your link to this link party gives permission to all 12 Hosts, along with any co-hosts, guest hosts, and participants of Happiness Is Homemade, to share your posts and pictures via social media and as features, roundups, etc. with an explicit link back to your original source. Therefore, linking up you agree to allow us to use your images on each of our blogs in features relating to Happiness is Homemade Link Party.

An InLinkz Link-up


January 22, 2016 by Krista

5 Seam Pajama Pants – No Pattern Needed!

Hey there! I’m so glad you’re here. If you’re on the look out for a quick and easy sewing project then don’t go anywhere, because you have found it! These 5 Seam Pajama Pants are the perfect project for beginners and advanced sewists alike.  They are simple and relatively quick – the more you do, the faster you’ll get.

Are these 5 Seam Pajama Pants exactly what you’re looking for?

The answer to that is abso-freaking-lutely if you can say yes to any of these:

  • Are you a beginner? These pajama pants are PERFECT for beginners. There’s only 5 seams and two pieces of fabric. The steps are simple and repetitive. The fit is relaxed, so seams don’t have to be perfect. You probably won’t even notice any imperfections. Ideal for beginners!
  • Do you hate patterns? These pajama pants require NO PATTERN! You use pants you already have. You don’t have to worry about cutting out the right size pattern or using one pattern to make multiple sizes. Or, my favorite, keeping track of the pattern pieces.
  • Are you short on creative time? These 5 seam pajama pants are a fast project! The first couple of times might take a couple hours – which really isn’t very long in sewing terms. The more you make, the faster you’ll get. Before you know it, you’ll go from measuring your fabric to wearing your pants in an hour!
  • Do you need multiple sizes? These pajama pants are versatile. They are easy to make in any size and are great for both genders. Simple and comfy for the whole family.

These are one of the first things I ever learned to sew and I still make these at least once a year. I make Christmas Eve pants for my family every year (that’s six pairs!) and THIS is the method I use. These pants are easy, quick and so incredibly comfy.

These 5 seam pajama pants really are the perfect project for beginners and a great quick project for the more advanced sewists. And you really don’t need a pattern!


5 SEAM PAJAMA PANTS – NO PATTERN REQUIRED

5 Seam Pajama Pants - Great sewing project for beginners and a quick project for more advanced sewists

Affiliate Link Disclaimer

5 Seam Pajama Pants Materials:

– Sewing machine (I have the 15+ year old version of this sewing machine. I’ve had it since I was 16 and it’s still going strong.)
– Needle (and extras – there’s nothing worse than being in the middle of a project, breaking a needle and not having any spares!)
– Empty bobbins
– Fabric (See Tips and Tricks below)
– Coordinating thread
– Fabric marking pens or Tailor’s Chalk (see Tips and Tricks below)
– Iron and ironing board
– Straight pins
– Fabric Scissors (I’ve had a pair of these for nearly 10 years and they are still amazingly sharp. Love these things!)
– Another pair of pants that currently fit well (see Tips and Tricks below)
– Elastic or Ribbon/Fabric (see Tips and Tricks below)
– Safety Pin


Tips and Tricks for Successful 5 Seam Pajama Pants

FABRIC

  • The fabric types that work best to make these pants are Cotton Apparel Fabric and Fleece. Flannel Fabrics are another great option for cold weather months, although you may consider adding approximately an inch extra to all sides to make up for the limited stretch of this kind of fabric.
  • If you have a finished inseam of 25 inches or less, you can use a yard of fabric. Otherwise, a yard and a half should be enough. Two yards will be plenty, even if you have a really long inseam or like a high waist.
  • My favorite way to buy fabric is online because then I don’t have to drag my three unruly boys to the fabric store. It never ends well. But, it can be hard to buy fabric you can’t touch. I’ve done a lot of shopping around and my very favorite place to get fabric online is from Fabric.com. The quality is always great, the selection is wide and plentiful, the customer service has been great every time I’ve needed something and prices are competitive and shipping is quick.

FABRIC MARKING PENS

  • I actually prefer plain old chalk to do my fabric marking with. You can find it in the art section of most retail stores. Chalk washes out easily, offers the option of making small marks or large ones and can be simply rubbed away if you make a mistake and need to redo your marks. Tailor’s Chalk is my next preferred method. Same idea, slightly more expensive.

WHICH PANTS SHOULD I USE?

  • These will, in essence, be your pattern. You will want to choose a pair that fits well and is comfortable. Another pair of lounge or pajama pants are great. I make these 5 seam pants every year for Christmas for my whole family. I use a current pair of athletic-style pants that fits well or are slightly big and add approximately two inches around the entire pair of pants for seam allowance and a bit of growing room. Except the length; I add about two inches to the length so my kids can wear them longer before they become flood pants or capri pants.
  • Always err on the side of too large. You can always trim them down, but it’s really hard to put material back once it’s been cut.

ELASTIC OR DRAWSTRING

  • Which style you chose is up to personal preference. I prefer elastic and I like 3/4 inch wide. It’s wide enough to not roll, but not so wide it’s cumbersome or uncomfortable.
  • If you opt for a drawstring, you will need a ribbon or piece of fabric (sewn into a strip with right sides together and then turned right sides out) that is the same length as the circumference of your pants, plus 8-10 inches.

5 Seam Pajama Pants Directions

* All seam allowances are 3/4 of an inch, unless otherwise stated.

PREPARING AND CUTTING YOUR FABRIC

– Wash and dry your fabric to prevent any shrinkage after you make your pants. Don’t skip this part or your fit may be altered and less amazing.
– Fold the fabric in half, wrong sides together. Fold your pair of pants in half, as if you’re going to fold them up. Straighten all the seams and pull the crotch area until it lays flat. You don’t want any weird bubbles or your pants will fit weird across your hips.

5 Seam Pajama Pants Template Pants
– Lay the pants on top of your fabric near one edge. The straight edge (the outside part of the leg) should be facing the middle of the fabric, the crotch pointing toward the edge.
– Use the chalk, or whatever marking tool you’re using, to draw a line 1-2 inches away from the edge of the pants. The further out you go, the looser your pants will fit around your body. The elastic you will insert later will hold them up, so go for comfort.

This isn’t rocket science and the cut of these pants don’t require precision, so you don’t need to spend too much time getting specific measurements. Trace around the crotch, inseam, bottom of the leg and the waistband. You can trace the outside of the leg if you want, but it isn’t necessary. If you do, you’ll be able to use it as a reference line in the next step.

5 Seam Pajama Pants Trace the Template Pants
– Flip the pants on the straight edge so the crotch is now pointing toward the other edge of the fabric. If you did trace the outside edge of the pants you can line it back up. If you didn’t, just approximate the placement. You can move the pants over an inch or two if you’re worried. It will just make your pajama pants slightly baggier, although you probably won’t even notice. Trace the crotch, inseam, bottom of the leg and the waistband. Connect the lines on the bottom of the leg and the top of the waistband. You can set the extra pair of pants aside, you won’t need them again.

5 Seam Pajama Pants Trace the Pants

5 Seam Pajama Pants Flip the Pants

– Make sure your fabric is laying flat – it should still be folded in half, right sides out – and pin just inside the lines you drew all the way around the pajama pants. Cut on the lines. You should end up with two identical pieces with the pattern facing you.

5 Seam Pajama Pants Cut Out the Pants

SEAM #1: THE INSEAM

– Separate the pieces and match up the front of the crotch to the back on each piece, right sides together this time. Match up the bottoms of the leg too. Pin and then sew the inseam. Repeat on the other piece of fabric. Iron your seams.

5 Seam Pajama Pants Pin and Sew Inseam

SEAM #2 & 3: THE HEM

– Hem the bottom of each leg. You don’t have to do this now, but I find it easier to do it before you sew the legs together, especially on little pairs of pajama pants. Iron your hems.

5 Seam Pajama Pants Hem Pant Legs

SEAM #4: THE CENTER SEAM

– Turn one of the legs right side out and stick it inside the other leg. Match the two inseams together and pin. Then match up the front and back of the waistbands. Pin and sew the center seam, or the crotch seam. I always do a double (or quadruple!) stitch over the crotch, where the seams all meet. No one likes to pop a hole in the crotch of their pants!

5 Seam Pajama Pants Pin the Center Seam

5 Seam Pajama Pants Sew the Center Seam
– Pull the pant legs apart and iron your seams. Hey, they are starting to look like pants, right?!

5 Seam Pajama Pants Inseam and Center Seams

SEAM #5: THE WAIST BAND

– This is the last part: the waistband. First, you’ll need to make a casing for your elastic. At the waistband, fold down about 1/2 inch of fabric all the way around. Iron to hold the fold. Fold down again just enough to hold your elastic. I like to use 3/4 inch elastic, so I fold down about 7/8 inch to an inch. Pin the fold down.

5 Seam Pajama Pants Elastic Casing
– Start at the back of the pants and about 1/2 inch off the center seam and sew your casing around the waist band. When you get back to the back of the pants, stop about 1/2 inch before you reach the center seam. There should be a gap where you can thread the elastic into the casing.

– Cut your elastic to size. If you have a fabric measuring tape handy, you can measure the hips of your intended wearer. If not, just stretch the elastic around their waist. You’ll want approximately 2 inches less in elastic length than the circumference of your wearer’s hips.

– Fasten the safety pin to one end of the elastic. Thread the safety pin and the elastic into the casing you just sewed. Thread it all the way around the waistband. Don’t let the other end of the elastic disappear inside the casing while you’re working the other end through the pants. You can pin an additional safety pin to the other end or pin the end of the elastic to the pants to help you keep track of it.

5 Seam Pajama Pants Safety Pin to the Elastic
– When you get the elastic through the casing, check to make sure you didn’t get it twisted inside the casing anywhere. If you did, untwist it. Pull out both ends of the elastic and stitch them together. It doesn’t need to be pretty, but it does need to be secure. Once the ends are sewn together, stretch the waistband of the pants and that should pull your elastic inside the casing entirely. Help it out if it’s getting stuck and just tuck it in with your fingers.

5 Seam Pajama Pants Thread the Elastic through the Casing
– This is completely optional, but I highly recommend it, especially on pants for kids. Cut a length of ribbon about an inch and a half long. Fold it in half and stick the ends inside the gap in the casing where you just pushed the elastic through. This will create a little tag so that it’s easier to tell the front from the back of you new pajama pants. If you don’t want the tag, you can always just check the waistband hem around the center seam and if there is double stitching, it’s the back.
– Sew the casing gap shut.
– Iron your pants.

5 Seam Pajama Pants Finished
– Wear those babies all the time. Ok, not ALL the time, but they’re so comfy you’ll want to wear them all the time.

PRACTICE, PRACTICE, PRACTICE

Practice makes perfect and these 5-seam pajama pants are no exception. The more you make, the quicker you’ll get. This past year, I made four sets in about four hours. It’s easier and quicker to make a single pair at a time because you aren’t changing anything (like thread colors or stitch length). I never leave myself that much time and always end up working on several pairs at once. I’ve gotten fast enough I can zip out a single pair in about 45 minutes to an hour, so it doesn’t take much more time to do a bunch either.

5 Seam Pajama Pants Set of 4 Superhero PJ Pants


I love these 5 seam pajama pants. My kids love them. Mr. Napping prefers sweats and, since he’s so particular about his sleep apparel, it’s easier (and WAAY cheaper!) to buy a pair of sweats than 2 yards of fabric. The guy is 6’3″ and it takes a lot of fabric to cover his long legs.

When he runs out of clean clothes, he still wears my last ultra failed attempt to make him some pants from a different pattern. It makes me laugh and makes me feel loved all at the same time. Only someone who really loves me would wear them!! And it reminds me why I stick to these 5 seam pajama pants!

My favorite thing about these pajama pants is how easy it is to adjust them to make them fit lots of different sizes. I make me a new pair every year too because they are quick and comfy. I don’t get to sew as often as I wish I did and even more rarely do I get to make something for myself. These are the perfect project. They are perfect for grabbing all the snuggles I can get and playing cars on the floor.

5 Seam Pajama Pants Great for Snuggles

Leave any questions in the comments and I will answer them as quickly as I can. Who are you going to make your first pair of 5 seam pajama pants for?

January 21, 2016 by Krista

Between the Sheets Game: At Home Date Night Idea

This shop has been compensated by Collective Bias, Inc. and its advertiser. All opinions are mine alone. #KYALittleTouch #CollectiveBias


This is my love story. Please read on to see how K-Y® TOUCH® enhances our relationship and click here for a $2 off one K-Y® product coupon.

Valentine’s Day is right around the corner! Do you have plans already? Our anniversary is almost a week before Valentine’s Day, so I go into romance overload mode once the new year starts. It’s a lot of fun for me… and Mr. Napping doesn’t usually mind it too much either. Wink, wink.

Since our anniversary is so close to Valentine’s Day we usually go out for our anniversary – when it’s easier to get reservations and isn’t so crowded – and celebrate Valentine’s Day at home. I love me a good at-home date. It’s low-key, comfortable, and usually costs a lot less than going out. I feel like those are the dates I really get to enjoy my husband and his company. We’re approaching eight years together and, while our bedroom time is still hot and steamy, sometimes it’s fun to spice things up a little. If you’re thinking about an evening at home, I’ve got a fun date idea for you.  And be sure to grab the K-Y® TOUCH® at Walmart in the health and beauty section using this $2 off one K-Y® product coupon!

BETWEEN THE SHEETS GAME
AT HOME DATE NIGHT IDEA

 K-Y® TOUCH® Between the Sheets Game At Home Date Night Idea

Recently, things just did not work out with gifts for my husband. In a pitch, I shared the Between the Sheets game I made. This still got him pretty excited…

 K-Y® TOUCH® Between the Sheets Game Date Night Idea Set Up

We finally got to do our date and it was fantastic. Our evening started with a snack – because the way to my husband’s heart really is through his stomach. He was mildly curious when he came into our room and found the bed made (not a habit I developed, unfortunately), but was promptly distracted by the offering of food and sparkling juice. We talked for a little while, mostly about what I was up to. Mr. Napping doesn’t love surprises; too bad for him, because I do. When he was done with the crackers, we peeled the comforter off and I had his complete attention.

 K-Y® TOUCH® Between the Sheets Game Date Night Idea Reveal

We read the rules and started to play. I had everything set up beforehand. A playlist with romantic songs ready to inspire and set the mood, a fun wardrobe change (or two), and our K-Y® TOUCH® pleasure gel. We love this for giving couples’ massages! We love the warming feature that can be sensual and can help relax tired muscles so you can really focus on all the other amazing pleasures and touches during intimate time. And you don’t have to stop to switch gears. Get in the mood and just go for it. You’ll both be glad you used K-Y® TOUCH®. Check out the full tutorial and make your own Between the Sheets game!

 K-Y® TOUCH® Between the Sheets Game Date Night Idea Rules

K-Y® TOUCH® Between the Sheets Game Date Night Idea K-Y® TOUCH®

The idea of the game is to spend time together enjoying each other without rushing straight to the finish line. I mentioned we’ll be celebrating eight married years in just a couple weeks and sometimes we get so busy trying to squeeze in our time together between diaper changes, middle of the night wakings, and all our other responsibilities that we don’t get to really enjoy just being together. It’s no secret that men and women don’t typically reach that intimacy finish line at the same time and it’s an age-old question on how both parties can find a happy finish. We were both completely happy and satisfied at the end if this date. Completely. (P.S. That was the best night’s sleep I’ve had in … a very long time. Ahhh-mazing.)

K-Y® TOUCH® Between the Sheets Game Date Night Idea K-Y® TOUCH® finish


Before this date, Mr. Napping and I were in need of some time together. Over the holidays, life had gotten crazy and our together time had dwindled. This was perfect. It was a great night full of laughter and fun. And we were able to make that connection again! We were dating again! The kids faded away, the mortgage, the bills, the deadlines, the responsibilities… just kinda disappeared. It was just us. It was amazing. The tall, dark, and handsome 23-year-old I fell for nine years ago is still around. Our whole house is happier and runs more smoothly when Mr. Napping and I have that connection and intimacy between the two of us. So, really, we do date night for the kids… wink, wink.

So, if you’re ready to get your romance on this Valentine’s Day, get to planning your own Between the Sheets game night. I’ll have more detailed directions on making your own game next week, so if you want a little more guidance you can come check that out. I grabbed our amazing K-Y® TOUCH® at Walmart. Click here for the $2 off one K-Y® product coupon! So, grab that coupon and start scheming the best Valentine’s date… what will you do?

 K-Y® TOUCH® Between the Sheets Game Date Night Idea In-Store

This Valentine’s Day, K-Y® is inspiring couples to connect more deeply via the power of touch by using new K-Y® TOUCH®, a new touch activated gel crème for massage and intimacy that gently warms and intensifies sensation with every touch. The warm sensation builds with every caress and encourages couples to slow down and explore more of each other for a more profound intimate connection. Pick up K-Y® TOUCH® at a Walmart near you! 

Also, click both the images below to receive a total savings of $6 off any one K-Y® product and see K-Y.com for more information on the new K-Y® TOUCH® and intimacy tips that can help you deepen your couples’ connection.

K-Y Product Coupons

K-Y Product ibotta rebate


I did a post on the K-Y® LOVE pleasure gels back in September… it’s good stuff, friends! So make sure you take advantage of these discounts and spice up your Valentine’s Day!


See the full tutorial on making your own Between the Sheets game HERE.

January 18, 2016 by Krista

Progresso® Light Soup Enchilada Casserole

This shop has been compensated by Collective Bias, Inc. and its advertiser. All opinions are mine alone. #EatLightEatRight #CollectiveBias

The holidays are over and school (finally!) started back up again. Which means our lives are back into a routine of sorts. Which means that I’ve gotten back into my slightly more structured life. I’ve gotten back to more regular meal planning, which has been good for us in more than one way: our budget, our waistlines, and our overall health. I definitely feel much better when I’m eating more healthy. But we have a routine because we’re busier now and that means I don’t have a lot of time to spend in the kitchen. I need quick meals that are delicious and family-friendly. So, with the help of Progresso® Light soup, I came up with this Enchilada Casserole.

PROGRESSO® LIGHT SOUP ENCHILADA CASSEROLE

Progresso® Light Chicken and Cheese Enchildad Soup Enchilada Casserole

Print This Recipe
Progresso® Light Soup Enchilada Casserole

Prep time:  25 mins

Cook time:  35 mins

Total time:  1 hour

Serves: Serves 6-10

Enchiladas in a fraction of the time.
Ingredients
  • Progresso® Light Soup Enchilada Casserole Ingredients
  • - Progresso® Light Soup Chicken and Cheese Enchilada Flavor
  • - 1 cup Enchilada Sauce
  • - 3 large Mushrooms, sliced
  • - 3 Green Onion Stalks, sliced
  • - 2 cups Shredded Cheese
  • - 4 Wheat Tortillas
  • - 1 large Red Pepper, cut into slices
  • - 1 medium Roma Tomato, sliced
  • - 1 cup cilantro, sliced
  • *We had some rotisserie chicken in the fridge from a meal a couple days before, so I cut it up and added it to our enchiladas as well. The soup has chicken in it already, so you don't really need to add more. But, I needed to use ours up and three of the four males in my home are meat-lovers, so no one complained.
Instructions
  1. - In a 9x13" pan, pour about ½ cup of enchilada sauce in the bottom of the pan. Spread the sauce so that it covers the entire bottom of the pan. Progresso® Light Soup Enchilada Casserole Enchilada Sauce Layer
  2. - Cut the tortillas in half. Arrange them on top of the enchilada sauce with the flat edge against the edge of the pan.Progresso® Light Soup Enchilada Casserole Tortilla Layer
  3. - Pour half the can of Progresso® Light Soup on top of the tortillas. Spread to completely cover the tortillas. Progresso® Light Soup Enchilada Casserole Soup Layer
  4. - Sprinkle cilantro, mushrooms and chicken pieces (if desired) on top of the soup. Progresso® Light Soup Enchilada Casserole Cilantro & Mushroom Layer
  5. - Sprinkle ¾ cup of shredded cheese on top of the cilantro and mushroom pieces. Progresso® Light Soup Enchilada Casserole Shredded Cheese Layer
  6. - Repeat the steps above. Add another layer of tortillas, then another layer of soup, another layer of cilantro and mushrooms, and another ¾ cup layer of shredded cheese and the rest of the enchilada sauce.
  7. - Lay out red pepper slices on top of the shredded cheese and then put a tomato slice in the middle of each pepper slice. Progresso® Light Soup Enchilada Casserole Red Peppers & Tomatoes Layer
  8. - Sprinkle green onion slices on top.
  9. - Cover and bake at 350ºF for 20-25 minutes. Then, uncover and sprinkle the remaining cheese on top. Bake another 5-10 minutes until the cheese is melted, bubbly and lightly toasted.
  10. - Remove from oven and allow to set for 10 minutes - your layers will stay together better if you do.
  11. - Slice and serve. Top with sour cream and cilantro if desired. Enjoy! Progresso® Light Chicken and Cheese Enchildad Soup Enchilada Casserole
3.5.3208

I will admit that this isn’t quite as amazing as my cream cheese chicken enchiladas, but those take nearly an hour to put together and half an hour in the oven. This is a great alternative to that with half the prep time. We will be enjoying this lower-prep-time Enchilada Casserole as a weekday meal and saving the full-on enchiladas for special occasions… like Sunday Family Dinners and birthdays.

Progresso® Light Soup Enchilada Casserole Progresso Light Soups

I like the light part of these soups. It’s a new year and many of us have recommitted to eating better. This soup was full of flavor and goodness without being loaded with calories. And there is so much variety available. My boys loved the potato and bacon one we had for lunch the other day. It was creamy and cheesy, yum! We haven’t tried the other ones yet, but I’m pretty excited about them!

I also love Progresso® Light soups because they have BoxTops for Education Labels. Big J’s school collects them. I love that I can help out his school and feed my family healthy meals! The boys and I grabbed our Progresso® Light soups at Walmart. So, next time you are at Walmart, grab a few cans and make them apart of your family dinners. Right now you can grab this coupon and save $1.00 when you purchase four cans. And check out even more recipe ideas using Progresso® Light soups!

Progresso® Light Soup Enchilada Casserole Progresso Light Soups In Store

Progresso Light Soup Enchillada Casserole In Store Wide


January 17, 2016 by Krista

Happiness is Homemade – 01/17

Welcome back to another week of Happiness is Homemade. I’m so glad you’re here! Last week’s party was amazing! Did you get to check out all the great things that were linked up?! There were some amazing ideas! When you link up, there’s a chance we’ll share your ideas on our social media pages! That family time capsule last week was one of my favorites! So, show us your latest and greatest! Let’s get this party started!

_________________________________

Happiness is Homemade Hosts Image

Can you believe January is half over? I could use a few extra days to keep organizing my house. I’ve been de-cluttering my kitchen which is nearly as hard as cleaning out the craft closet. That ONE item you NEVER use but MAY – do you keep it? Or donate it?

The struggle is real.

Then there is our Happiness is Homemade Link Party – So many delicious recipes, creative crafts, fabulous DIY projects and amazing tips – all in one place yet HOW do you decide on JUST four to feature!! This first party of the year was amazing and I’ve had such fun looking at all of the Hosts’ blogs and all of the posts linked up.

In case you missed it, we’ve expanded our party to include 9 amazing bloggers to share in the duties of host of Happiness is Homemade (that’s 12 blogs your post will appear on). We couldn’t be happier to have them with us.

So get your “clicking” finger ready and link up, browse, pin, drool, and dream with us!!

Remember to check out all of the Hosts and their blogs and give them a warm welcome.

Then link up your best posts and remember to check out the other links and give them some love, too.


This Week’s Features

Pasta-Fagioli-with-Fresh-Pesto

Pasta Fagioli with Fresh Pesto from

Ramblings of a (Bad) Domestic Goddess


d230739e6f51b4b9e29160d1cc2c2cbb

Taylor-Made KitchenAid Sandwich Bread from

Taylor-Made Homestead


Curtain-Rod-Makeover-Using-Drawer-Pulls-07

DIY Curtain Rod Makeover Using Drawer Pulls from

The Painted Hinge


meal-planner

Free 2016 Meal Planner Printables from

Simply Stacie


MEET YOUR NEW HOSTS

Happiness is Homemade Hosts Collage

Row One:

Cathy from A Peek Into My Paradise

Brittany from Mommy on Demand

Lisa from Blogghetti

Row Two:

Michelle from The Painted Hinge

Anne from Upstate Ramblings

Krista from While He Was Napping

Row Three:

Sinea from Ducks ‘n a Row

Katie from Love My Messy Messy Mess

Linda from A Labour of Life

Row Four:

Nicole from The Lady Prefers 2 Save

Bev from Eclectic Red Barn

Audrey from That Recipe


Now, that’s enough talking!

Let’s get this party started!!!

Happiness is Homemade Hosts Image The rules are really simple! Make sure you visit a few other blogs and make some new friends along the way. Feel free to link up your favorite recipes, crafts or your latest DIY project. We want you you share it all! As always, please make sure to follow your hosts and co-hosts!! Link up your posts, make some friends, and earn the chance to be featured at Happiness Is Homemade Link Party! We will feature the favorite posts each week! Disclaimer: Adding your link to this link party gives permission to all 12 Hosts, along with any co-hosts, guest hosts, and participants of Happiness Is Homemade, to share your posts and pictures via social media and as features, roundups, etc. with an explicit link back to your original source. Therefore, linking up you agree to allow us to use your images on each of our blogs in features relating to Happiness is Homemade Link Party.

An InLinkz Link-up


  • « Previous Page
  • 1
  • …
  • 19
  • 20
  • 21
  • 22
  • 23
  • …
  • 231
  • Next Page »

I'm Krista. Ringleader here on While He Was Napping, wife to my handsome Mr. Right & momma to my THREE energetic boys, Big J (9), Little J (6) & Little N (4). We FINALLY added a beautiful little girl to our family last December.

I’m knee-deep in Tonka trucks & Thomas trains. I survive our crazy days with Vanilla Coke, Sonic slushies, sweet snuggles and little giggles. When I tuck them in tight & kiss them good night, I get a little time to create & just be me.


It all happened
while (s)he was napping
Want More of My Story?

Privacy Policy

While He Was Napping respects your privacy and is committed to keeping any personal information collected on this website confidential. To find out what information we collect and how it is used or what options you have regarding your information, see our full privacy policy here. Creative Commons License The website found at whilehewasnapping.com and all subdomainsauthored and published by Krista is licensed under a Creative Commons Attribution-NonCommercial-NoDerivs 3.0 Unported License.

Pretty Chic Theme By: Pretty Darn Cute Design