While He Was Napping

momma gets stuff done

  • Home
  • About
  • Archive
  • Do It Yourself
    • Crafts
      • No Sew
      • Painting
      • Paper Crafts
      • Repurpose Projects
      • Vinyl
      • Washi Tape
      • Kid’s Crafts
      • Fonts
    • Sewing
    • Decorate
      • Home Decor
      • Holiday Decor
    • Celebrate
      • DIY Gifts
      • DIY Your Party
  • Recipes
    • Beverages
    • Appetizer
      • Bread
      • Other Appetizers
    • Snacks
    • Main Dish
      • Meat
        • Chicken
        • Beef
        • Pork
        • Seafood
      • Vegetarian
      • Slow Cooker
      • 30 Minute Meals
    • Dips & Sauces
    • Salads
    • Pasta
    • Soup
    • Dessert
      • Cookies
      • Brownies
      • Cupcakes and Cake
      • Box Mix Recipes
      • Other Sweet Treats
    • Breakfast Food
      • Pancakes
      • Waffles
      • Muffins
      • Other Breakfast Food
  • Family
    • Babies
      • Pregnancy
      • Newborns
      • The 1st Year
    • Toddlers
    • Preschoolers
    • Kindergartners
    • 6-8 Year Olds
    • The Grown Ups
      • Date Night
      • Romantic Gifts
    • Self Care
  • For the Home
    • Cleaning
    • Organizing
    • Emergency Preparedness
  • Travel
    • Travel Tricks & Tips
    • Traveling with Kids
  • Tech & Gadgets
    • Must-Have Apps
    • Techy Home Appliances
    • Gadgets & Electronics
    • Blogging Tips
  • Printables
    • Posters
      • Quote Printables
      • Subway Art Printables
    • Printable Organizers
    • Printable Journals
    • Learning Printables & Worksheets
    • LDS Printables
  • Holidays
    • New Year’s
    • Valentine’s Day
    • St. Patrick’s Day
    • Easter
    • Cinco de Mayo
    • Mother’s Day
    • Father’s Day
    • 4th of July
    • Back to School
    • Halloween
    • Thanksgiving
    • Christmas
    • Holiday & Seasonal Printables

June 23, 2014 by Krista

{Printable} 4th of July Cupcake Toppers/Drink Labels

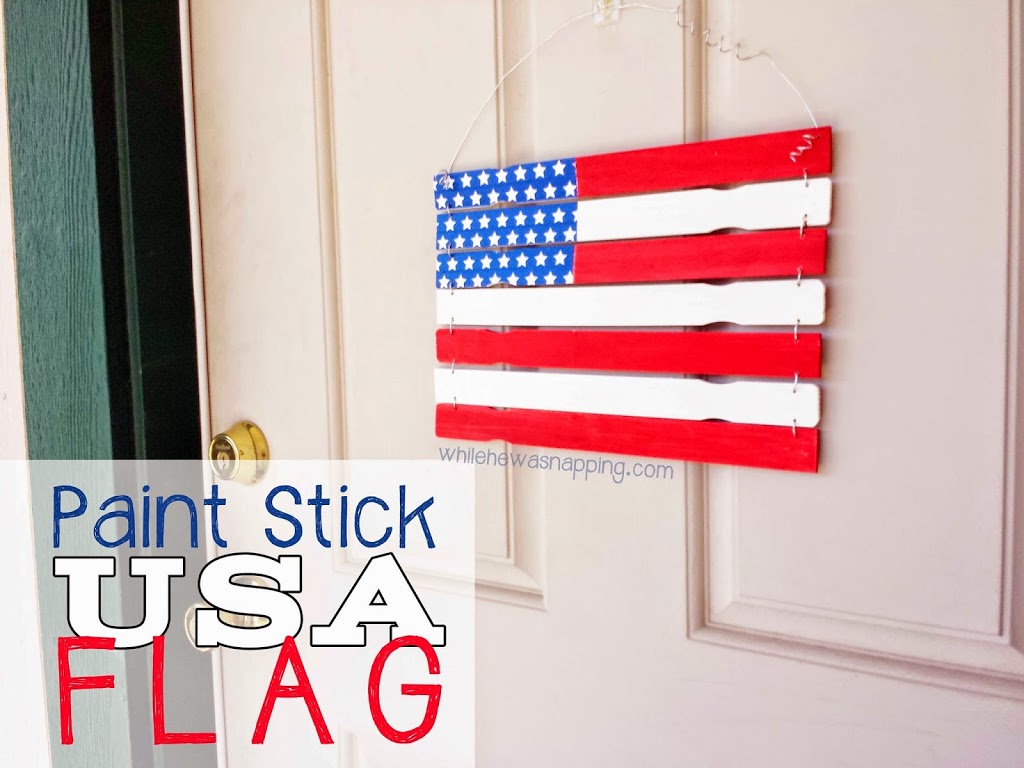
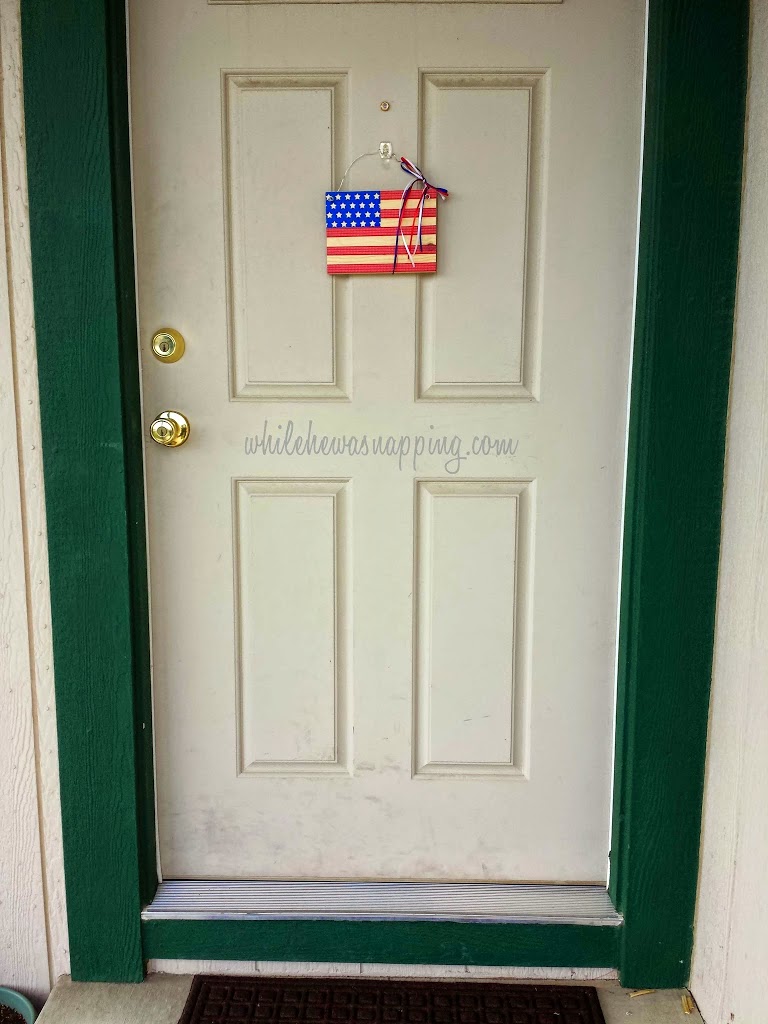
I had grandiose ideas for these toppers… how adorable would they look atop a plethora of little mini raspberry lemonade cupcakes?  Light, creamy cake creations, finished off with blue and red frosting then topped with just a dash of sprinkles and these totally cute toppers.  Do you see it, do you see my dream?  Beautiful, isn’t it……….. Bask with me for a moment, won’t you?  Aaaaaaaahhmazing.

Now insert two rambunctious little boys that have been constantly fighting since the sun started staying out later and a super cute, albeit needy little baby in a house that looks like it’s been hit with a tornado.  Twice.  These tornadoes have names… Big J and Little J.  So, now you know why I don’t have these awesome cupcakes to share.

So then I even contemplated going out and buying some so I’d have some fabulous photos… but that meant taking all three boys out in public.  The thought put me into hysterics (you can read why HERE) and by the time I was calm enough to leave the corner I’d crawled my way into and stop breathing into a paper bag, I wanted cupcakes to eat.  So I didn’t go, because what’s worse than using store-bought cupcakes to stage a photo for a printable on your hobby blog…?  Eating all those cupcakes by yourself, that’s what.  “Hello, Calories, I’m having a party tonight?  Would you like to come?  You can hang around my waistline forever.  See you at 8… after the kids are in bed ’cause Momma doesn’t share.”

Apparently, though, the good news is that I can complete a digital design easier than I can bake cupcakes… because well, getting out a carton of eggs with my personal tornadoes whirling around my feet didn’t seem wise at all.  Digital is harder for them to get their grubby little hands on… or in.

So, you make the cupcakes (or buy them, I don’t care) and you can print these off and make all my dreams come true.  You don’t even have to bother with the photos.  Me… I just used mini donuts instead and snapped some carefully angled photos with my cell phone before the sun was too low.  I just did the tops of the donuts so maybe they look like cupcakes at first glance?  And no, it doesn’t make any sense to me, to put toppers on mini donuts; but, that was our activity today and so that’s what I’ve got.  But why not?  If you get real ambitious, you could even make a 4th of July garland with them, you crazy girl, you.

What does a flag do when you threaten to dunk it in a jar of lemonade?  Why, it runs of course, and ruins all your photos…  wishing my laser printer wasn’t just black and white.
Here’s the file:
Right click, open in a new window or tab.  Right click again and ‘save as’.  Print as many as you need.
File is formatted to an 8×10″, so make sure you print it as such to avoid cutting part of it off!

This post was written by Krista and originally appeared on While He Was Napping.

June 20, 2014 by Krista

Paint Stir Stick USA Flag

I have been meaning to do this project for quite some time.  When I posted as part of Jen’s Patriotic Series last week, this was actually the original project I planned to post.  However, life got a little cah-ray-zee and I didn’t have the chance to get it completely finished before I finished the Washi Tape Flag.  So that one won the race to be my contribution to the series (you can check out all the awesome projects in the series on the Washi Tape Flag post – at the bottom).

Anyway, this project was pretty easy and only took as long as it did because I messed up painting part of the sticks, had to wait for the paint to dry and then repaint them the correct color.  I’m going to blame my distraction on my children, ’cause well that’s why you have children, right?!

PAINT STIR STICK USA FLAG

Materials:
– Seven Paint Stir Sticks
– Red Acrylic Paint
– White Acrylic Paint
– Blue Star Washi Tape
– Picture Hanging Wire
– 1/16″ Drill Bit and Drill
– Needle Nose Pliers

Directions:
– Begin by painting the sticks.  Paint three of them white.  Paint two of them red (this is where I messed up, paint the whole stick red).  On the other two, decide how long you want the blue star portion of the flag and mark it on two of the sticks.  Paint everything to the left of your line white.  Everything to the right should be red.  Got that?  Basically, make it look like the photo, but paint the last two half-and-half sticks all red.  Let the paint dry.

– Take the two sticks you painted half-red, half-white and another all white stick and apply the star washi tape to the left side of the stick.  I was able to get about two rows of tape on each stick with some overlap and minor folding over the edges.  Make sure to alternate the stars, if you want it to look like an authentic flag.  Trim any parts of the tape that don’t cover wood.  I had to trim the handle notches on a couple of the sticks (you don’t want dirt to get stuck to it as it can work it’s way between the tape and the stick and cause all sorts of problems – ugh, so just trim it).

– Lay out your sticks in the correct order and make a small mark where you will drill the hole for your wire.  I just eyeballed it, I didn’t measure.  Make sure you are in from the edge far enough that the stick isn’t going to break when you pull the wire through.  Drill holes with your 1/16″ bit on the marks you made.  Your bottom stick only needs a hole at the top.

– Thread your wire through the holes you drilled.  Start in the bottom hole of the top stick and thread up through the hole.  Go down through the top hole on the next stick down.  This way the wire will be behind each stick and only visible in between the sticks, not over them.

– Repeat the last step until both sides of all the sticks are connected.  Twist the wire on the back side of the last stick to hold it in place.
– Thread some wire through the top hole in the top stick, loosely over the top of the flag and back up through the hole on the other side.  Cut the wire and twist the ends to hold in place and form your hanger.  You can put a little twist in the wire with a pencil if you wish.  Tie on some ribbon if your heart so desires.  Mine did not, but my brain thought about it…

– Hang it up and bask in your awesomeness.

This post was written by Krista and originally appeared on While He Was Napping.

June 17, 2014 by Krista

Black Bean Salsa

So… I was introduced to this “salsa” when I was dating Mr. Napping.  We were attending a potluck dinner on the 4th of July and this was the dish we decided to bring – together.  Yeah, big stuff.  We told my parents we needed to get together to make it and they didn’t really believe we’d show up with anything.  They figured we were just going to kiss and hold hands and gaze into each other’s eyes like love-struck young kids do.  They were quite surprised when we showed up with this salsa – and it was really good!  My mom was doubly impressed when it wasn’t spicy (she has a weak palette and prefers her food quite bland), but still full of flavor.  We are now expected to bring this to Thanksgiving every year by my dad’s extended family.

BLACK BEAN SALSA


Print This Recipe
Black Bean Salsa

Prep time:  25 mins

Total time:  25 mins

Ingredients
  • - 1 can Black Beans, rinsed
  • - 1 can Shoepeg Corn (we can usually find this at Wal-Mart, but it has been difficult to locate in grocery stores at times)
  • - 6 to 8 Roma Tomatoes
  • - 1 purple Onion
  • - 1 bunch Cilantro
  • - Italian Dressing (we prefer Kraft's Zesty Fat Free version)
  • - Tortilla Chips
Instructions
  1. - Rinse the black beans and the corn with cool water.
  2. - Dice the tomatoes into bite-sized pieces.
  3. - Dice about half the onion.
  4. - Rinse and chop the cilantro.
  5. - Combine beans, corn, onion, tomatoes and cilantro in a large bowl.
  6. - Toss with Italian dressing.  We usually use around half the bottle on one batch of this recipe.
  7. - Serve with tortilla chips.
  8. Yields approximately 6 cups.  Serves approximately 12 (depending on serving size)
3.5.3208


You can adjust the quantities to your personal tastes.  It will get stronger the longer it sits.  Refrigerate any leftovers.  Keeps for 5-7 days in a sealed container in the fridge.


This post was written by Krista and originally appeared on While He Was Napping.


June 13, 2014 by Krista

Five Must-Have Android Apps When You Have a Newborn

It’s very possible these apps are available on iOS, but I didn’t double check on that.  Life with a newborn can be hectic, crazy and a big whirly blur for the first few weeks.  Especially if you have other kiddos already.  Between medication schedules, feedings, diaper changes, daily life and existing on very little sleep sometimes you need a little help.  In this day, how many of us don’t have smart phones attached to our palms… or at least our hips?  Let’s use that to our advantage, shall we?  Here are my very favorite, must-have, can’t survive without apps…

1. BabyESP.  This app is amazing.  If you only check out one app on this list, make it this one.  I bought this when Big J was born nearly five years ago.  It is my lifeline every time a new kiddo joins our family.  You can track EVERYTHING with this app.  Diapers, baths, feedings – both bottle and nursing, medications, growth, sleep – both naps and nighttime sleep.  This app just keeps getting better and better.  Baby N is three months old now and I still use this app multiple times every day.  So worth the money.

UPDATE 03/2016: This particular app is no longer available. I was so disappointed. BUT, it made me do some searching and I think I found one that’s pretty similar. Baby Connect has most of the same features, although I did like the Baby ESP layout better. I’ve never used Baby Connect with an infant – which is when Baby ESP was the most valuable to me – but I have used it with my boys to track growth and things like that. It does a great job. Find out more about Baby Connect!

2.  Baby Monitor.  The only downside to this app is that you have to leave a phone with the sleeping baby and it has to stay on.  If you don’t need your phone attached to your body and you can plug it in, this app is fabulous.  You download this app on two phones, one is the monitor and the other is the number that will be alerted if baby wakes.  You set a volume threshold and the monitoring phone will listen.  If baby wakes and begins to cry, it will call the number you’ve put in and alert you that baby is making noise.  We have used this on multiple occasions – camping, at a family dinner held in a church, and during a birthday party.  You can tuck baby away in a quiet corner so they get a decent nap without worrying you won’t hear them wake or having to check on them every twenty minutes.

3.  A noise maker.  I have tried a couple different apps and don’t have one that I am just completely in love with.  But, Baby Sleep Instant is usually my go-to.  It’s your average noise maker app, but I like that it has the basic sounds and some other, not-so-common ones too.  Like, washing machine for example.  And shushing.  I’ve had the thought that I should record a shush sound before… now I can just turn it on and I don’t have to get a major 20-minute workout for my cheeks at 3am.

4.  WebMD Baby.  While this in no way replaces your pediatrician or family physician, it can be helpful when junior develops a weird rash or something minor.  Even after 3 kids, weird things still pop up at 4 in the morning.  When I start to suspect my kids are sick, I can check the symptoms and see if they fit with the illness I suspect.  It gives me enough info to know if I need to make a call to the Peds Line or if I can wait and call my doctor in the morning.  It’s also got tracking abilities similar to BabyESP as well as a fun milestones tracker.

5.  Newborn Development is nice for the first few months and can help you know what to expect.  Newborns change and grow so fast that sometimes it’s overwhelming.  It’s got good basic information on the first 16 weeks of your baby’s life.  It would be nice if the info went further than the first four months, but it’s better than nothing.

Still expecting?  Check out my list of Android Pregnancy Apps too!


This post was written by Krista and originally appeared on While He Was Napping.


June 11, 2014 by Krista

Washi Tape USA Flag Craft

I’m super excited to be part of Jen’s {from Girl in the Garage} Red, White and Blue Inspiration Series.  There have been some fun projects so far, which I’ll show off a little more in a minute or two.  You’re gonna want to check them out.  But first… I’m going to share a fun and super easy USA flag craft for your patriotic enjoyment!

This project is incredibly simple and took me about 20 minutes to do.  The supplies are simple and you can easily take this idea and run with it… how cute would these be as smaller, drink coasters?!

WASHI TAPE USA FLAG CRAFT

SUPPLIES NEEDED TO CREATE ONE USA FLAG CRAFT

Affiliate Link Disclaimer

– One 1″x6″ board cut at 7.5″ long.  You can get it at Lowe’s or Home Depot and if you ask nice, they’ll even cut it for you.
– Red Washi Tape – I like to buy washi tape on Etsy (SOLID RED | RED POLKA DOTS | RED CHEVRON | RED STRIPES)
– Blue Washi Tape – The blue star tape I used can be found on ETSY or AMAZON
– Craft Knife (I have THIS ONE in both the knife and swivel knife and really like them)
– Ruler
– Pencil
– Sandpaper (optional, but recommended)
– Polyurethane (optional, but also recommended)


DIRECTIONS TO CREATE YOUR USA FLAG CRAFT

MEASURE FIRST!

– If you want to shape your board and clean up any rough edges or imperfections, do so now.  I just took a quick swipe along the edges with sandpaper to get any splintery slivers and take a little of the edge off.
– Lay your board down horizontally.  Measure out 3.75″ from the top, left side of your board.  Mark it with your pencil. This space will be for the blue stars.

– Measure the stripes on your flag.  I did it the super technical way and just used a roll of washi tape to measure the width of each stripe.  Fancy, huh?

APPLY THE RED STRIPES

– Start with whichever tape you want, I did the red.  Following the measurements your marked on your board, lay down strips of tape.  I wrapped the edges of the board as well as the face.
– Skip every other line to create the white stripes in between the red ones.  If you want a truer white than the board you’re using, you could paint the board before you begin.  Because I am using pine, it’s a pretty light color already and I really like the wood grain in it.

NOW FOR THE BLUE

– When you finish with the red, switch to the blue tape and start in the top left corner, carefully laying down strips of that tape.
– Make sure your stars face the way you want them to and remember to stagger each row if you want them offset, like they are on a real flag.

– Use your craft knife to get precise straight(ish) lines where the blue square stops.  I wasn’t too particular, but use your ruler if you want it to be straight and even.

That’s it.  You’re done!


HELPFUL TIPS AND TRICKS

I did end up going over the board with a layer of polyurethane to help hold the tape in place.  (A glue stick will also help if your tape keeps coming up.)  It actually added an antique look to the flag, which was kind of neat.

I think these USA Flag Crafts would make super cute coasters if you scaled the proportions down a bit.

There are some great options to display your USA flag craft. Sawtooth hangers are inexpensive and easy to install. The real no muss, no fuss solution.

I ended up drilling a couple holes and then looped some picture hanging wire through them and tied some ribbon on it for a little more cutesy finish and hung it on our door.


THE BEST PART?

I like that it’s not huge, but the bright colors will still draw the eye.  It’s a nice wreath alternative.  Because, seriously, who has the room to store a wreath for every holiday?  Uh, not me.  A 5×7″ wooden board, I can probably handle though.


As I mentioned, there are some other really great projects from some super talented bloggers.  Don’t miss the other great features in this series!  Check them all out!


*After some looking around… I found the red swirly washi tape HERE and the blue star tape HERE.  These are not affiliate links, just what I found with my own Google searches. Hopefully, they will help you complete your own washi tape USA flag craft.


This post was written by Krista and originally appeared on While He Was Napping.


  • « Previous Page
  • 1
  • …
  • 59
  • 60
  • 61
  • 62
  • 63
  • …
  • 231
  • Next Page »

I'm Krista. Ringleader here on While He Was Napping, wife to my handsome Mr. Right & momma to my THREE energetic boys, Big J (9), Little J (6) & Little N (4). We FINALLY added a beautiful little girl to our family last December.

I’m knee-deep in Tonka trucks & Thomas trains. I survive our crazy days with Vanilla Coke, Sonic slushies, sweet snuggles and little giggles. When I tuck them in tight & kiss them good night, I get a little time to create & just be me.


It all happened
while (s)he was napping
Want More of My Story?

Privacy Policy

While He Was Napping respects your privacy and is committed to keeping any personal information collected on this website confidential. To find out what information we collect and how it is used or what options you have regarding your information, see our full privacy policy here. Creative Commons License The website found at whilehewasnapping.com and all subdomainsauthored and published by Krista is licensed under a Creative Commons Attribution-NonCommercial-NoDerivs 3.0 Unported License.

Pretty Chic Theme By: Pretty Darn Cute Design